
Modifying your NAT (Network Address Translation) type can greatly enhance your online gaming and communication experiences by improving connectivity with other players and services. For Windows 11 users, this involves configuring both your computer and your router settings. This guide provides detailed steps to help you change your NAT type effectively.
Types of NAT
There are three primary NAT types that determine your network’s connectivity characteristics:
- Open NAT: Allows your device to connect freely with others, ideal for online gaming, but may reduce network security.
- Moderate NAT: Balances security and connectivity, suitable for most users with reasonable access and protection.
- Strict NAT: Provides the highest security but can limit your ability to connect with other devices, potentially causing issues with online games and peer-to-peer connections.
Initial Setup on Windows 11
Before adjusting your router settings, it’s recommended to configure your Windows 11 PC to have a static IP address and enable network discovery. These steps prepare your network for NAT type changes.
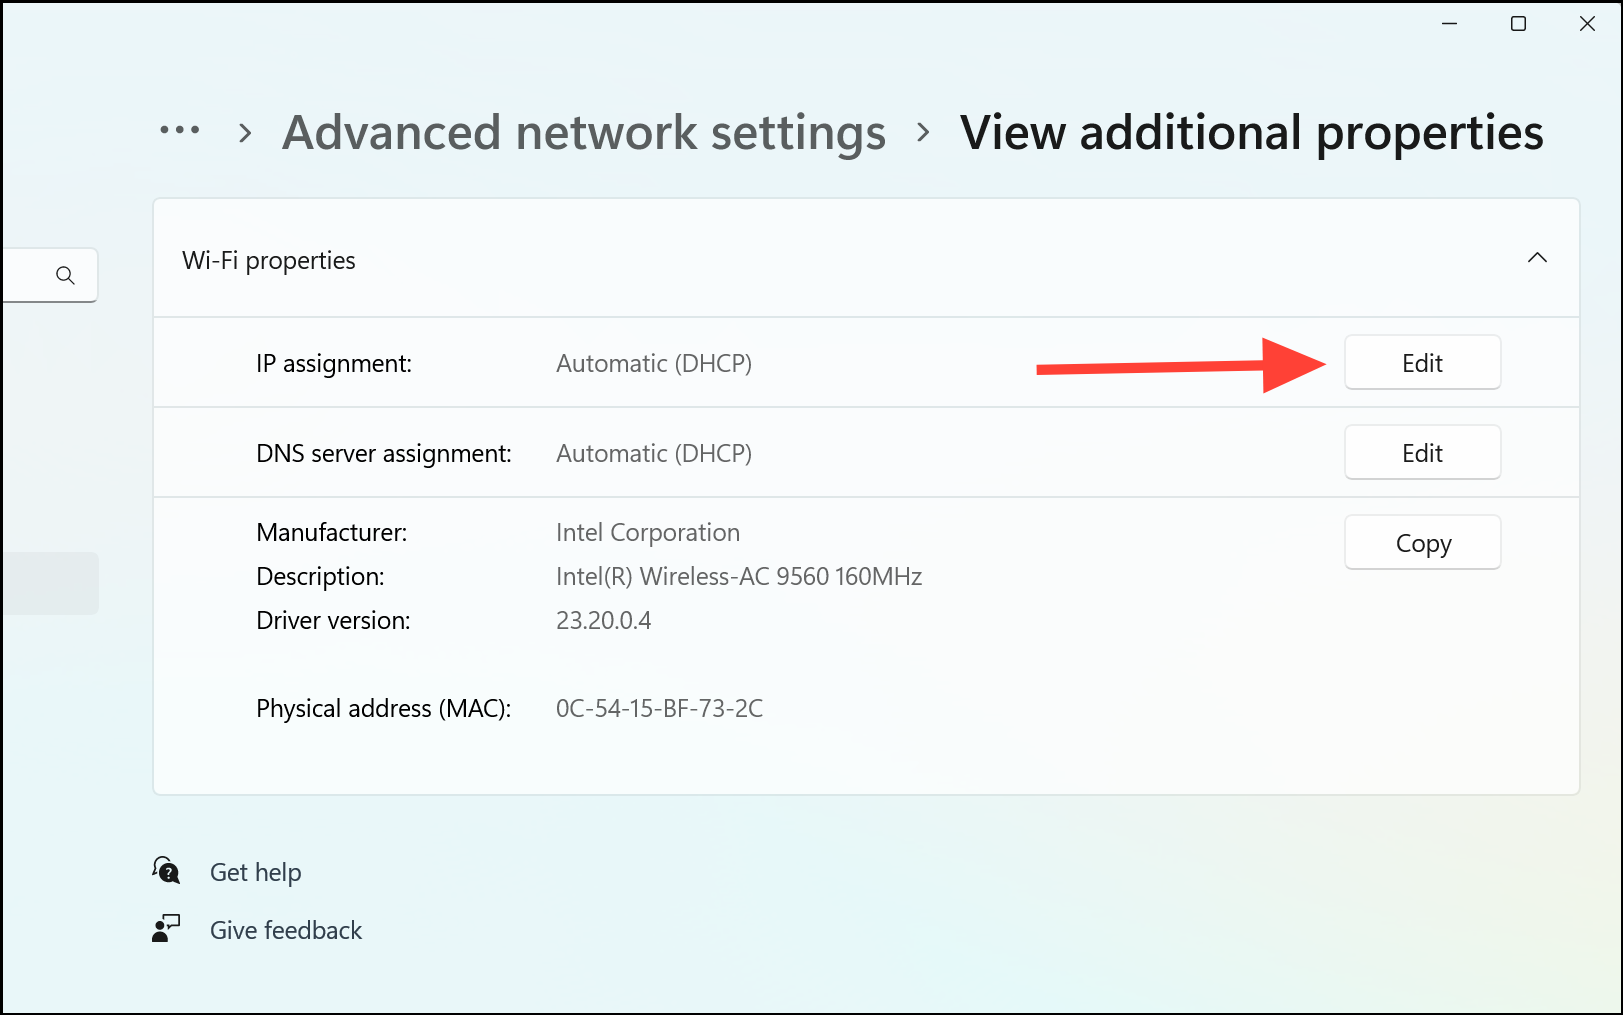
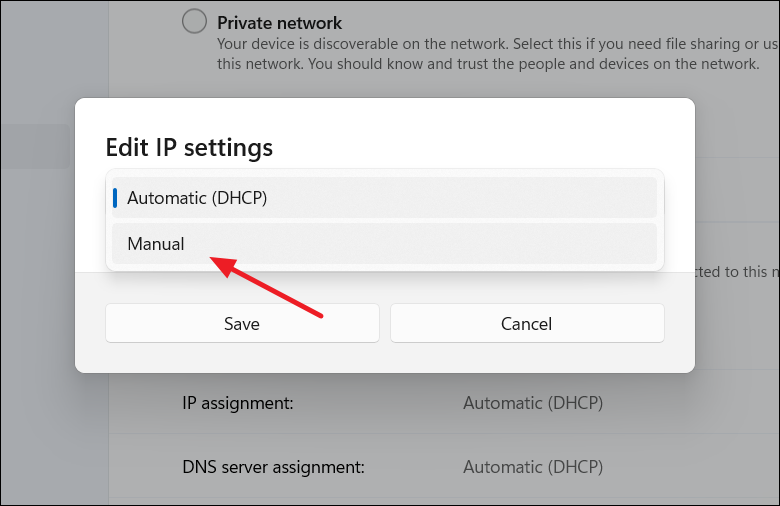
Assigning a Static IP Address
Setting a static IP address for your computer ensures that it retains the same IP address on your network, which simplifies NAT and port forwarding configurations. This is optional but highly recommended.
Win + I. Navigate to Network & Internet, then select Advanced network settings.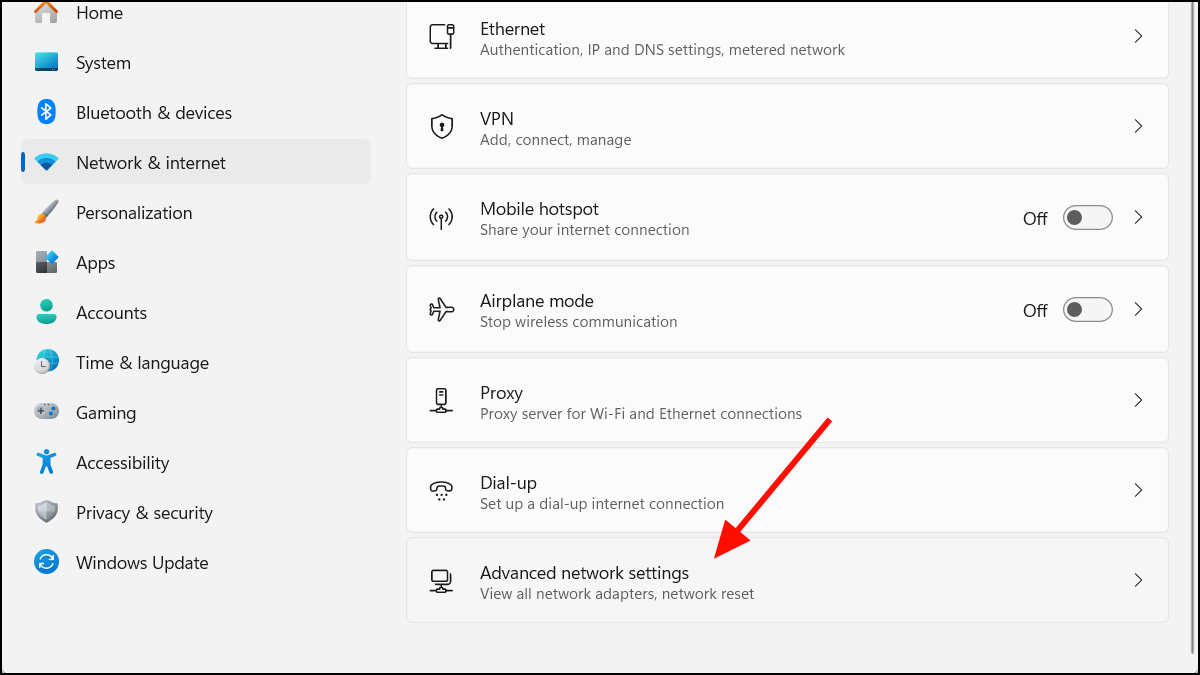
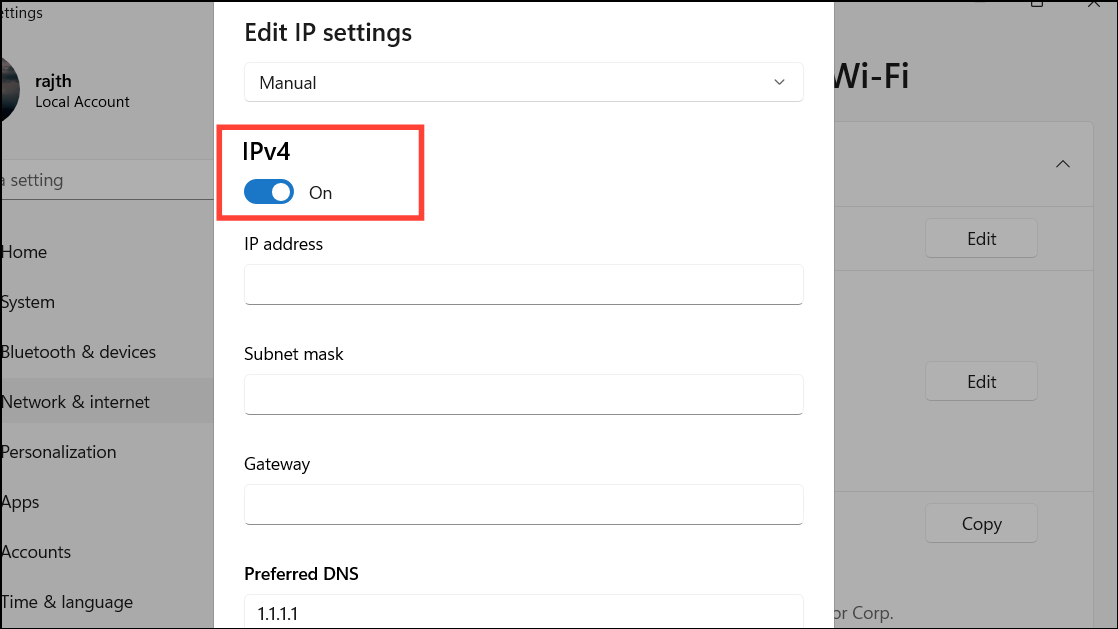
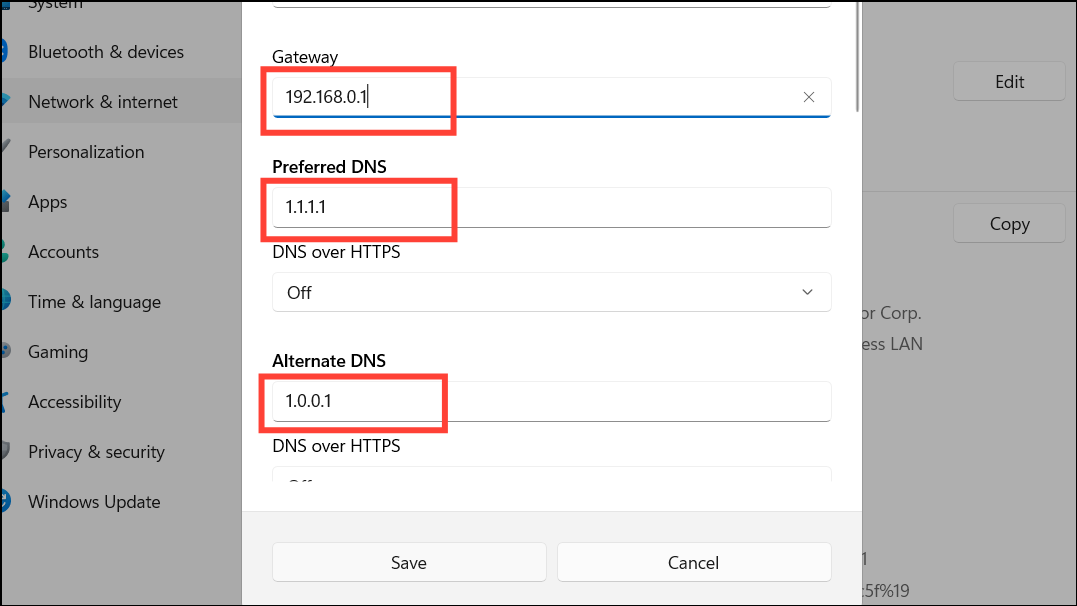
For the IP address, choose a unique address within your router’s range, typically between 192.168.0.2 and 192.168.0.254. The Subnet mask is usually 255.255.255.0 for home networks. For the Gateway, enter your router’s IP address, commonly 192.168.0.1 or 192.168.1.1; you can find it on your router or by running the ipconfig command in Command Prompt. Enter a Preferred DNS server, such as 1.1.1.1 (Cloudflare) or 8.8.8.8 (Google), and an Alternate DNS server like 1.0.0.1 (Cloudflare) to ensure continuous connectivity if the primary DNS fails.
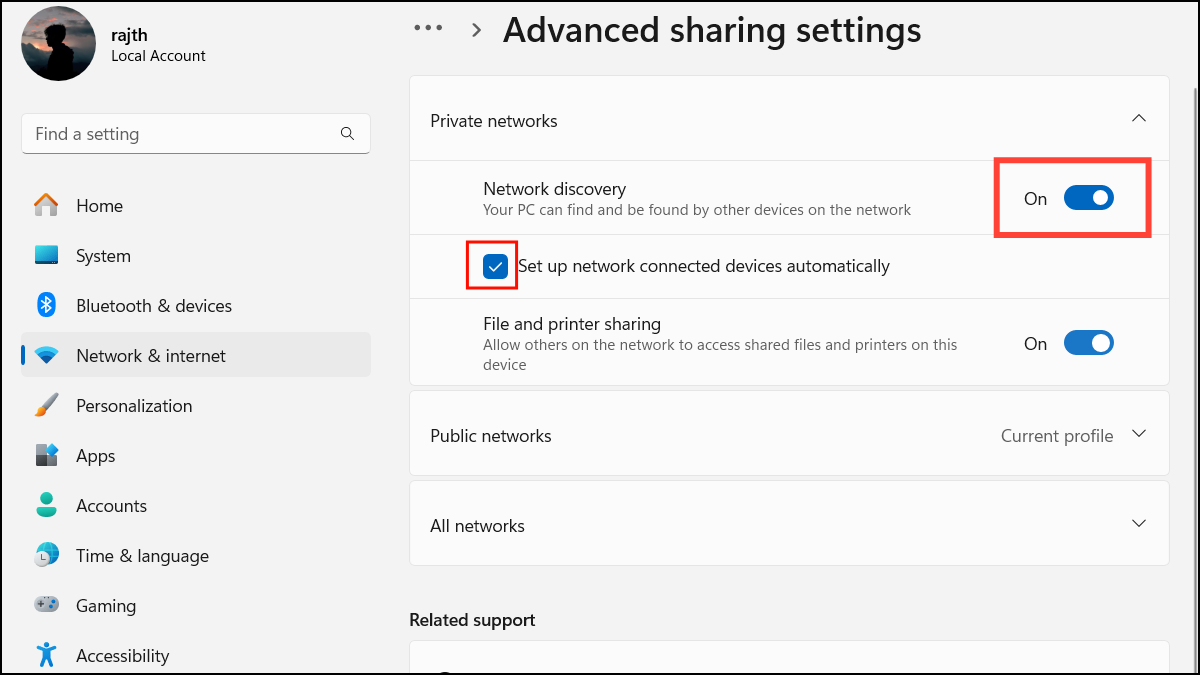
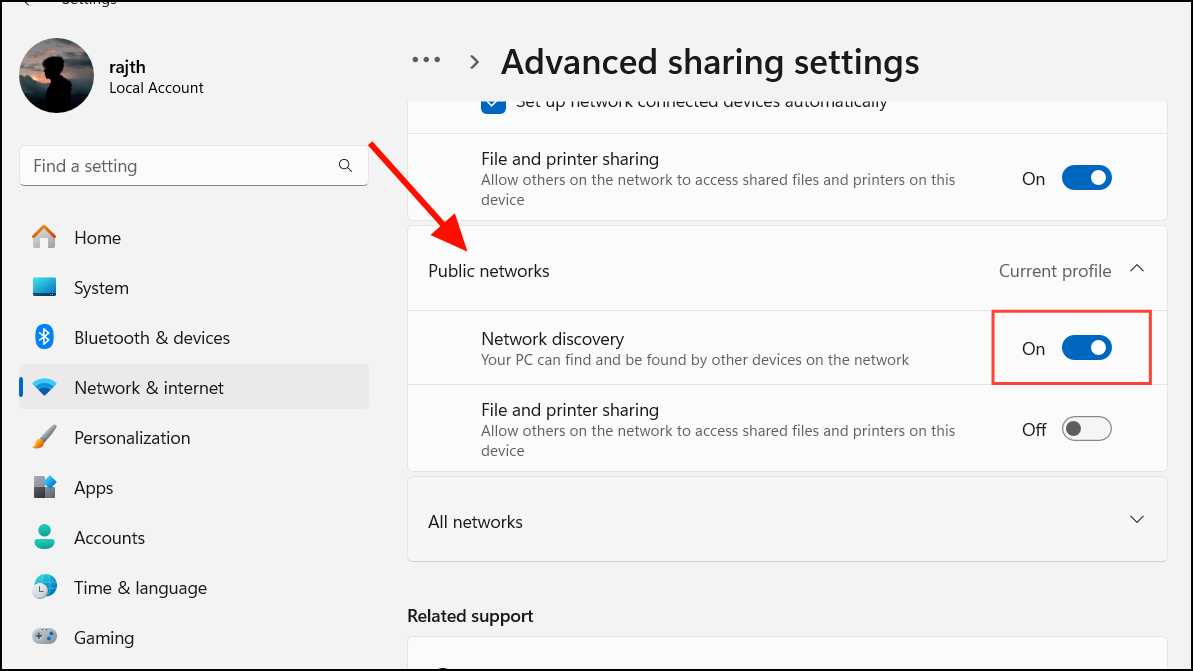
Enabling Network Discovery
Activating Network Discovery allows your computer to see other devices on your local network and makes it visible to them, which can help with certain network functions like file sharing and can assist in changing NAT types.
Win + I, navigate to Network & Internet, and select Advanced network settings.
Configuring Your Router
Changing your NAT type usually requires adjustments in your router settings. The following methods can help you modify your router configuration to change your NAT type.
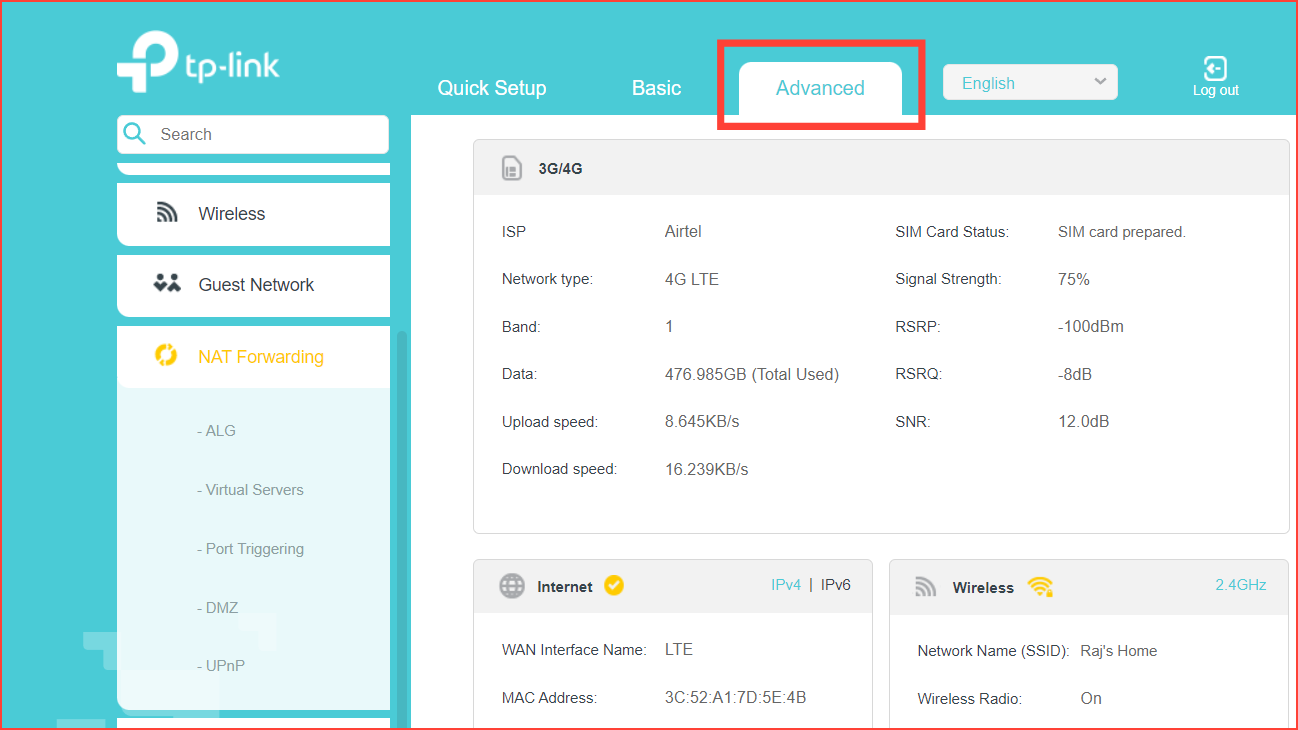
Accessing Your Router Settings
To make changes to your router, you need to access its web interface.
Enter.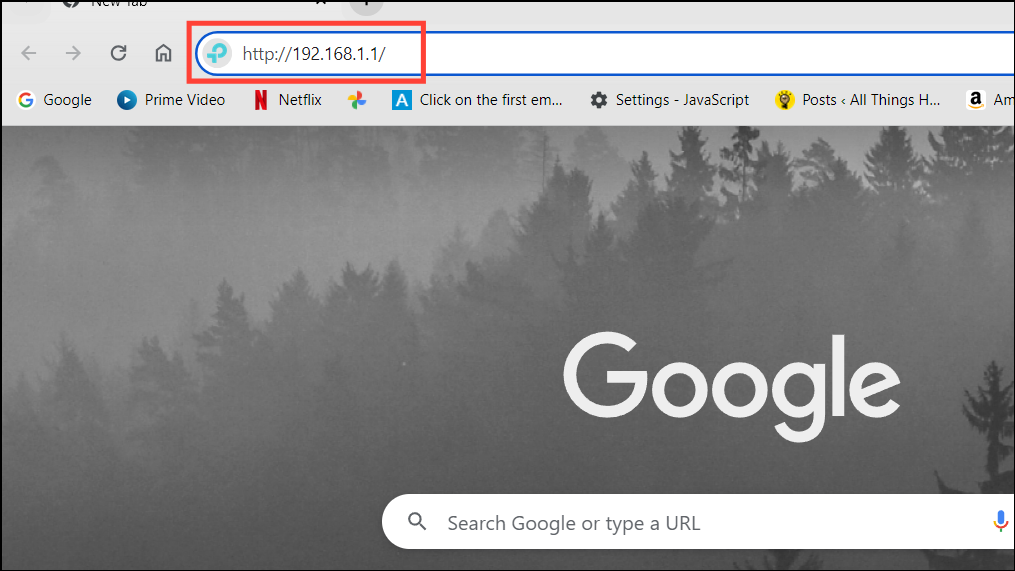
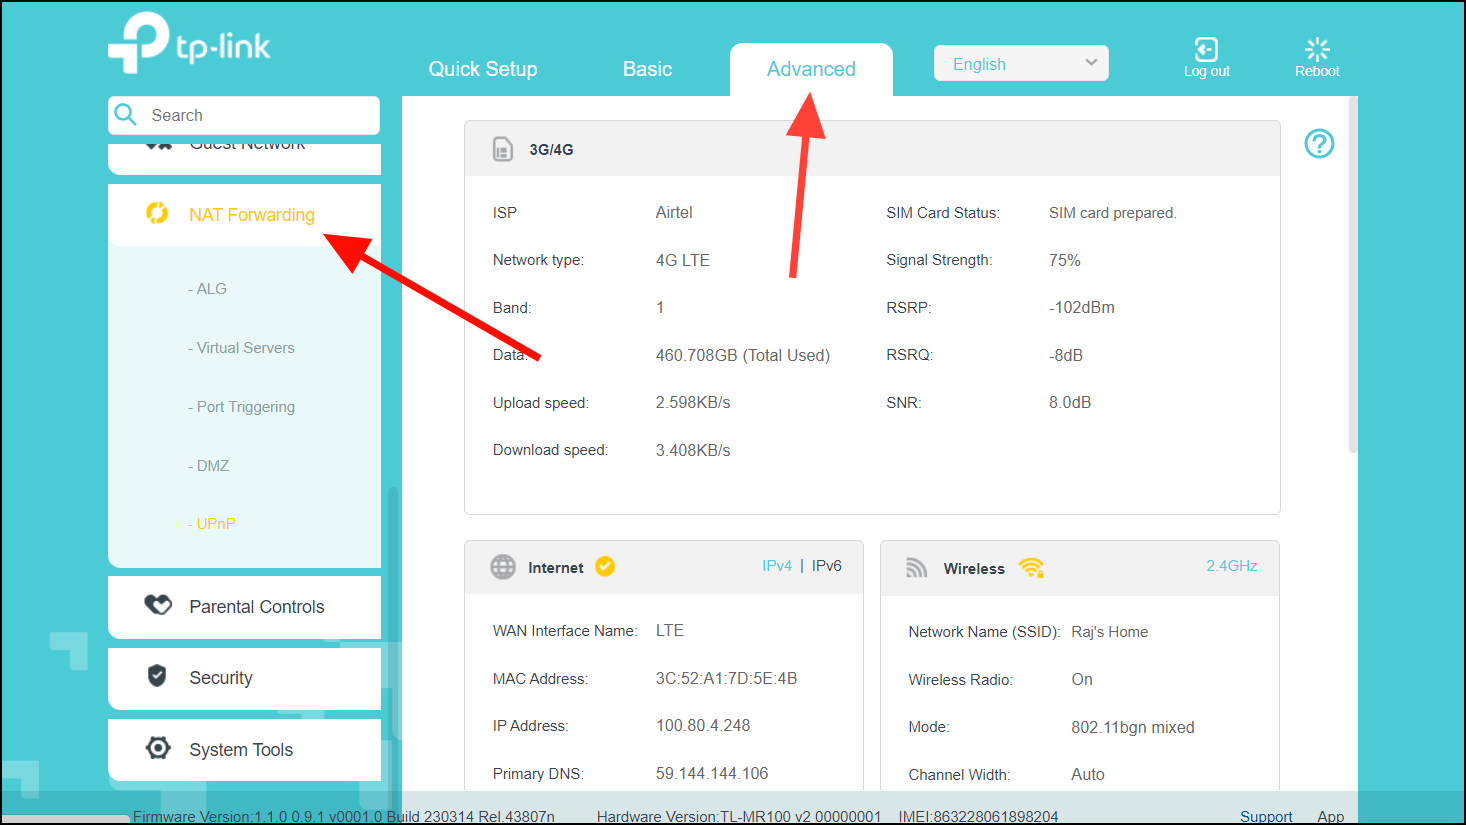
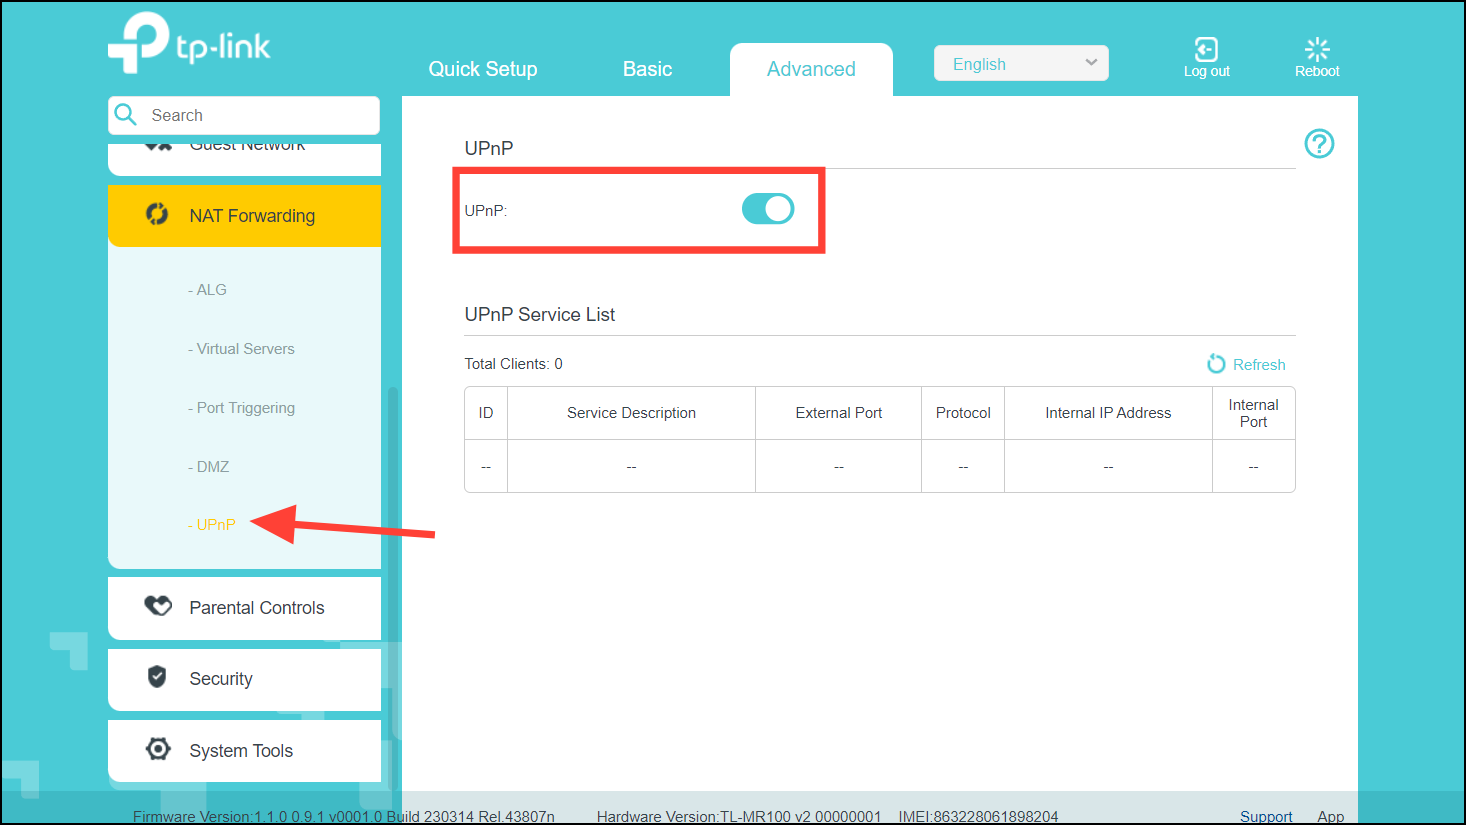
ipconfig, and press Enter. Look for the ‘Default Gateway’ under your network adapter’s information.Method 1: Enabling UPnP (Universal Plug and Play)
UPnP allows devices on the same network to discover each other and establish functional network services. Enabling UPnP can help adjust your NAT type.
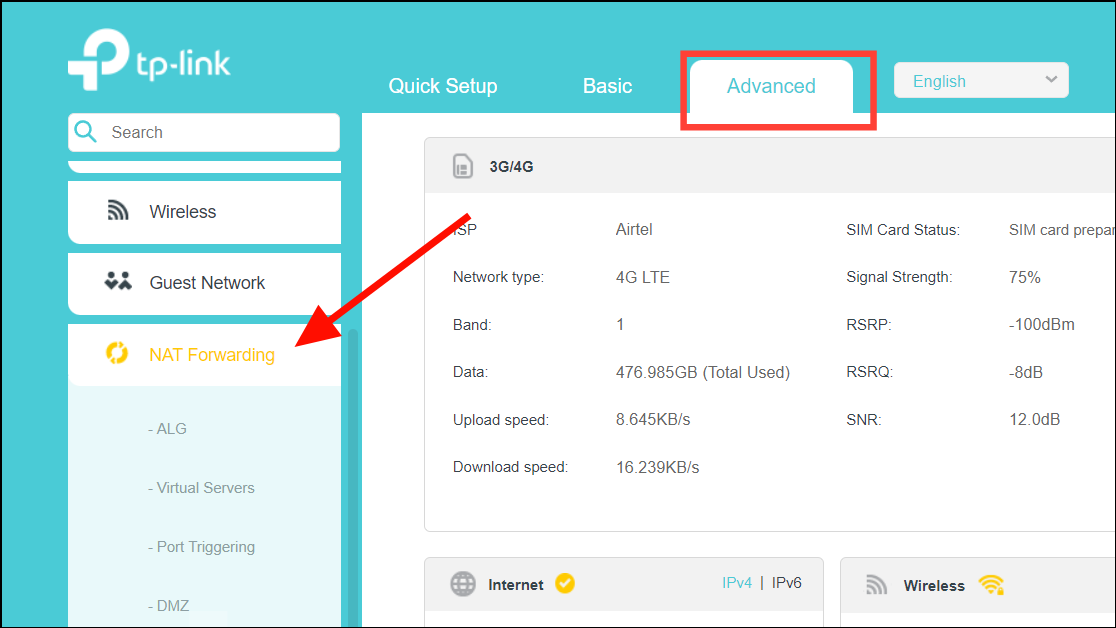
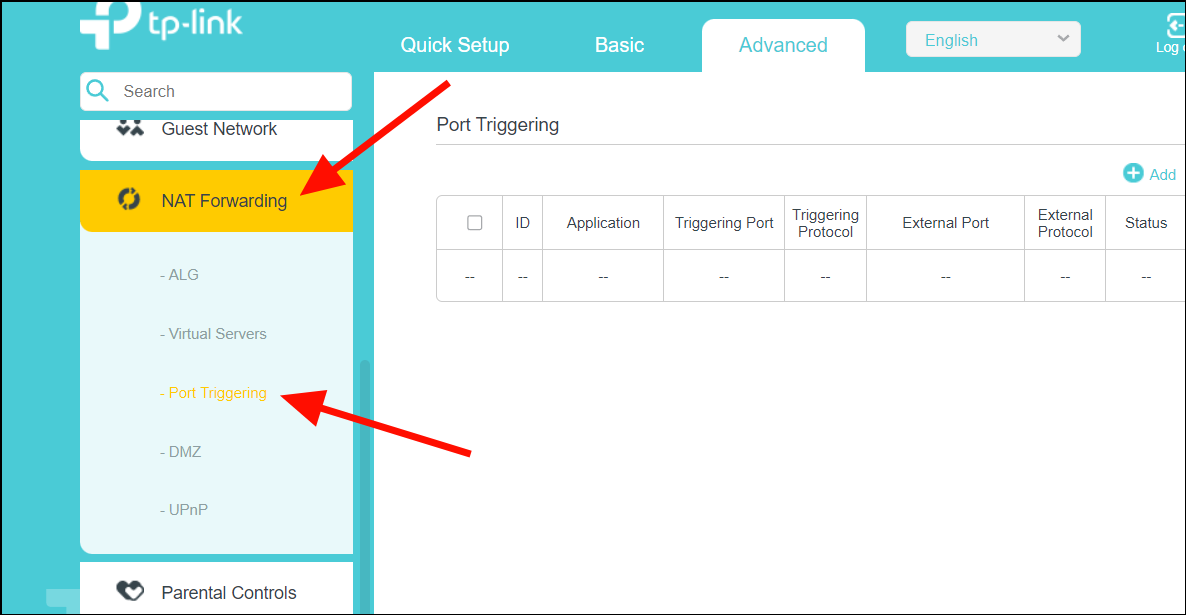
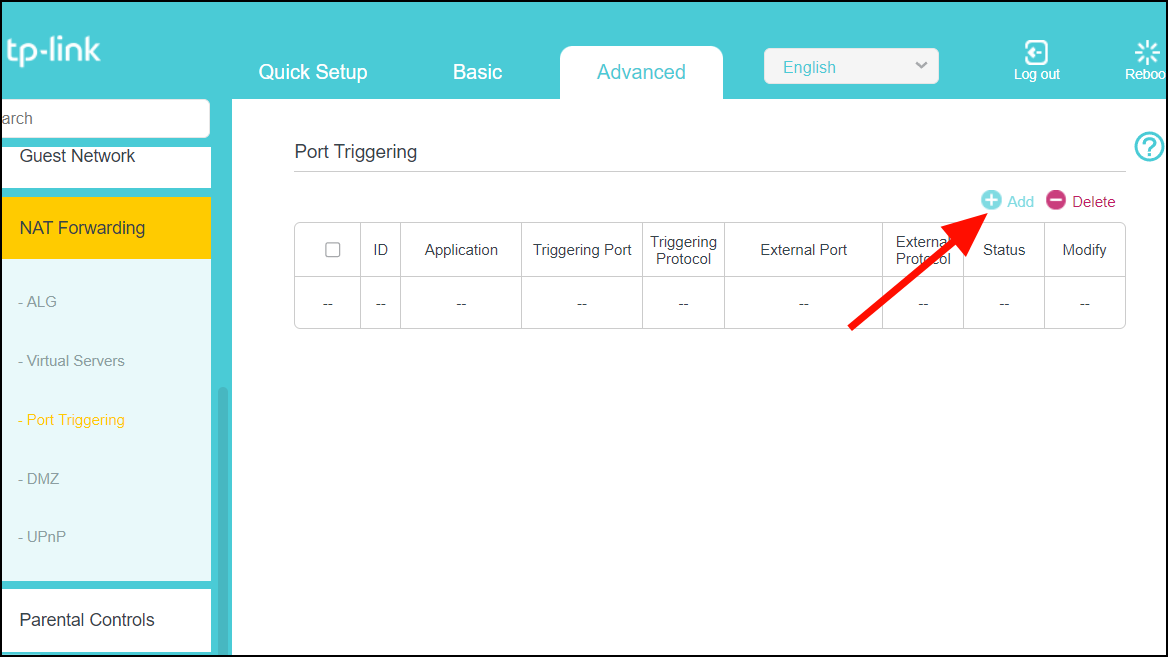
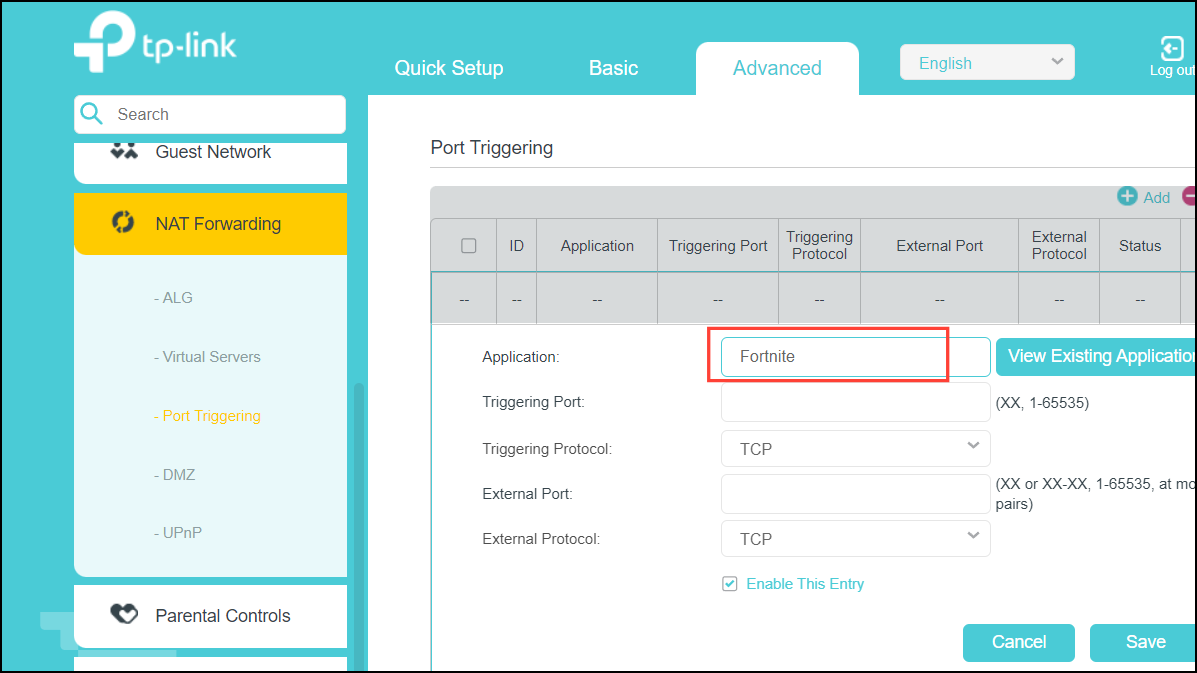
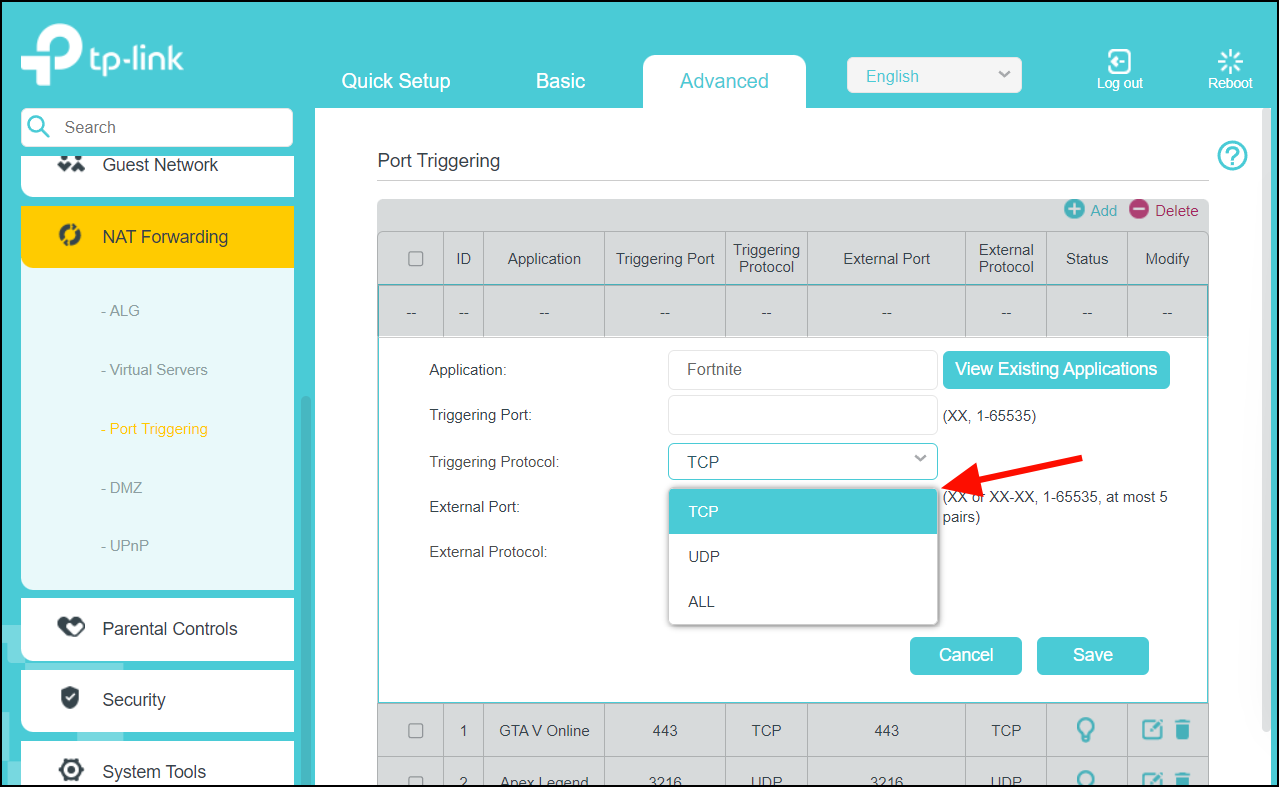
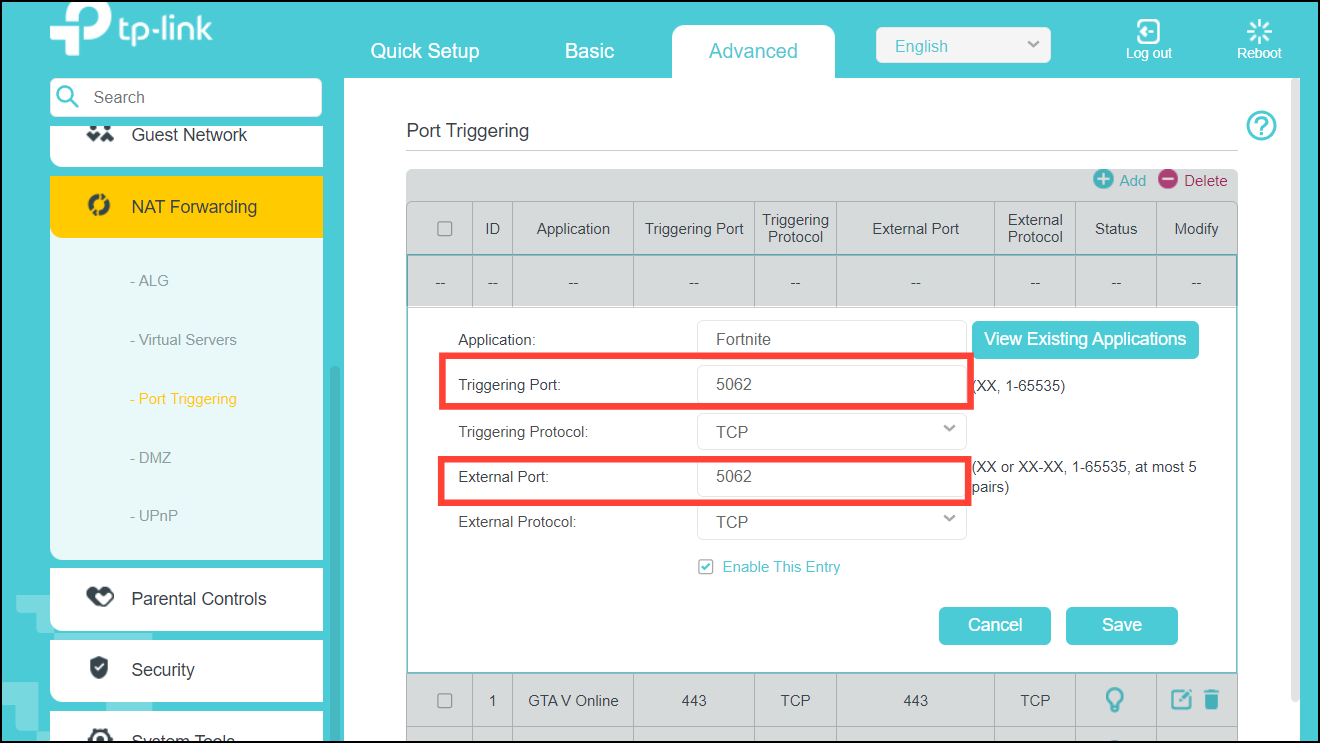
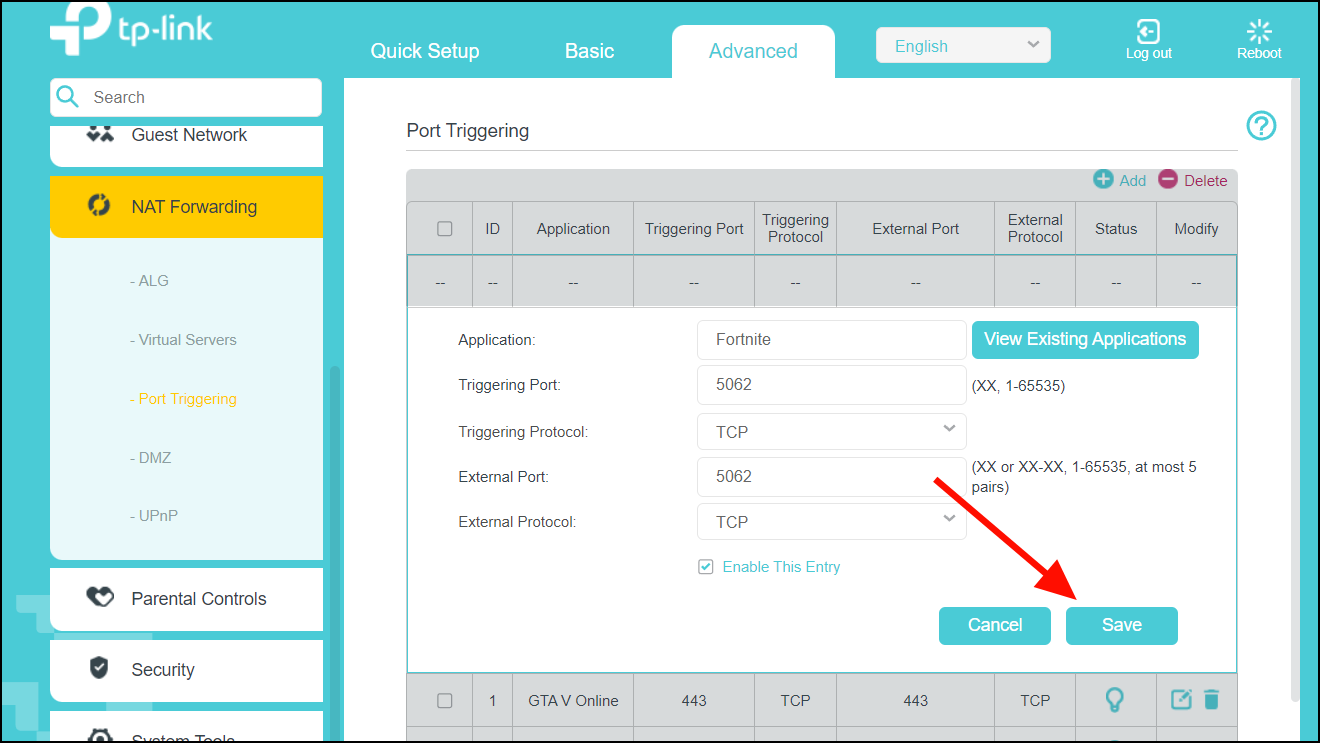
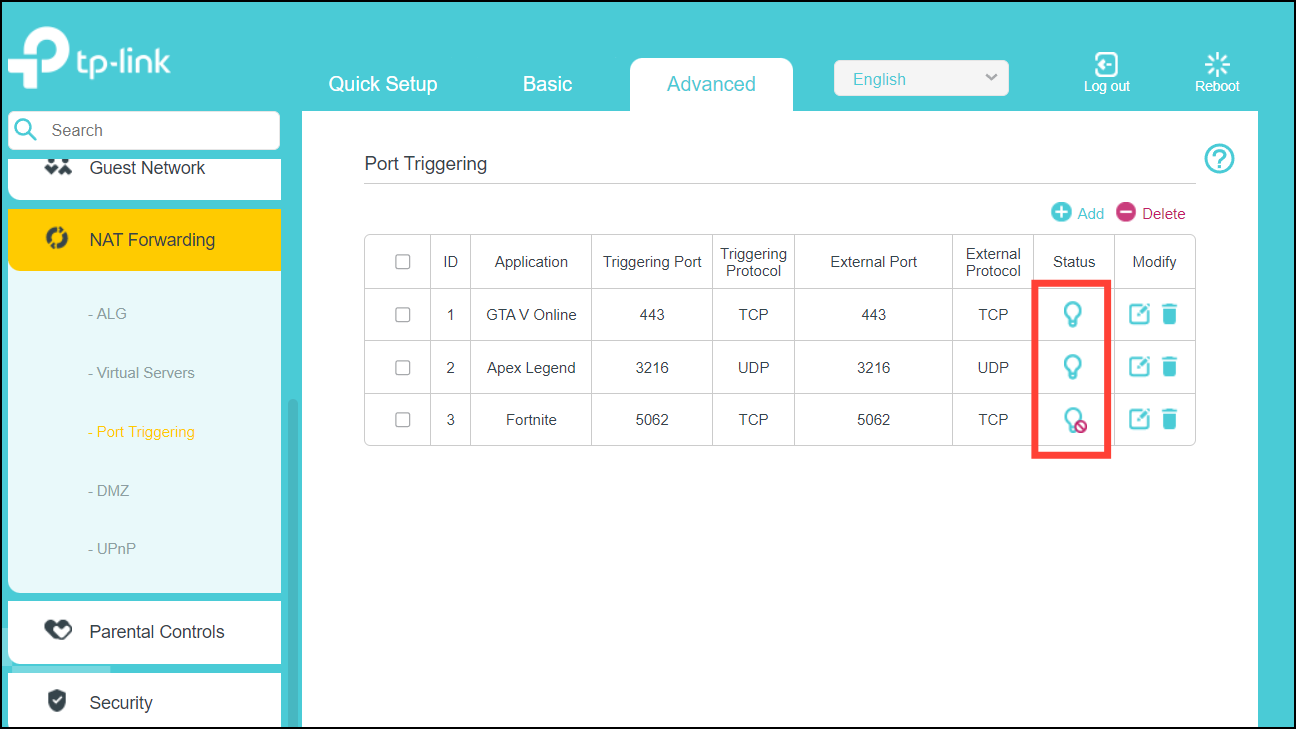
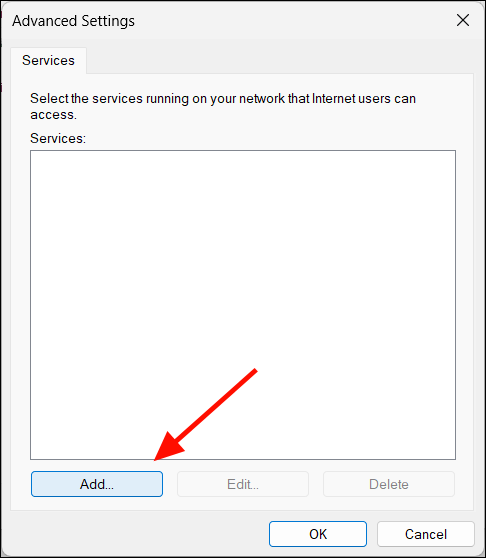
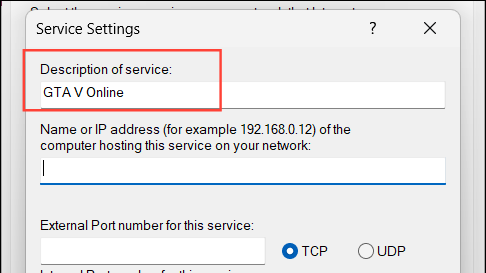
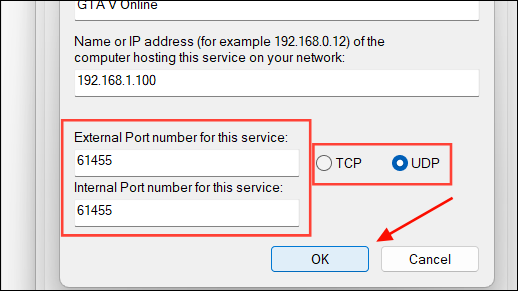
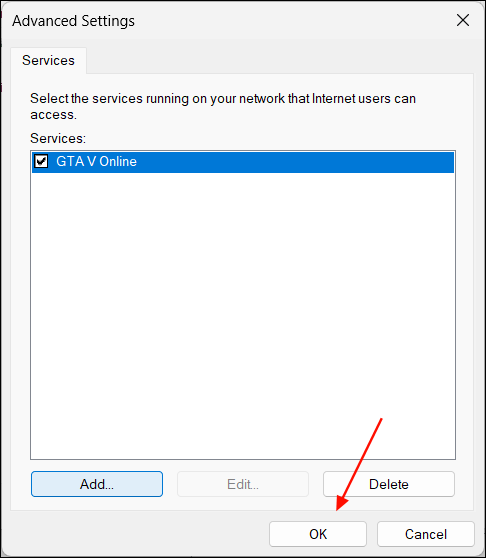
Method 2: Port Forwarding
Port forwarding manually opens specific ports to allow incoming and outgoing traffic for particular applications, improving connectivity while maintaining better security than UPnP.
Method 3: Enabling DMZ (Demilitarized Zone) Mode
DMZ mode places your computer outside the router’s firewall, exposing it directly to the internet. This can help change your NAT type but comes with significant security risks.
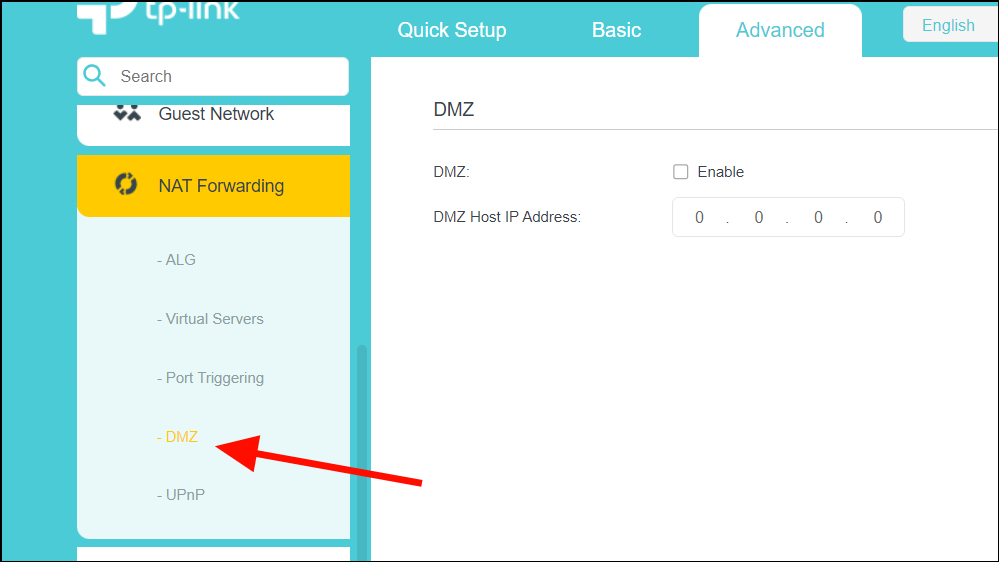

Using DMZ mode exposes your computer directly to the internet, which can significantly compromise security. It should be used cautiously and only if other methods do not work.
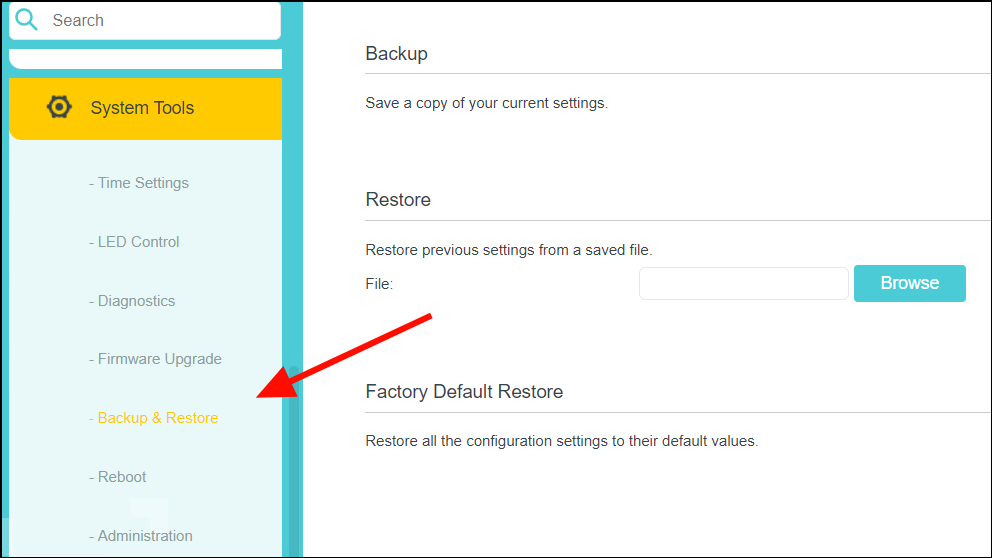
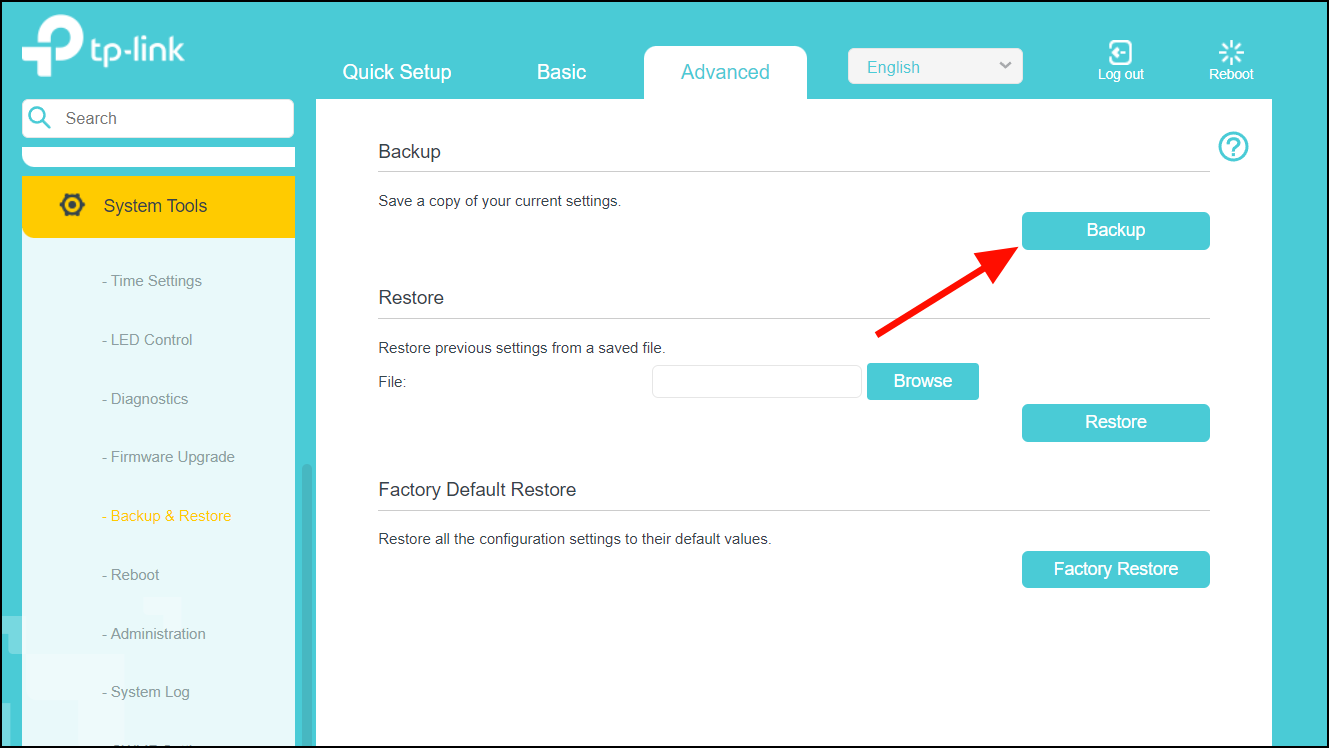
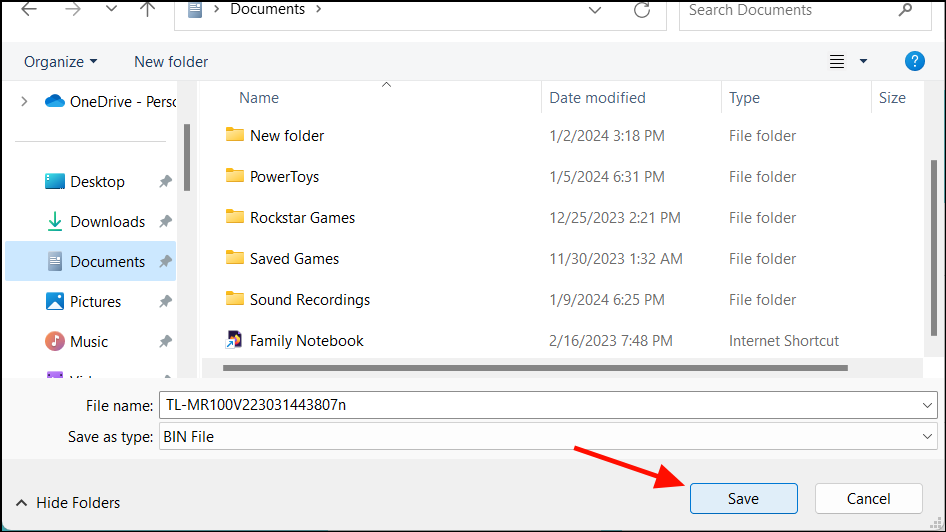
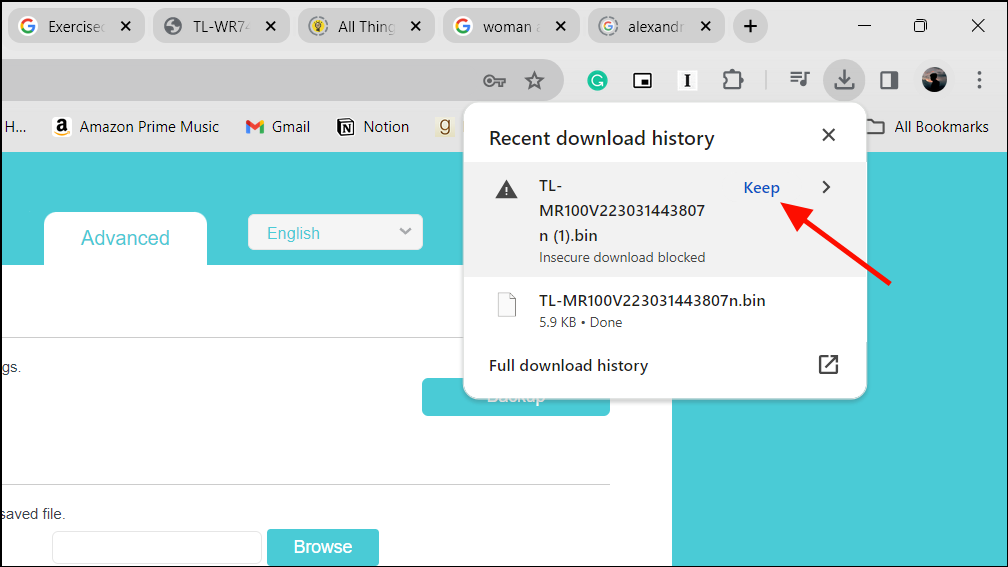
Method 4: Editing the Router Configuration File
For advanced users, editing the router’s configuration file can provide more control over NAT settings. This method should be used with caution, as incorrect changes can disrupt your network.

Ctrl + F) to locate the connection.ini section and find the last bind line.bind line, add the following code, replacing the port numbers with those required by your application:bind application=CONE(UDP) port=3478-3479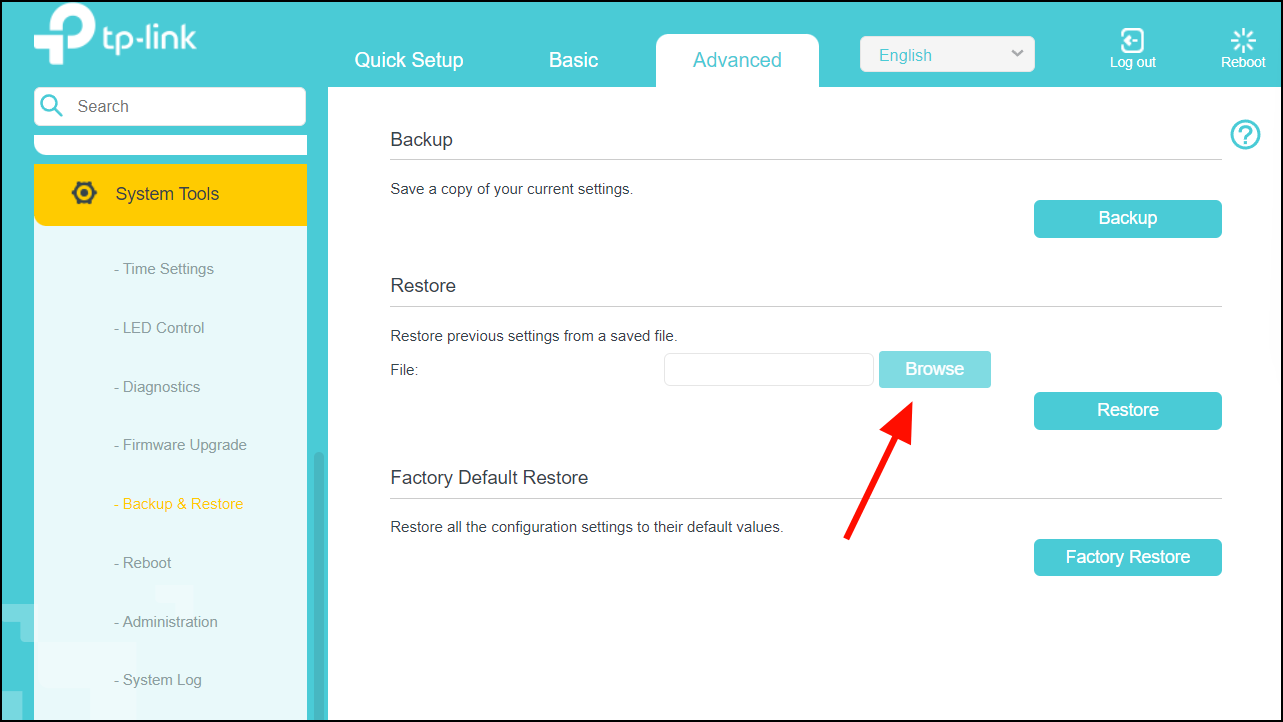
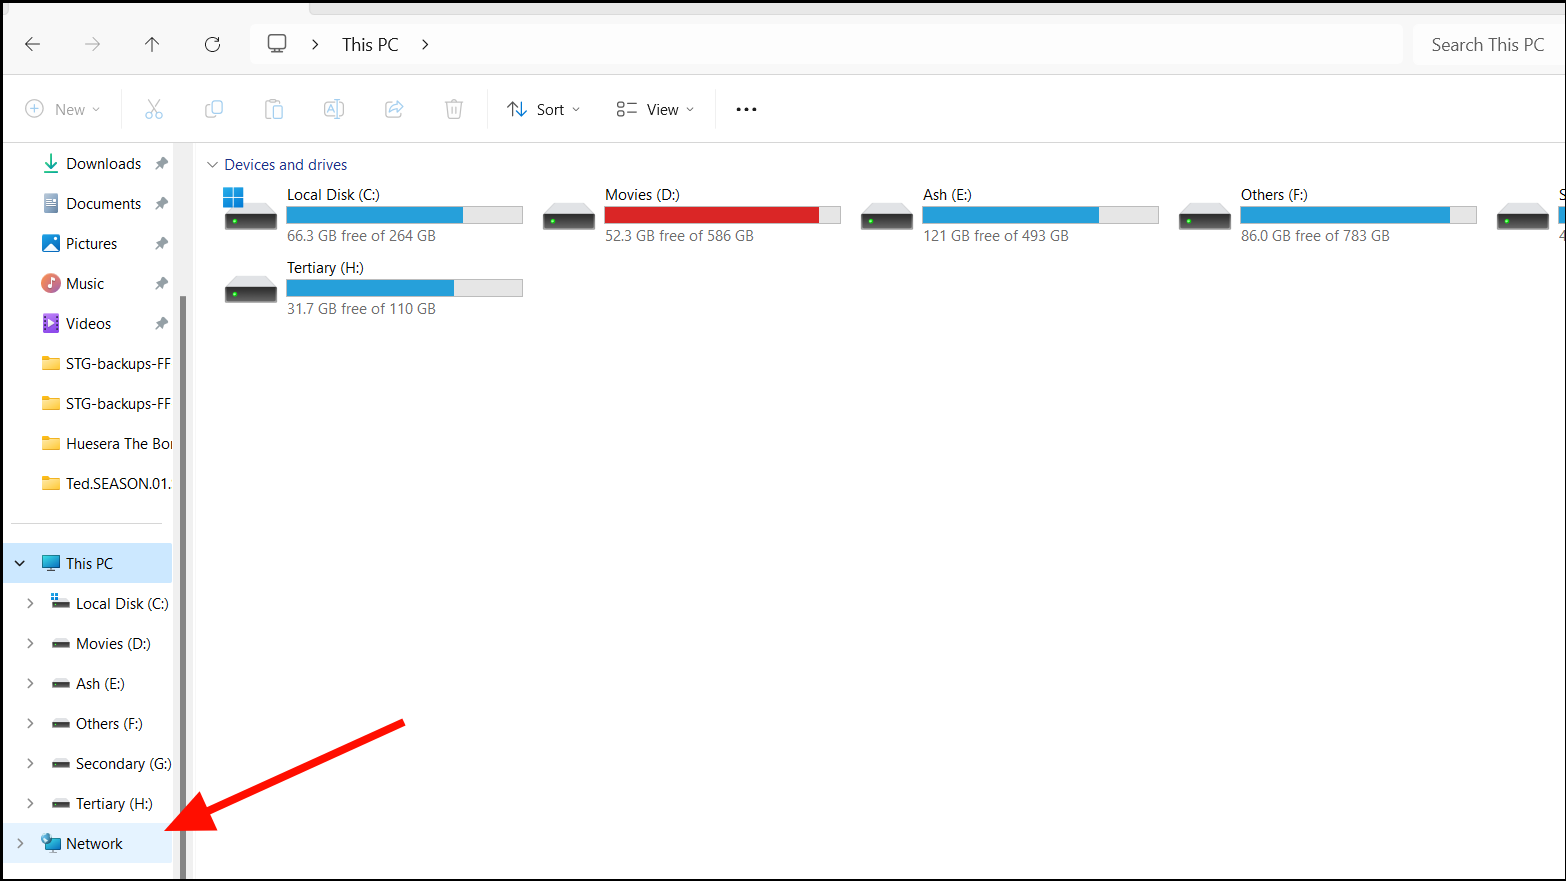
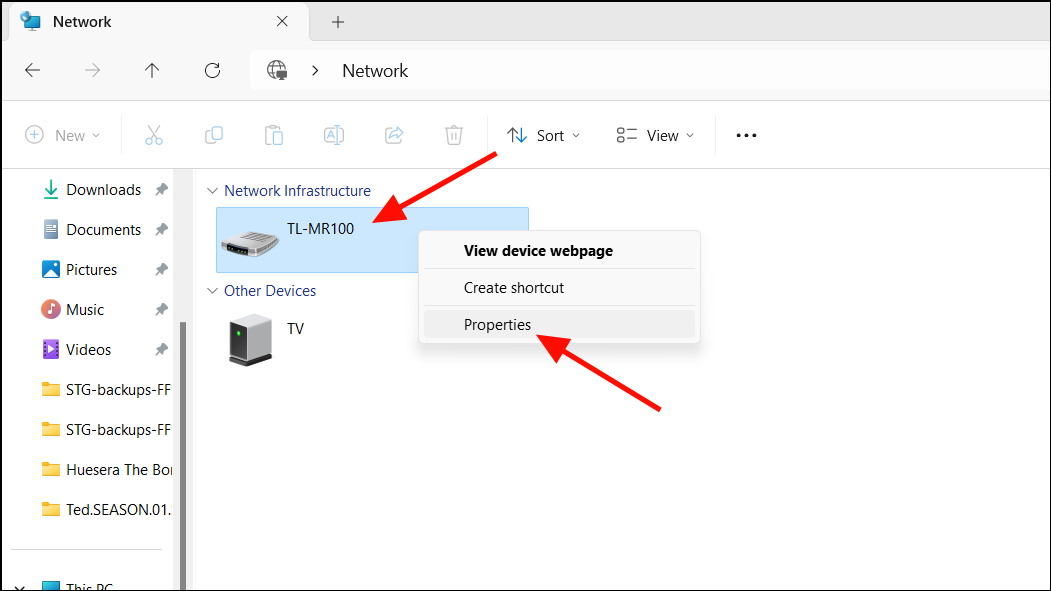
Enabling UPnP Using Windows Network Settings
If your router does not support UPnP or you cannot access its settings, you can enable UPnP through Windows Network settings to help change your NAT type.
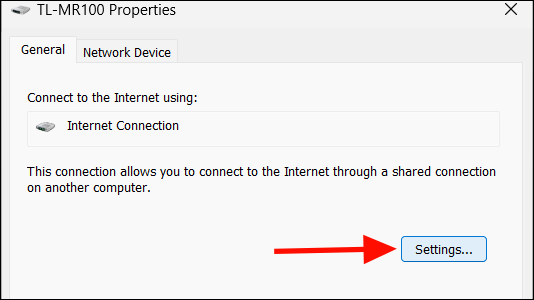
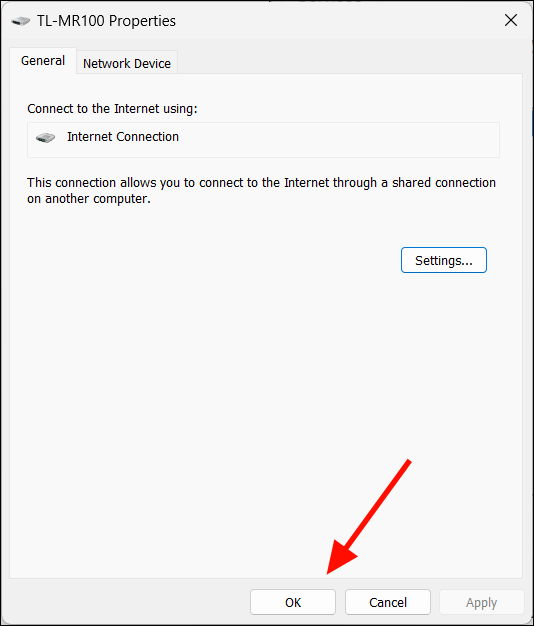
This method creates temporary port forwarding rules that reset when you restart your router or disconnect from the network. You may need to repeat these steps if your NAT type reverts.
Verifying NAT Type Changes
After making these changes, you should verify whether your NAT type has changed. You can usually check this within your application’s network settings, or by accessing your router’s interface.
- In Application Settings: Launch the application or game and navigate to its network or connection settings to view your NAT type.
- Via Router Interface: Log into your router’s web interface and look for a section that displays your current NAT type under network or status information.
- Restart Devices: If changes are not reflected, restart your router and computer to ensure new configurations are applied.
Security Considerations
- Always keep your router’s firmware updated to protect against known vulnerabilities.
- Be cautious when enabling features like UPnP or DMZ, as they can expose your network to security risks.
- Regularly review your router’s security settings and disable unnecessary services.
By adjusting your NAT type through router and Windows settings, you can enhance your online connectivity for gaming and other applications. Remember to balance improved access with security considerations to protect your network.


