
Keeping track of your CPU temperature is crucial for ensuring the optimal performance and longevity of your computer. High temperatures can lead to reduced efficiency, unexpected shutdowns, and even permanent damage to your CPU. On a Windows 11 PC, there are effective methods to monitor your CPU’s temperature, helping you maintain a healthy system.
Checking CPU Temperature Using Third-Party Software
The most efficient way to monitor your CPU temperature is by using dedicated third-party applications. These tools provide real-time temperature readings and additional information about your system’s hardware, such as usage percentages, clock speeds, and fan speeds. Some popular options include:
For this guide, we’ll demonstrate how to use NZXT CAM to check your CPU temperature.
NZXT-CAM-Setup.exe file is downloaded, double-click it to start the installation. The setup process will begin automatically.


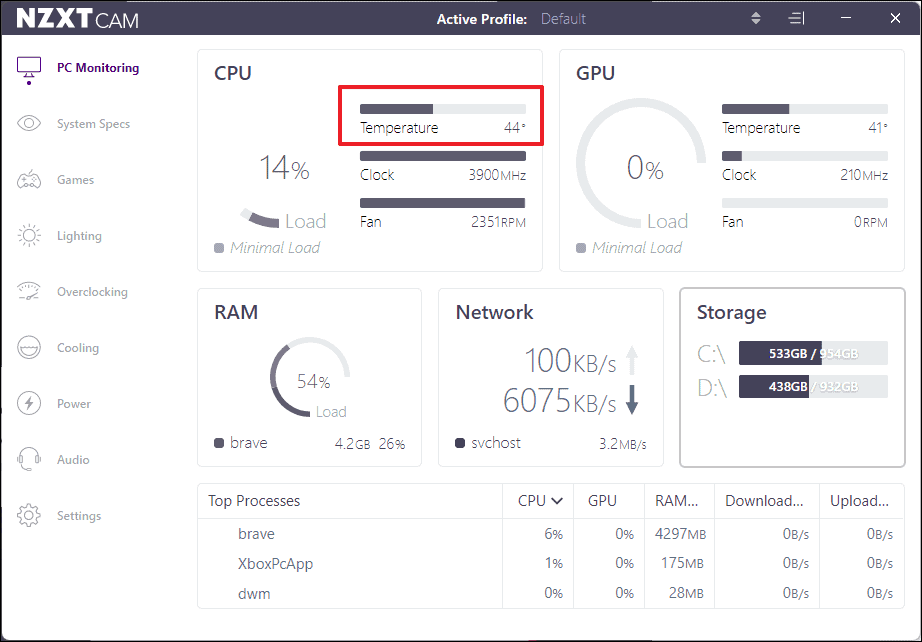
Using NZXT CAM or similar software provides you with real-time monitoring of your CPU’s temperature, helping you to keep tabs on your system’s performance and prevent overheating issues before they become serious problems.
Checking CPU Temperature in BIOS
Alternatively, you can check your CPU temperature through your computer’s BIOS. While this method doesn’t offer real-time monitoring or reflect temperatures under typical usage, it can be useful for initial diagnostics.
DEL, F2, or F12, but it can vary depending on your hardware.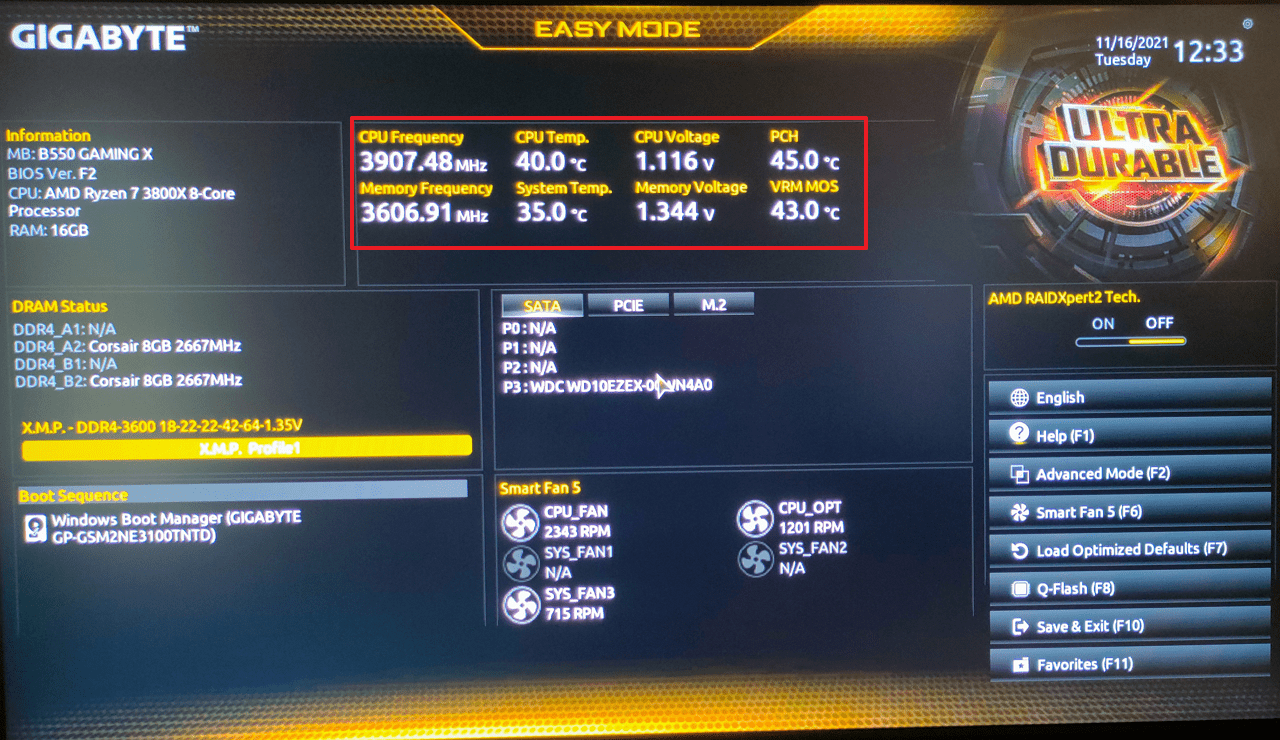
While checking the temperature in the BIOS provides a quick overview, it doesn’t reflect how the CPU performs under normal operating conditions since the system isn’t under load.
Understanding Ideal and High CPU Temperatures
It’s important to know what temperature ranges are considered normal for your CPU. Generally, an ideal temperature under heavy load is between 65-70°C for most CPUs. However, some processors, particularly those in laptops, can operate safely at temperatures up to 80°C during resource-intensive tasks like gaming or video editing.
Temperatures exceeding 85°C are considered high and may indicate potential cooling issues. Factors that can contribute to elevated CPU temperatures include:
- Ineffective cooling solutions, such as inadequate or malfunctioning CPU coolers.
- Dried or insufficient thermal paste between the CPU and cooler.
- Prolonged periods of heavy CPU usage without adequate breaks.
Modern CPUs are equipped with protective mechanisms to prevent damage from overheating. If temperatures rise too high, the CPU may throttle performance to reduce heat output. If temperatures continue to increase, the system may shut down automatically to protect the hardware.
Regularly monitoring your CPU temperature helps you maintain optimal performance and prevent potential hardware issues. By using reliable third-party software or checking through the BIOS, you can stay informed about your system’s health and take action if temperatures reach unsafe levels.


