Cache files are temporary data that applications and programs store on your system to speed up tasks on subsequent uses. While these files can enhance performance initially, they can accumulate over time, occupying significant storage space and potentially slowing down your Windows 11 PC. Regularly clearing the cache frees up disk space, boosts system performance, and helps prevent errors caused by corrupted cache files.
Clear System Cache with Disk Cleanup
One of the most effective ways to clear system cache is by using the built-in Disk Cleanup utility. This tool scans your system for cache files and other temporary files that can be safely deleted.
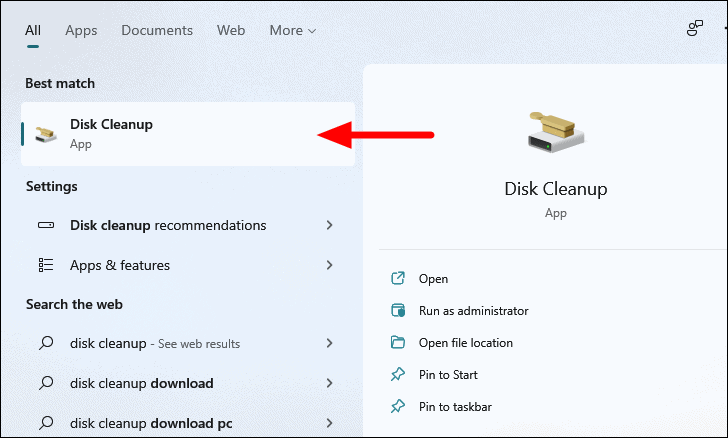
Step 1: Search for 'Disk Cleanup' in the Search menu and select the relevant result to launch the application.
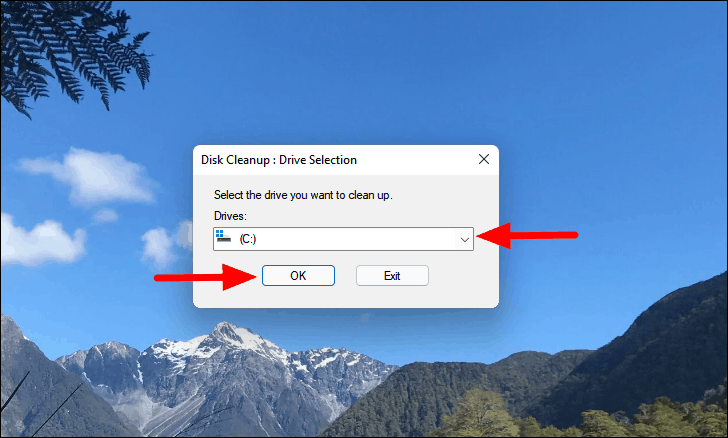
Step 2: When prompted, choose the drive you want to clean up, typically the 'C:' drive, and click 'OK'. Disk Cleanup will analyze the selected drive to identify files that can be deleted.
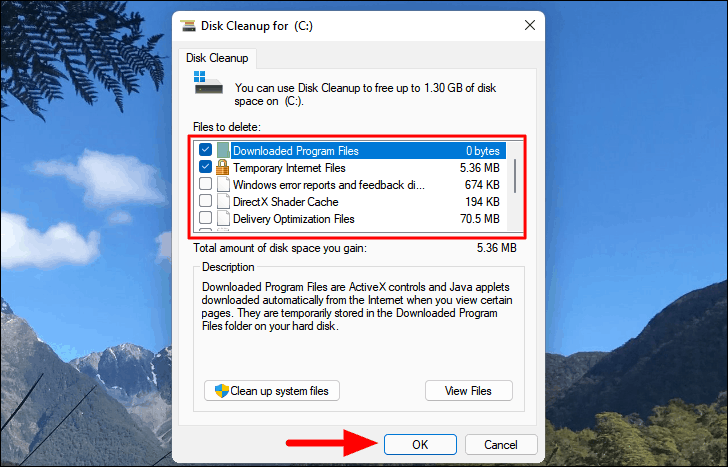
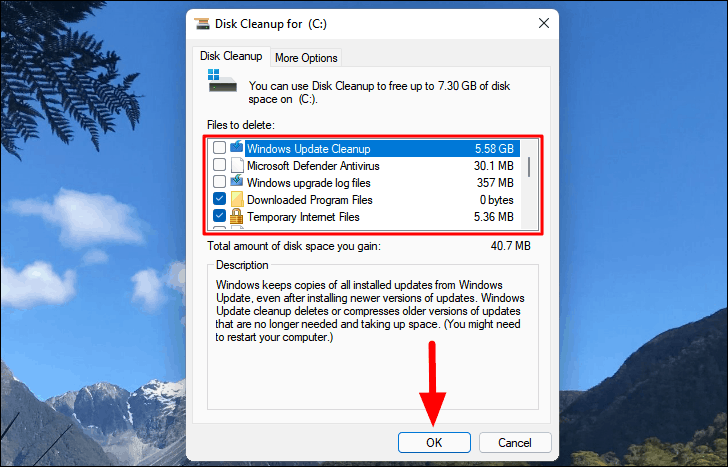
Step 3: In the 'Files to delete' section, select the types of files you want to remove. These may include temporary files, thumbnails, and recycle bin contents. Once selected, click 'OK' to proceed.
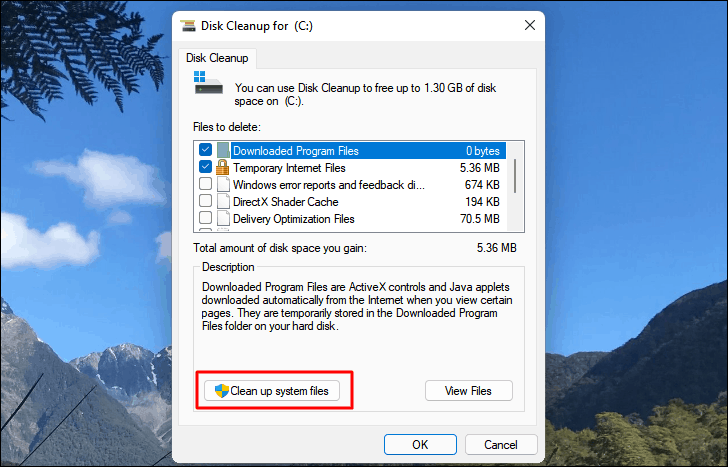
Step 4: To delete system files, click on 'Clean up system files' in the Disk Cleanup window.
Step 5: Select the drive again if prompted. Disk Cleanup will scan for system files that can be removed. After the scan, choose the system file categories you wish to delete and click 'OK'. Confirm any prompts to complete the process.
Clear System Cache via Settings
Windows 11 allows you to clear temporary system files through the Settings app, providing an easy way to manage cache without using external tools.
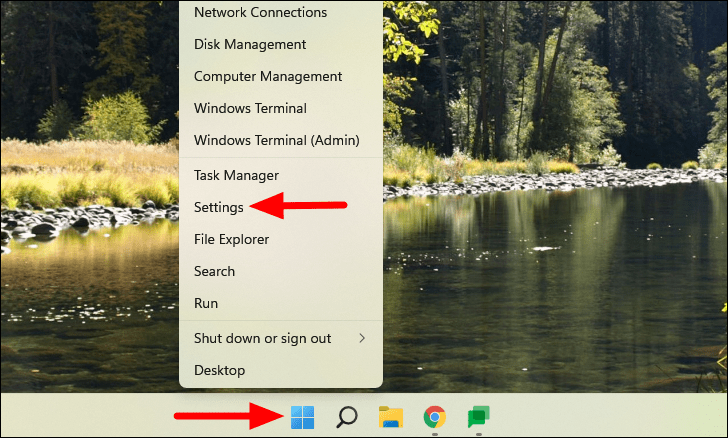
Step 1: Open the Settings app by right-clicking the 'Start' icon and selecting 'Settings' from the menu, or by pressing WINDOWS + I on your keyboard.
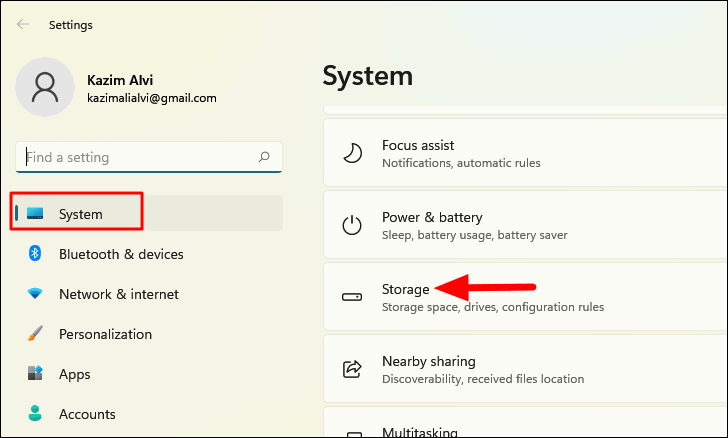
Step 2: In the 'System' section, scroll down and click on 'Storage'. Wait for Windows to scan and assess your system for temporary files.
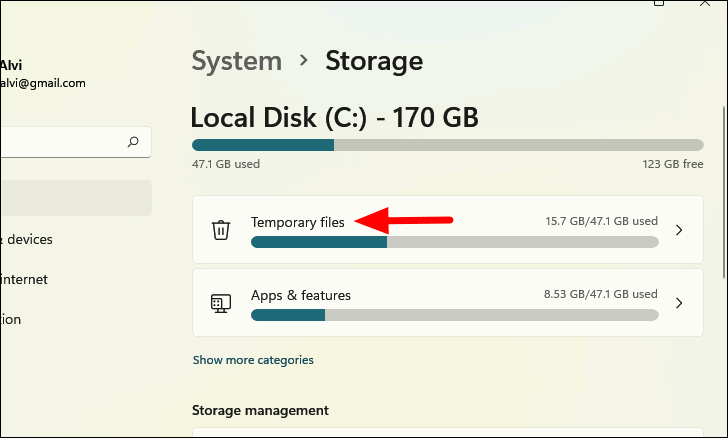
Step 3: Click on 'Temporary files' at the top of the window.
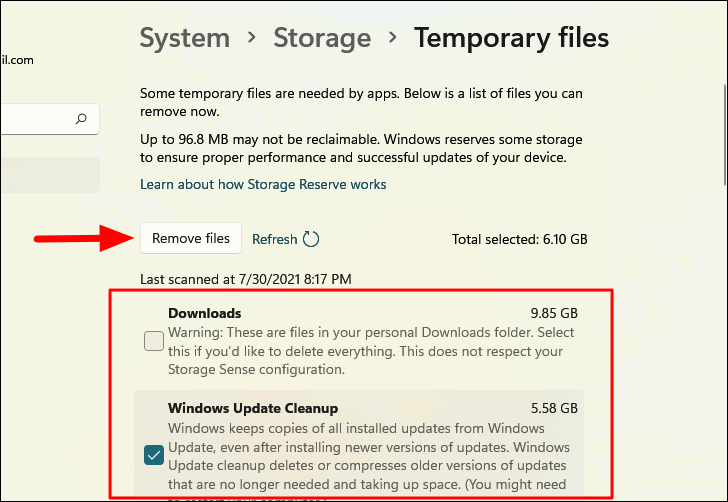
Step 4: Review the list of temporary files available for deletion. Select the files you want to remove, such as temporary setup files, system logs, and recycle bin contents. Click 'Remove files' to delete them.
Note: For detailed descriptions of each file type, refer to How to Delete Temporary Files in Windows 11.
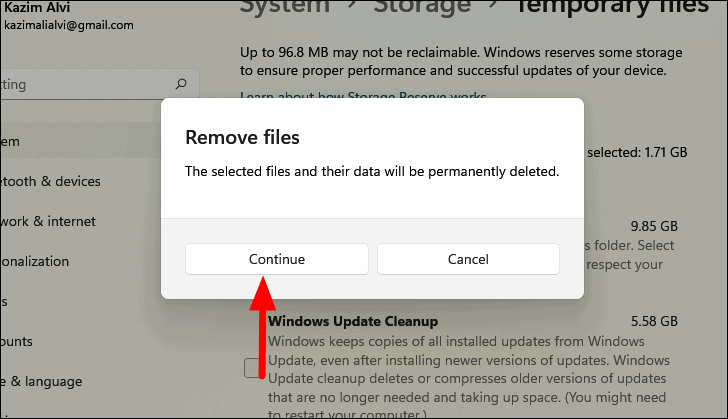
Step 5: Confirm the deletion by clicking 'Continue' if prompted. The selected temporary files will be removed from your system.
Clear Temporary Cache Files Manually
Applications create temporary files during operation, which may not always be removed automatically. Manually deleting these files can help reclaim storage space.
Step 1: Press WINDOWS + R to open the Run dialog box. Type %temp% and press ENTER or click 'OK'. This will open the folder where temporary files are stored.
%temp%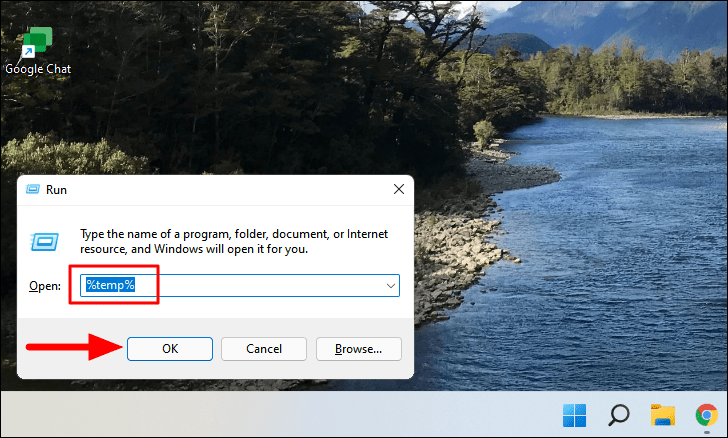
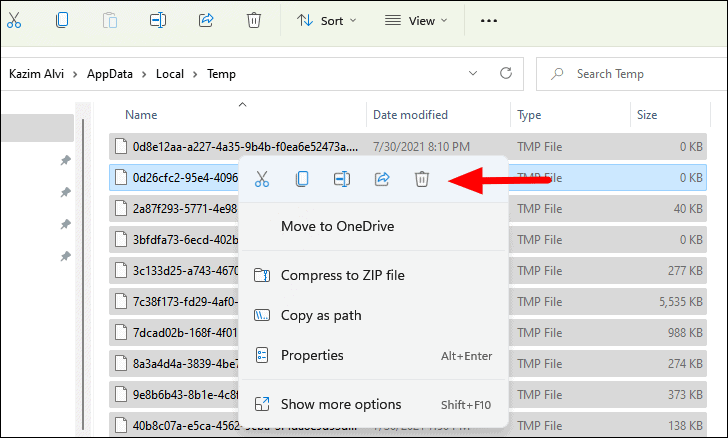
Step 2: In the temporary files folder, press CTRL + A to select all files. Right-click on any selected file and choose 'Delete', or simply press the DELETE key to remove them.
Step 3: If a confirmation dialog appears or some files cannot be deleted because they are in use, select 'Skip' or 'Continue' to proceed with deleting the rest of the files.
Clear DNS Cache
The DNS cache stores the domain names of websites you've visited, which helps load them faster on future visits. Clearing the DNS cache can resolve issues with loading websites, especially if the cache has become outdated or corrupted.
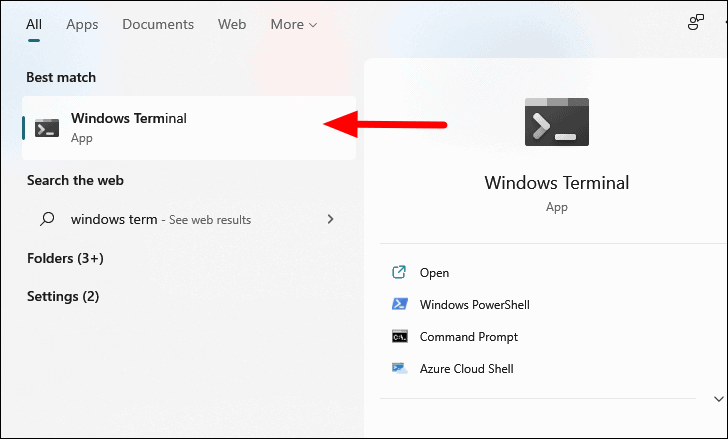
Step 1: Open Windows Terminal by searching for it in the Search menu and selecting 'Windows Terminal' from the results.
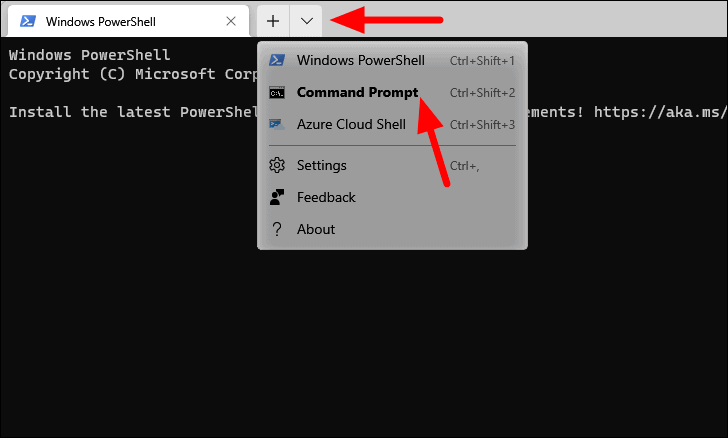
Step 2: In Windows Terminal, open a Command Prompt tab by clicking the arrow next to the '+' icon and selecting 'Command Prompt'. Alternatively, press CTRL + SHIFT + 2.
Step 3: In the Command Prompt, type the following command and press ENTER to flush the DNS cache:
ipconfig /flushdns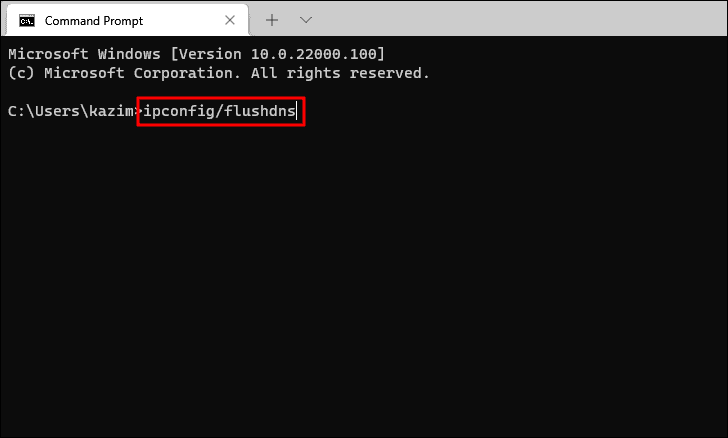
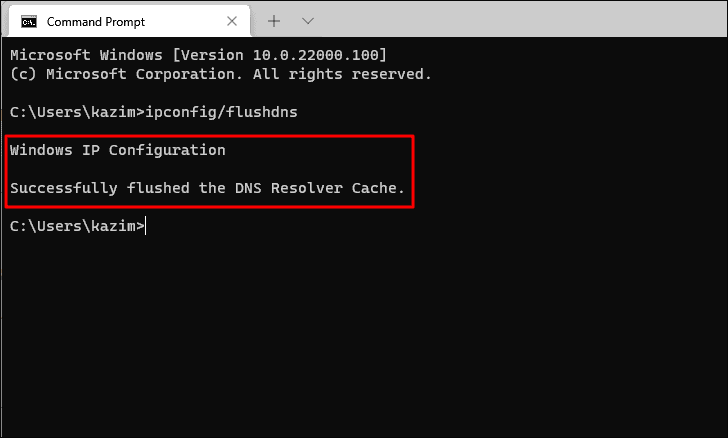
Step 4: You will receive a confirmation message indicating that the DNS cache has been successfully flushed.
Clear Location Cache
Windows 11 keeps a record of your location history, which can be cleared to protect your privacy or resolve issues with location services.
Step 1: Open the Settings app by pressing WINDOWS + I or by right-clicking the 'Start' icon and selecting 'Settings'.
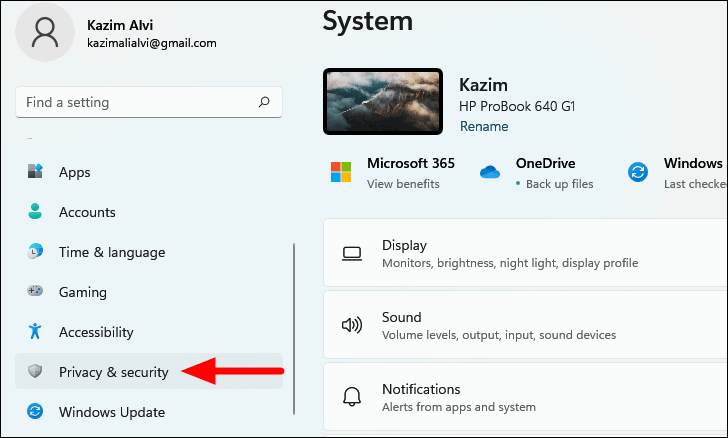
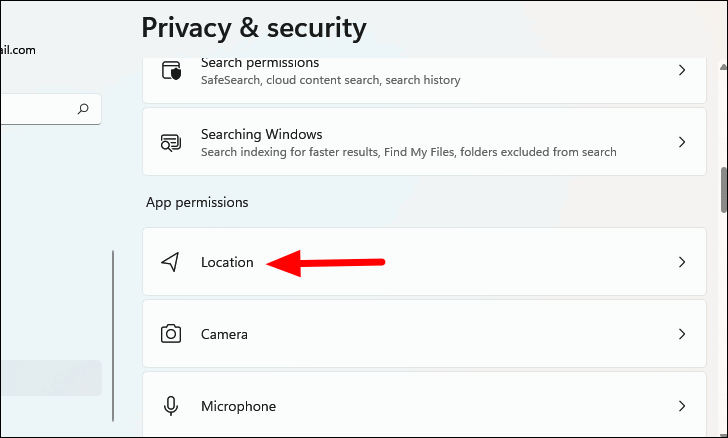
Step 2: In the left pane, click on 'Privacy & security'. On the right, under 'App permissions', select 'Location'.
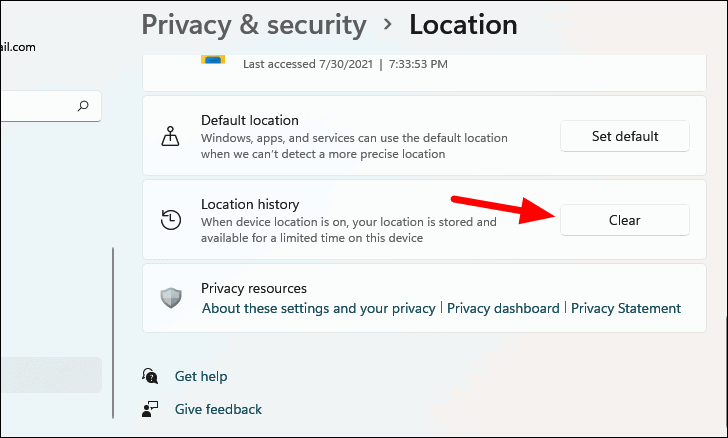
Step 3: Scroll down to the 'Location history' section and click on the 'Clear' button to delete your location cache.
Clear Microsoft Store Cache
The Microsoft Store accumulates cache files when you download apps, which can sometimes cause issues or slow down the app. Clearing this cache can resolve these problems.
Step 1: Press WINDOWS + R to open the Run dialog box. Type wsreset.exe and click 'OK' or press ENTER.
wsreset.exe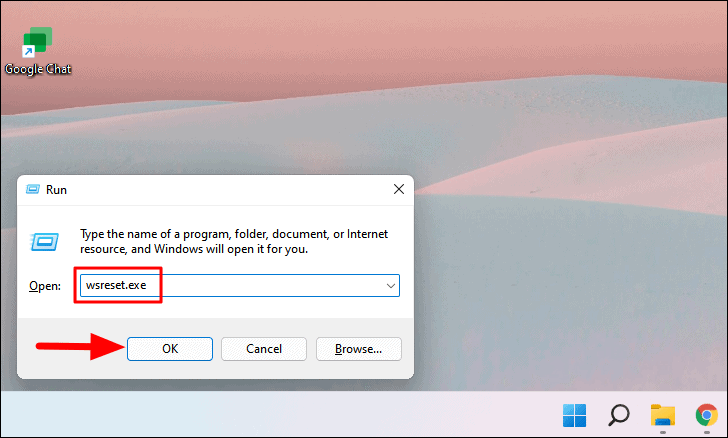
Step 2: A blank Command Prompt window will appear. Wait a few moments as the cache is cleared. Once the process is complete, the Microsoft Store will launch automatically.
Clear Browser Cache
Your web browser stores cache files such as images and website data to speed up loading times. However, clearing the browser cache can resolve issues with website loading errors or free up disk space.
Clear Microsoft Edge Cache
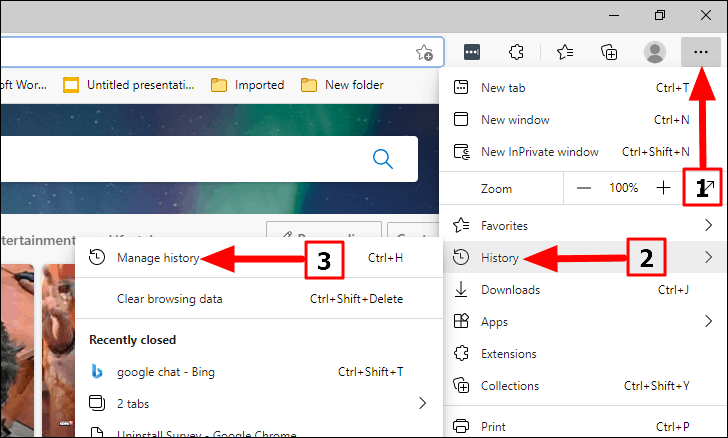
Step 1: Open Microsoft Edge and click on the 'Settings and more' icon (three dots) at the top-right corner. Hover over 'History' in the menu, then select 'Manage history'. Alternatively, press CTRL + H to open the History pane.
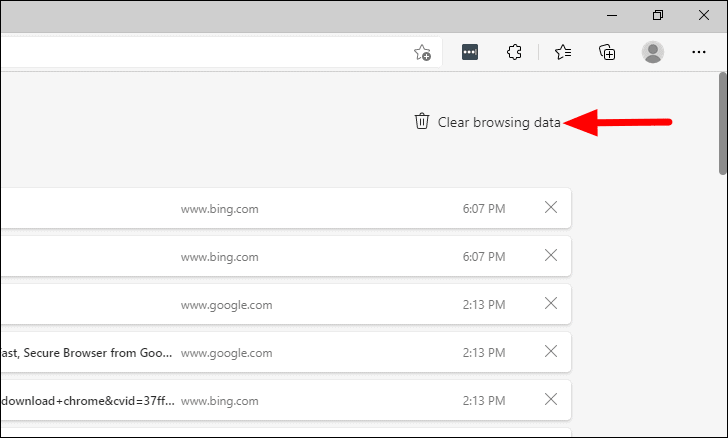
Step 2: Click on 'Clear browsing data' at the top-right corner of the History pane.
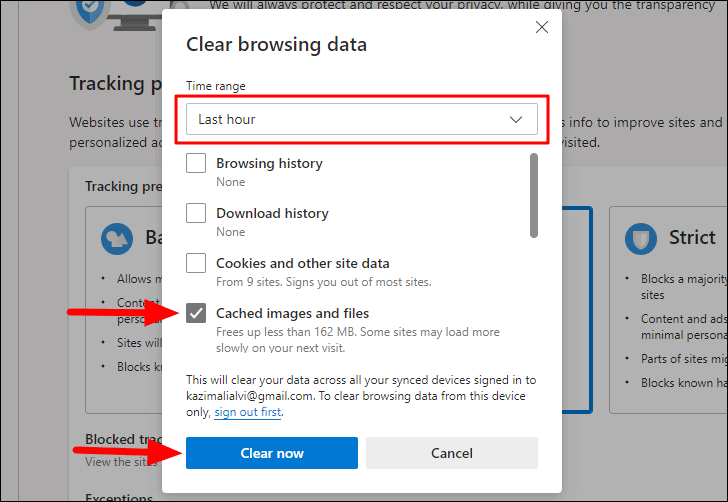
Step 3: In the dialog that appears, select a 'Time range' from the drop-down menu. Check the box for 'Cached images and files', then click 'Clear now' to delete the cache.
Clear Google Chrome Cache
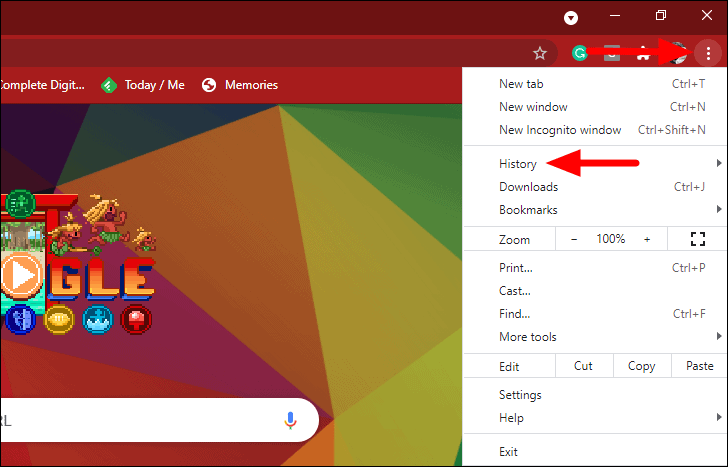
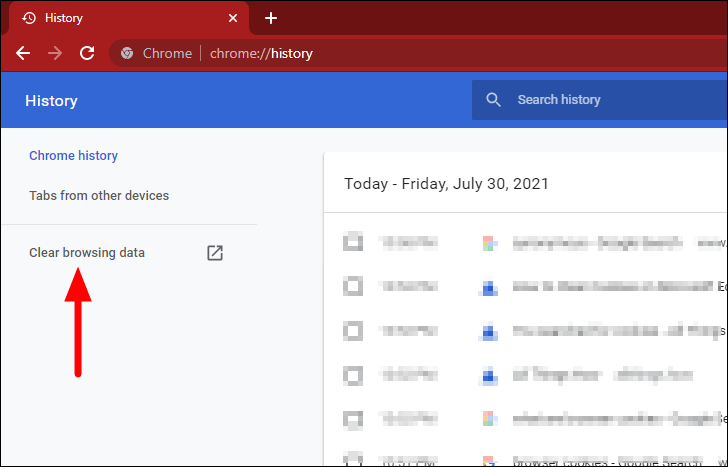
Step 1: Open Google Chrome and click on the three vertical dots at the top-right corner. Hover over 'History', then click on 'History' in the submenu. You can also press CTRL + H to open the History tab.
Step 2: On the left side of the History tab, click on 'Clear browsing data'.
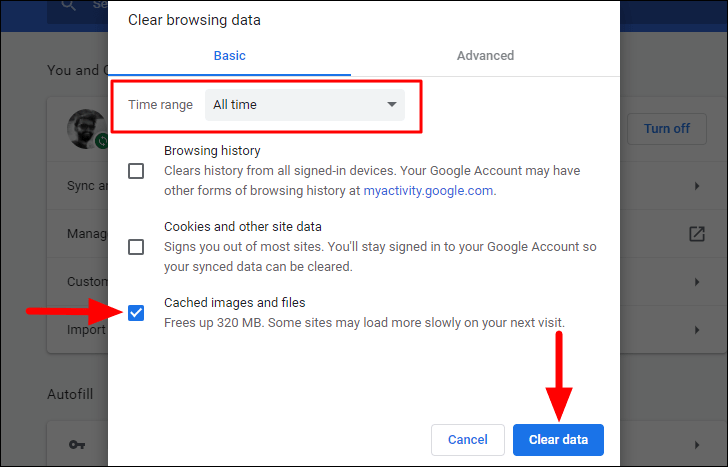
Step 3: In the 'Clear browsing data' window, choose a 'Time range'. Check the box next to 'Cached images and files', then click 'Clear data' to remove the cache. Confirm if prompted.
Regularly clearing the cache on your Windows 11 PC helps maintain optimal performance and frees up valuable disk space. By following these methods, you can ensure your system runs smoothly and efficiently.







Member discussion