Managing the storage on your Windows 11 PC is crucial for maintaining its performance and ensuring you have enough space for essential files and applications. Over time, your system accumulates temporary files, caches, and other unnecessary data that can consume significant storage space. This guide provides effective methods to help you clear memory on your Windows 11 computer.
1. Use Storage Sense to Automatically Free Up Space
Clearing out unnecessary files manually can be time-consuming. Windows 11 offers a built-in feature called Storage Sense that automatically manages your storage by deleting temporary files and items you no longer need.
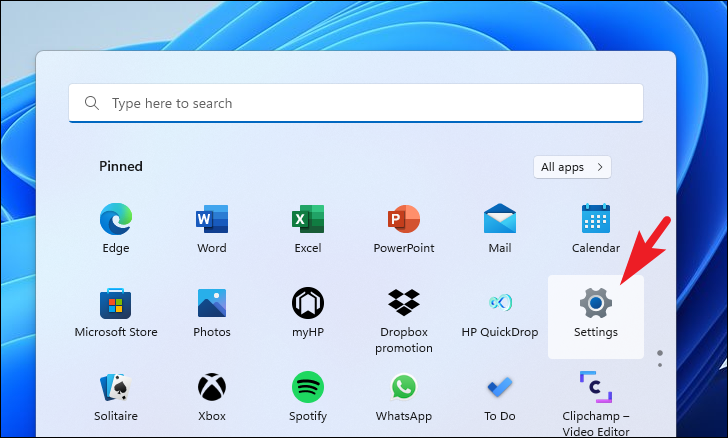
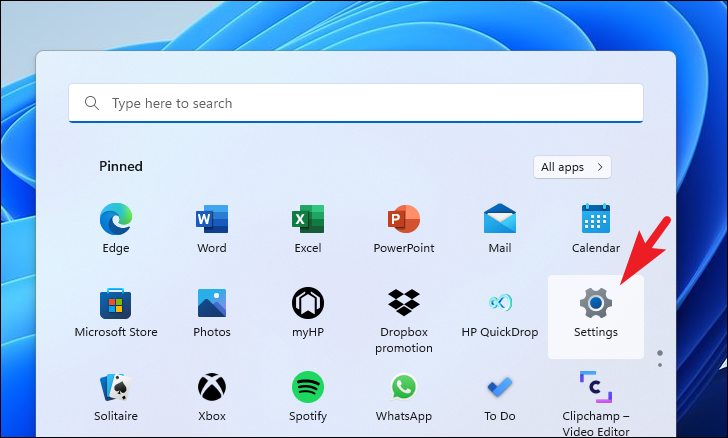
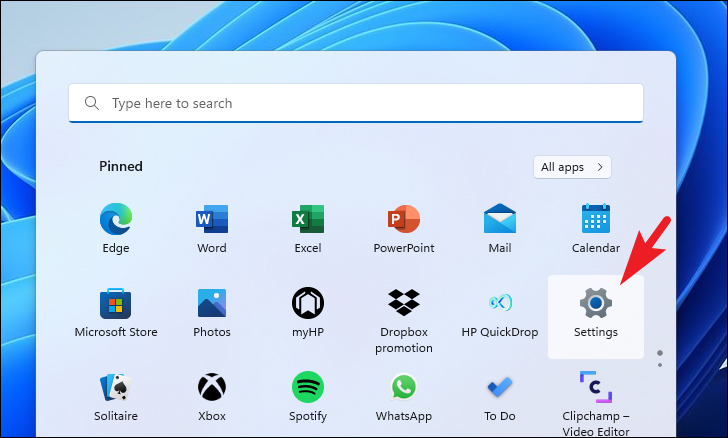
Step 1: Open the Settings app on your Windows 11 PC. To do this, click on the Start menu and select the Settings icon from the Pinned apps section, or press Windows+I on your keyboard.
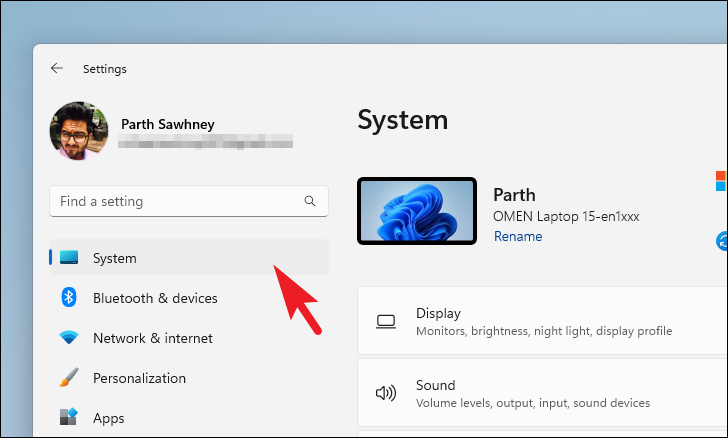
Step 2: In the Settings window, ensure that the System tab is selected on the left sidebar.
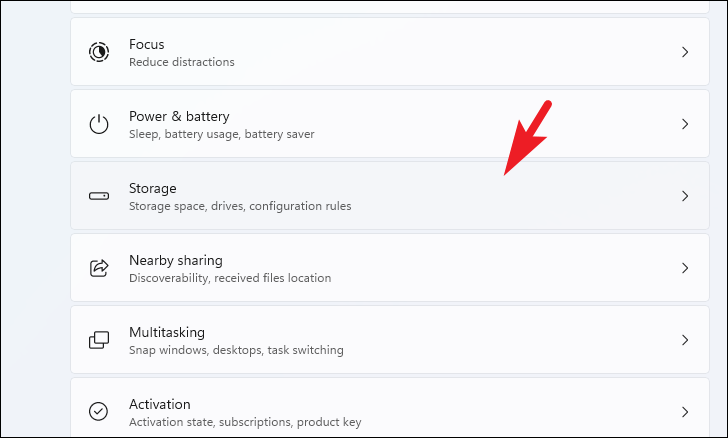
Step 3: From the right pane, scroll down and click on the Storage option.
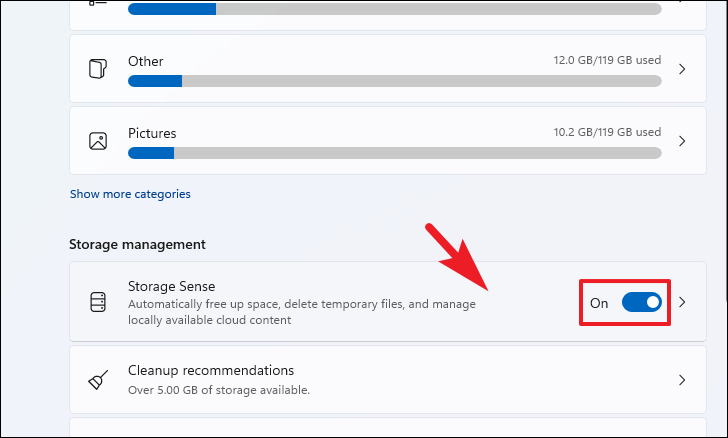
Step 4: Under the Storage management section, locate Storage Sense. Toggle the switch to turn it On. If you wish to configure Storage Sense settings further, click on the Storage Sense option.
Step 5: In the Storage Sense settings, check the box next to Keep Windows running smoothly by automatically cleaning up temporary system and app files to enable automatic cleanup of temporary files.
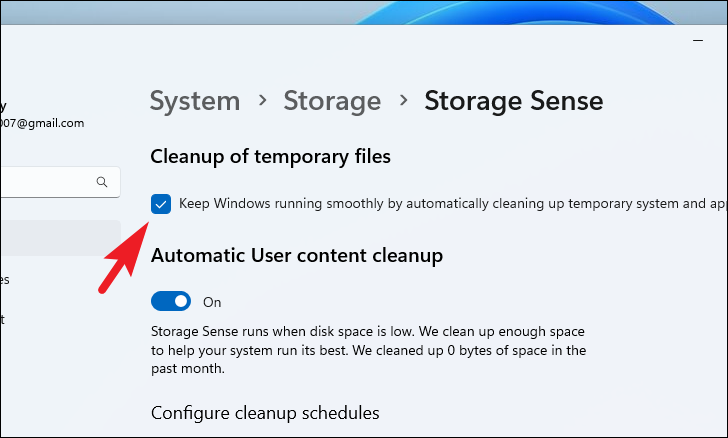
Step 6: To set up a regular cleanup schedule, navigate to the Configure cleanup schedules section. Click on the drop-down menu under Run Storage Sense and select your preferred frequency (e.g., Every week).
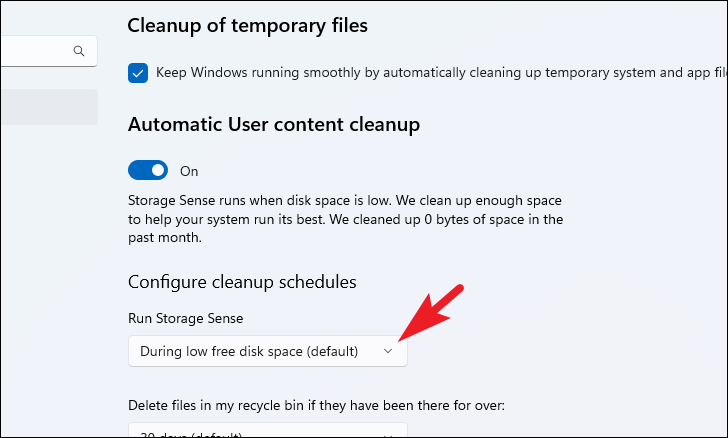
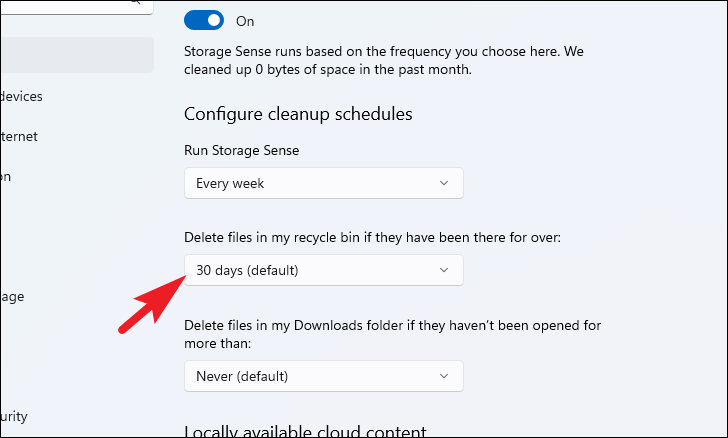
Step 7: Configure how often files in the Recycle Bin and Downloads folder are deleted. Under Delete files in my recycle bin if they have been there for over, select a time period that suits you. Similarly, set a time period under Delete files in my Downloads folder if they haven't been opened for more than.
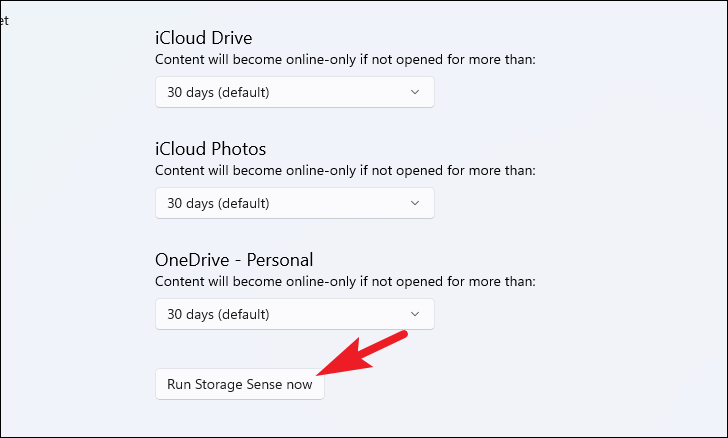
Step 8: Once you have configured the settings, you can manually initiate Storage Sense by clicking on Run Storage Sense now at the bottom of the page. This will immediately free up space based on your settings.
2. Run Disk Cleanup to Remove Unnecessary Files
Disk Cleanup is a long-standing Windows utility that helps you delete temporary and unnecessary files from your system.
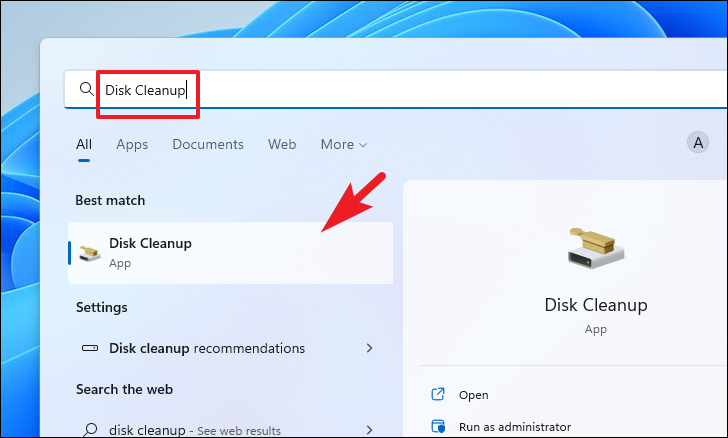
Step 1: Open Disk Cleanup by searching for it in the Start menu. Click on the Start menu, type Disk Cleanup, and select the app from the search results.
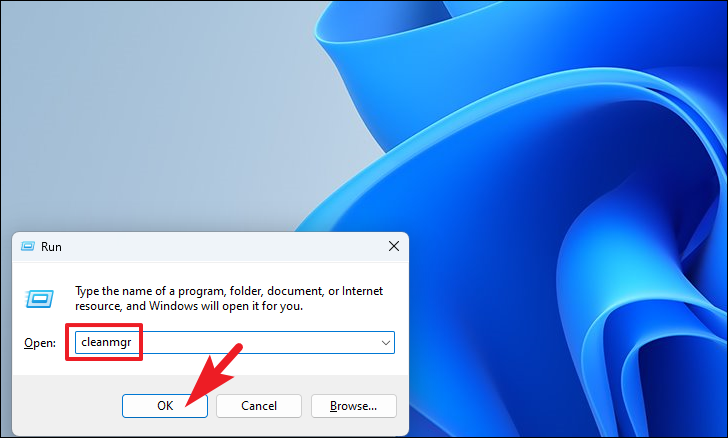
Alternatively, you can press Windows+R to open the Run dialog, type cleanmgr, and press Enter.
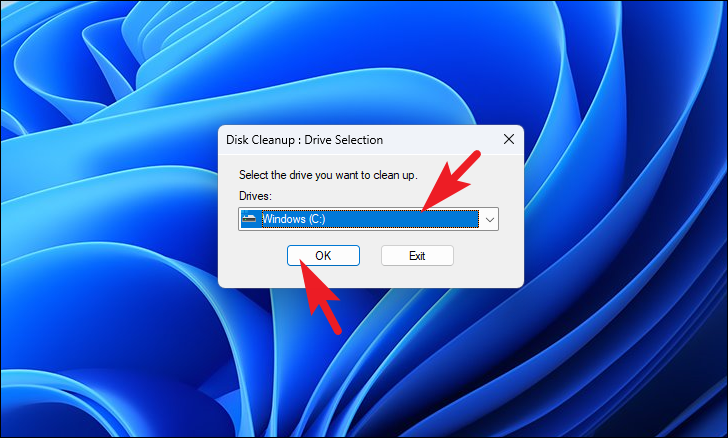
Step 2: When prompted, select the drive you wish to clean up (usually the C: drive) from the drop-down menu and click OK.
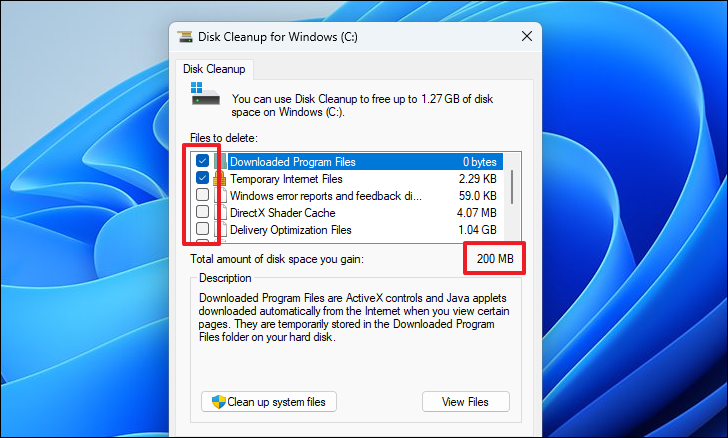
Step 3: Disk Cleanup will calculate how much space you can free up. Once the calculation is complete, you will see a list of file categories. Scroll through the list and check the boxes next to the types of files you want to delete. You can see the amount of space each category occupies.
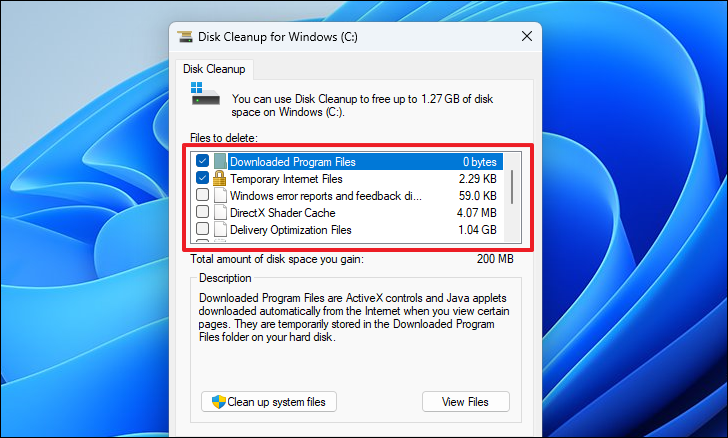
Step 4: After selecting the file categories, note the total amount of space you will free up, displayed at the bottom. Click on OK to proceed.
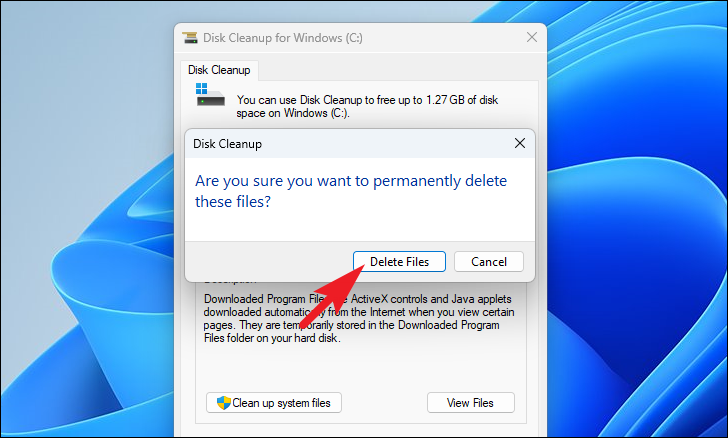
Step 5: A prompt will appear asking for confirmation. Click Delete Files to permanently remove the selected files from your system.
3. Empty the Temporary Files Folder
The Temp folder stores temporary files that applications and the system use. Clearing this folder can free up space without affecting your system's functionality.
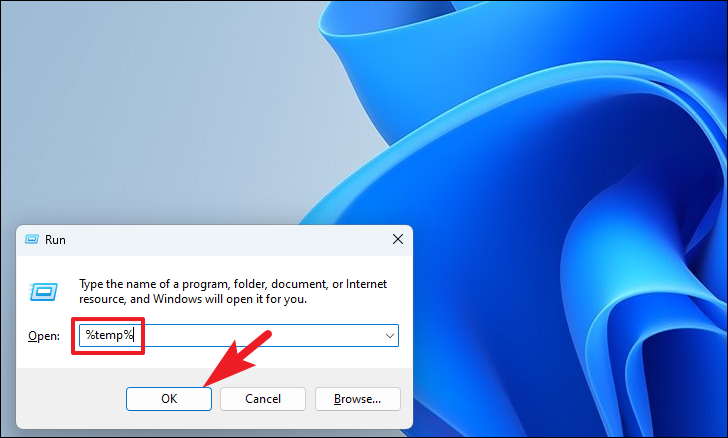
Step 1: Open the Run dialog by pressing Windows+R on your keyboard. In the text box, type %temp% and press Enter or click OK.
Step 2: This will open the Temp folder in File Explorer. Press Ctrl+A to select all files and folders within this directory.
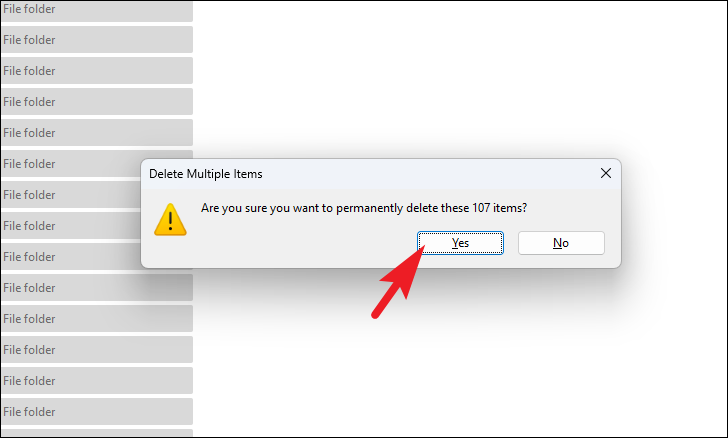
Step 3: Press Shift+Delete to permanently delete these files (bypassing the Recycle Bin). Confirm the action if prompted by clicking Yes.
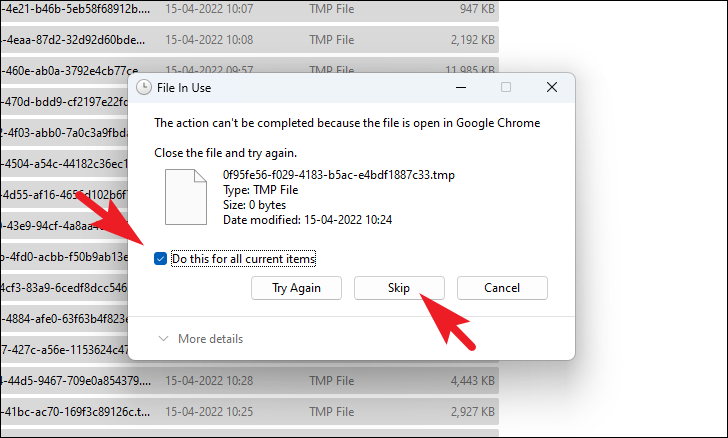
Step 4: If a dialog appears stating that some files are in use and cannot be deleted, check the box next to Do this for all current items and click Skip to proceed without deleting those files.
4. Free Up Space Using Clean Up Recommendations
Windows 11 provides Clean Up Recommendations within the Settings app, offering an intuitive way to identify and remove unnecessary files.
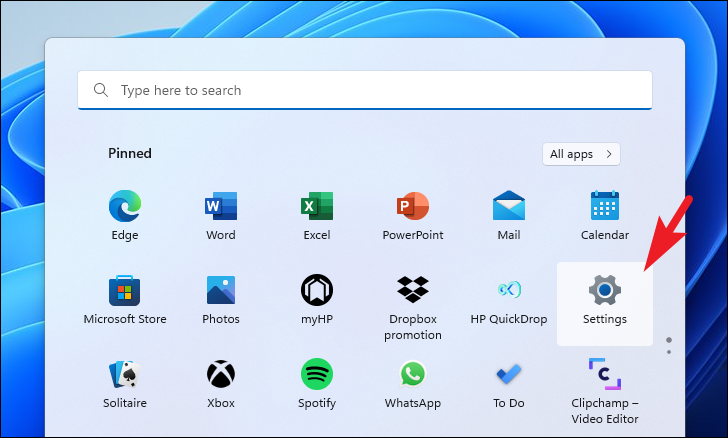
Step 1: Open the Settings app by clicking the Start menu and selecting Settings, or press Windows+I.
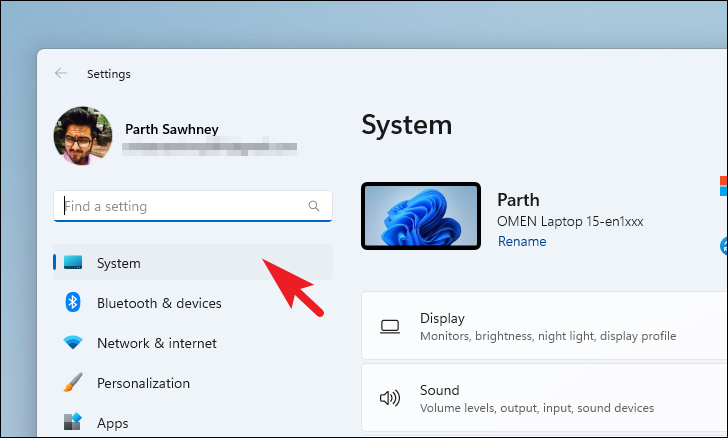
Step 2: In the Settings window, select the System tab on the left sidebar.
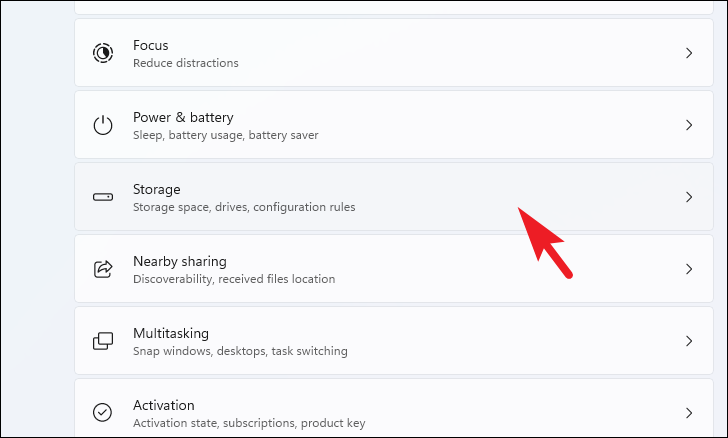
Step 3: Click on Storage from the right pane.
Step 4: Under the Storage management section, click on Cleanup recommendations.
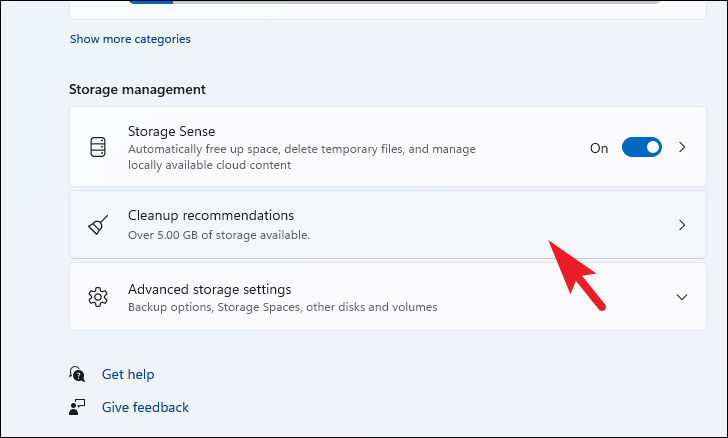
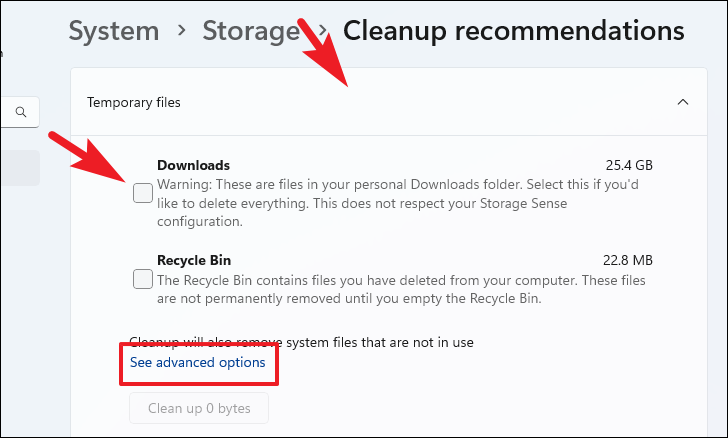
Step 5: Expand the Temporary files section by clicking on it. Check the boxes next to the types of temporary files you wish to delete. If you need more options, click on See advanced options. Once selected, click Clean up to delete the files.
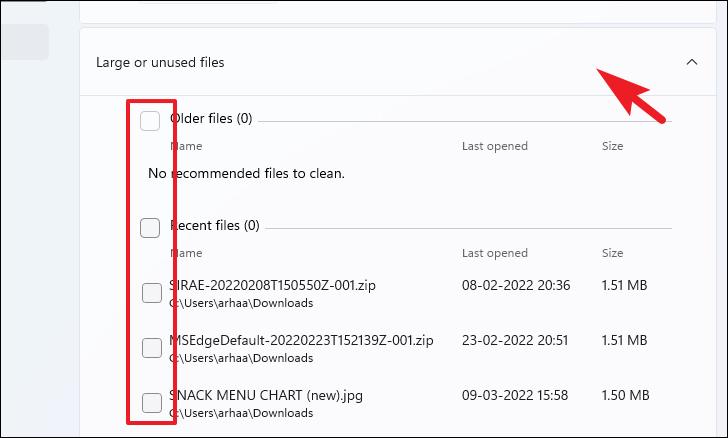
Step 6: Similarly, expand the Large & unused files section. Review the files, select the ones you don't need by checking the boxes next to them, and click Clean up.
Step 7: If there are unused apps listed, expand the Unused apps section. Select the apps you wish to remove and click Clean up to uninstall them from your system.
5. Clear Browser Cache
Web browsers store cache files to speed up loading times for frequently visited websites. Over time, these files can accumulate and take up considerable space. Clearing your browser's cache can free up memory and potentially resolve browsing issues.
Clearing Cache in Microsoft Edge
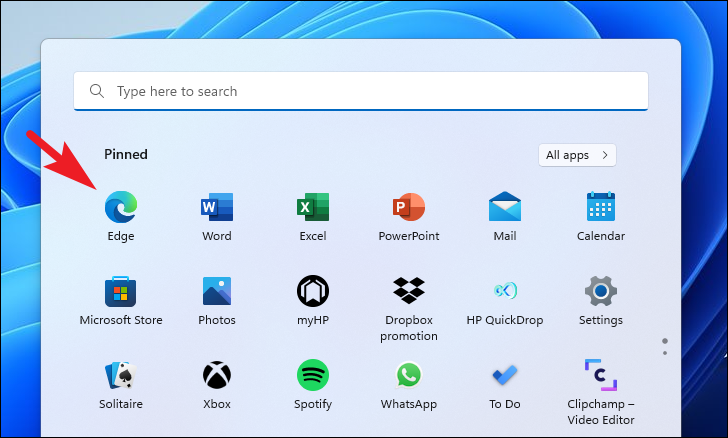
Step 1: Open Microsoft Edge by clicking on the Start menu and selecting Edge, or search for it if it's not pinned.
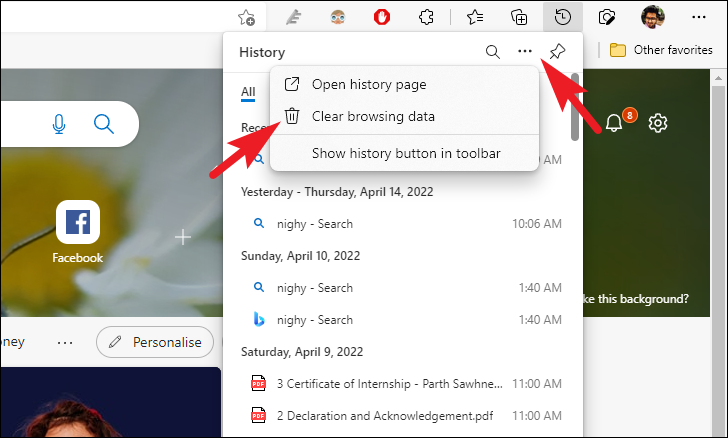
Step 2: Press Ctrl+H to open the History pane. Click on the ellipsis icon in the top-right corner of the pane, and select Clear browsing data. This will open a new tab.
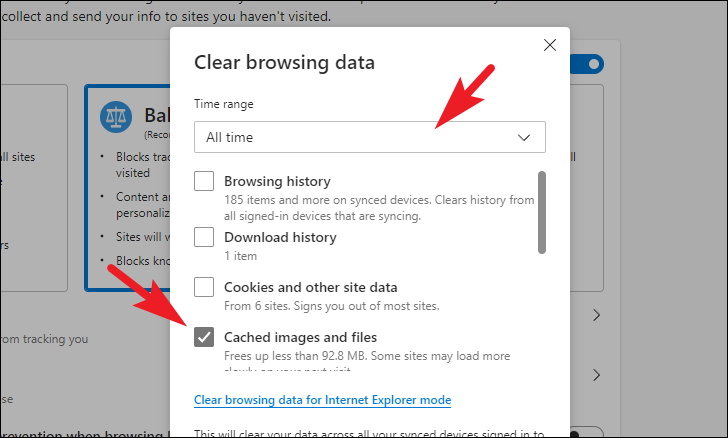
Step 3: In the Clear browsing data window, set the Time range to All time. Uncheck all options except Cached images and files. Click Clear now to delete the cache.
Clearing Cache in Google Chrome
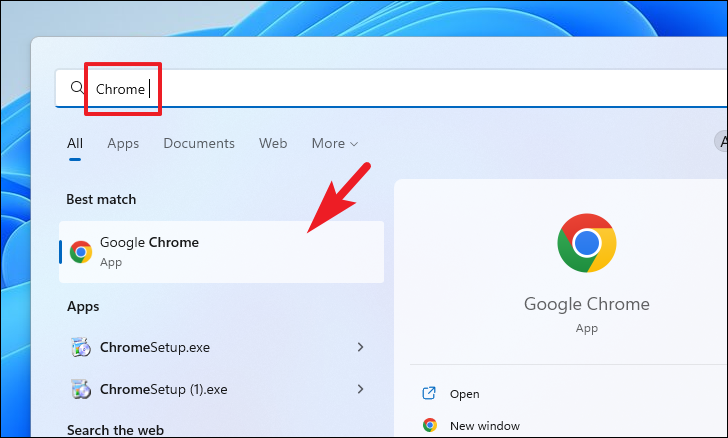
Step 1: Open Google Chrome from the Start menu.
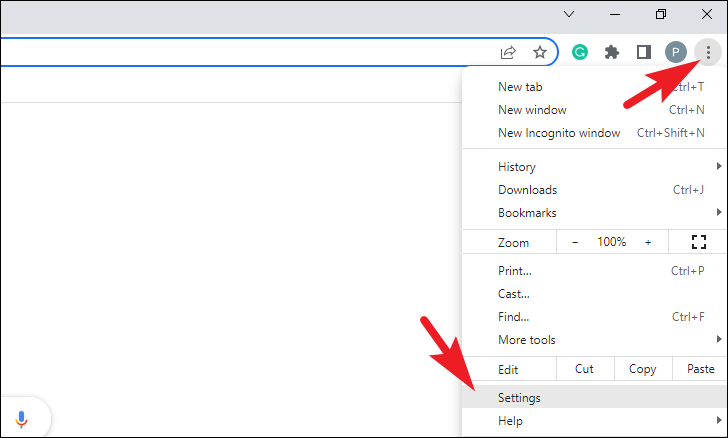
Step 2: Click on the ellipsis icon (three dots) in the top-right corner and select Settings from the drop-down menu.
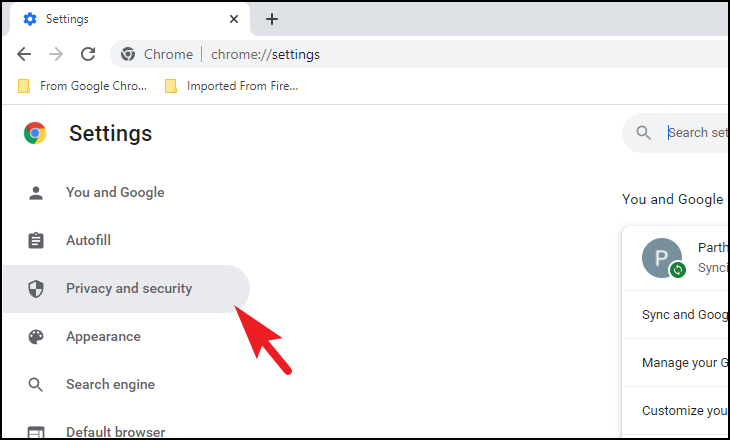
Step 3: In the Settings tab, select Privacy and security from the left sidebar.
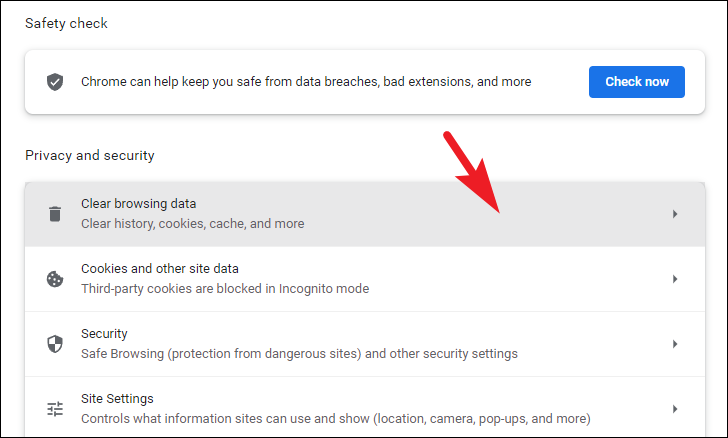
Step 4: Click on Clear browsing data.
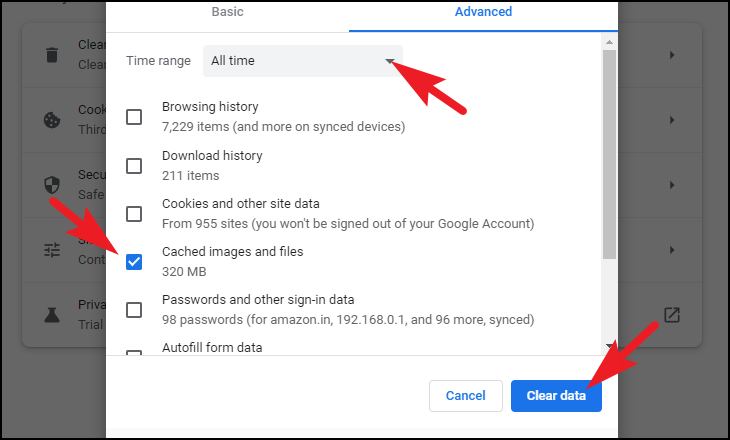
Step 5: In the overlay window, set the Time range to All time. Uncheck all options except Cached images and files. Click Clear data to proceed.
Clearing Cache in Mozilla Firefox
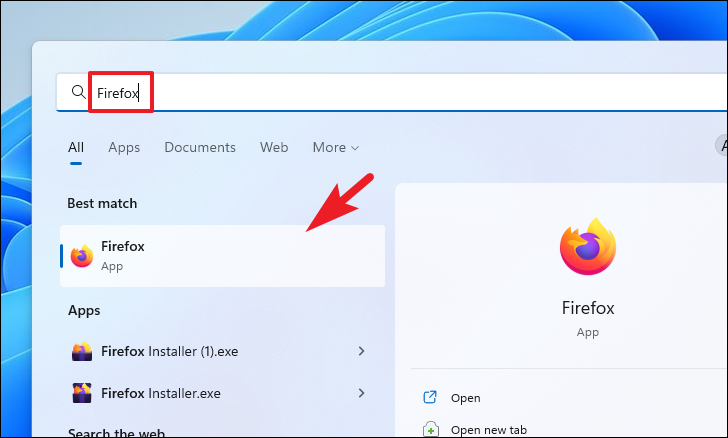
Step 1: Launch Mozilla Firefox from the Start menu.
Step 2: Click on the hamburger menu (three horizontal lines) in the top-right corner and select History.
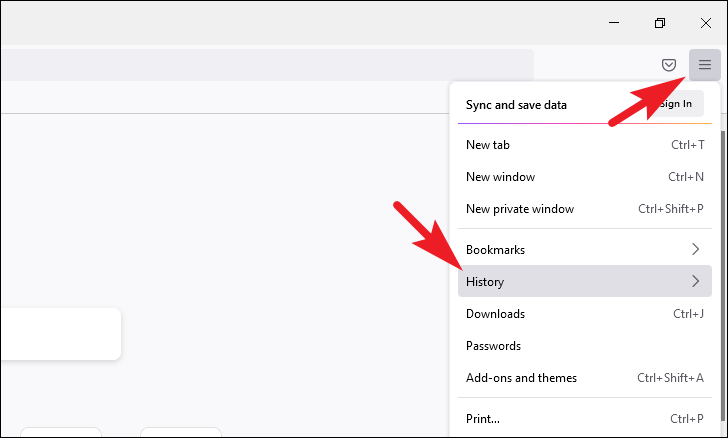
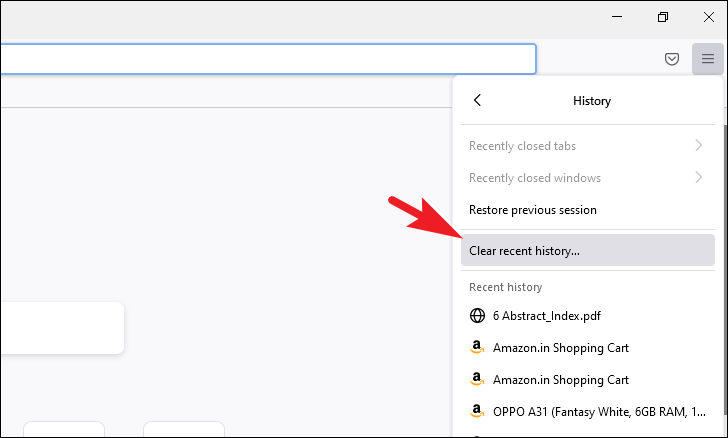
Step 3: From the expanded menu, click on Clear Recent History.
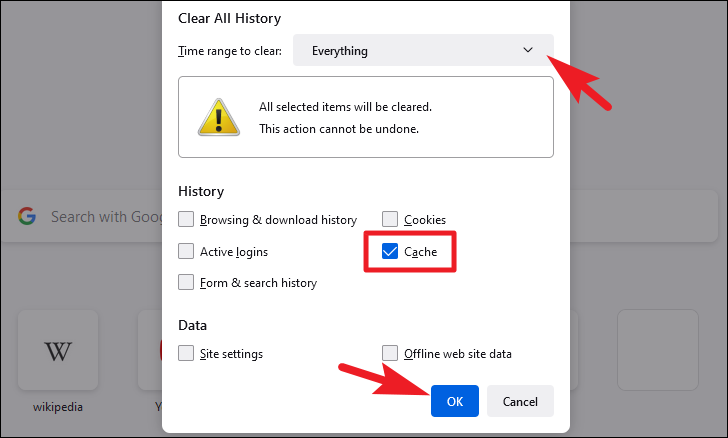
Step 4: In the overlay window, set Time range to clear to Everything. Check only the Cache option, unchecking others if necessary. Click OK to clear the cache.
6. Uninstall Unused Optional Features
Optional features in Windows 11 may consume storage space, especially if they are not in use. Removing these features can help free up memory.
Step 1: Open the Settings app by pressing Windows+I or selecting Settings from the Start menu.
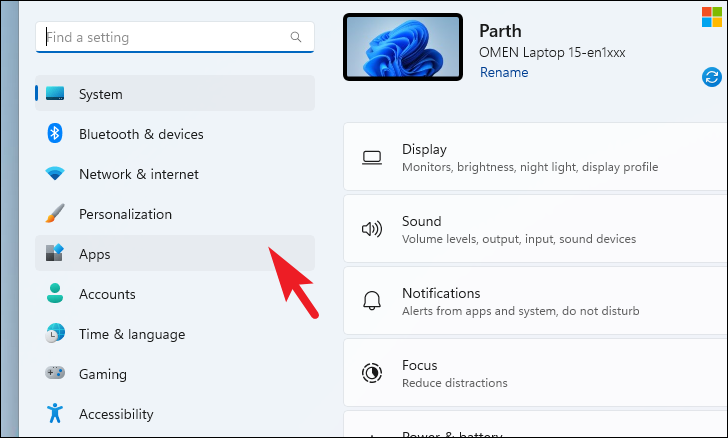
Step 2: Click on the Apps tab on the left sidebar.
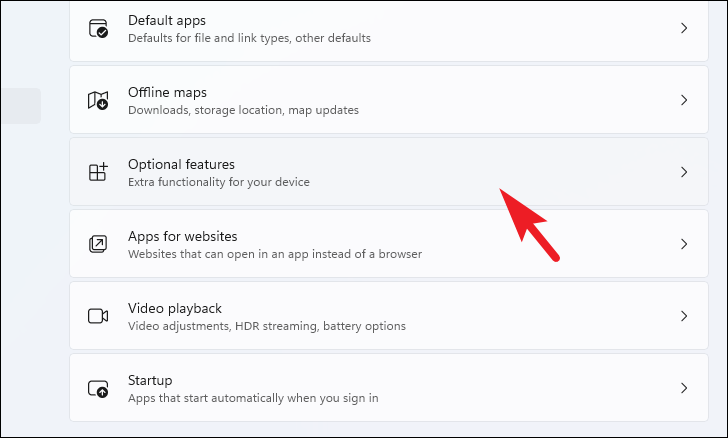
Step 3: From the right pane, select Optional features.
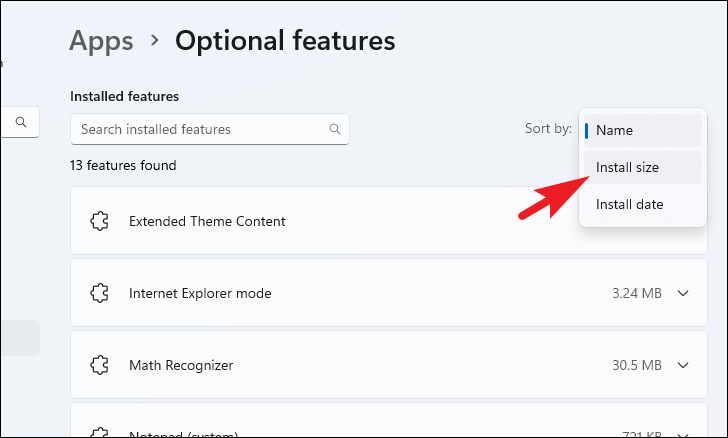
Step 4: Under Installed features, click on the Sort by drop-down menu and choose Install size to list features by their size.
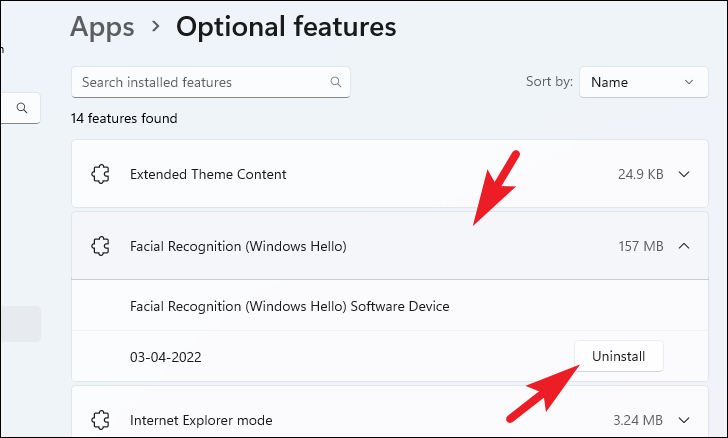
Step 5: Review the list of features. For any feature you wish to remove, click on it to expand, then click on Uninstall.
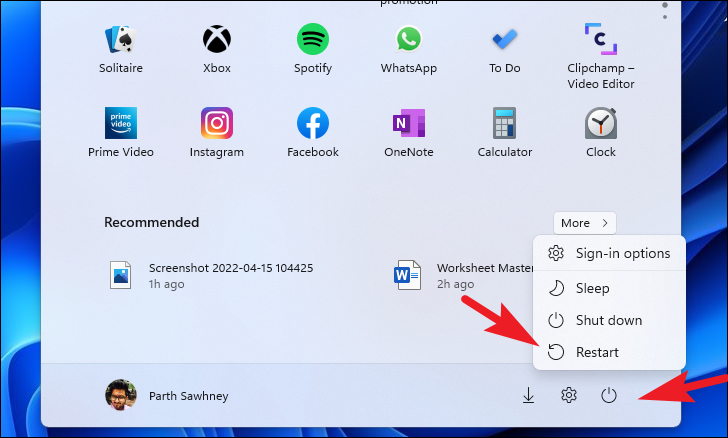
Step 6: You may be prompted to restart your computer to complete the uninstallation. Choose Restart now to reboot immediately or Restart later if you prefer to reboot later.
7. Remove Unused Language Packs
Language packs can take up significant space on your system. If you have installed multiple languages that you no longer use, removing them can free up storage.
Step 1: Open the Settings app by pressing Windows+I.
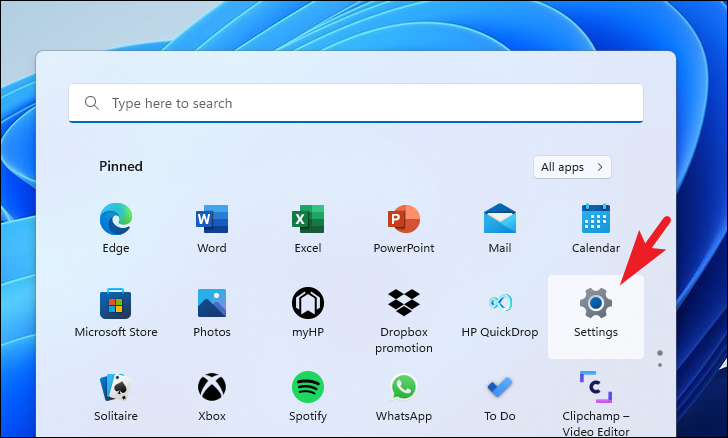
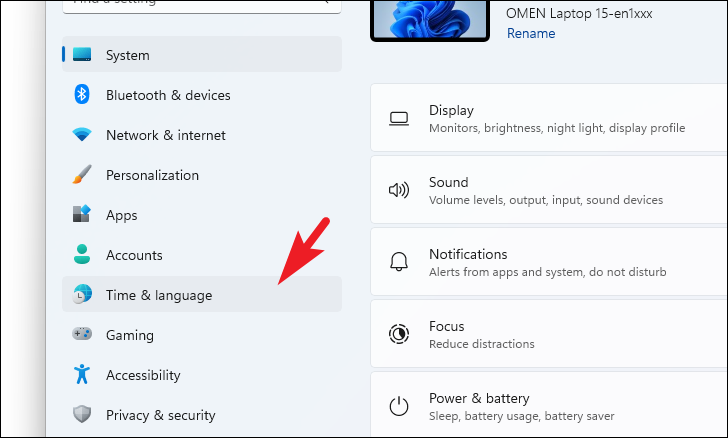
Step 2: Click on the Time & language tab on the left sidebar.
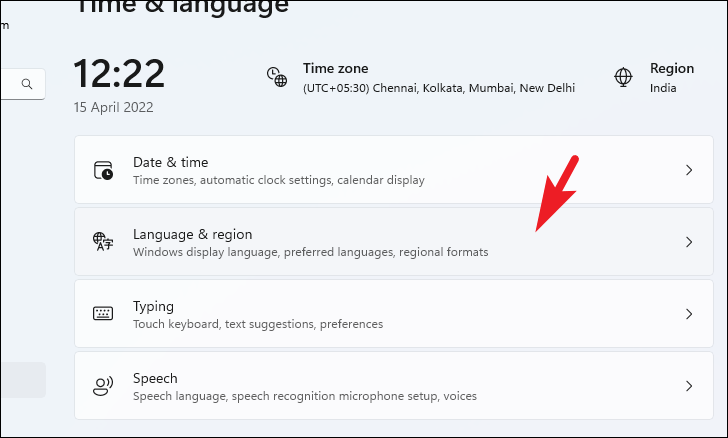
Step 3: Select Language & region from the right pane.
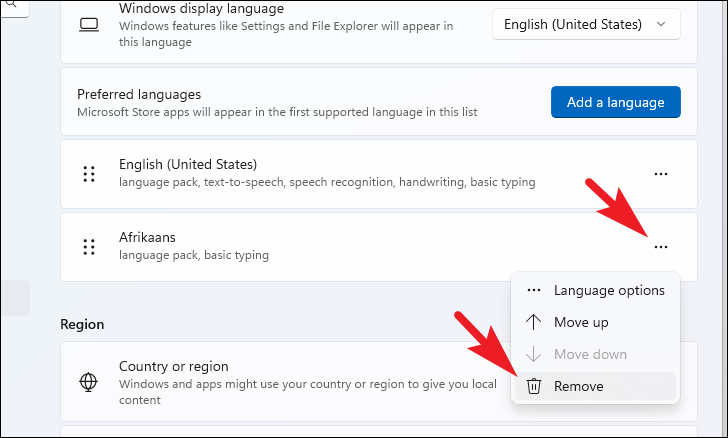
Step 4: Under the Language section, you will see a list of installed languages. Click on the ellipsis icon (three dots) next to the language you wish to remove and select Remove.
8. Adjust Search Indexing to Reduce Storage Usage
The Windows search index can consume a considerable amount of space, especially if it includes locations with large amounts of data. By modifying the search indexing options, you can reduce the storage used by the index.
Step 1: Open the Settings app by pressing Windows+I.
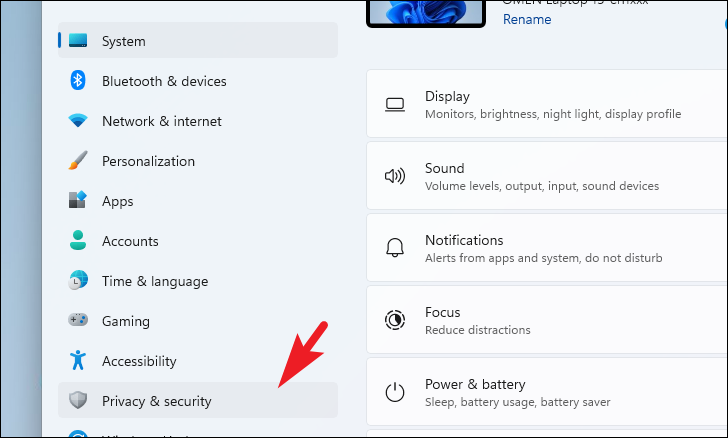
Step 2: Click on the Privacy & security tab on the left sidebar.
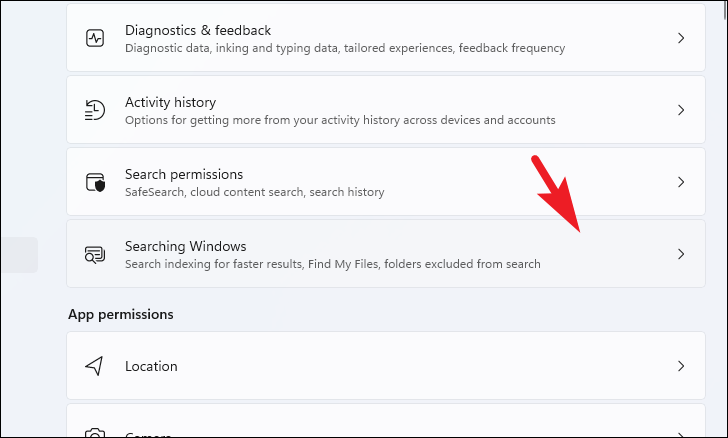
Step 3: Scroll down and select Searching Windows.
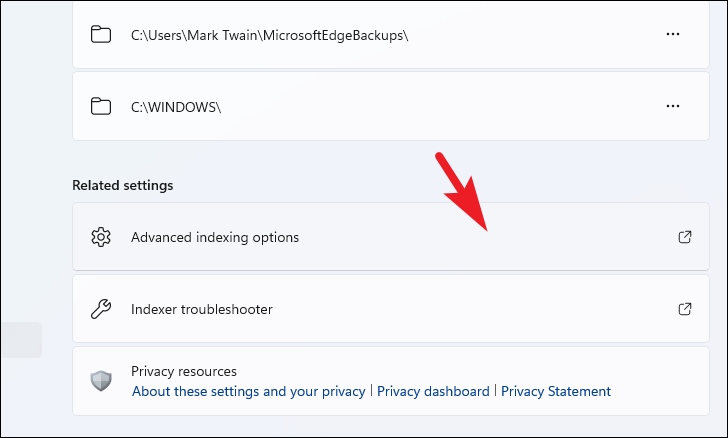
Step 4: Under the Related settings section, click on Advanced indexing options. This will open the Indexing Options window.
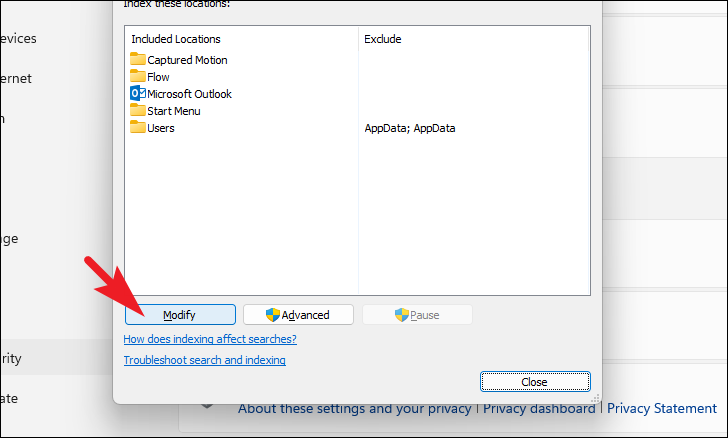
Step 5: In the Indexing Options window, click on Modify.
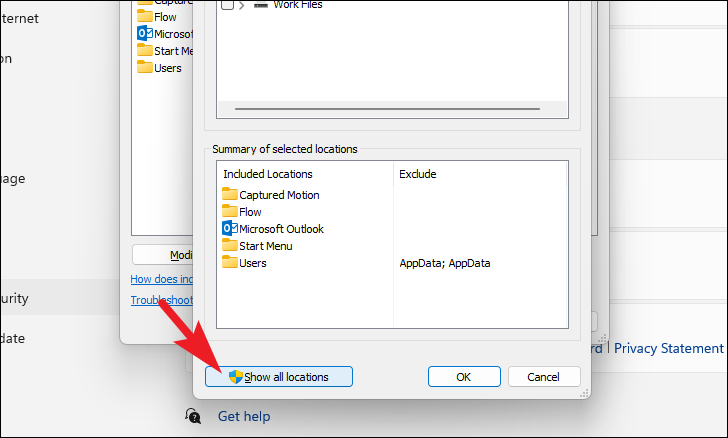
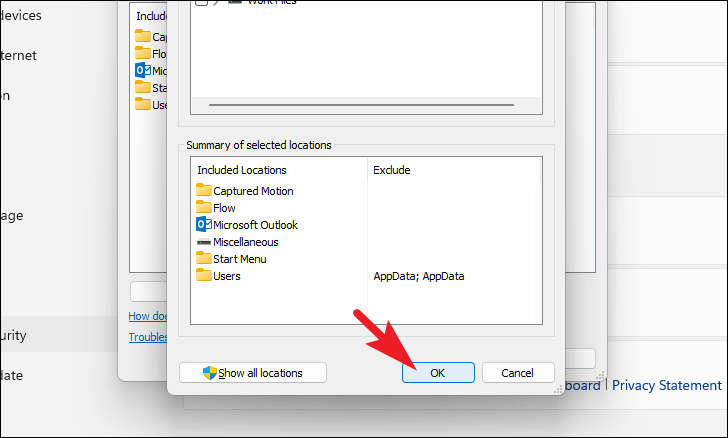
Step 6: Click on Show all locations at the bottom of the Indexed Locations window.
Step 7: In the list of locations, uncheck the boxes next to folders you don't want to be indexed. Be cautious, as removing locations from indexing means they won't show up in search results.
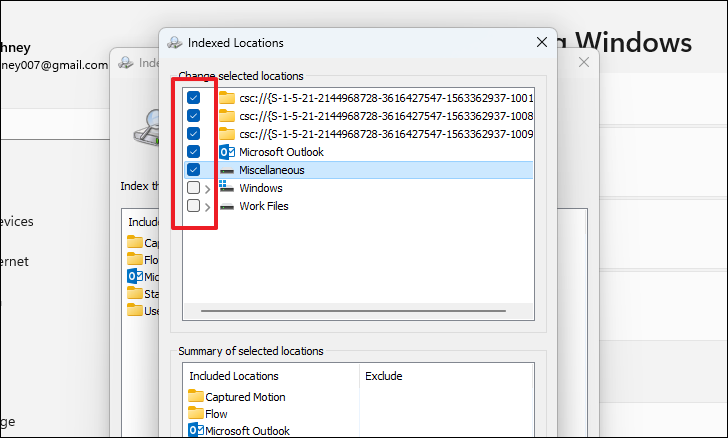
Step 8: After making your selections, click OK to save the changes.
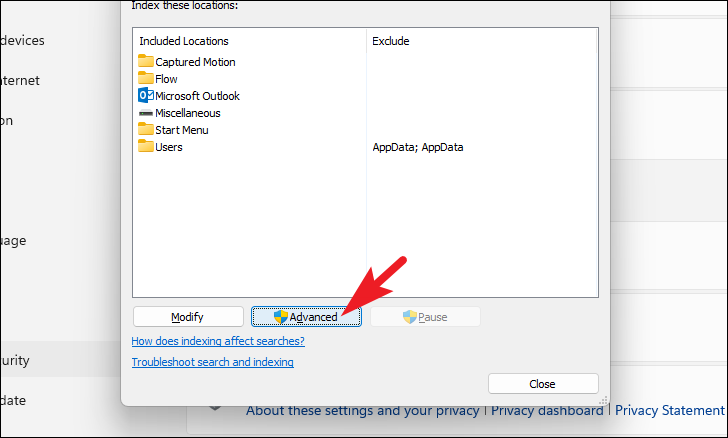
Step 9: Back in the Indexing Options window, click on Advanced.
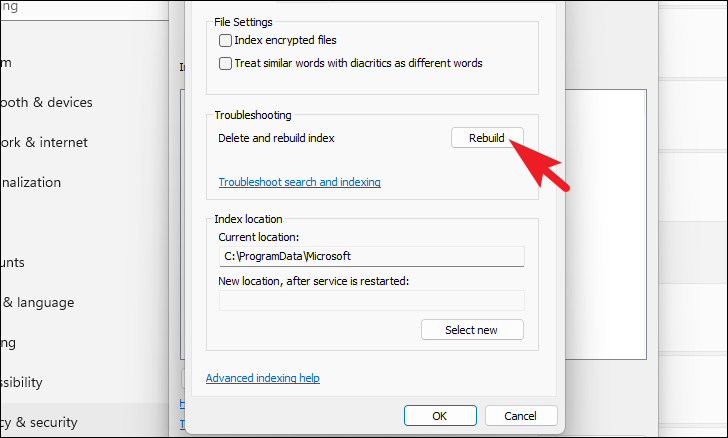
Step 10: Under the Troubleshooting section, click on Rebuild to regenerate the search index based on your new settings.
Regular maintenance and cleanup can significantly improve the performance of your Windows 11 PC. By using the methods outlined above, you can efficiently manage your storage and ensure your system runs smoothly.


