
Knowing your computer’s name on Windows 11 is essential when connecting to networks, sharing files, or accessing your PC remotely. There are several methods to find your computer name, and here’s how you can do it.
Method 1: Using the Settings app
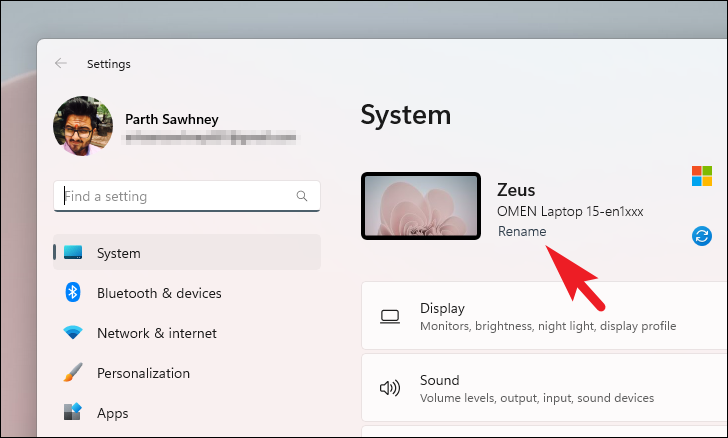
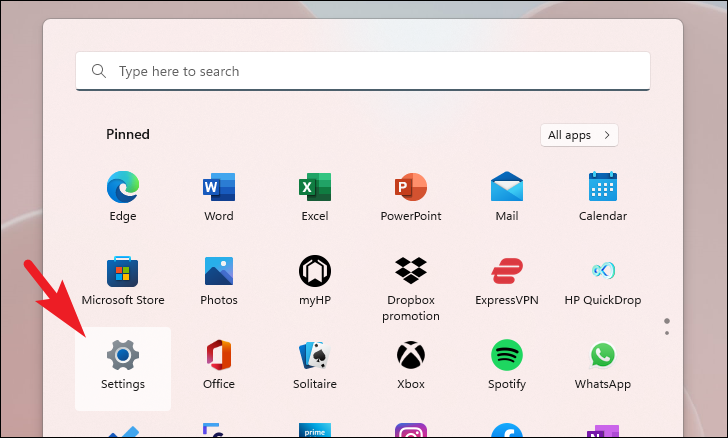
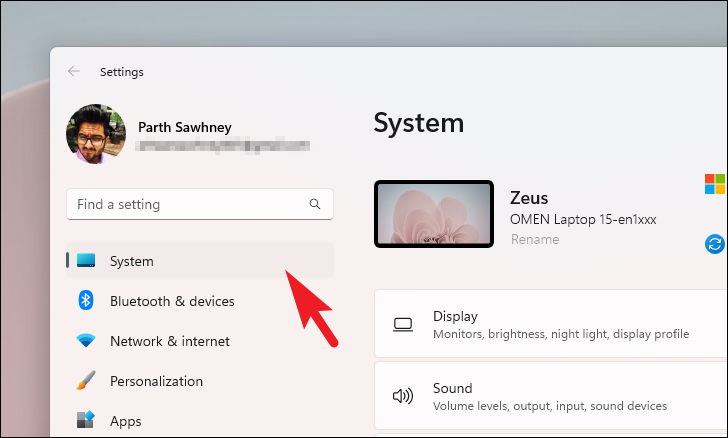
One of the simplest ways to find your computer name is through the Settings app.
Settings icon under the pinned apps. Alternatively, press Windows+I on your keyboard to launch the Settings app.

If you want to rename your PC, click on the Rename button next to your computer name. A new window will pop up.
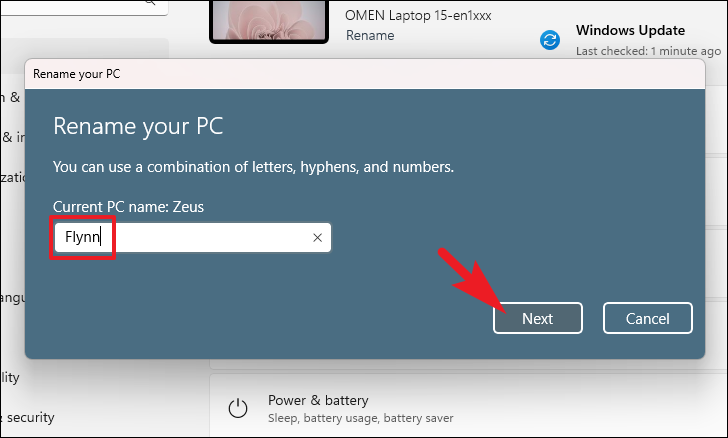
Enter your desired computer name in the text field and click Next to proceed.
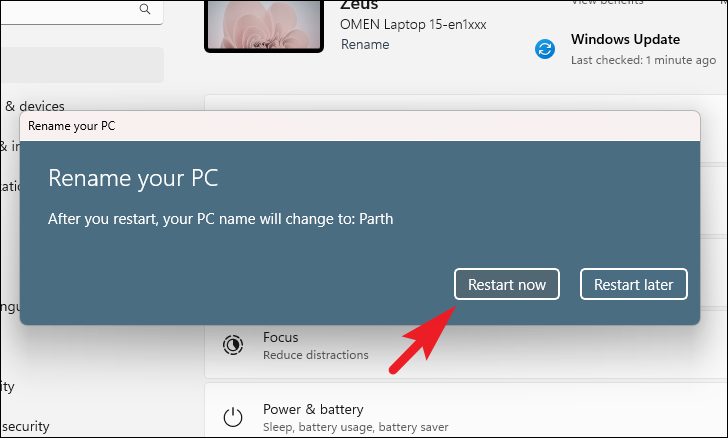
To apply the new name, you’ll need to restart your computer. Choose Restart now to reboot immediately or Restart later to postpone.
Method 2: From the System Properties
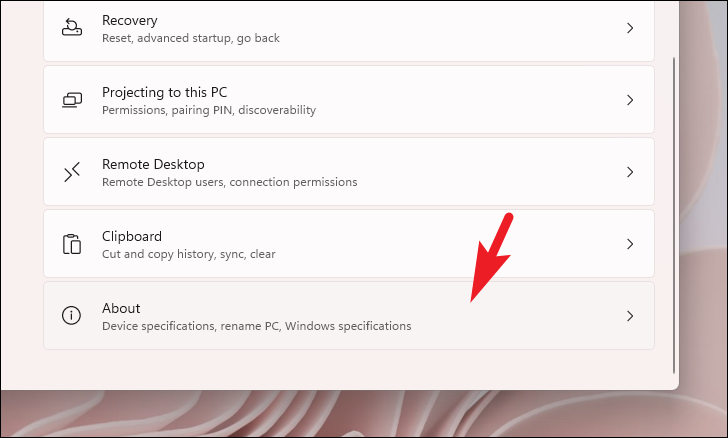
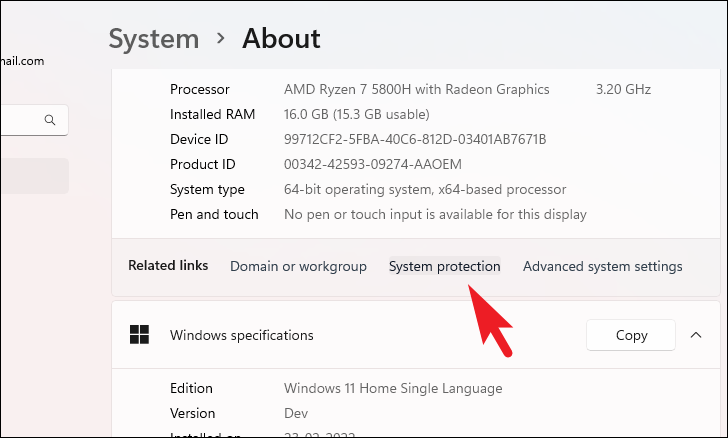
You can also find your computer name through the System Properties window for more advanced system details.
Alternatively, press Windows+R, type sysdm.cpl, and press Enter to open System Properties directly.
sysdm.cpl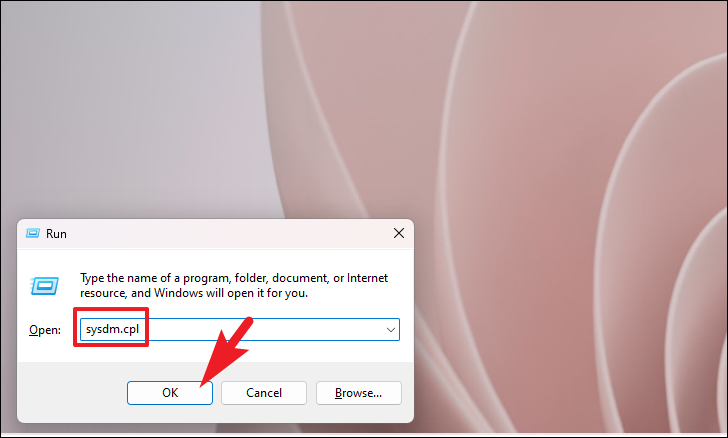
Computer Name tab to view your computer’s name and workgroup settings.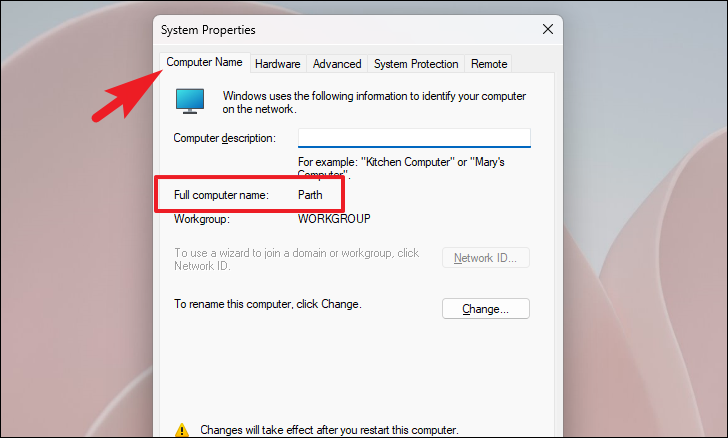
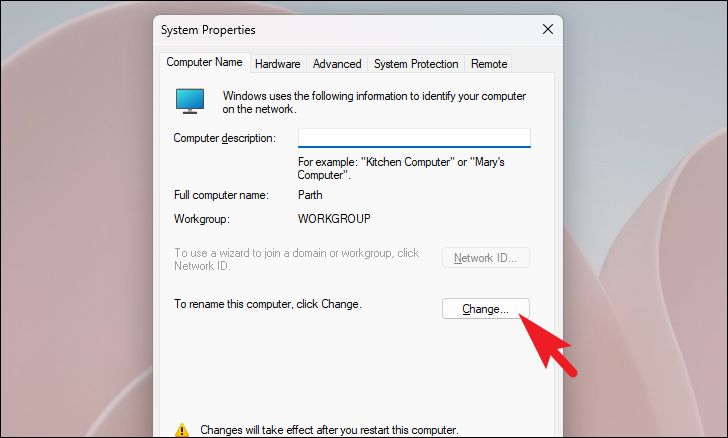
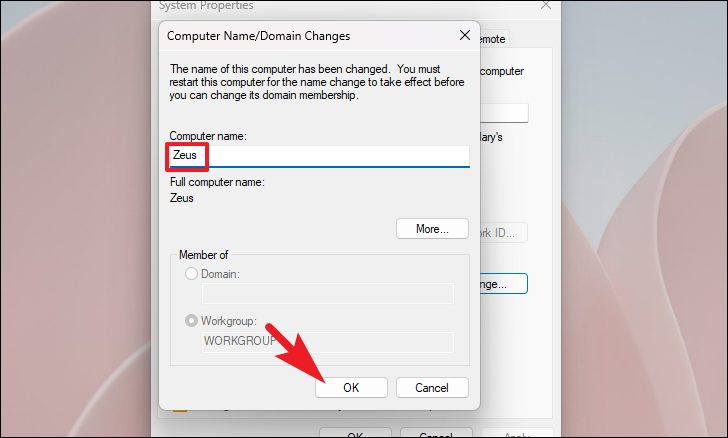
If you’d like to change your computer name, click on the Change button. A new window will appear where you can type a new name.
Enter the new computer name and click OK. You’ll need to restart your PC for the changes to take effect.
Method 3: Using a run command
For a quick method, you can use a run command to find your computer name.
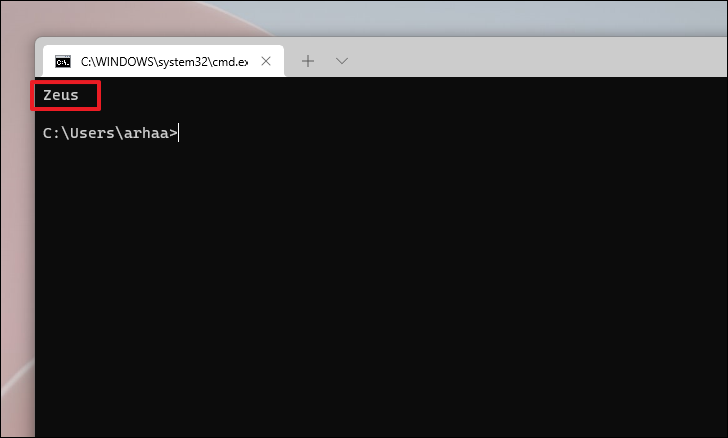
cmd /k hostname and press Enter. This command opens Command Prompt and displays your computer name.cmd /k hostname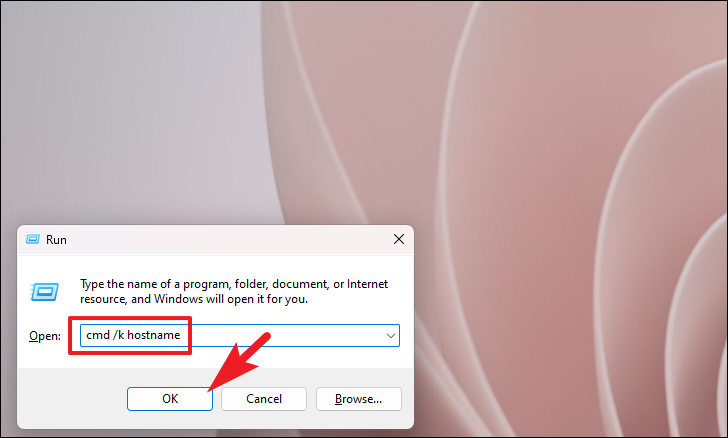
Your computer name will be shown in the Command Prompt window that appears.
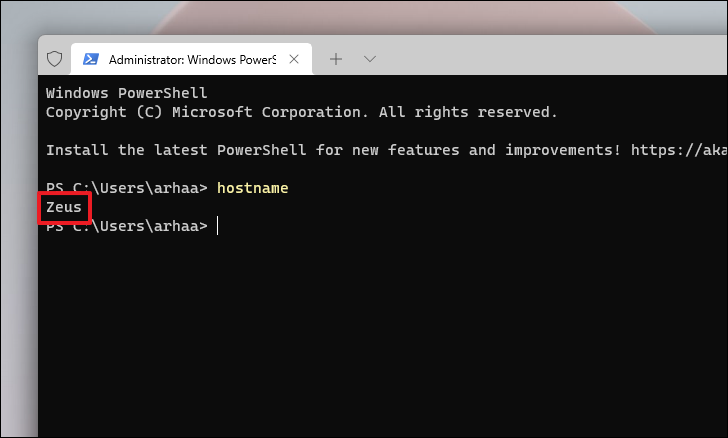
Method 4: Using Windows Terminal
If you’re comfortable with command-line tools, Windows Terminal offers a way to find your computer name.
Windows Terminal. Right-click on it and select Run as administrator.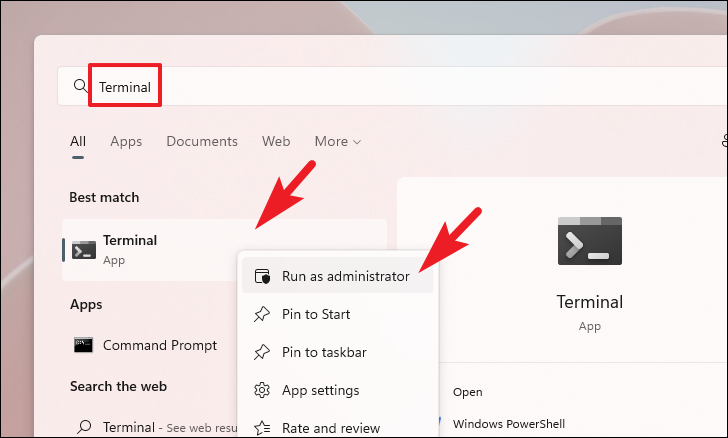
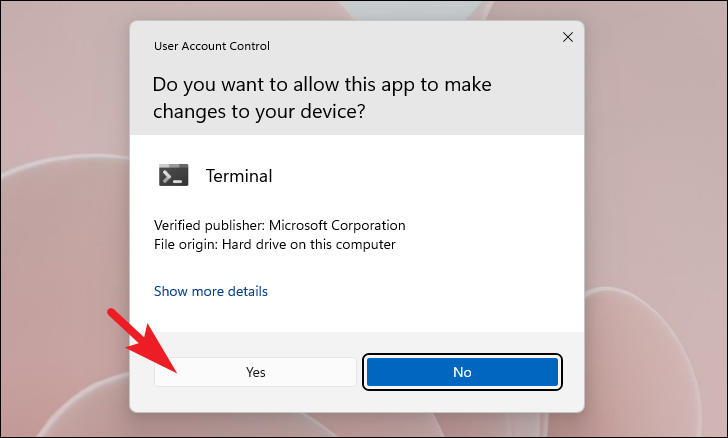
If prompted by User Account Control, click Yes to grant permissions.
hostname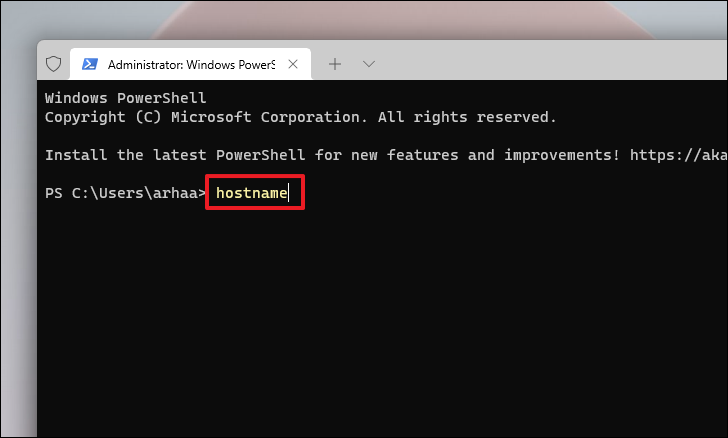
The name of your computer will appear below the command you entered.
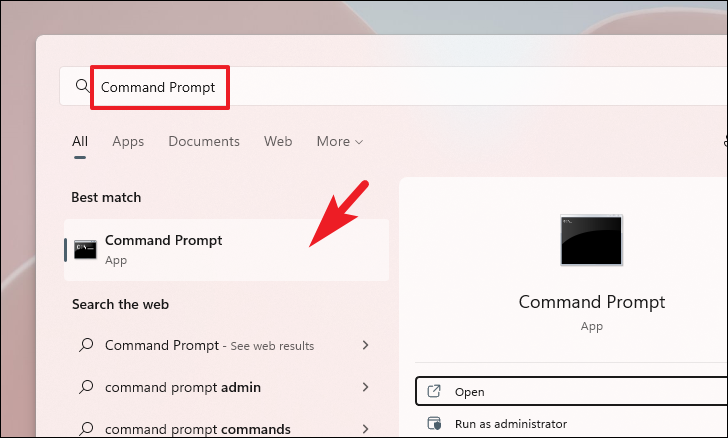
Method 5: Using Command Prompt
You can also use Command Prompt to find your computer name and view detailed network configurations.
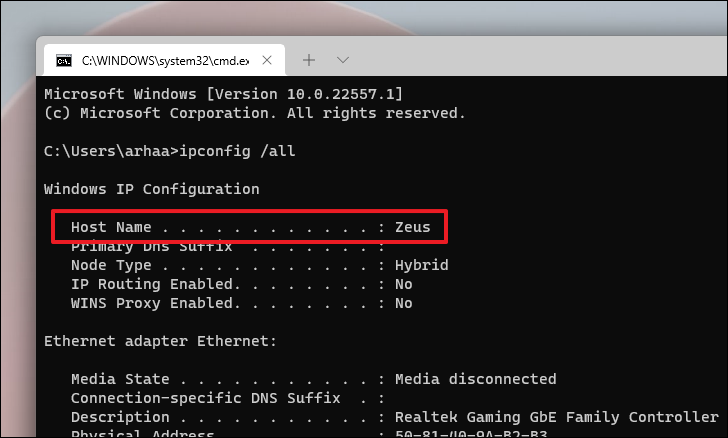
ipconfig /all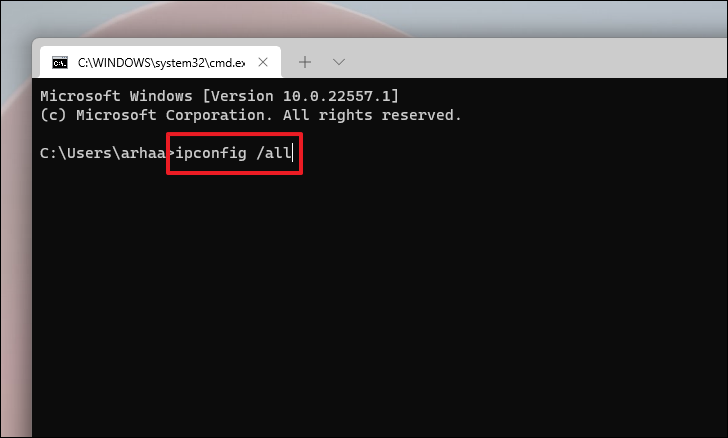
Under the Windows IP Configuration section, you’ll find the Host Name, which is your computer’s name. Additionally, you can view your IP configuration details.
By following these methods, you can easily locate your computer name on Windows 11 whenever you need it.


