If you want to run Linux distros on your Windows laptop without dual-booting or using a Virtual Machine, the Windows Subsystem for Linux or WSL is one of the ways by which you can do so. WSL is installed by default in Windows 11 and the process of installing it on Windows 10 very simple and straightforward. However, if you want to remove it from your Windows PC, the process is not very easy and requires multiple steps.
Method 1: Using Windows Settings
There are two methods by which you can remove WSL from Windows, and the first one relies on the Settings app.
Step 1: Remove all Linux distros installed on Windows
If you have installed Linux distros on Windows using WSL, you will first need to remove them.
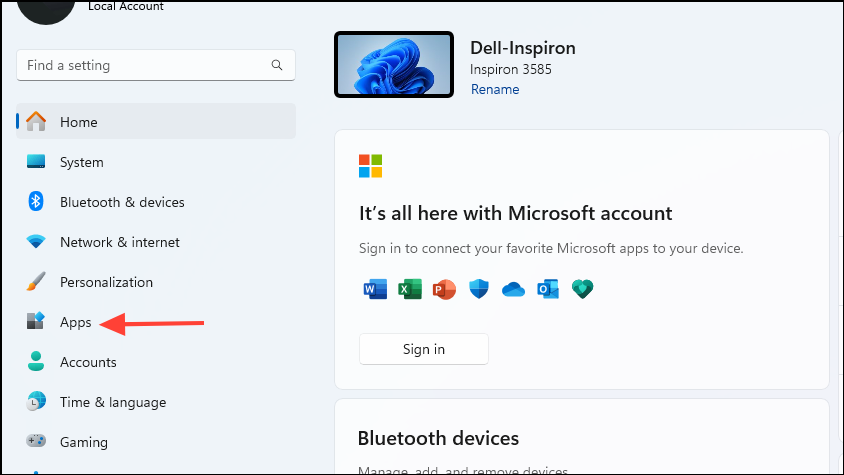
- Open the Settings app using the
Win + Ishortcut and click on 'Apps'.
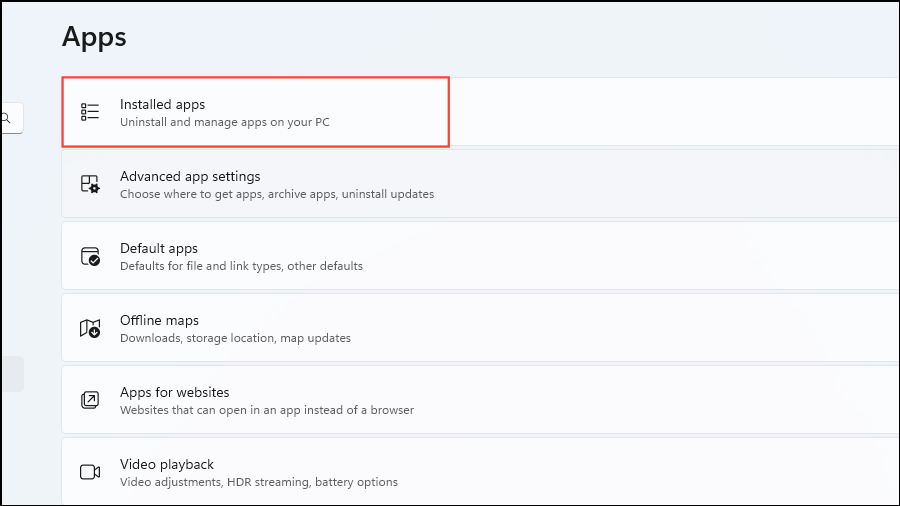
- On the Apps page, click on 'Installed Apps'.
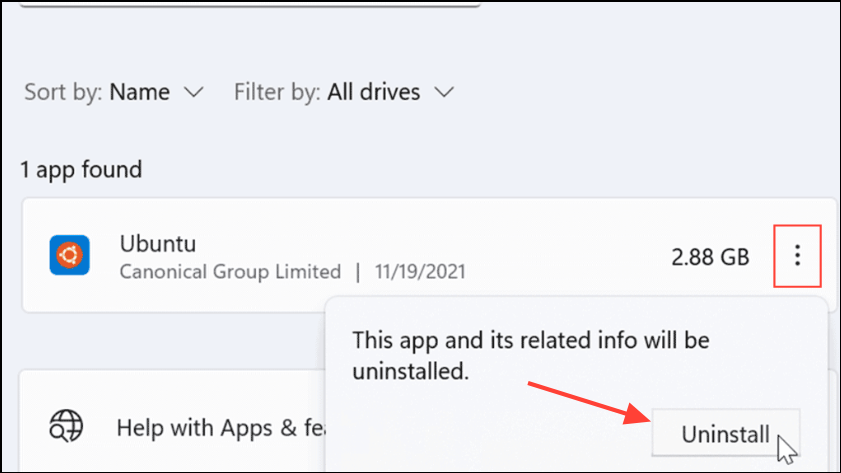
- Look for the Linux distros you've installed. When you find a distro, click on the three dots on its right and then click on the 'Uninstall' button.
- Follow the same process for all the Linux distros you have installed on your system.
Step 2: Uninstall the WSL components
Once you've removed all Linux distros from your Windows installation, you can uninstall WSL and all related components.
- Open the Settings app again and go to the 'Apps' page.
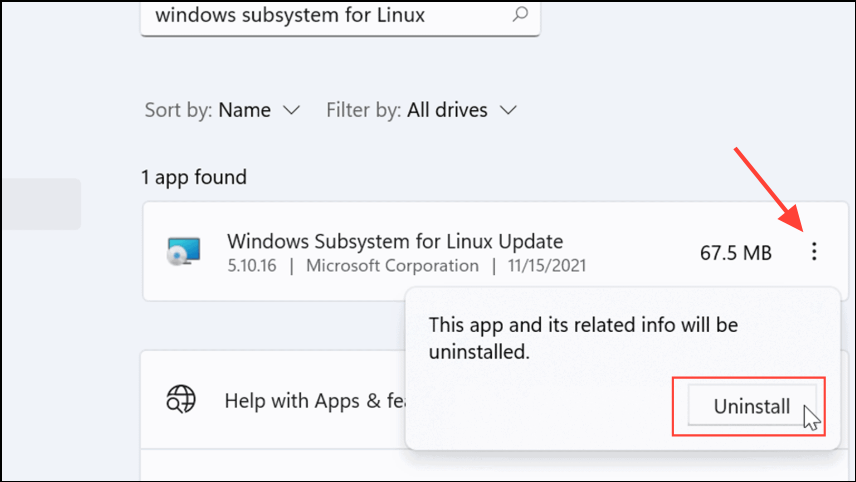
- Scroll down the apps list and click on the three dots next to 'Windows Subsystem for Linux' before clicking on the 'Uninstall' button. You can also search for it in the search box at the top.
- Make sure to remove all WSL components, such as the WSLg Preview and WSL update as well.
Step 3: Remove the Virtual Machine Platform and WSL
Now, you need to remove the core WSL files and turn the feature off.
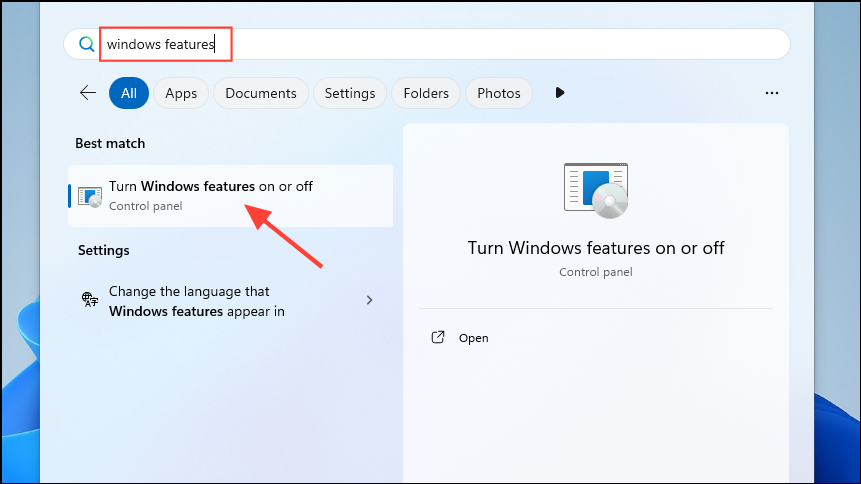
- Open the Start menu, type
windows featuresand click on 'Turn Windows features on or off'.
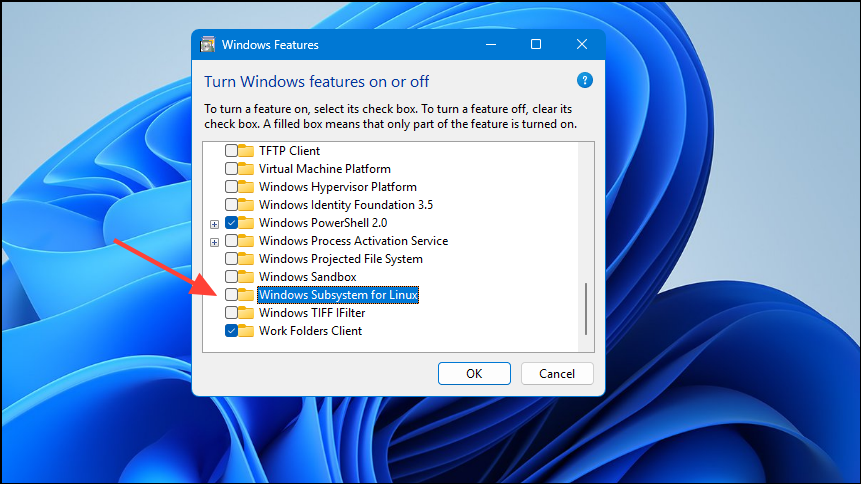
- In the Optional Features window, scroll down and click on the 'Windows Subsystem for Linux' feature checkbox to deselect it.
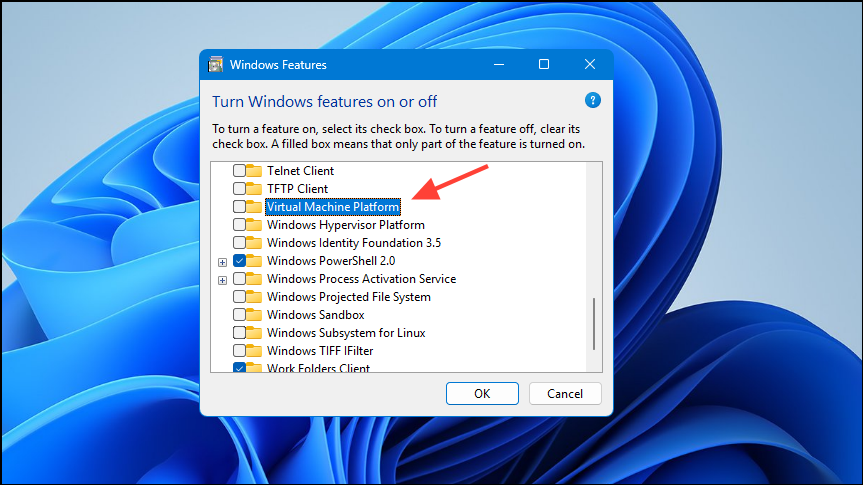
- You can also deselect features like the Virtual Machine Platform if you don't need them before clicking on the 'OK' button. Then reboot your PC.
Method 2: Using PowerShell
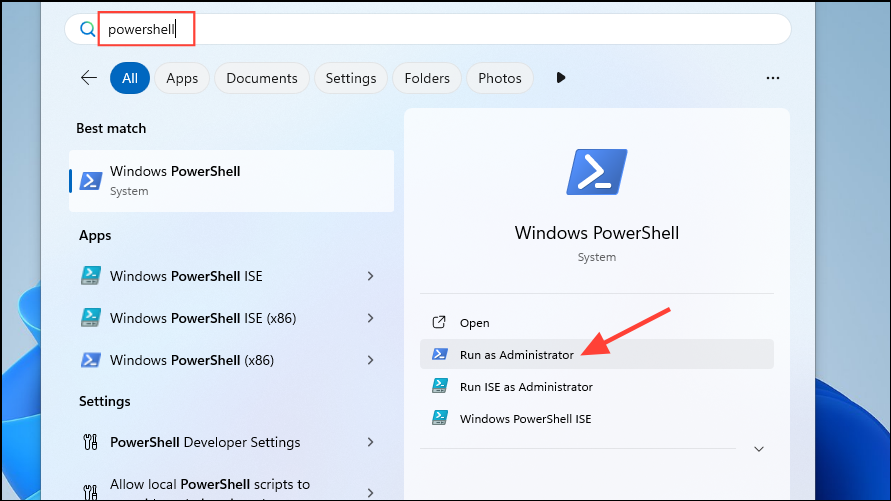
- Open the Start menu, type
powershelland click on 'Run as administrator' on the right.
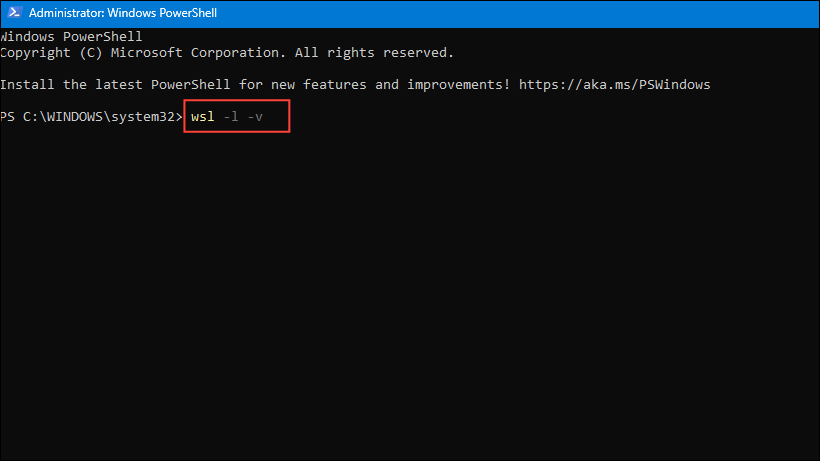
- When the PowerShell window opens, type
wsl -l -vto list all instances of WSL installed on your system.
- Now, type
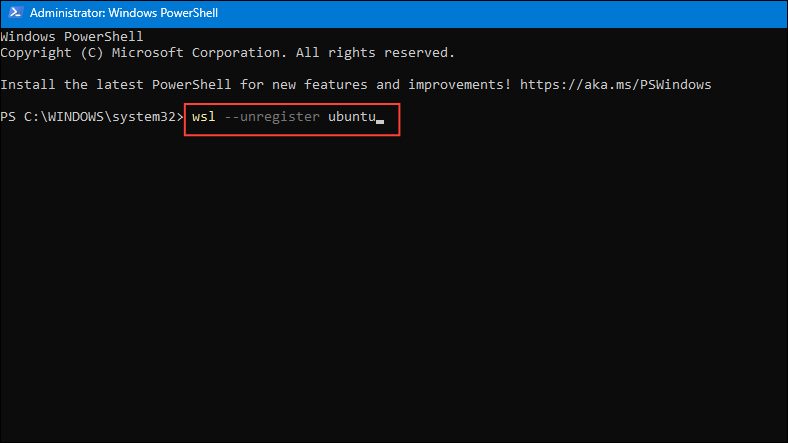
wsl --unregister distroreplacing the distro with the distro name. For instance, if you've installed Ubuntu, the command will bewsl --unregister ubuntu.
- Run the Unregister command for all the Linux distros installed on your PC. Then run the
wsl -l -vcommand again to check whether they have been removed.

- Open the File Browser and navigate to the following address:
C:\Users\<username>\AppData\Local\Packages\LocalState\. Check that the virtual hard drive used for storing the Linux installation has been removed. - Finally, open the Optional Features window as explained in the previous method and deselect WSL and Virtual Machine Platform before rebooting your PC.
Things to know
- While removing WSL from Windows should not cause problems, you should create a backup of your system just in case something goes wrong.
- You can always reinstall WSL after removing it from your system as long as you are running Windows 10 version 2004 or later or Windows 11.
- If you wish to run Linux without relying on WSL, you can create a Virtual Machine using tools like Oracle's VirtualBox. This lets you keep your Linux system completely separate from your Windows installation and you can even deactivate it when you are not using it.


