
Running Linux command-line tools and applications directly on Windows 11 can significantly enhance productivity for developers and IT professionals. Windows Subsystem for Linux (WSL) allows you to seamlessly integrate Linux distributions into your Windows environment without the need for a virtual machine or dual-boot setup. This guide will walk you through the process of installing WSL on your Windows 11 system, downloading a Linux distribution, and uninstalling WSL if necessary.
What is Windows Subsystem for Linux?
Windows Subsystem for Linux (WSL) is a compatibility layer that enables you to run Linux binary executables natively on Windows 11. With WSL, you can use Linux command-line tools and applications alongside your Windows applications, offering a flexible and powerful development environment. This integration eliminates the need to replace your Windows OS or set up a separate virtual machine, allowing for efficient workflow and resource utilization.
Enabling Windows Subsystem for Linux via Windows PowerShell
The most efficient method to enable WSL is through Windows PowerShell. By running a simple command, you can activate WSL and begin using Linux distributions on your Windows 11 machine.
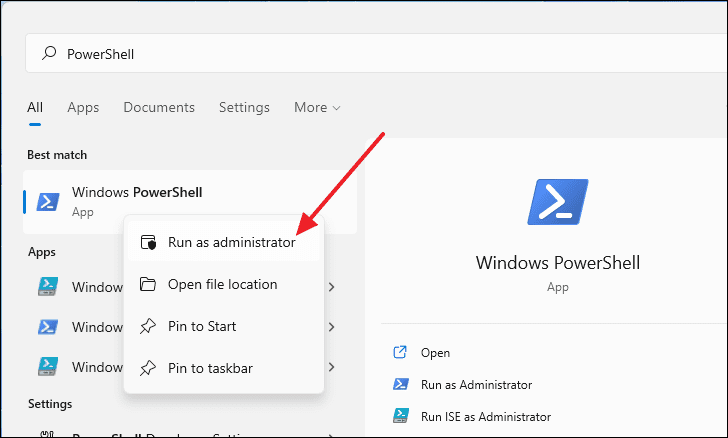
- Press the
Windowskey to open the Start Menu, typeWindows PowerShell, right-click on it, and selectRun as administrator.
- In the PowerShell window, enter the following command and press
Enter:
Enable-WindowsOptionalFeature -Online -FeatureName Microsoft-Windows-Subsystem-Linux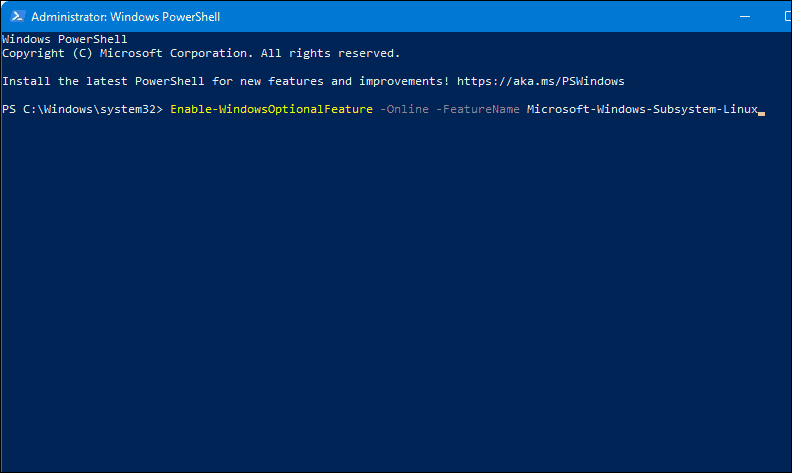
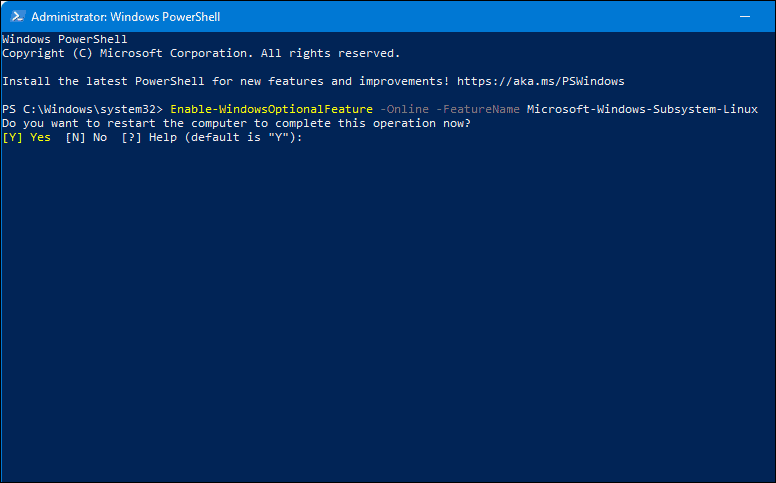
- After executing the command, PowerShell will prompt you to restart your computer. Type
Yand pressEnterto reboot your system and complete the installation.
Enabling Windows Subsystem for Linux from the Control Panel
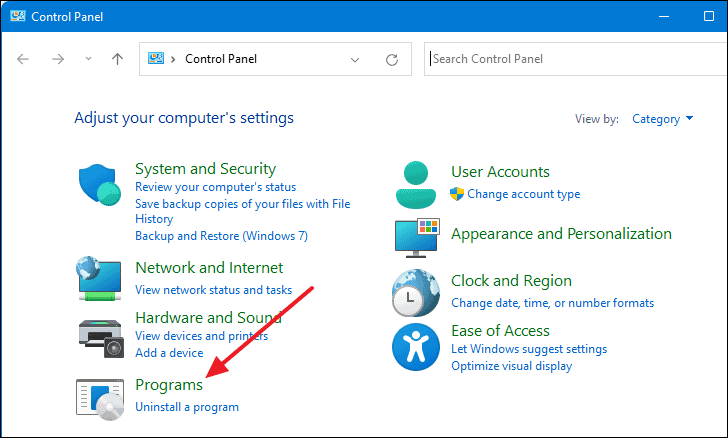
If you prefer using a graphical interface, you can enable WSL through the Control Panel.
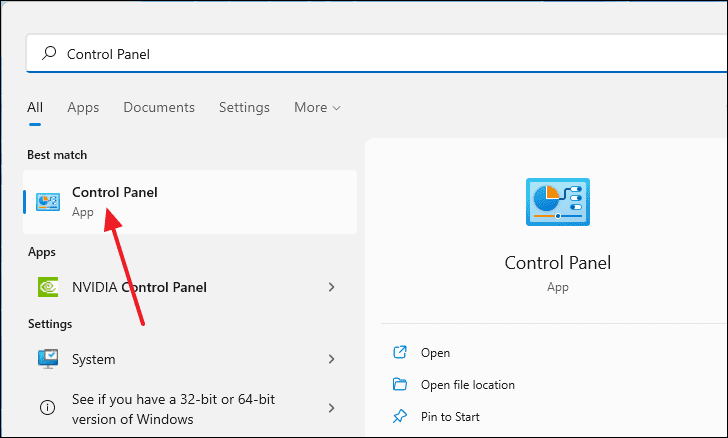
- Open the Start Menu, search for
Control Panel, and select it from the search results.
- In the Control Panel window, click on
Programs.
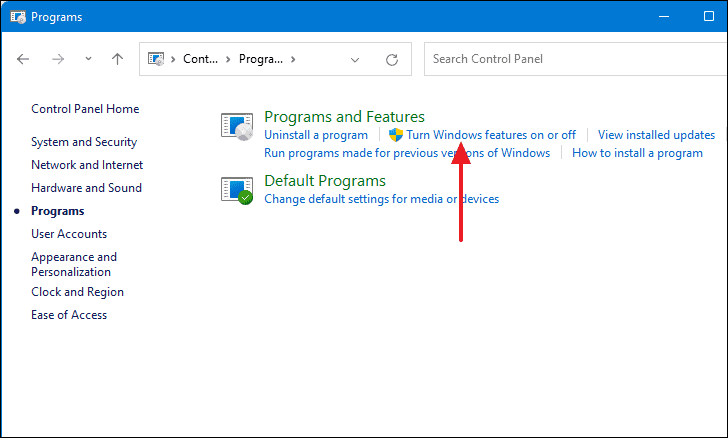
- Under the
Programs and Featuressection, selectTurn Windows features on or off.
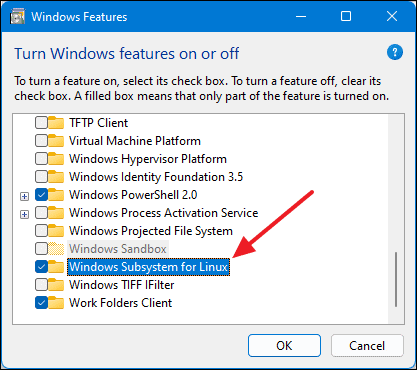
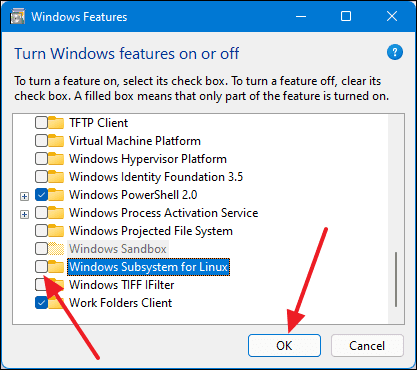
- In the
Windows Featuresdialog box, scroll down and check the box next toWindows Subsystem for Linux, then clickOK.
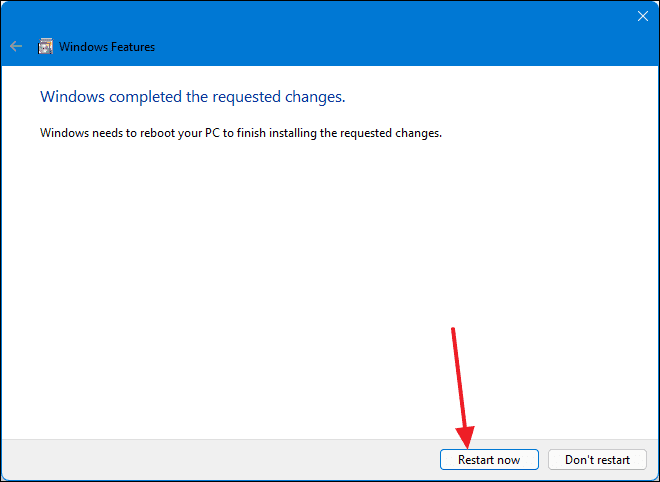
- Windows will begin installing the necessary components. Once the process is complete, you will be prompted to restart your computer. Click
Restart nowto reboot and finalize the installation.
Downloading a Linux Distribution
With WSL enabled, you can now download and install a Linux distribution of your choice from the Microsoft Store.
- Open the
Microsoft Storeby searching for it in the Start Menu.

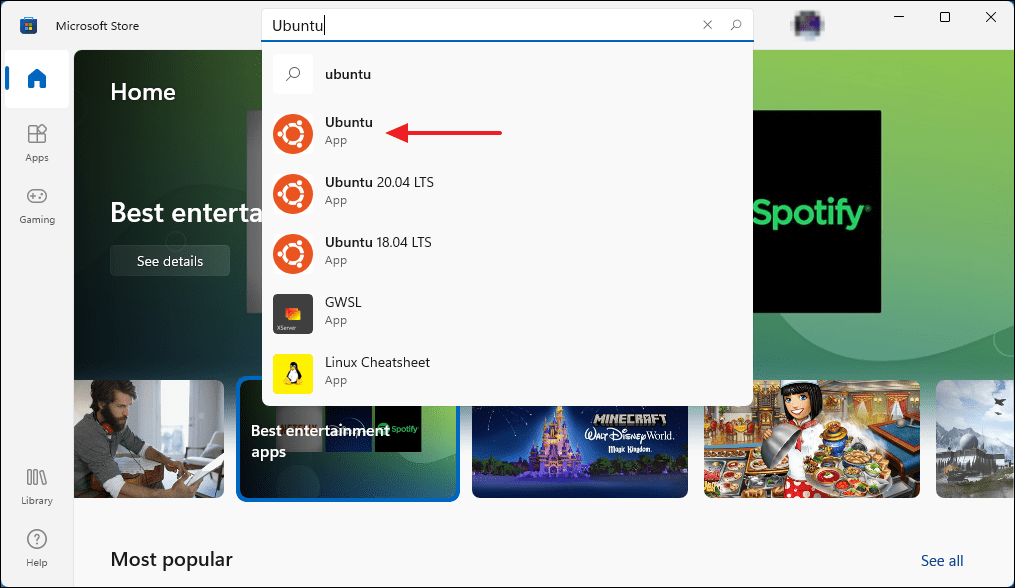
- In the Microsoft Store, type
Ubuntu(or another preferred distribution) into the search bar at the top and select it from the results.
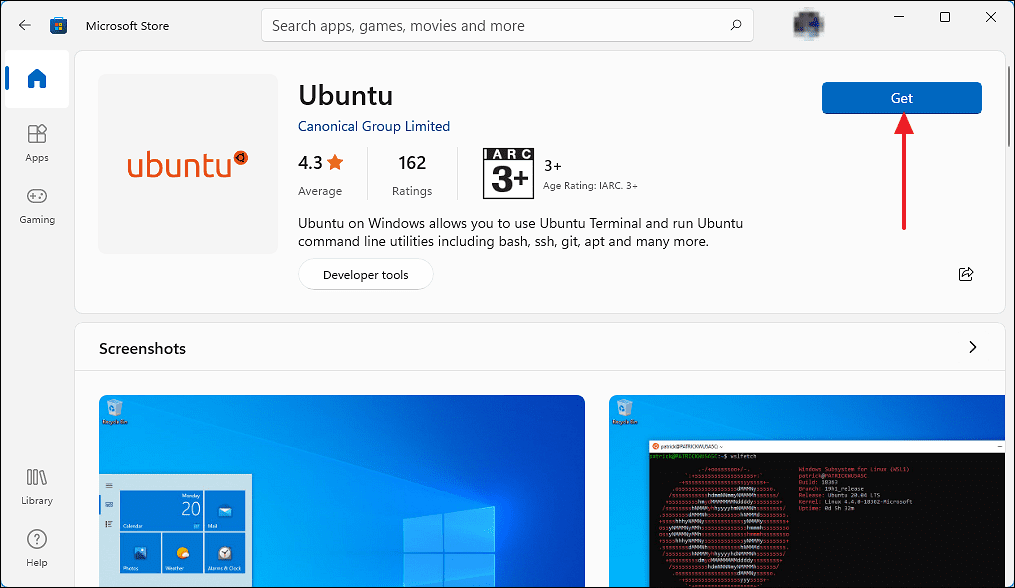
- Click on the
Getbutton to download and install the Linux distribution.
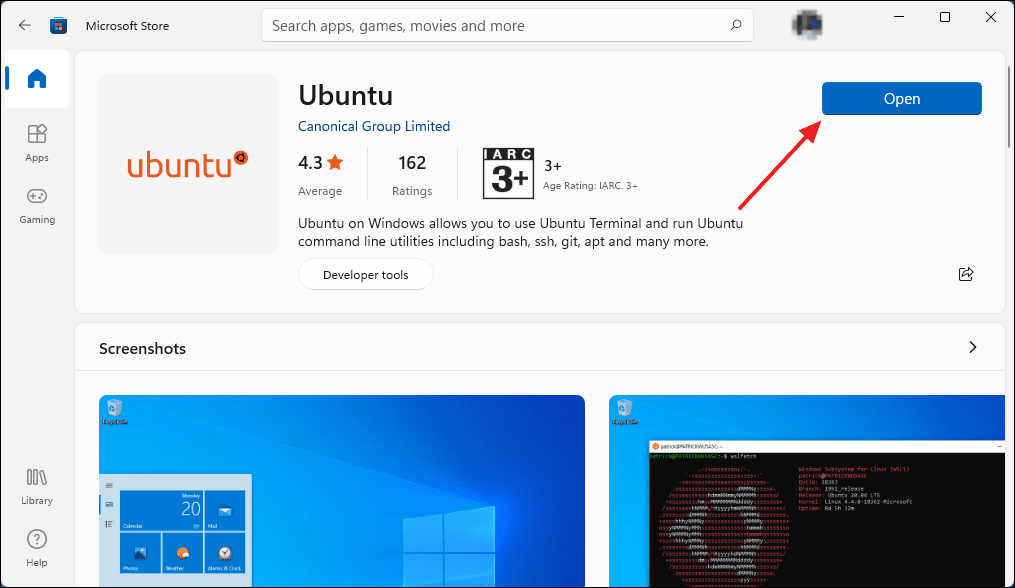
- Once the installation is complete, you can launch the distribution and start using Linux commands and applications directly on your Windows 11 system.
How to Uninstall Windows Subsystem for Linux
If you need to uninstall WSL from your system, you’ll first need to remove the installed Linux distribution and then disable WSL.
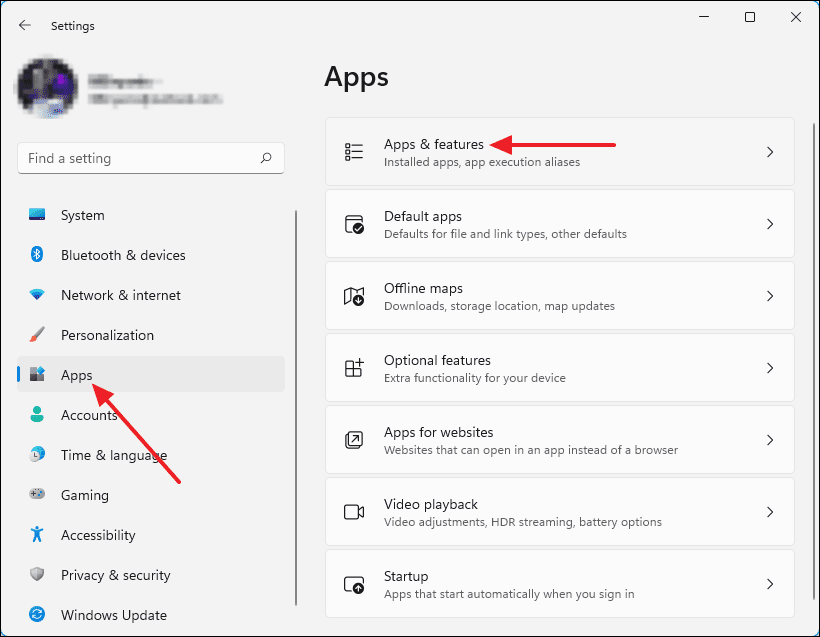
- Press
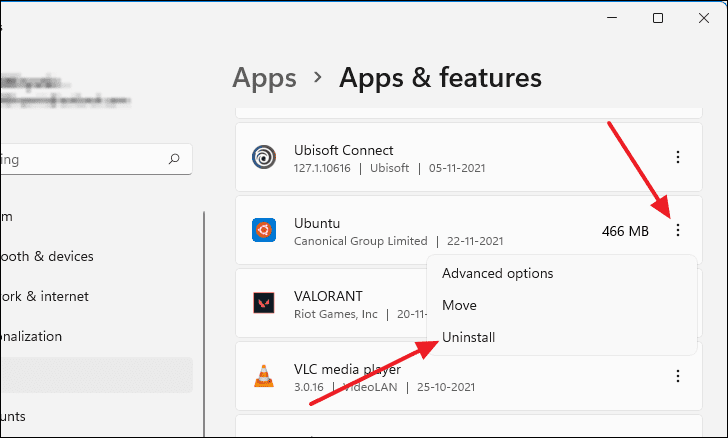
Windows + ito open the Settings menu. Click onAppsin the left-hand pane, then selectApps & featureson the right.
- Scroll down to locate
Ubuntu(or the distribution you installed). Click on the three vertical dots next to it and selectUninstall.
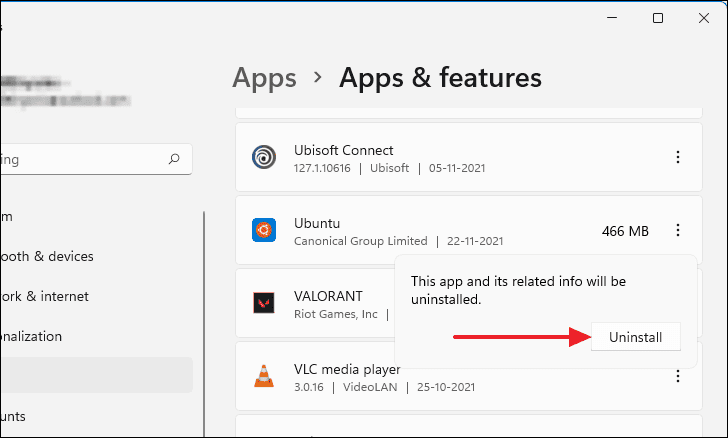
- Confirm the uninstallation by clicking
Uninstallagain. This will remove the Linux distribution from your system.
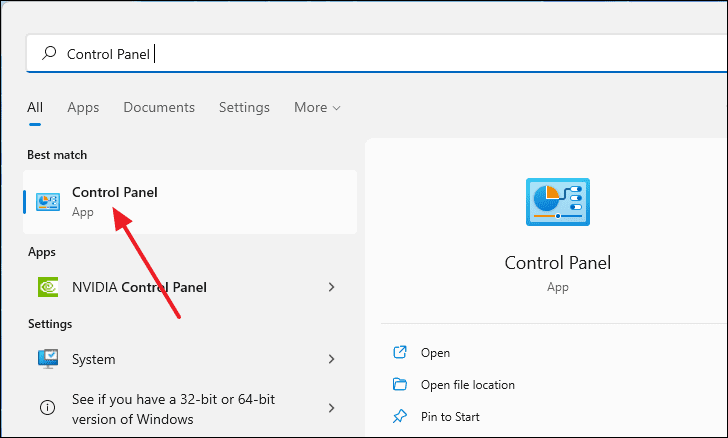
- Next, open the
Control Panelby searching for it in the Start Menu.
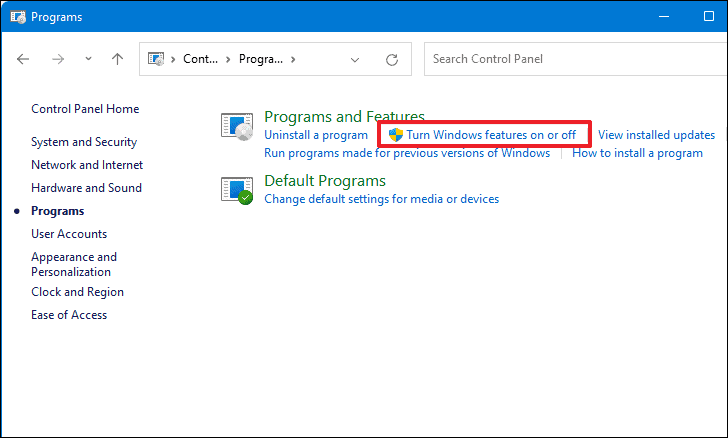
- In the Control Panel, click on
Programs.

- Under the
Programs and Featuressection, selectTurn Windows features on or off.
- In the
Windows Featuresdialog, uncheck the box next toWindows Subsystem for Linuxand clickOK.
- You will be prompted to restart your computer. Restart your system to complete the uninstallation process.
By following these steps, you can easily install or remove Windows Subsystem for Linux on your Windows 11 computer, providing flexibility to work with Linux tools as needed.


