
HEIC (High Efficiency Image Container) is a modern image format primarily used by Apple devices. While it offers superior compression and quality compared to JPEG, it’s not universally supported, especially on Windows systems. This guide will show you how to convert HEIC files to JPEG on Windows 11 using built-in tools and free online services.
Using the Photos app
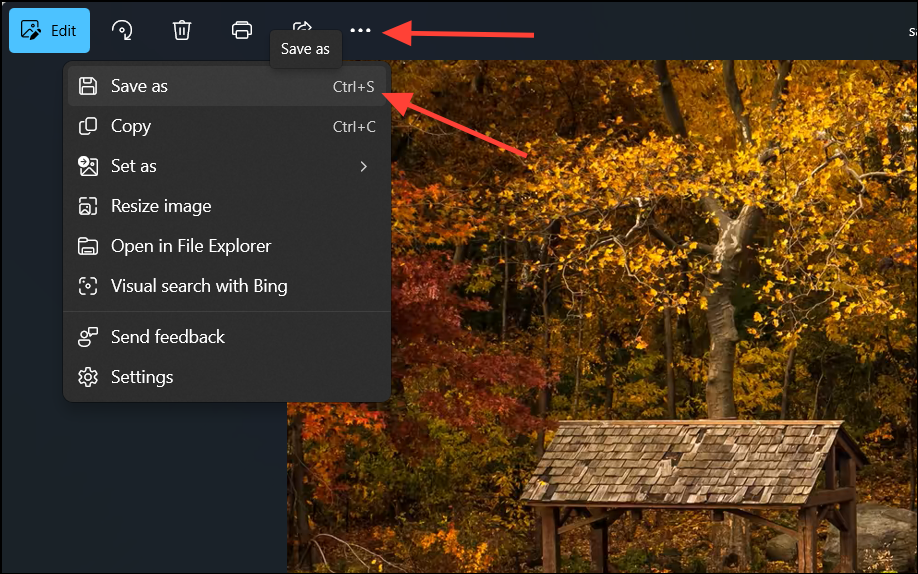
The simplest method to convert HEIC to JPEG on Windows 11 is using the built-in Photos app. First, ensure you have the HEIF Image Extensions installed from the Microsoft Store.
- Open the HEIC file in the Photos app.
- Click the ellipsis (…) icon in the top-left corner.
- Select “Save as”.
- Choose JPEG from the “Save as type” dropdown menu.
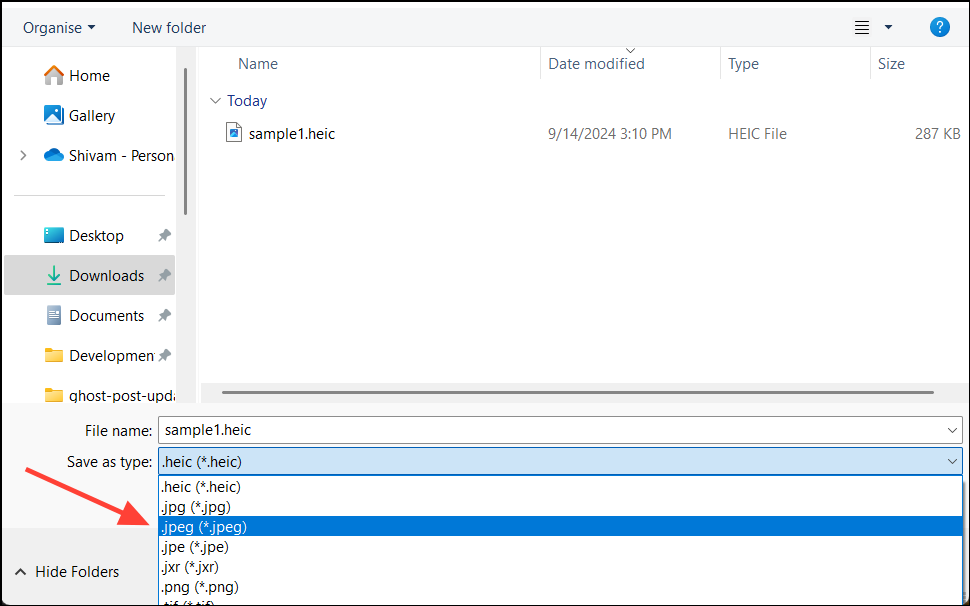
- Name your file and click “Save”.

Using Microsoft Paint
Another native option is Microsoft Paint:
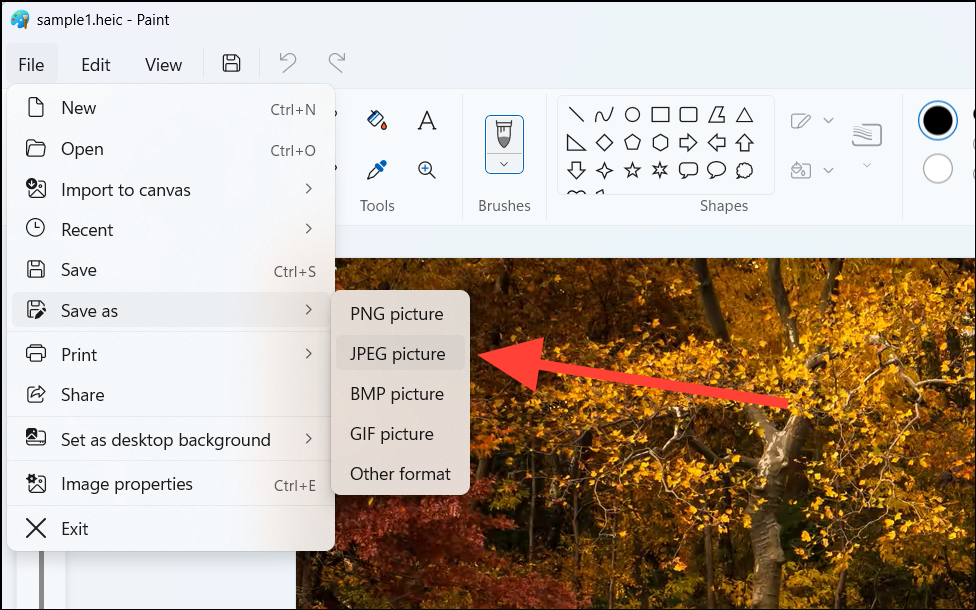
- Right-click on a HEIC file in File Explorer.
- Select “Open with” and choose “Paint”.
- In Paint, click “File” then “Save as”.
- Choose “JPEG picture” as the file type.
- Select where to save the converted file and click “Save”.
Using an online converter
For batch conversions or if you prefer not to install additional software, you can use a free online converter like Convertio:
- Go to convertio.co/heic-jpg website.
- Click “Choose Files” and select your HEIC images.
- Set the output format to JPG.
- Click “Convert”.
- Download your converted files.
Note that free online converters often have daily limits on file sizes and quantities.
Batch conversion using iMazing HEIC Converter
For converting multiple HEIC files at once:
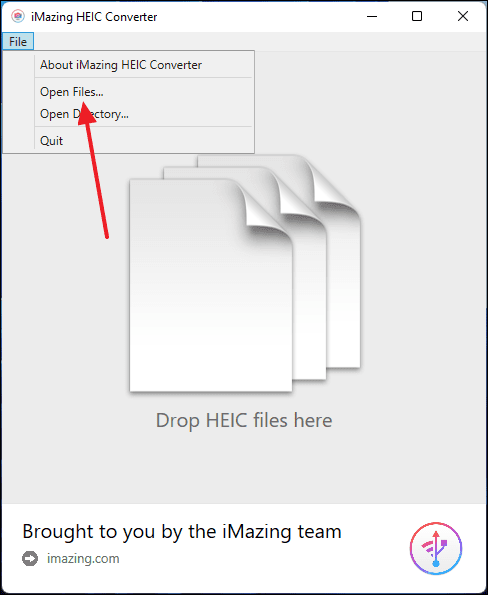
- Download and install iMazing HEIC Converter from the Microsoft Store.
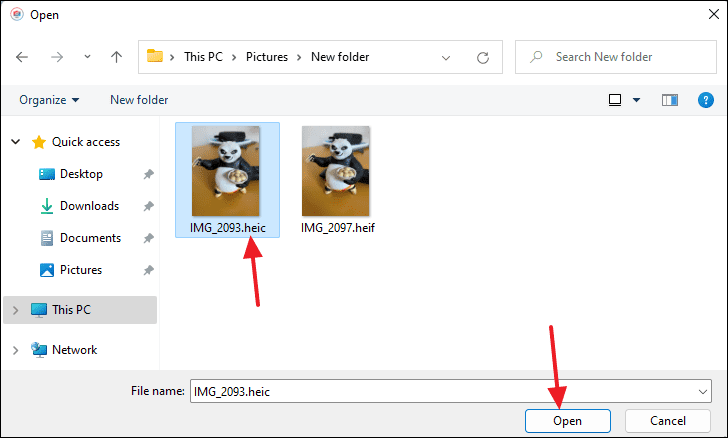
- Launch the app and click “File” then “Open Files” or “Open Directory”.
- Select the HEIC files or folder you want to convert.
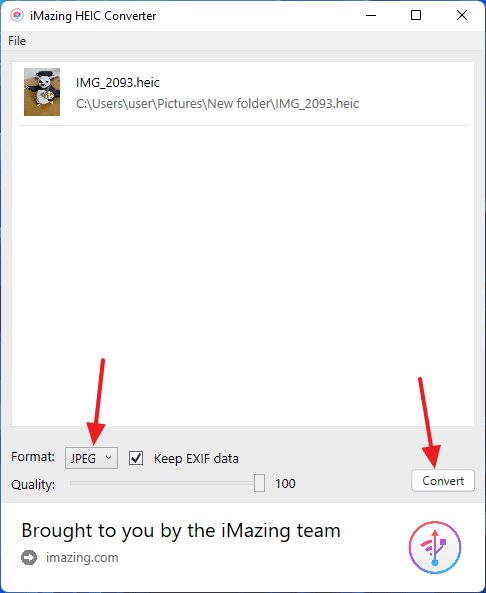
- Adjust quality and resolution settings if desired.
- Click “Convert”.
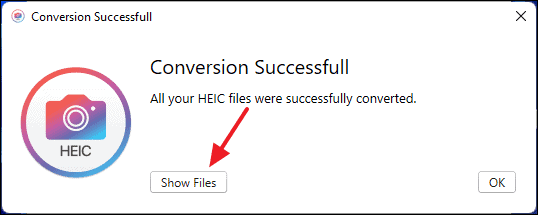
- Choose the output folder and click “OK”.

- You will see a “Conversion Successful” window. Here, click “Show Files” to directly go to the location of the saved converted file.
- You will see that you have a copy of your
.heicimages in a.jpgformat as well.
Remember, while converting to JPEG makes your images more universally compatible, HEIC offers better compression and quality. Only convert when necessary for compatibility reasons.


