🚀 Creating a bootable USB drive is always a good idea. It's portable, compatible, and can come in handy if you ever run into problems with your operating system. Follow our step-by-step guide to make your own portable and compatible Windows 11 drive to help you start afresh in case of OS issues.
🚀 Creating a bootable USB drive is always a good idea. It’s portable, compatible, and can come in handy if you ever run into problems with your operating system. Follow our step-by-step guide to make your…
by Parth Sawhney
🔊
In Brief. To make a bootable Windows 11 USB drive, you’ll require an 8GB or larger USB flash drive, a Windows PC, and the Windows 11 ISO file. Download Rufus from rufus.ie, insert your USB drive, select it in Rufus, choose your Windows 11 ISO, adjust any settings if necessary, and click “Start” to create your bootable USB. That’s all!
Having a bootable Windows 11 USB drive is incredibly useful for installing or repairing your operating system. It’s portable, convenient, and compatible with most computers. Fortunately, creating one is a straightforward process that you can accomplish on your own using free software.
This guide will walk you through creating a bootable Windows 11 USB drive using Rufus, a free and efficient tool that simplifies the process.
Prerequisites
Before getting started, ensure you have the following items:
A Windows 11 ISO file
A USB flash drive with at least 8GB capacity
A Windows computer
Creating a Windows 11 USB Drive
While there are several tools available for creating bootable USB drives, we’ll use Rufus due to its speed and advanced features.
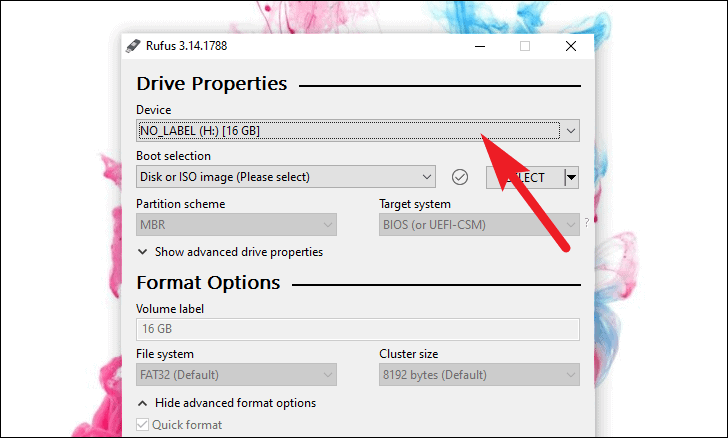
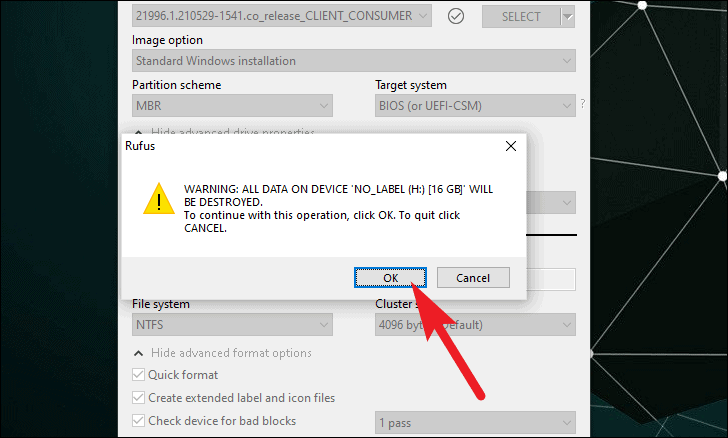
Insert your USB flash drive into your computer. If only one USB device is connected, Rufus will detect it automatically. If multiple devices are connected, select the correct USB drive from the drop-down menu under the Device section.
Note: It’s advisable to use a USB drive that has more storage capacity than the size of the Windows 11 ISO file.
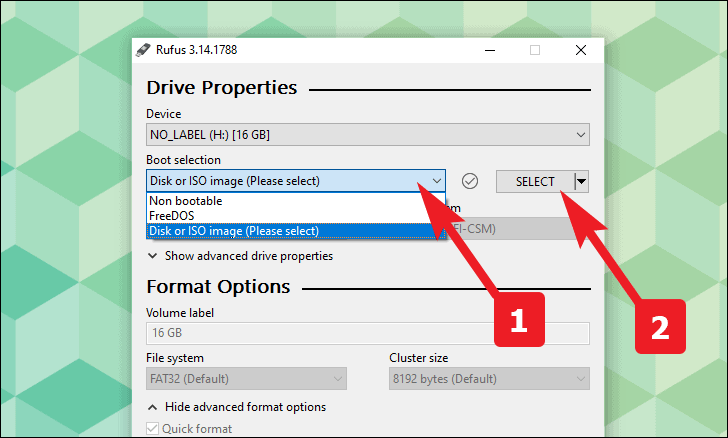
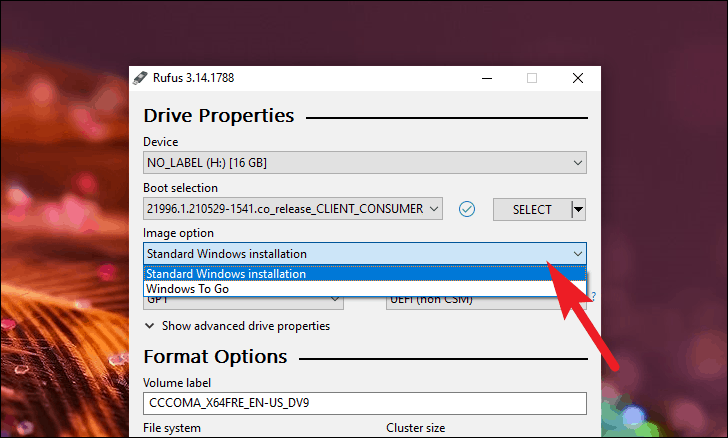
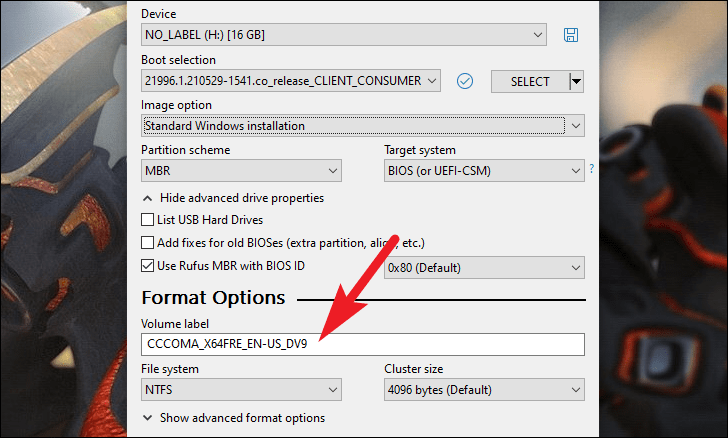
Choose the image option from the drop-down menu under Image option. Select Standard Windows Installation to create a USB drive for installing Windows on other systems. Alternatively, you can choose Windows To Go to run Windows directly from the USB drive.
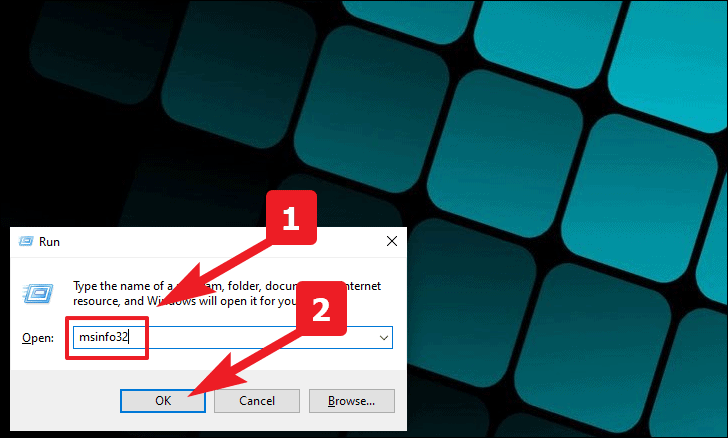
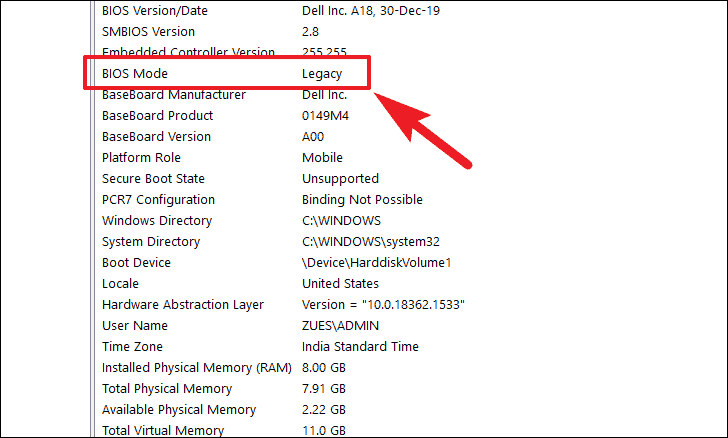
Determine your target machine’s BIOS mode to select the appropriate partition scheme. On the computer where you plan to install Windows 11, press Windows+R, type msinfo32, and click OK.
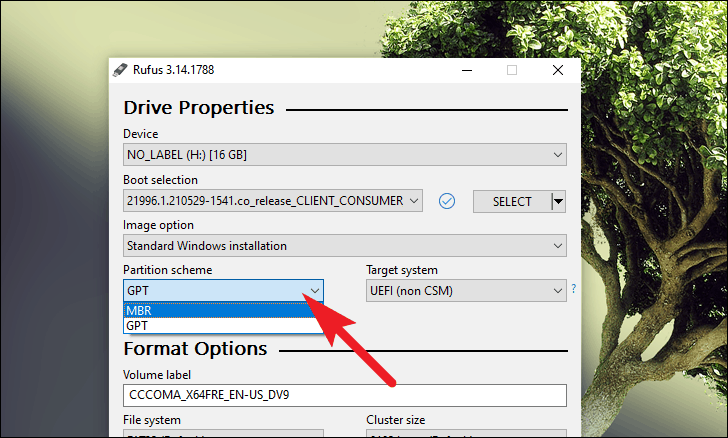
Back in Rufus, select the appropriate partition scheme under the Partition scheme section. Choose MBR if your BIOS mode is Legacy, or GPT if it is UEFI.
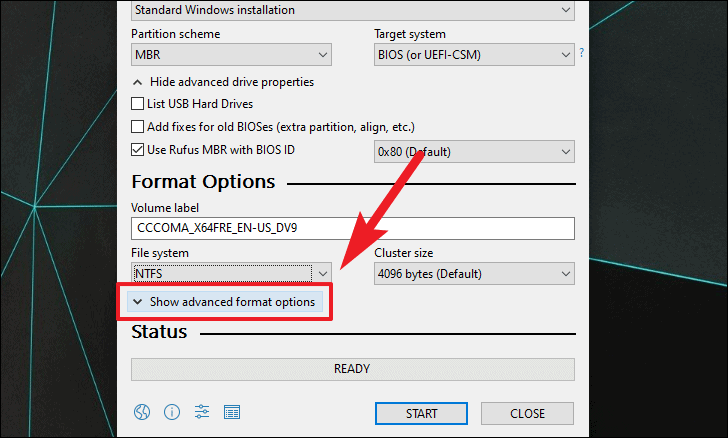
If needed, access advanced drive properties by clicking on Show advanced drive properties. Unless you’re familiar with these settings, it’s best to leave them at their default values.
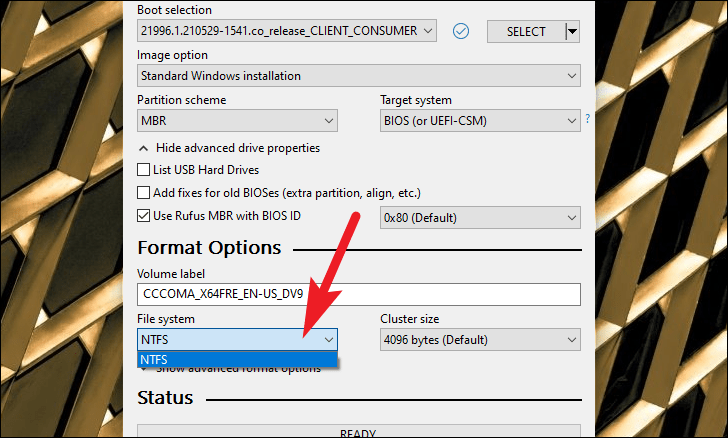
Select the file system for your USB drive from the File System drop-down menu. If you chose the GPT partition scheme, you can select FAT32. Otherwise, NTFS will be the default option.
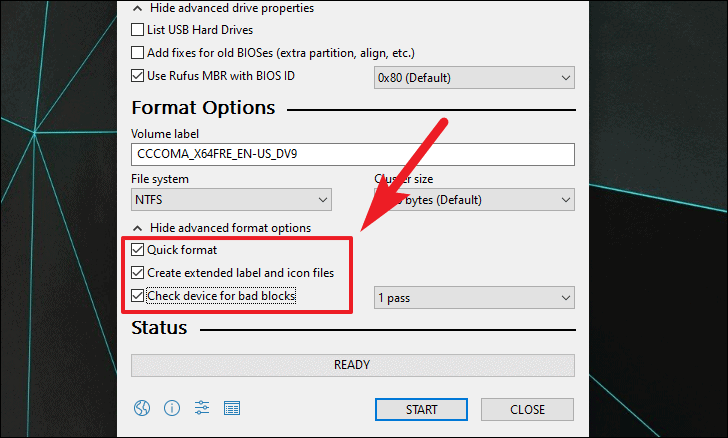
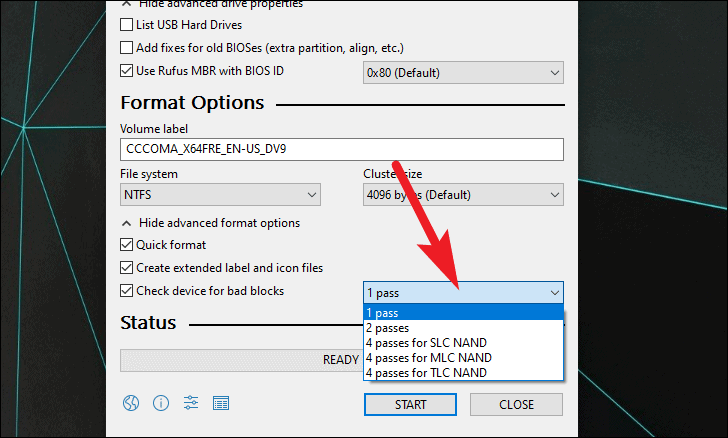
Check the boxes for Quick Format for a faster formatting process, Create extended label and icon files to assign an icon to the drive, and Check device for bad blocks to scan the USB drive for any issues.
If you opted to check for bad blocks, you can select the number of passes from the drop-down menu beside the Check device for bad blocks option. The default is 1 pass, which is sufficient in most cases.
Wait for Rufus to format the USB drive and copy the Windows 11 files. This may take several minutes. Once the process is complete, your bootable Windows 11 USB drive is ready to use.
You now have a bootable Windows 11 USB drive that you can use to install or repair Windows 11 on any compatible PC.