
Custom fillable forms in Microsoft Word allow you to collect structured information efficiently by providing users with designated fields for input while preventing changes to the rest of the document. This process is widely used for applications, surveys, feedback forms, and any scenario where consistent, formatted responses are required.
Creating a Fillable Form Using Content Controls in Microsoft Word
Step 1: Open Microsoft Word and start with a new blank document or a template that matches your needs. Using a template can speed up the process if you need a standard layout, but starting from scratch gives you full control over the design.
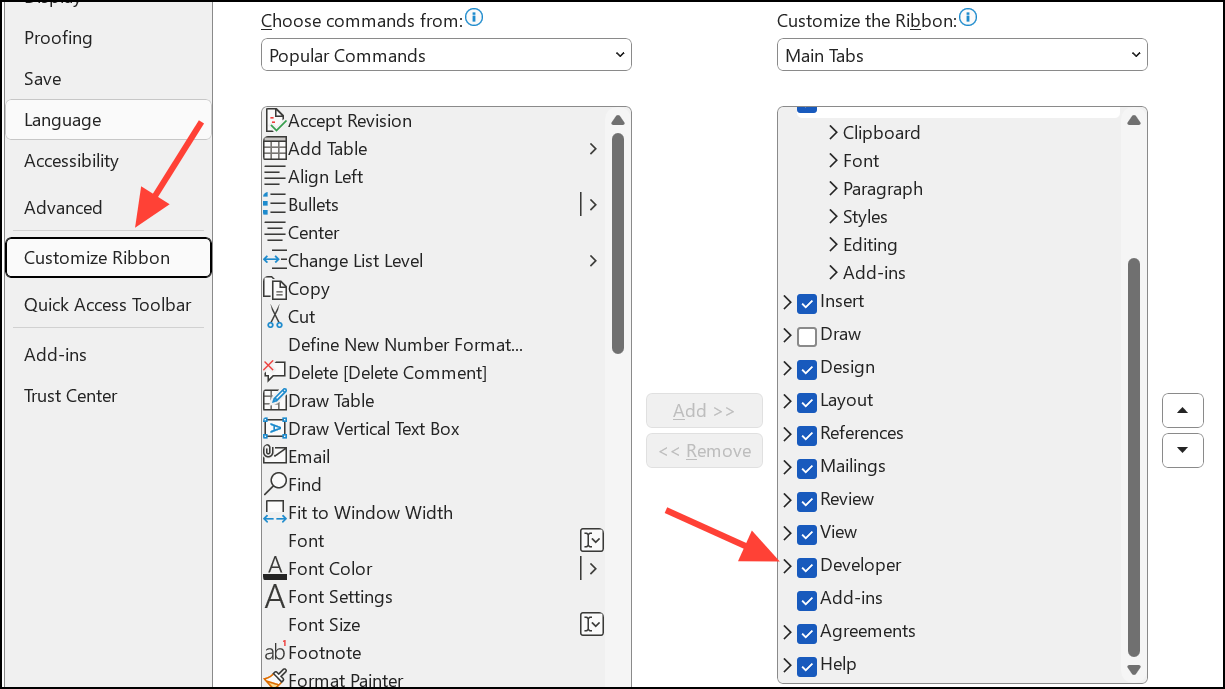
Step 2: Enable the Developer tab, which contains all the tools required for form creation. To do this, go to File > Options > Customize Ribbon, then in the right column, check the box next to Developer and click OK. The Developer tab will now appear in your ribbon at the top of Word.
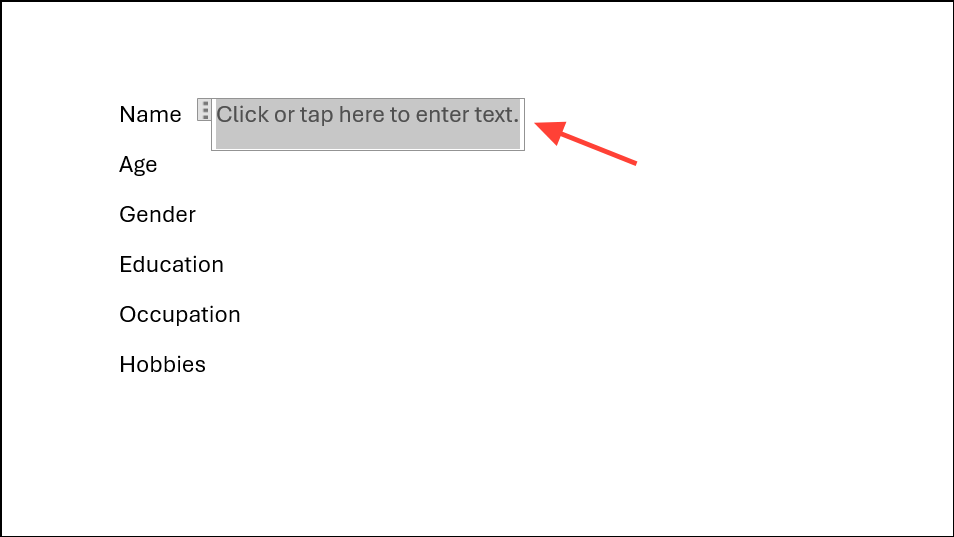
Step 3: Add your form questions or instructions in the document as static text. These are the parts you do not want users to edit. Clearly separate each section or question to make the form easy to read and fill out.

Step 4: Insert fillable fields where you want users to enter their responses. Click the Developer tab, then use the Controls group to add different types of content controls:
- Text Controls: For plain or rich text responses.
- Check Boxes: For yes/no or multiple-choice options.
- Drop-Down Lists or Combo Boxes: For selecting from a predefined list.
- Date Picker: For entering dates in a consistent format.
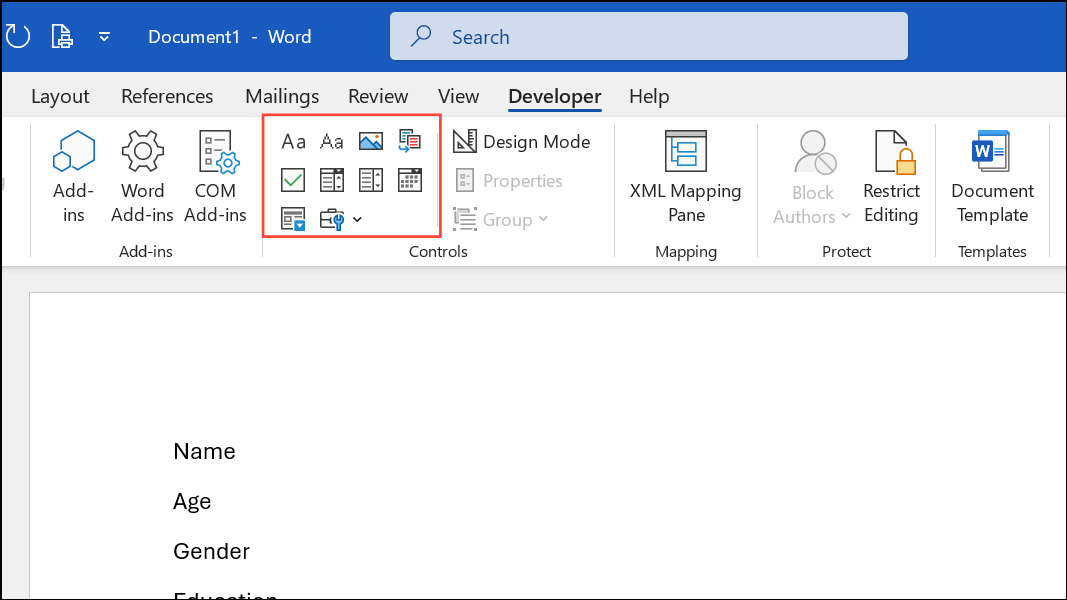
Click the icon for the desired control, then position it in the document where the answer should go. You can right-click any control and select Properties to set placeholder text, define drop-down options, or configure other settings.
Step 5: Refine the design and layout as needed. For example, use tables to align questions and fields, or adjust spacing to keep the form tidy. If you need users to enter longer responses, use a rich text control or adjust row properties in tables to allow text wrapping and expansion.
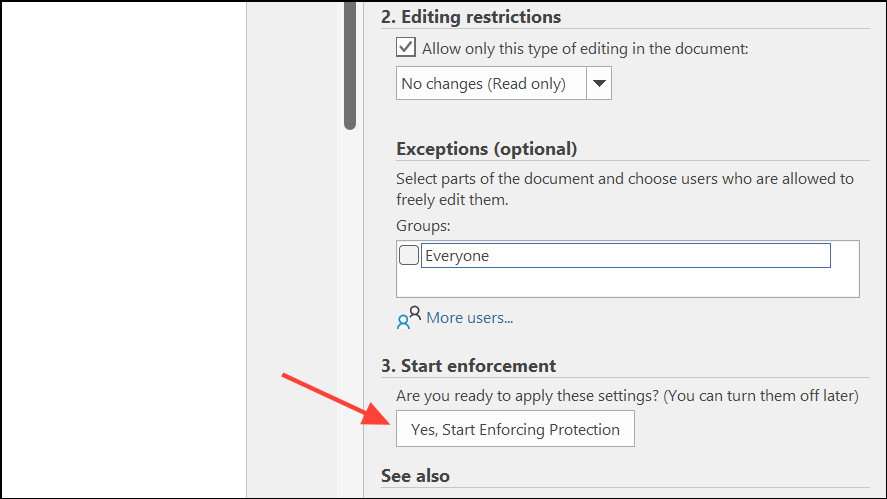
Step 6: Restrict editing to protect the form structure. On the Developer tab, click Restrict Editing. In the pane that appears, check Allow only this type of editing in the document and select Filling in forms from the dropdown.
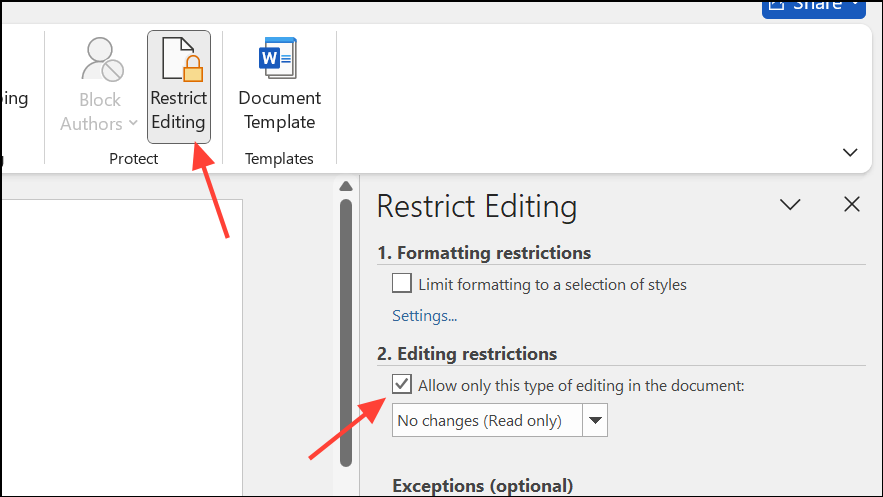
Step 7: Click Yes, Start Enforcing Protection, then set a password if you want to prevent others from turning off protection. This step ensures users can only fill in the designated fields while the rest of the document remains locked.
Step 8: Save your document. Use File > Save As and choose Word Document (*.docx) to retain fillability. If you need to distribute the form as a PDF, be aware that exporting directly from Word usually removes fillable functionality. Instead, use a dedicated PDF editor like Adobe Acrobat to recreate fillable fields after converting the document.
Alternative Approaches for Creating Fillable Forms
Using Legacy Form Fields
For compatibility with older versions of Word or when you need grey text boxes that resemble classic form fields, you can use legacy form controls. These are available in the Developer tab under Legacy Tools. Insert the desired field (such as text, checkbox, or drop-down), then protect the form as described above. This method is useful if you want forms that work consistently across different Word versions, but offers fewer customization options than content controls.
Using Bookmarks and UserForms
Advanced users sometimes use bookmarks combined with VBA UserForms to collect input and write it to specific locations in the document. This approach is more complex and generally not necessary for standard fillable forms. It is mainly used for highly customized workflows or when automating data entry directly into the document.
Tips and Limitations
- Word forms are best used as Word documents. When exporting to PDF, fillable fields typically do not carry over; use a PDF editor to recreate them if needed.
- For longer answers, adjust table row properties to allow text wrapping, or use rich text controls.
- On Word for Mac or in the web version, some features (like full editing restrictions) may be limited compared to the Windows desktop version.
- If you require analytics, web integration, or advanced logic (such as conditional questions), consider an online form builder instead of Word.
Custom fillable forms in Word streamline data collection and reduce manual entry errors. With the right controls and protection settings, you can distribute consistent, professional forms for a range of purposes.