
The Photos app on iPhone has an option for Shared Albums that makes it extremely easy to share photos with your friends or family. Of course, there are always messaging apps to share photos with people not in your vicinity, but if you have a few hundred photos, you can only share them in batches.
The Shared Albums provide some much-needed respite in this area. You can add as many photos as you want to a shared album in one fell swoop (so long you’re sticking to the numbers: no more than 1000 photos in an hour for all shared albums and 5000 photos for an album in total).
“Shared Albums are good and everything but what if we want to share an album with non-Apple users?” What of it? You can easily use the Shared Albums feature to share photos with anyone and not just Apple users! You can create a public website for your shared album so anyone can view the photos in the album.
How Does the Whole Setup Work?
Don’t let the prospect of creating a public website for your shared album intimidate you. You don’t have to do anything; all the heavy lifting is done by Apple itself. It creates a public website on iCloud for the shared album. All you need to do is the equivalent of turning on a switch. And then anyone who does not use iCloud can view the album. You can still invite iCloud users the normal way so they can see the album on their Apple devices.
But there is a catch with making your shared album public. Unlike some sharing options where you can decide whether you want anyone to be able to access the content or only certain people, a public shared album on iCloud can be viewed by anyone with the link. You cannot restrict access to it.
So, when you make your album public, be sure to tell others to not share the link with others.
Create a Public Website for the Shared Album
Open the Photos app on your iPhone.
Navigate to the ‘Albums’ tab.
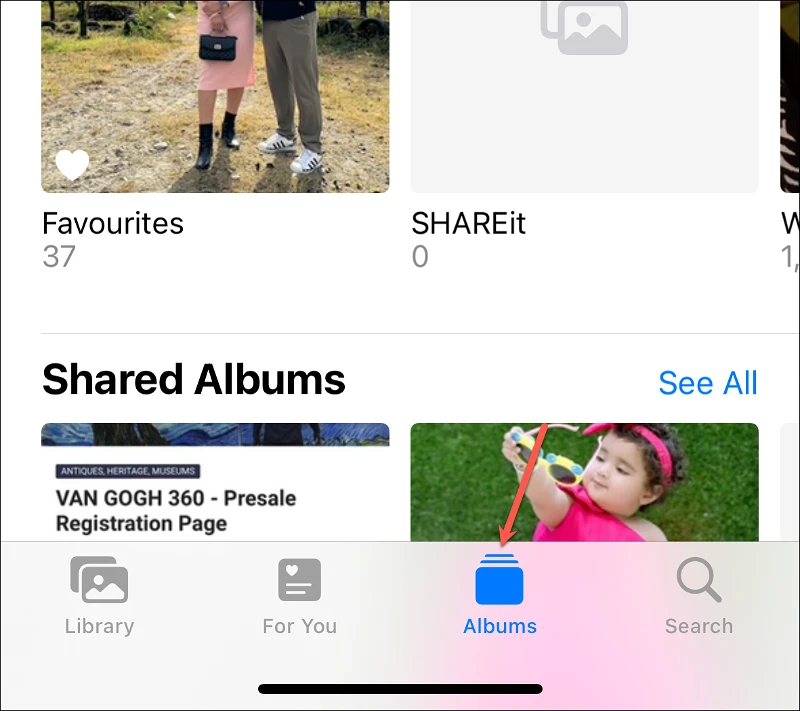
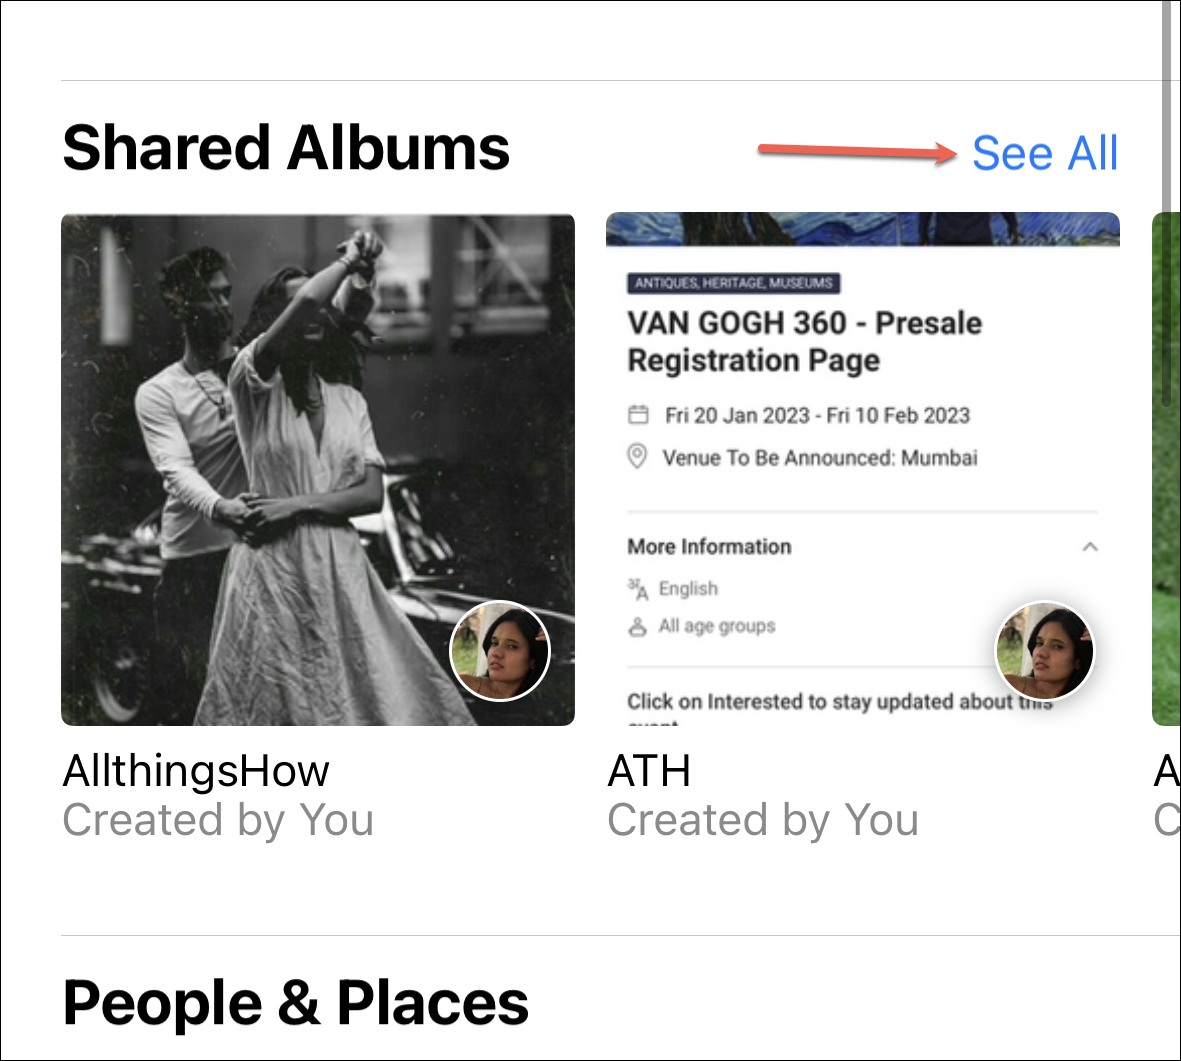
Then, go to the ‘Shared Albums’ section and either swipe left to view all the shared albums or tap ‘See All’. If you haven’t yet created a shared album, check out our guide on how you can create one. You’ll first have to create a shared album. Only then can you make it public, i.e., there is no direct way to make an album public while creating it.
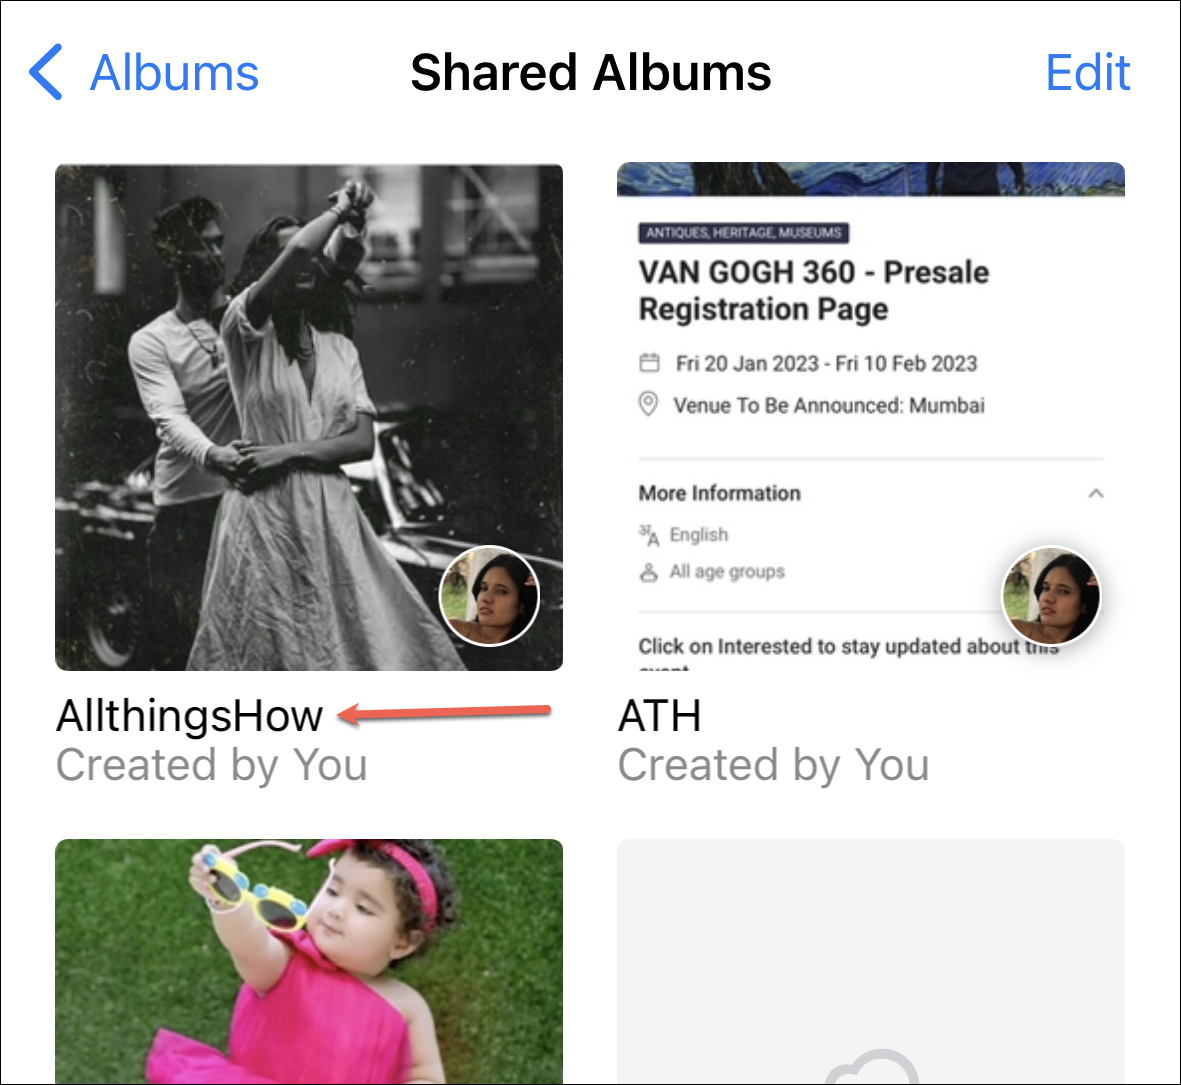
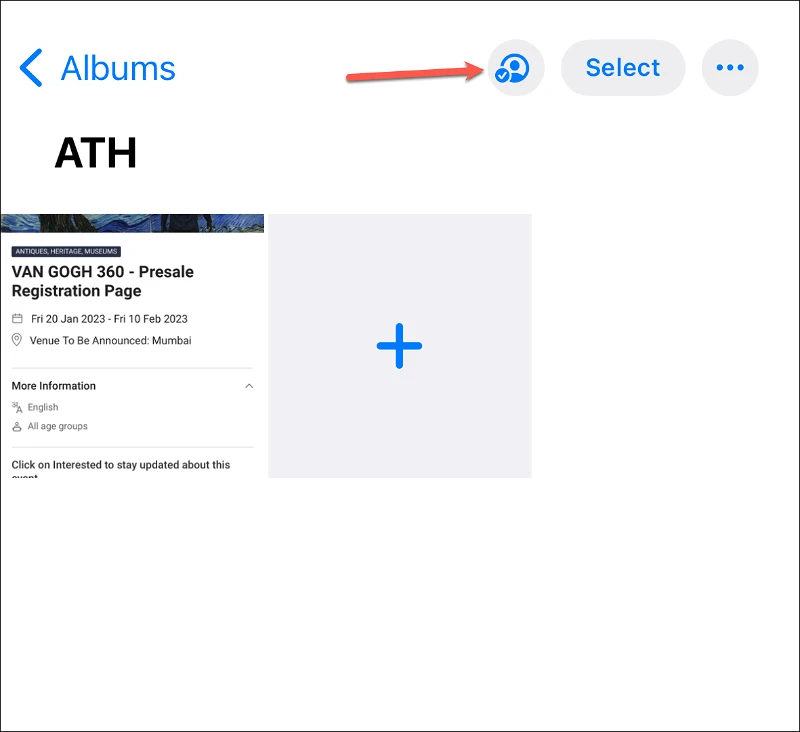
Now, tap the ‘Shared Album’ that you want to make public.
Tap the ‘People’ option from the options in the top-right corner of the screen.
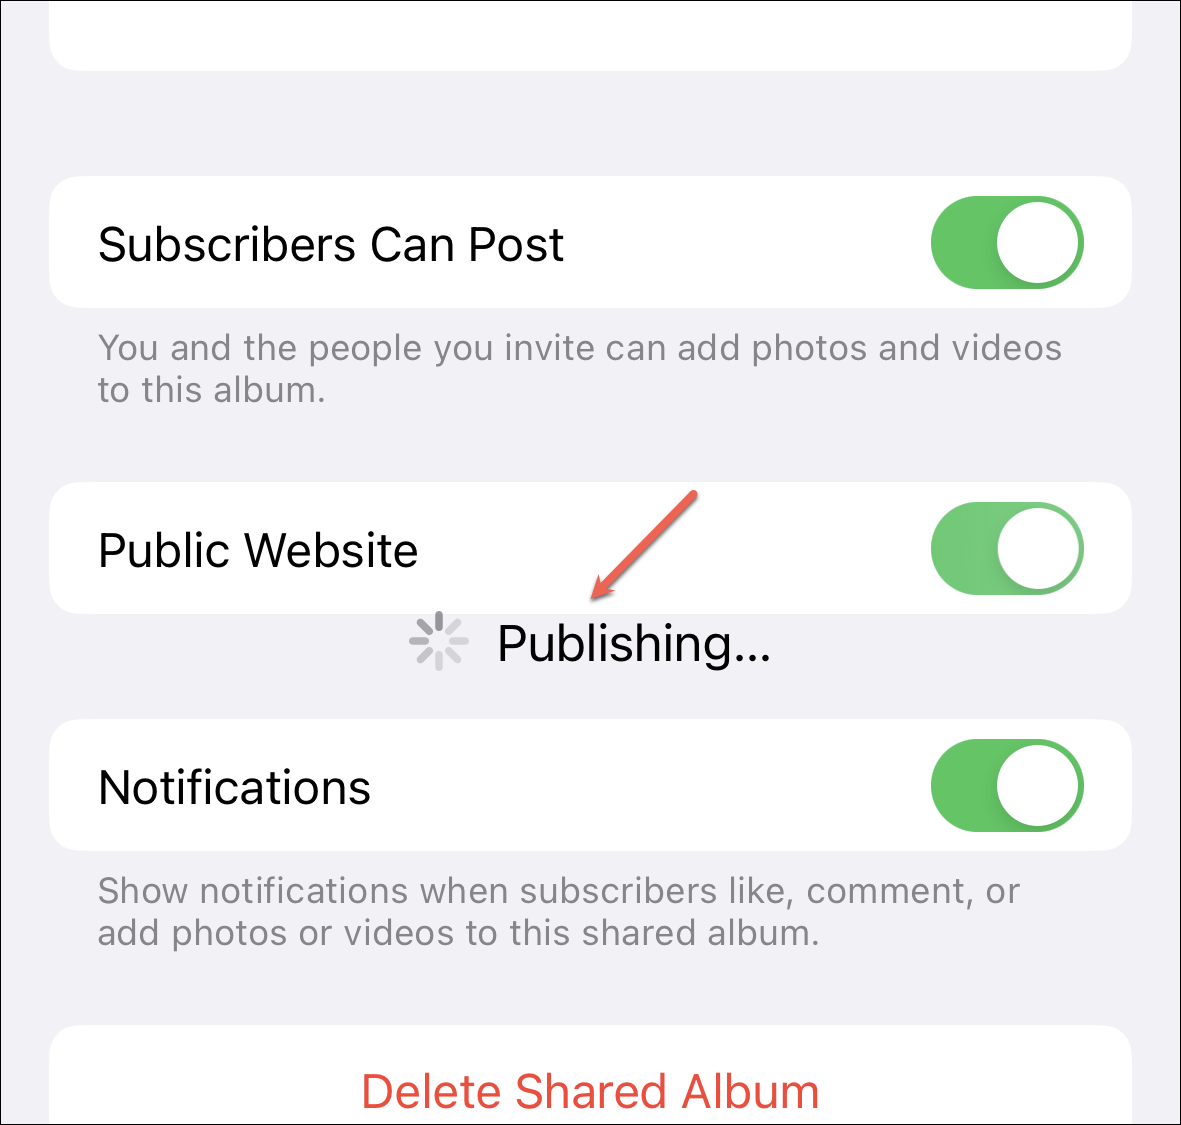
From the ‘Edit Shared Album’ screen, turn on the toggle for ‘Public Website’.

It will take a few seconds while the publishing completes.
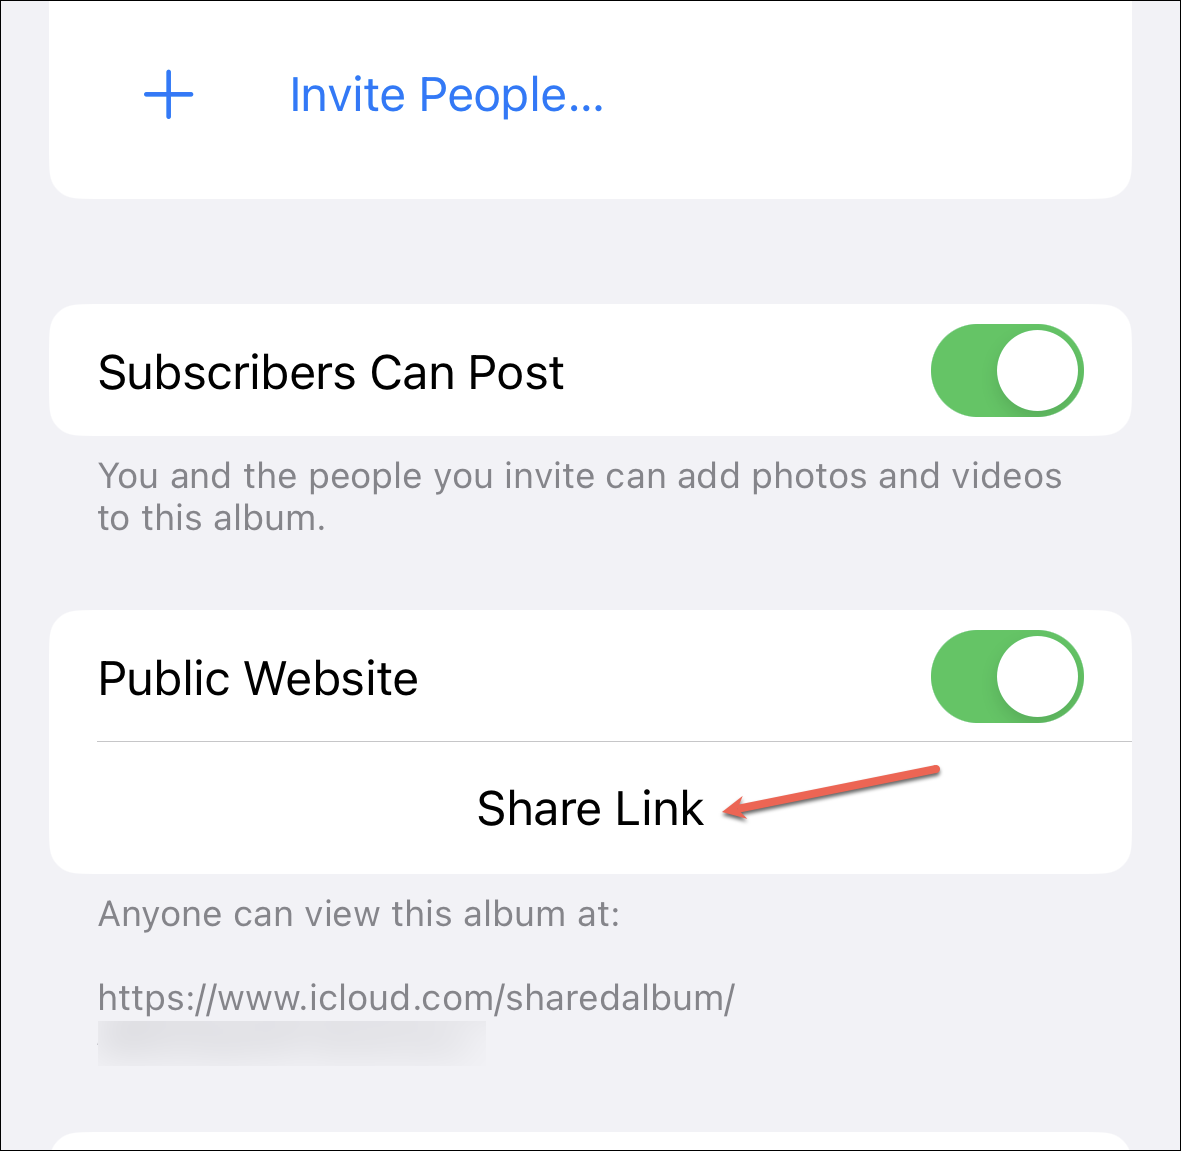
As soon as it publishes, a link and the option to share the link will appear. Tap ‘Share Link’ to open iOS’s share sheet and share the link using any convenient means.
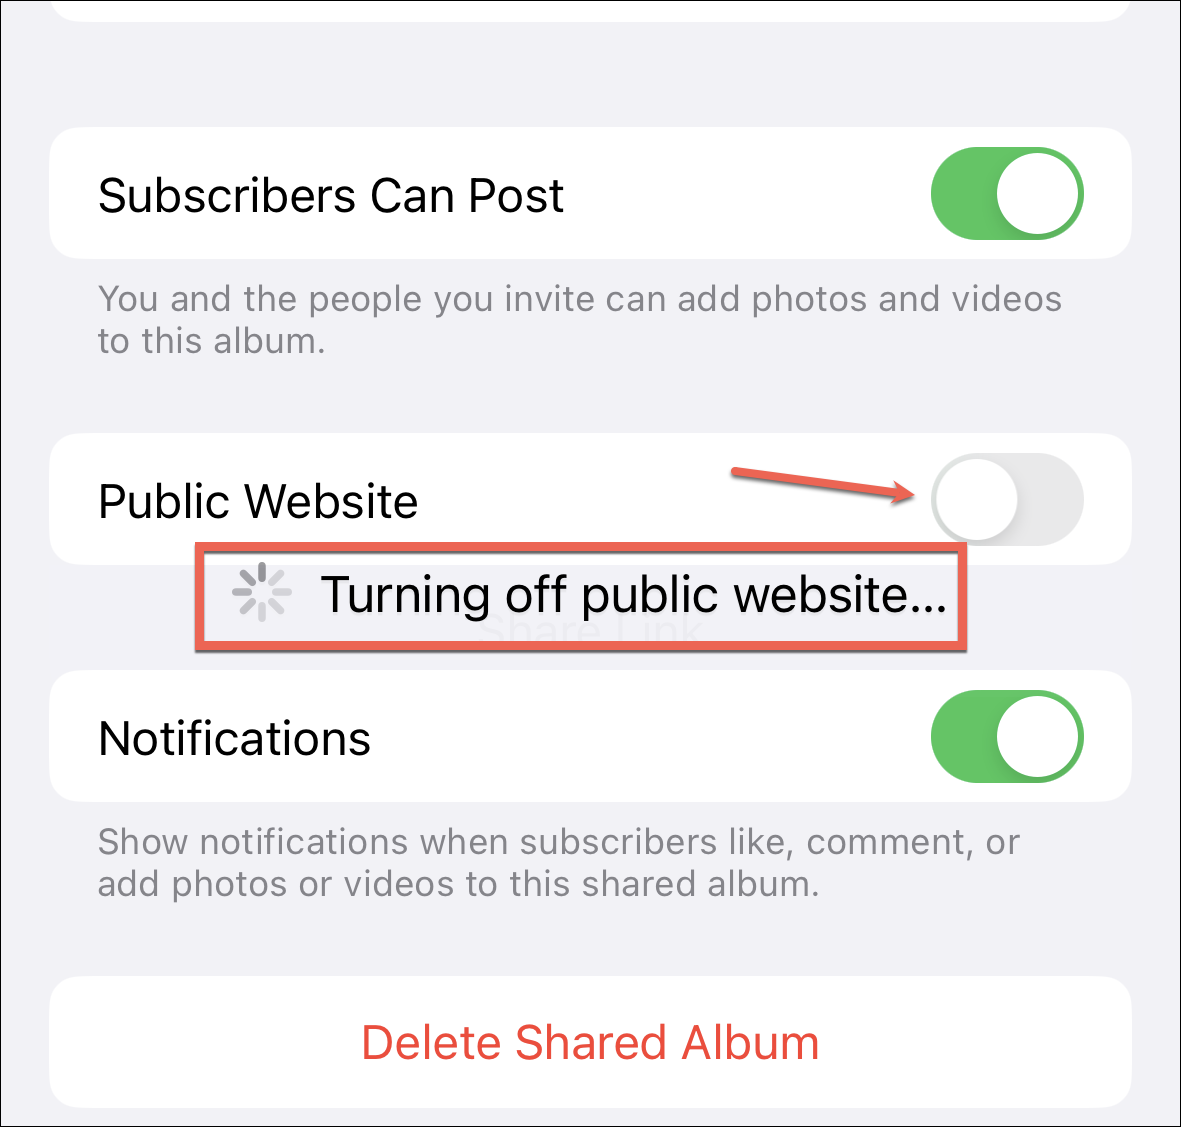
Anyone can navigate to the link in an up-to-date browser and view the photos and download them. You can make the album private gain anytime by turning off the toggle for ‘Public Website’ by navigating to the shared album settings.
Shared Albums on iPhone make it really easy to share photos with others, especially when you need to share a huge number. You don’t have to wait for the photos to upload to any cloud or share them in batches.


