
Creating a Windows 11 recovery USB drive is a smart precaution to help you restore your PC in case of major software issues or hardware failures. This guide will show you how to create a recovery drive and use it to get your system back on track.
Keep in mind that the recovery drive does not back up your personal files or any third-party apps installed on your computer. It only includes system files and preloaded applications that came with Windows.
It’s also advisable to recreate the recovery drive periodically because Windows updates can change system files. We recommend creating a new recovery drive annually to ensure it includes the latest updates.
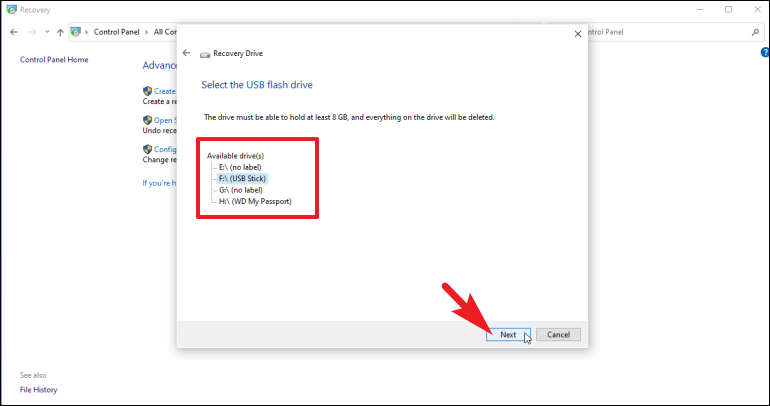
Note: You will need a USB drive with at least 16 GB of space (preferably 32 GB) to create a recovery drive.
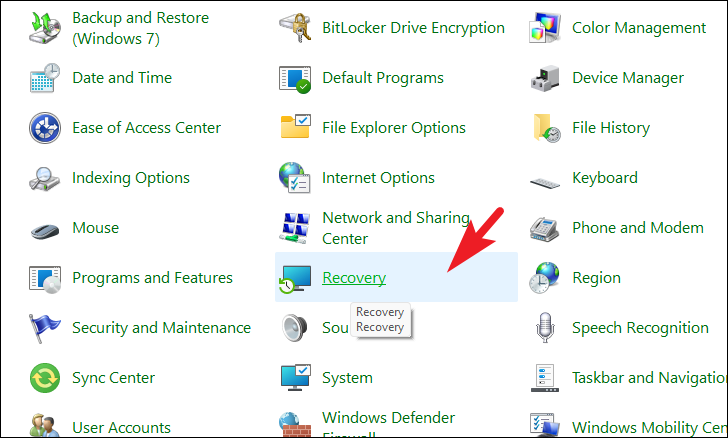
Create a recovery drive from the Control Panel
Creating a recovery USB drive in Windows 11 is straightforward and doesn’t require navigating through complex menus or using the Command Prompt. Just follow these steps to get started.
Control in the search bar. Then, click on the Control Panel application from the results.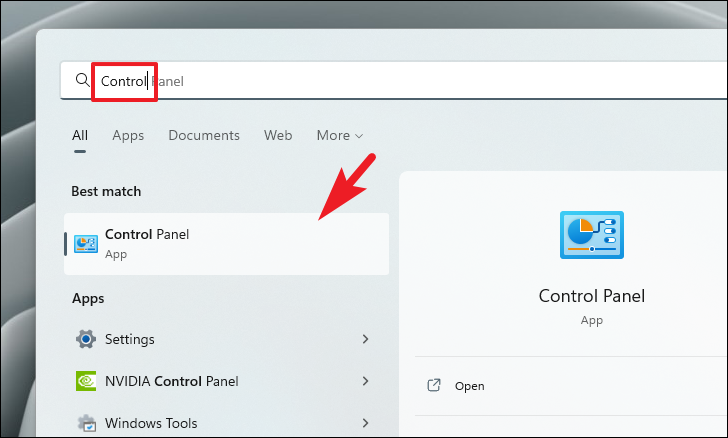

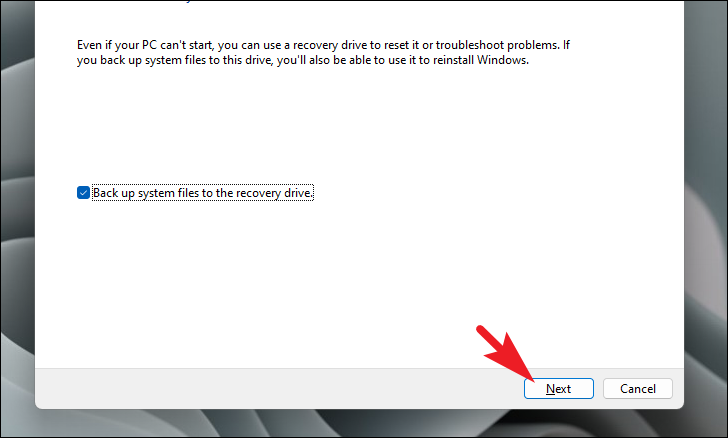
Note: Ensure you have inserted a USB drive with at least 32 GB of storage capacity before proceeding.
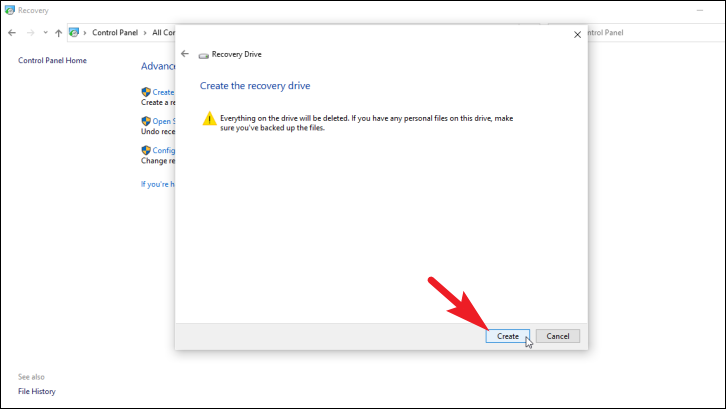
Once the process is complete, you have successfully created a Windows 11 recovery USB drive. You can use this drive to troubleshoot and restore your PC in case of major issues.
How to use Windows 11 USB recovery drive
Using the Windows 11 recovery USB drive is straightforward. Even if your PC cannot boot normally, you can use the recovery drive to access recovery options.
F12, F2, Del, or Esc. Refer to your computer’s manual for the specific key.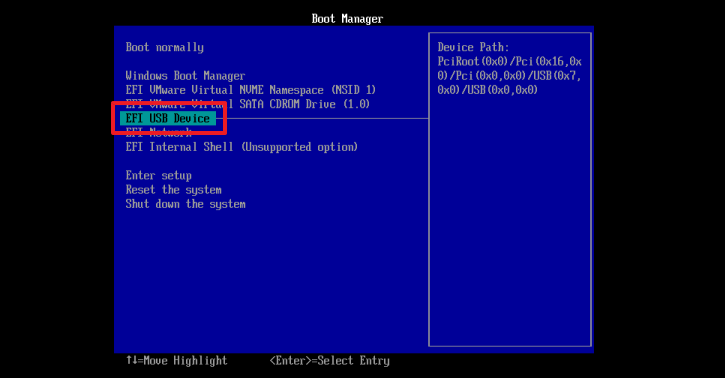
Enter to boot from the USB drive.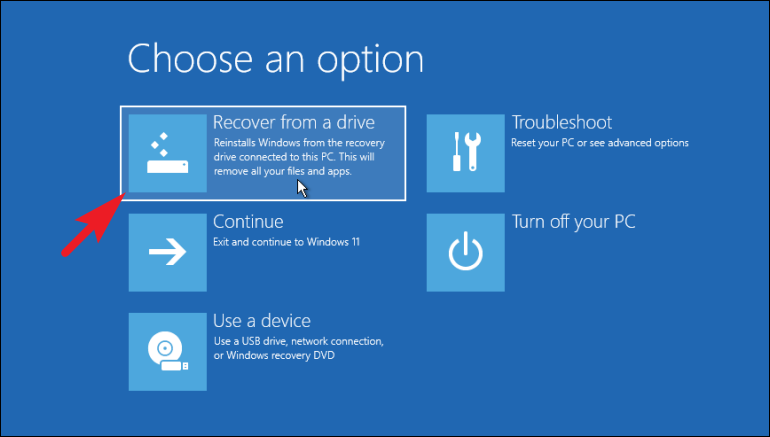
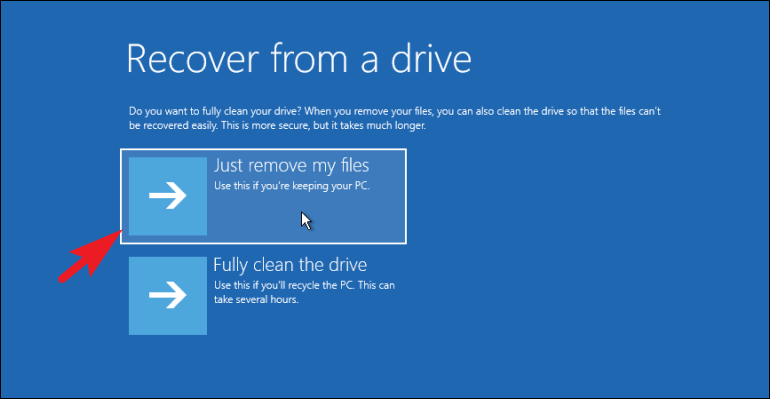
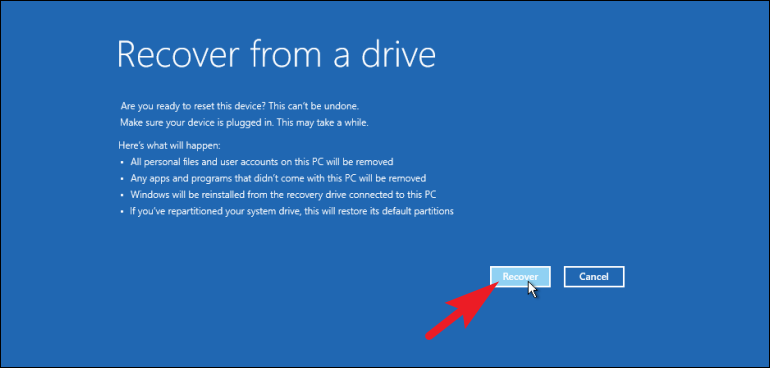
Once the recovery is complete, your PC will be restored to its factory default settings. All personal files and applications installed after purchase will be removed. If you have a backup of your personal data, you can restore your files after the recovery.
Creating a Windows 11 recovery USB drive is a simple yet essential step to safeguard your system. It’s always good to be prepared in case you encounter serious issues with your PC.


