
A few years ago, the concept of an online school would have seemed foreign and unnecessary. Sure, there are plenty of online courses, but a school? Nuh-uh. But now, everything’s changed. And the sheer necessity of the existence of such a virtual infrastructure is paramount these days.
Even if you disregard the recent situation of the pandemic that has forced all education to the virtual environment, the increasing student debt and unemployment in the USA had already created a need for an alternative education system. Online courses were the first step in this direction, but now it’s time for something new.
If you too are looking for such a virtual infrastructure, Virtually is the answer for you. It integrates everything you could need to run a virtual school: a payment structure, admissions, management infrastructure, assignments, video classes, communications – see, we really meant it when we said everything. It has all the basic features already, and there’s nowhere to go in the future but up.
How to Set Up Virtually
Creating an account is simple, and you can even test the waters for free in the beginning. It lets you create one class for up to 10 students at absolutely no cost and no commitment – you don’t even have to provide any payment information. Go to tryvirtually.com and click on ‘Get Started for Free’.
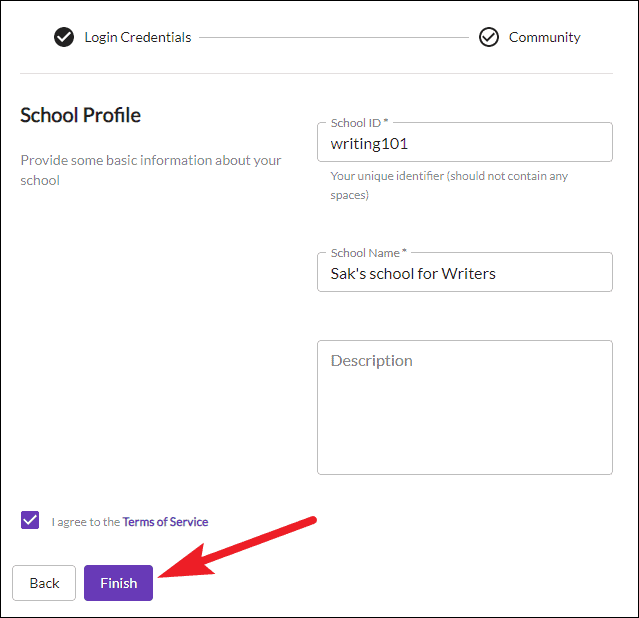
Create an account by providing basic information like your name, email address, and creating a password. Then, create an ID and name for your school, a short description for your school, agree to their terms, and click on ‘Finish’ and it will create your school. So, practically, all you need to do is come up with a unique ID and name for your school to get started!
Creating Your First Class
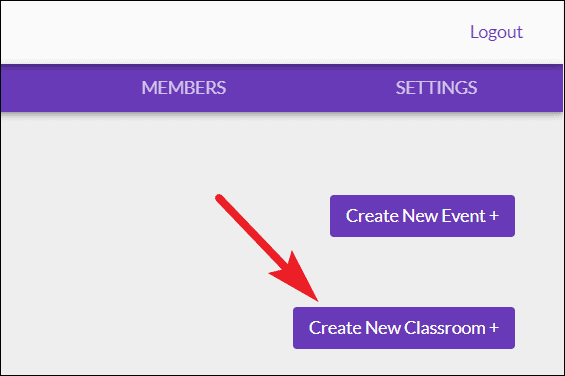
Once you have set up the school, the next building block is a classroom. You can create one class and enroll a maximum of 10 students in it for free. On your homepage, click on the ‘Create New Classroom’ button to get started. It will create the basic setup for the classroom, but you will need to edit it further to completely set it up.
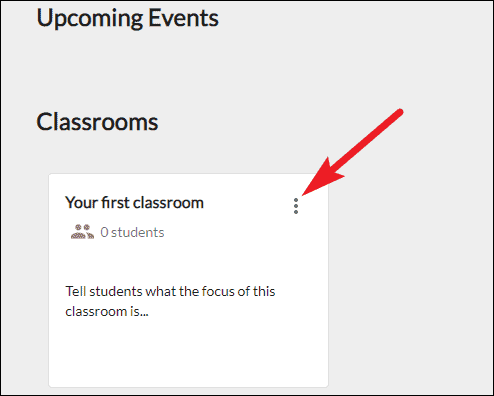
Go to the thumbnail for the class, and click on the ‘More’ option (three dots).
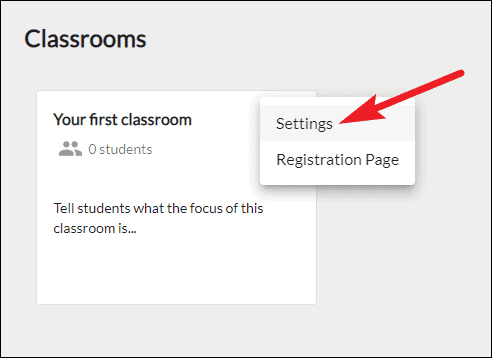
Then, go to ‘Settings’ from the menu that will open.
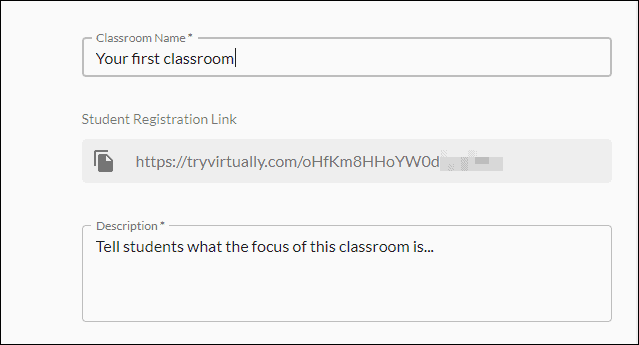
Classroom settings will open where you can manage further details about it, including but not limited to name, description, and pricing.
You can and should set up an image to visually define your class – visuals are very important in today’s world. You can also include a YouTube video if you think a video would be more suitable instead of the community image on the registration page.
Give your class a name and description; these are two of the most important parameters when defining your class as this is what potential students who want to enroll will primarily base their decision on.
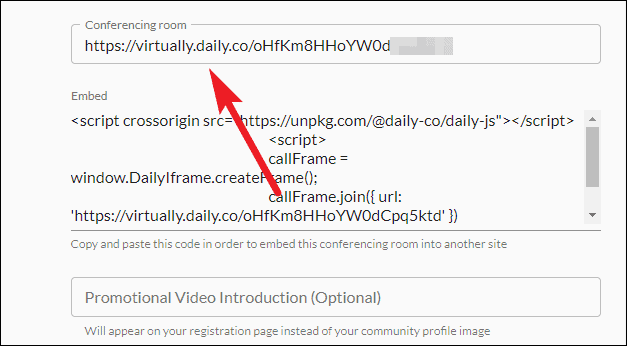
Now, in the ‘conferencing room’ section, a link for Virtually’s in-house video conferencing system – Daily.co – would be present. But the beauty of Virtually is that you can integrate it with your existing toolset. So, if you want to prefer Zoom as your video call tool, you can change the link from Daily.co video to a Zoom meeting.
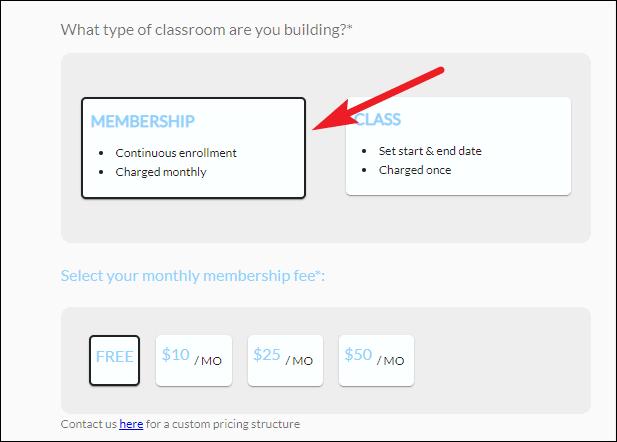
Now comes the second most important parameter of creating your classroom – the pricing infrastructure. Based on the type of class you want to build, there are two types of models available to you.
The first in this category is the Membership model. It’s an essentially subscription-based service or more like a monthly fee that students will pay to enroll in the class. You can price the subscription at Free, $10/mo, $25/mo, or $50/mo. If none of these price brackets suit you, you can contact the Virtually Team for creating a custom price.
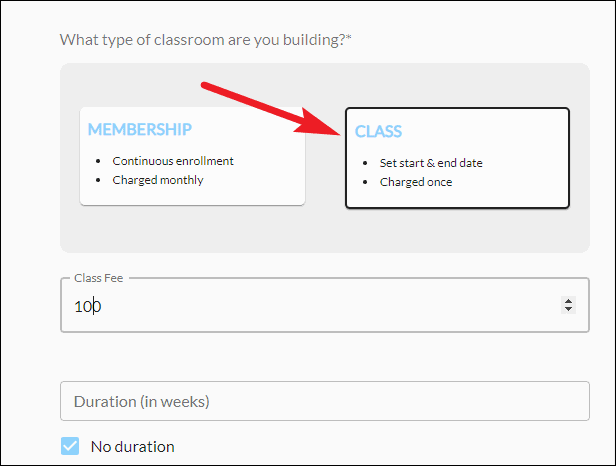
The other option available is the Class model. You can set a fee for the class that students who want to enroll will have to pay once. For this model, you can also choose to define a duration for the class so students will know the exact length of the course, or you can go with ‘No duration’ and opt for a more flexible schedule.
Virtually also lets you offer a free trial to students. Whether you want to offer a free trial or the number of days for the trial, everything is decided by you. You can also specify the number of seats available for enrollment or keep it unlimited.
Once you’ve filled everything, update the info so when students reach the registration page for your class, everything is in top shape.
A New Payment Plan for the Students
One of the most innovative things about Virtually is that it supports Income Share Agreements. An income share agreement is a form of agreement where you don’t take any fee or payment from the students upfront. Rather, you agree to receive payment in the form of a revenue share against your student’s future salary.
You can explore this option by contacting Virtually’s team if you think it is a good fit for your program instead of the traditional subscription or class models mentioned above.
Note: The Income Share Agreement feature is only available with the Business Plan.
Managing your Class
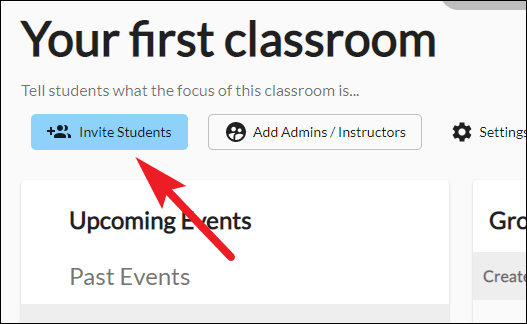
Click on the thumbnail for the class to open it. You’ll reach the overview page for the class. Click on the ‘Invite Students’ button to share the public registration link for your class.
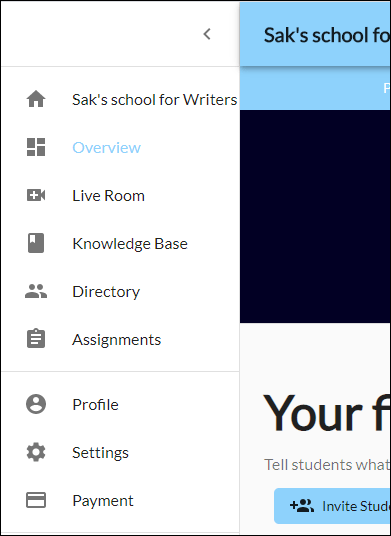
Once students have enrolled in the class, everything you need to manage your class can is present on the navigation bar on the left.
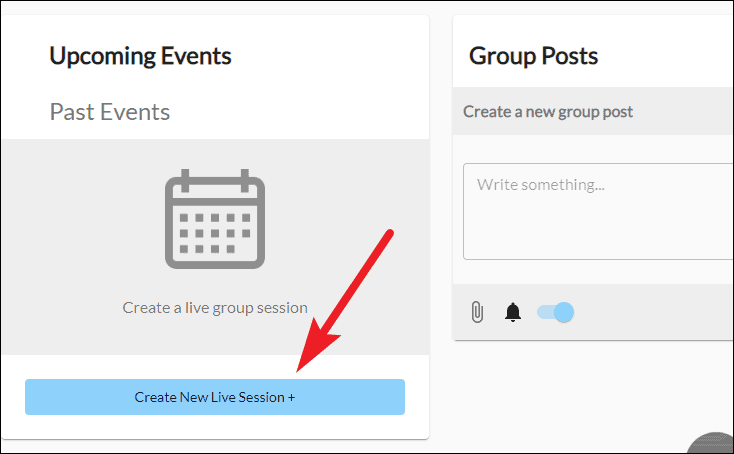
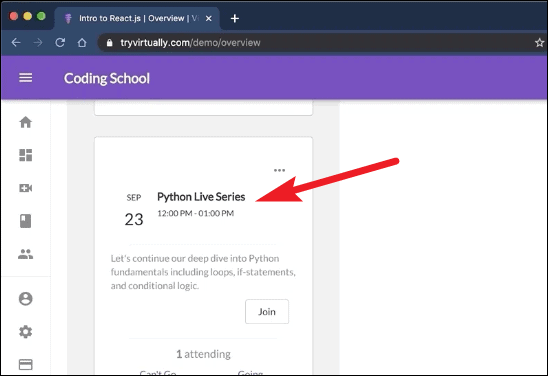
If there are any announcements, you can handle them right from the overview page by posting it as a group post. Here, you can also schedule lectures for the class in the form of live events by clicking on the ‘Create New Live Session’ button.
These events can be recurring or one time, and you can schedule them on the date and time you wish. In other words, it lets you create a complete timetable for your class. You can even choose to host these lectures in any other video conferencing app by replacing the link for the daily.co meeting room with the link for the meeting room from another app.
Go to the ‘Live Room’ from the navigation menu when you need to host an impromptu class, i.e., a video meeting with the students.
You can share any materials and resources with the class by going to the ‘Knowledge Base’ section. Whether it is a text document, URL, or any other file format like a video, presentation, etc., you can share everything here, and all students will be able to access them.

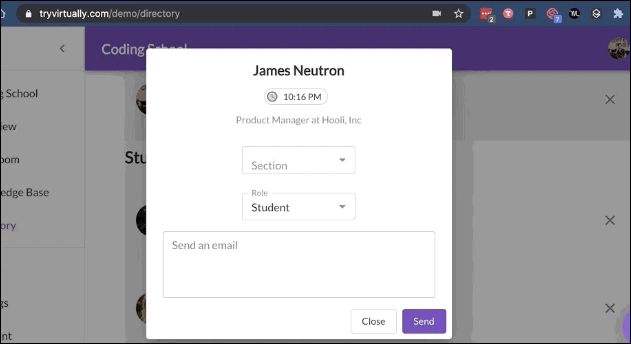
To communicate with individual students, go to the ‘Directory’. You can send messages to students in the form of emails from here. Just type what you want to send, and Virtually handles the rest for you.
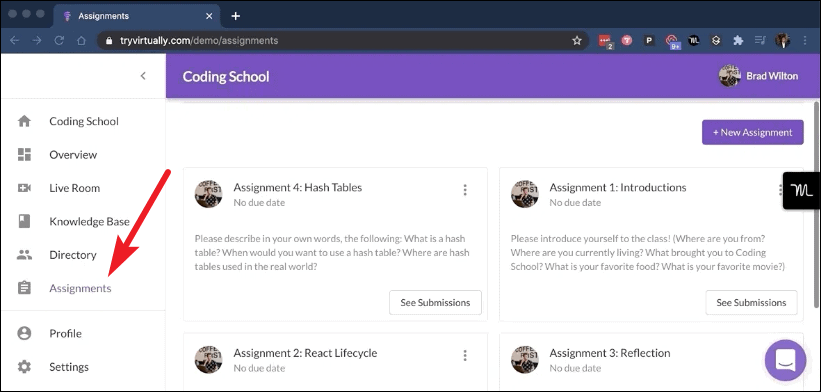
Any assignments you give to the students are also manageable from the navigation menu where you don’t have to toil to handle student assignments; Virtually handles everything for you, from creating assignments to submissions. But the assignment feature isn’t available with the free plan.
Student payments can also be handled right from here, and you can use PayPal or Stripe to accept payments from students. So basically, everything you need to run a school is present in one place in a highly streamlined and user-friendly interface.
How to Increase the Size of the School
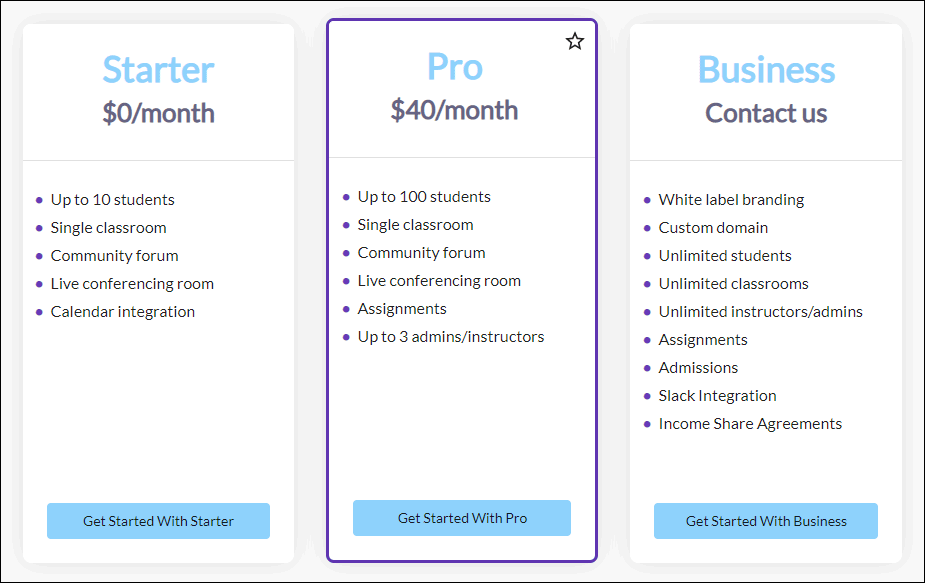
If you like Virtually and want to scale your school to include more students and offer new classes, you can upgrade to their paid plans. Apart from the Starter plan (the free one), Virtually offers Pro and Business plans.
Pro plan costs $40/month, and in addition to all the free features, it includes support for up to 100 students, but you can still have only a single classroom. This plan also adds support for the Assignments feature, which isn’t available with the free plan. You can also have up to 3 admins/ instructors, the limit for which is 1 with the Starter plan.
Now, if you truly want to scale your school to have unlimited classrooms, unlimited students, and unlimited instructors, the Business plan is the choice for you. The cost for the Business plan isn’t listed, and you’d have to contact Virtually’s team to hash out all the details.
The Business plan also offers a lot of new features like custom domain, White label branding, Slack Integration, admissions, and Income Share Agreements.
Running your own school seems like such a daunting task, but the way Virtually makes it seem so manageable and like a child’s play is an admirable feat. If you’re looking to start a virtual school, look no further – you have stumbled into the perfect place to create this modern enigma.
And if you’re still not sure about it, you can even schedule a short demo with Virtually’s team and then decide what to do.