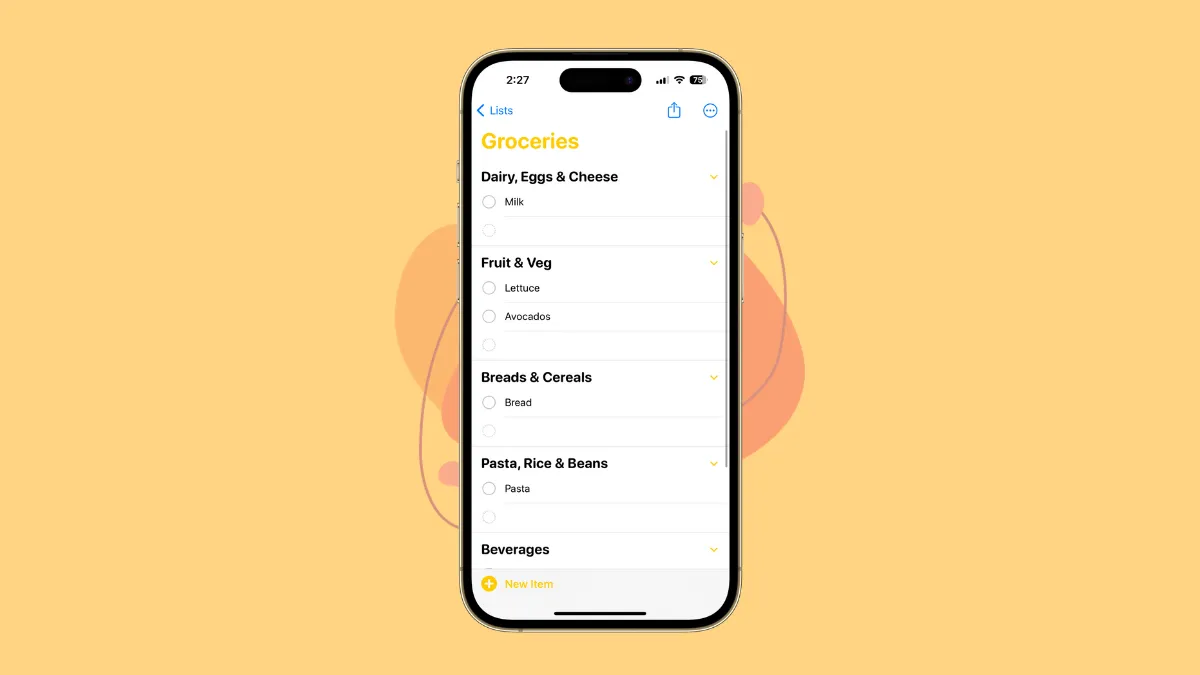
The Reminders app has steadily been getting some love from Apple since the past few updates. iOS 17 has been no different; it has a few updates in store for our favorite (for those of us who don't reach for third-party apps) organizational app.
Among those updates is an update named Shopping Lists. As the name suggests, it will make it easier to create Shopping Lists in the Reminders app. With this feature, the items you add to the list are automatically categorized into relevant sections (dairy, produce, personal care & health, etc.). But if you make any changes to how the items are grouped, the list will remember that as well. It's a pretty neat update. When clubbed with the new Column view in iOS 17, Reminders are making it extremely easy to visualize and get things done. So, let's see how to use this feature, shall we?
How to Create a Shopping List
You can either create a new shopping list from scratch or convert an existing list to take advantage of the automatic categorization from Apple in iOS 17.
- To create a new list, go to the Reminders app and tap 'Add List' from the bottom right corner of the screen.
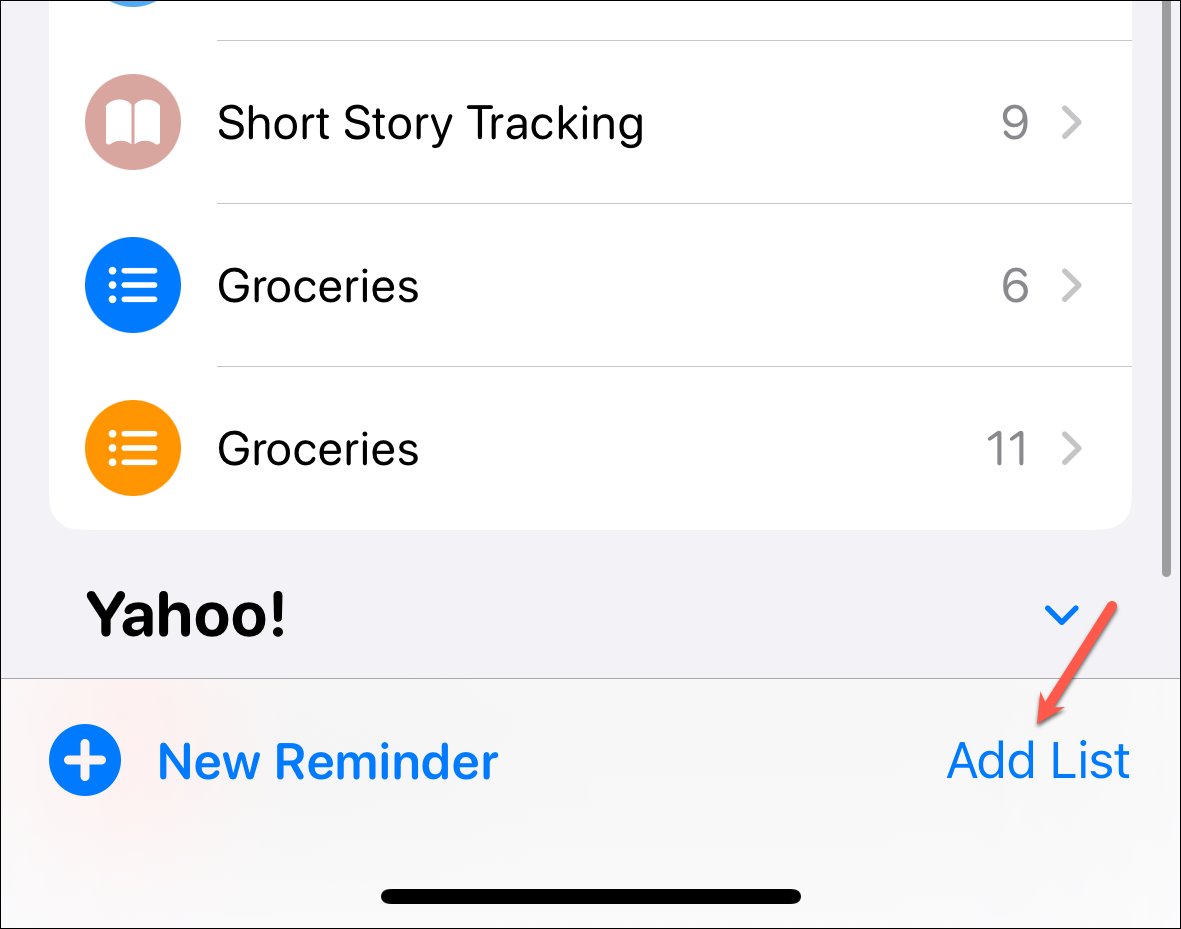
- Then, if you have more than one account, select 'iCloud' as the account to create the list. The feature is only available for iCloud Reminders.

- Next, enter a name for your list and select an icon and the color for it. Then, tap the 'List Type' drop-down menu.

- Select 'Shopping' from the drop-down options.

- Tap 'Done' in the top-right corner.

And that's it. The Shopping List will be created.
Adding Items to the List
Now when you add an item to the list, it'll automatically be categorized. For example, let's add items like, 'Milk', 'Lettuce', and 'Avocados' to the list.
First, create a new item by tapping on the 'New Item' option. Then type 'Milk', and tap 'Return'. An appropriate category will appear automatically. Repeat the steps with other items. As you add more items to the list, they'll either be added to the existing categories automatically, or a new category will be created. You have to create a new item in the default area and not in any of the existing sections.
A preview of how automatic categorization works in Shopping lists in the Reminders app.
But even if you do accidentally add it to another section where it doesn't belong, iOS will give you a suggestion to move it to a new section (if it doesn't exist, iPhone will create one).

Making Edits to the Sections
It's also possible that an item does not fall into any of the categories that iOS creates (iOS mostly only creates them for groceries or personal care & health items at this time), and it remains sectionless.
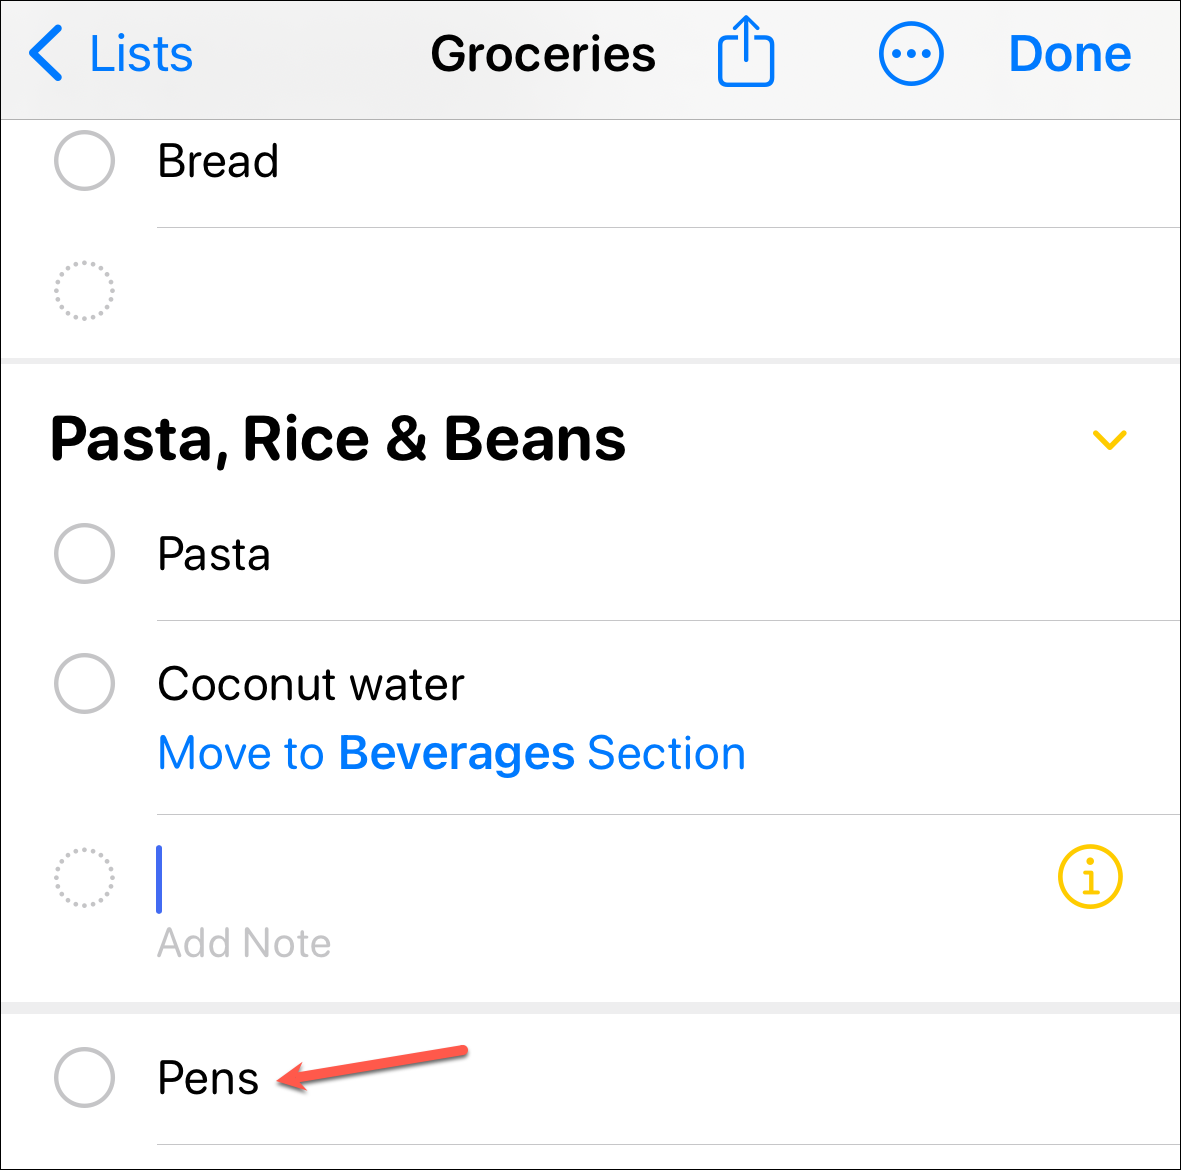
However, you can easily create a new section in your list. Here's how:
- To create a new section, tap the 'three-dot menu icon' in the top-right corner of the screen.

- Then, tap the 'Manage sections' option from the menu.
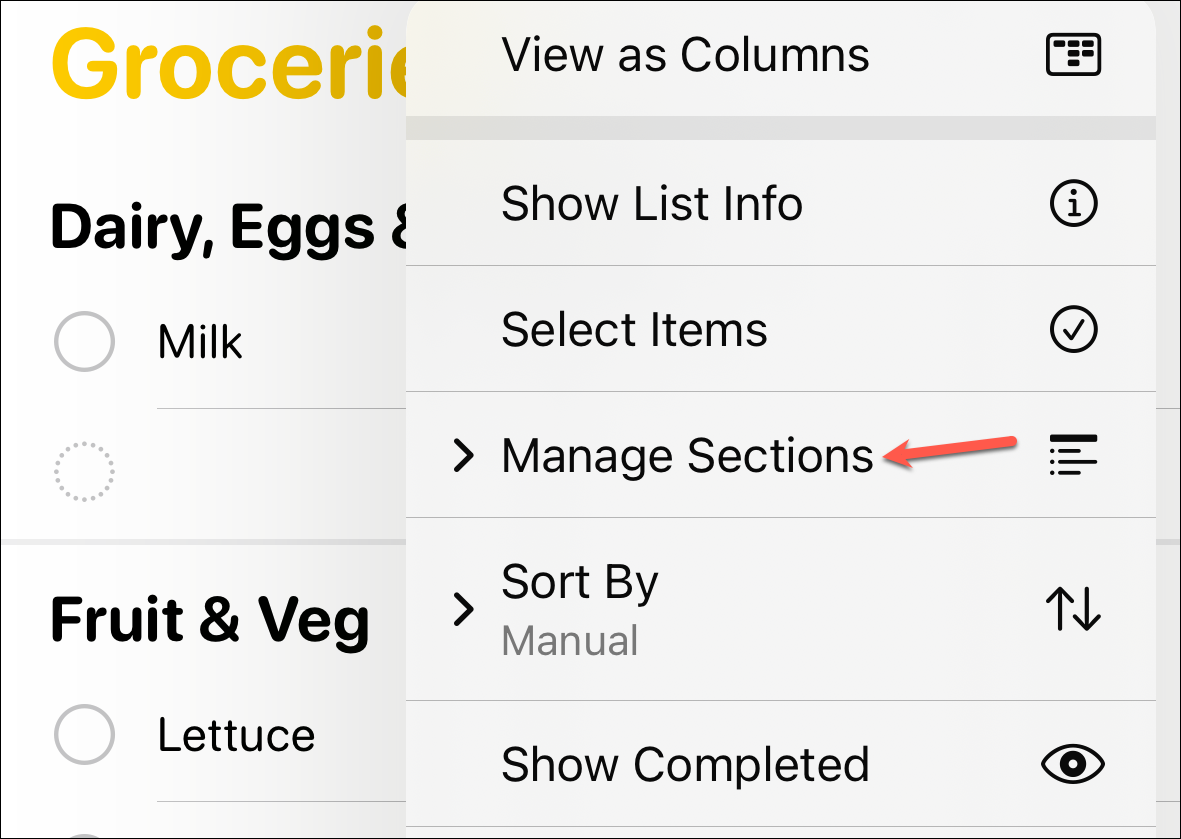
- Select 'New Section' from the options that expand.
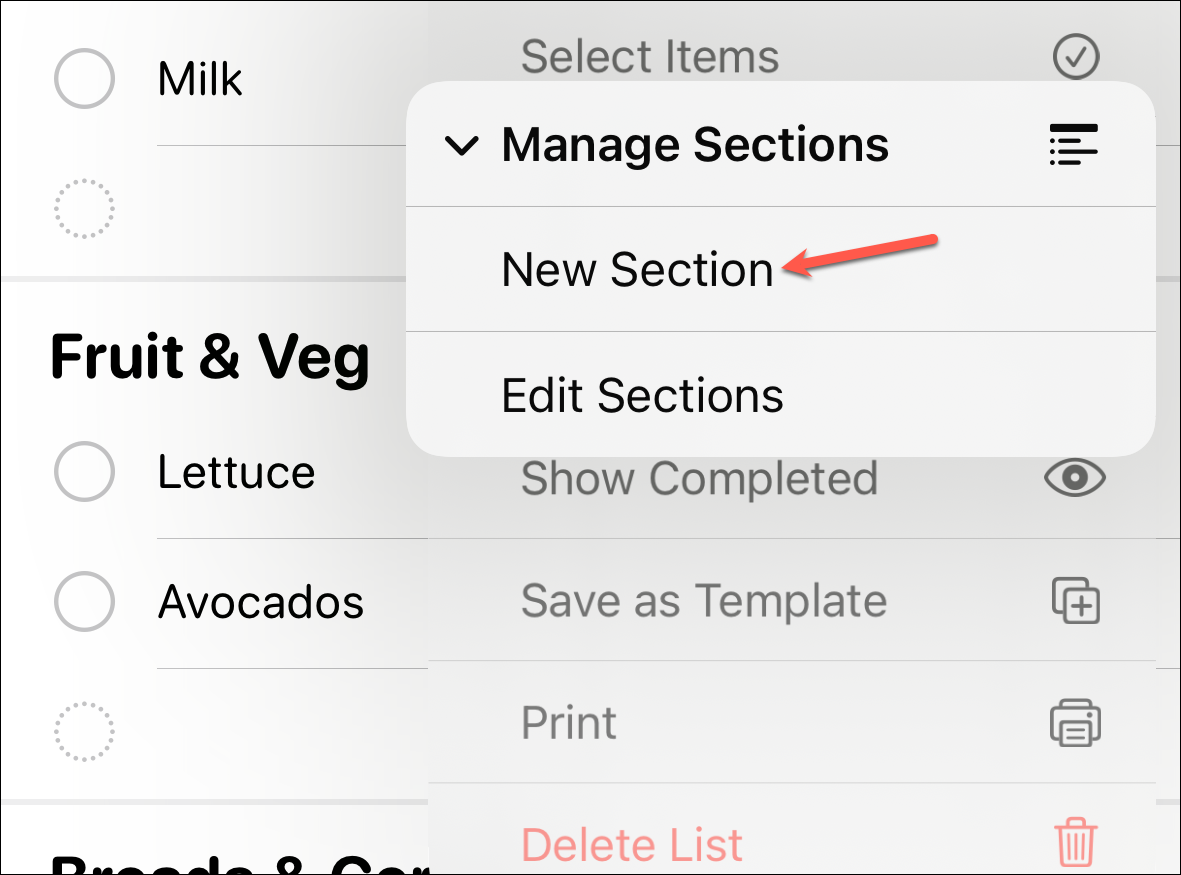
- A new section will be created; enter a name for it. After that, you can drag and drop the items from the sectionless area to the new section.
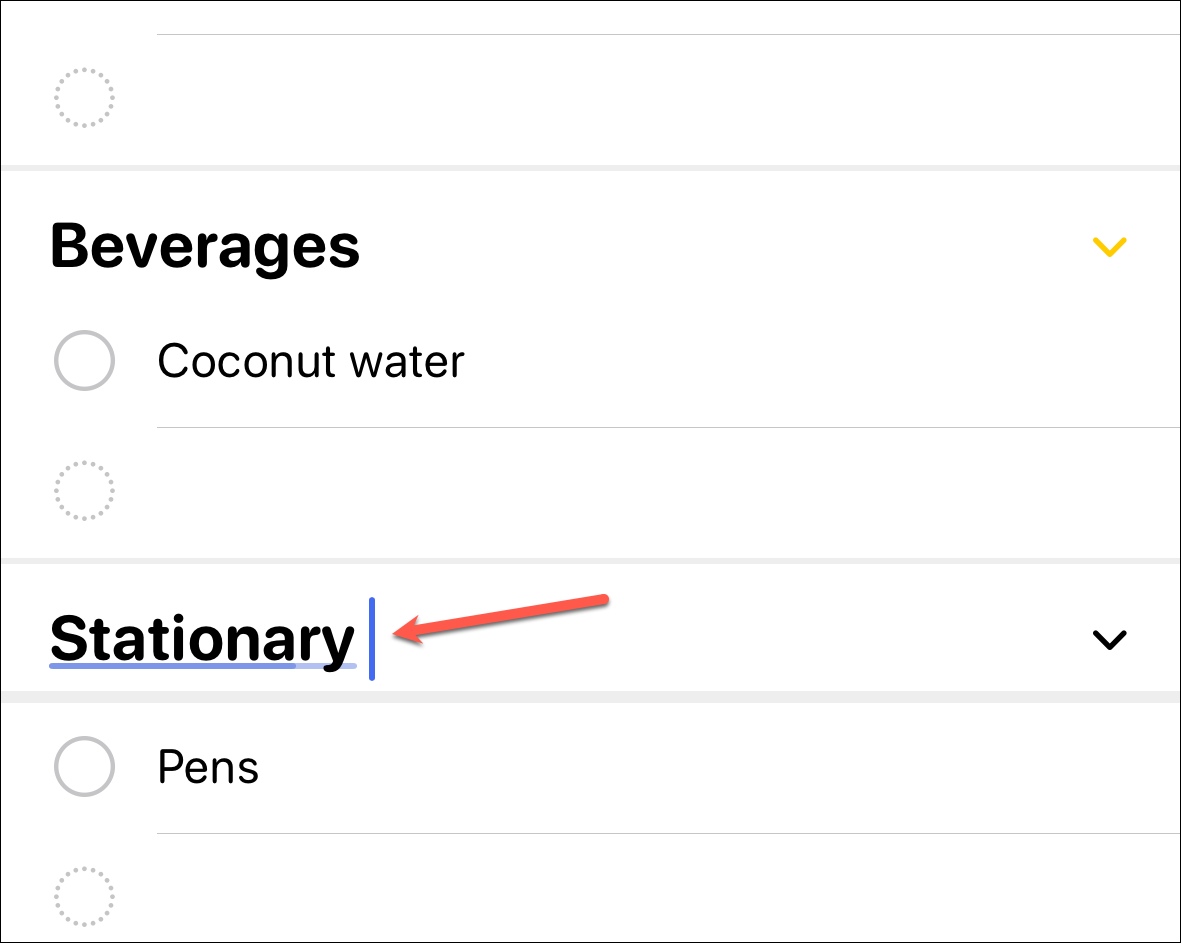
You can also edit a section for any item in the list.
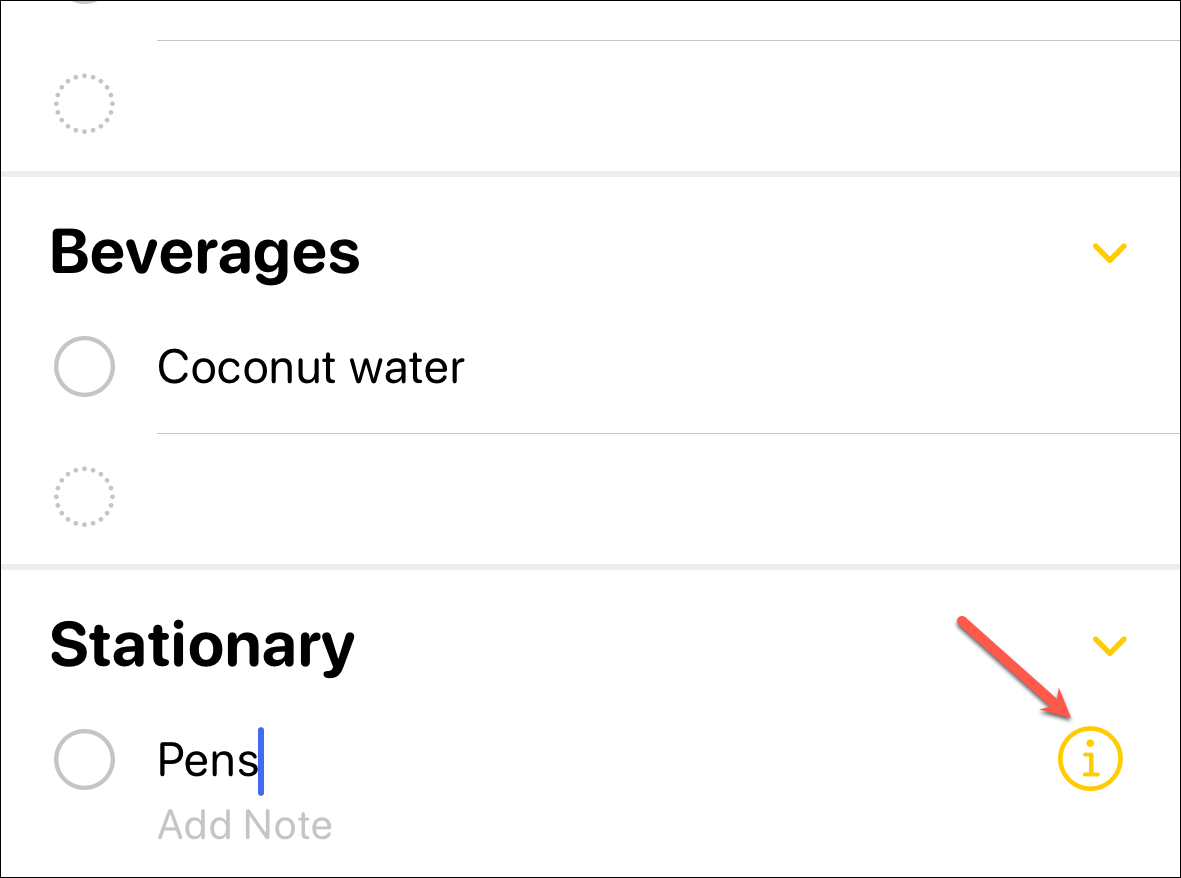
- Tap on the item to make it editable. Then, tap the 'i' on the right.
- Scroll down on the Details page and tap the 'Section' option.
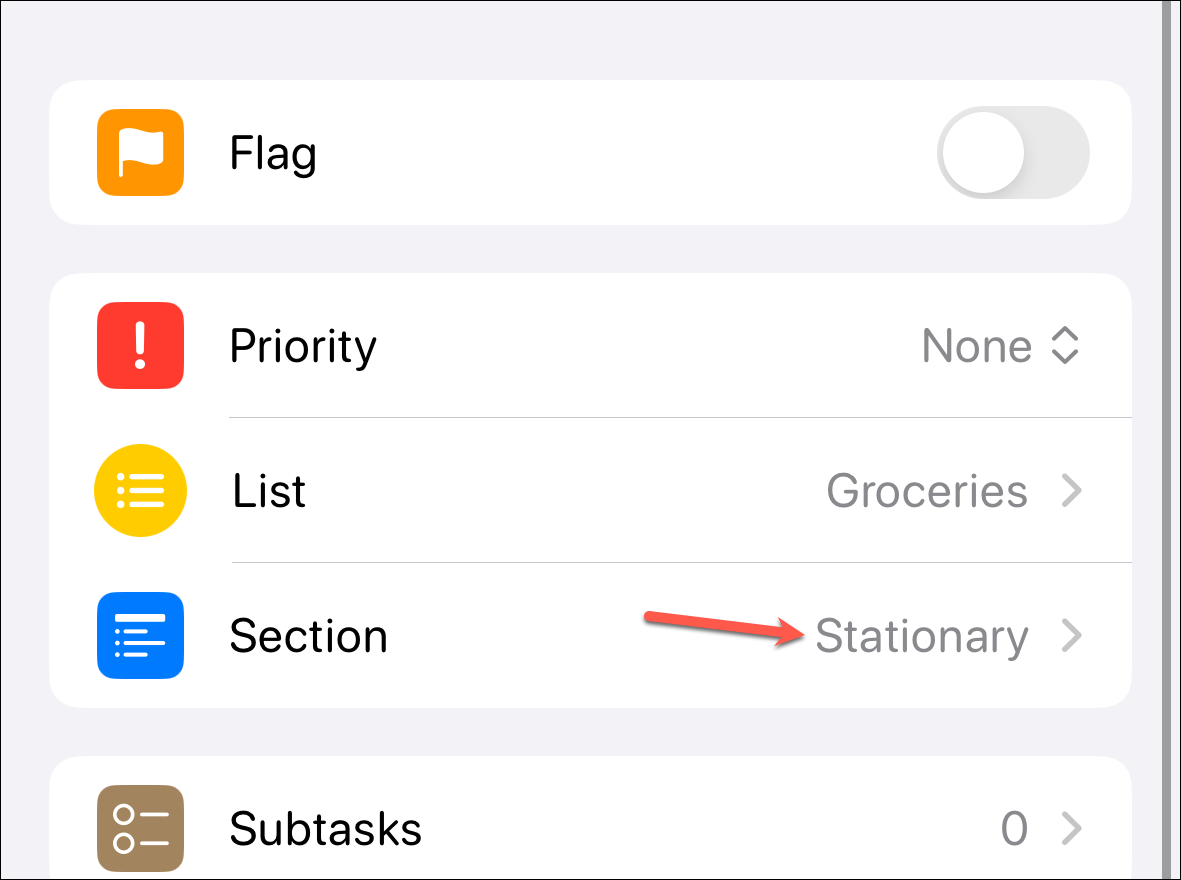
- Then, you can select a section for the item from the available options. The sections already in the list will appear in the top section.

- If you scroll down, you can see the other sections that the Reminders app has for automatic categorization.

- You can also create a new section by entering its name in the 'New Section with Selection' field.

- You can even make the item section less by selecting 'None'.

The Reminders app learns from your preferences. So, even if it makes a mistake in categorization, you will only need to correct the section for it only once. The next time you add that item, the app will put it in the category you did.
The Shopping Lists feature in the Reminders app might not be a game-changing feature. But it will surely make our day-to-day a little more organized. And the Shopping List is just one template. I'm excited to see what others Apple might add to the app in the future.

