Crossfading gets rid of the awkward silence in between songs. This is a helpful feature especially if you’re playing your Spotify music in a space that cannot afford to have these gaps in between songs. Crossfade smoothly transitions tracks and makes them almost seamlessly indistinguishable from each other.
On Spotify, you can not only crossfade your music but also choose the duration of the crossfade. You are allowed anywhere between none to 12 seconds of transitional duration. Here’s how you can crossfade your music on two of your Spotify devices – computer and phone.
Crossfading Songs in Spotify on Desktop
- Launch Spotify on your computer and tap your username at the top right corner of the screen. Then, select ‘Settings’ from the drop-down menu.

- Scroll through to the end of the ‘Settings’ window to find an ‘Advanced Settings’ button. Tap this button.

- The first Advanced Setting is ‘Playback’, and the first setting under this section is ‘Crossfade’. Click the toggle next to ‘Crossfade’ to turn it green, thus enabling the setting. Then, tap and drag the white button along the slider next to ‘Crossfade songs’ to increase or decrease the amount of fade you want in between your music.
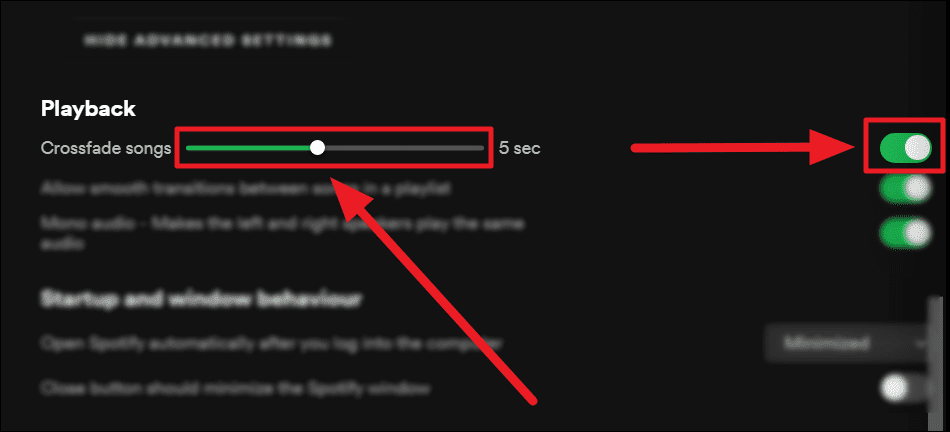
- The crossfading seconds you choose will reflect at the end of a track. The new track will begin that many seconds in advance. For instance, if you choose a crossfade of 7 seconds, your current track will end 7 seconds before time and the next track will begin immediately. Thus crossfading into the new track.
Crossfading Songs in Spotify on Your Phone
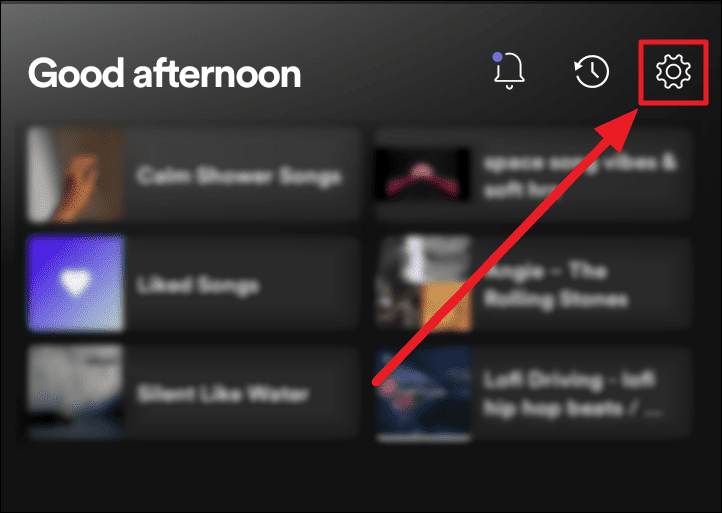
- Open Spotify on your phone and tap the ‘Settings’ icon (gear icon) at the top right corner of the screen.
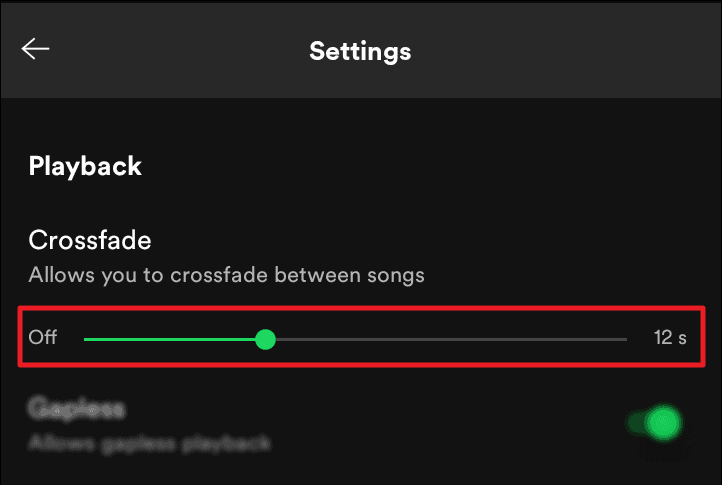
- Scroll a little on the ‘Settings’ page to find the ‘Playback’ section. Here too, the first setting option will be ‘Crossfade’. Tap and move the slider between ‘OFF’ and 12 seconds to set the crossfade duration of your choice.
Your songs will now crossfade with the duration you choose.


