Over time, your Windows 11 computer can accumulate unnecessary files that consume valuable disk space and hinder performance. Running low on storage can prevent you from installing new applications, downloading files, or even updating Windows. In this guide, we’ll explore the most effective methods to check, manage, and free up disk space on your Windows 11 PC.
Checking Disk Space on Windows 11
Monitoring your disk space usage is essential to ensure your system operates smoothly. Here are several ways to examine how much space you’re using and identify what’s occupying your storage.
Using File Explorer to Check Disk Usage
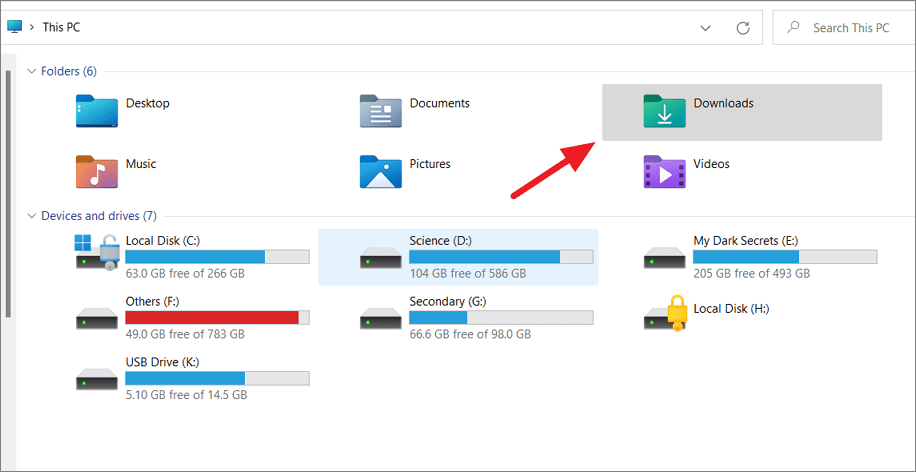
This PC. Under the Devices and drives section, you’ll see all your drives along with a visual representation of their used and available space.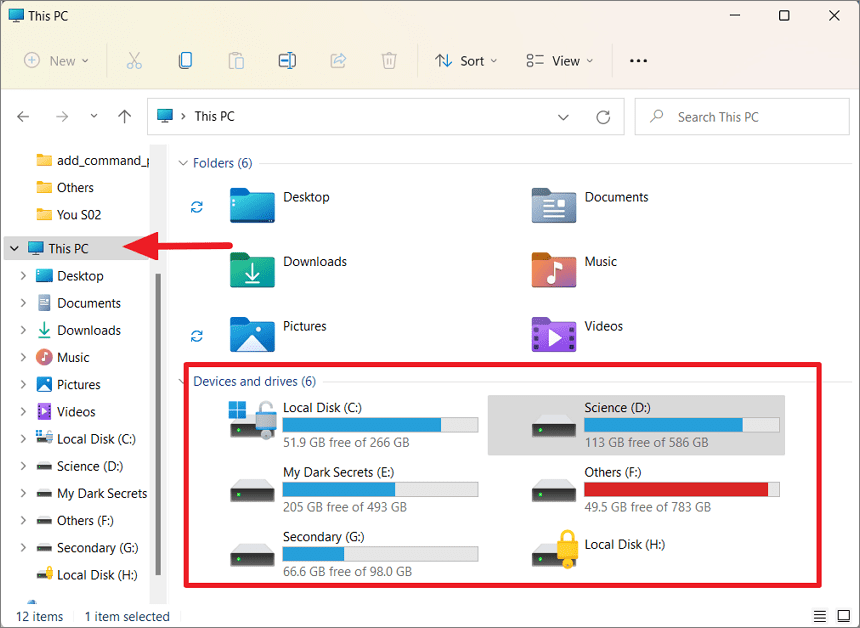
Properties from the context menu.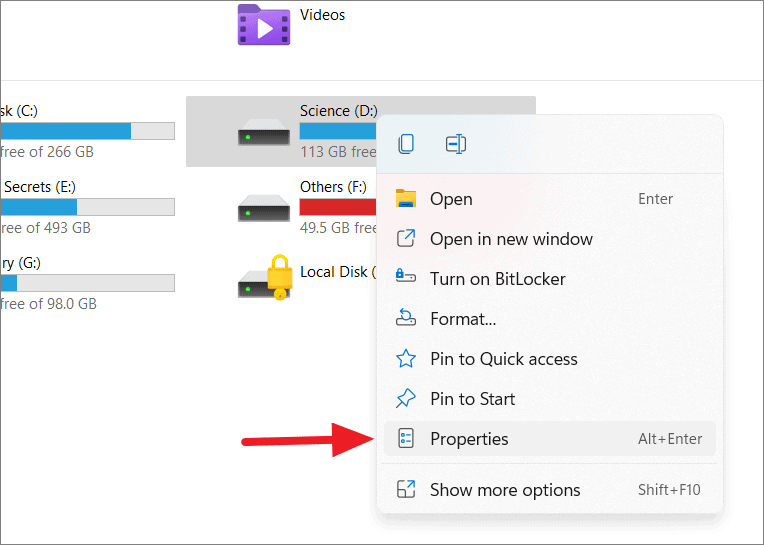
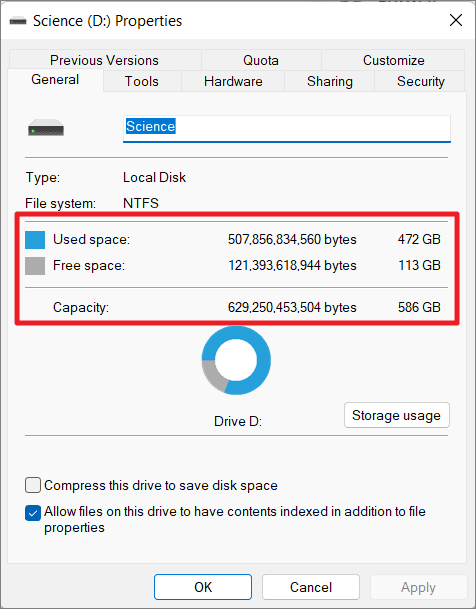
The General tab in the Properties window displays the drive’s total capacity, used space, and free space in both bytes and gigabytes.
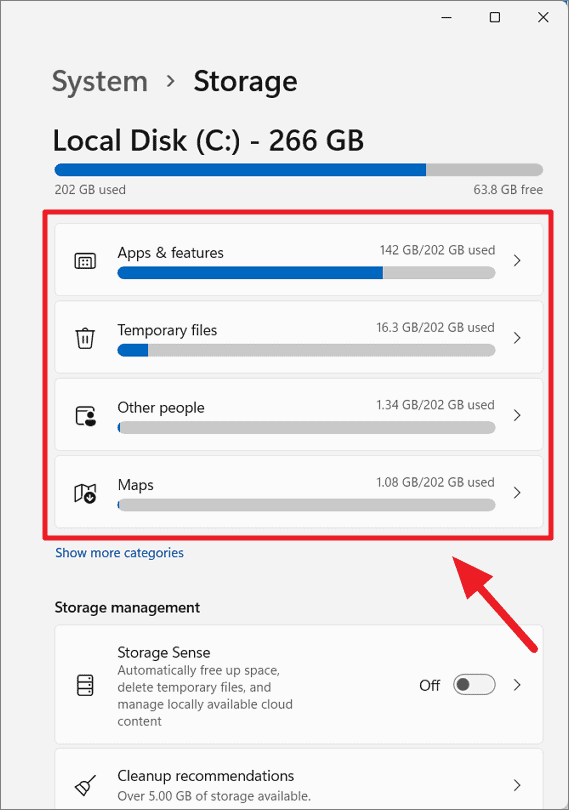
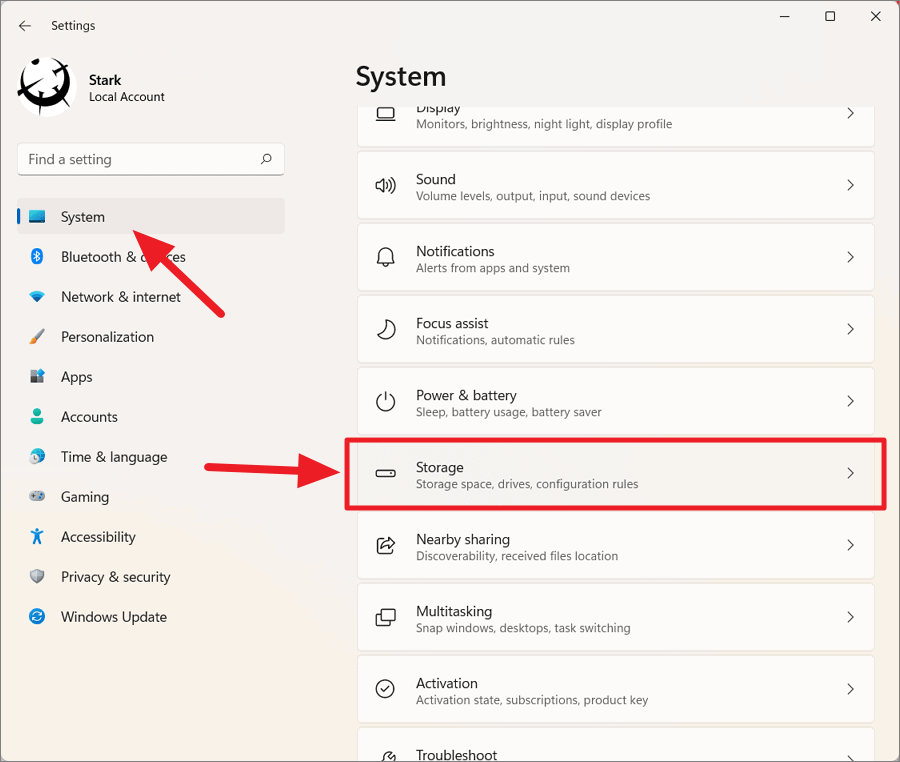
Using Settings to Check Disk Usage
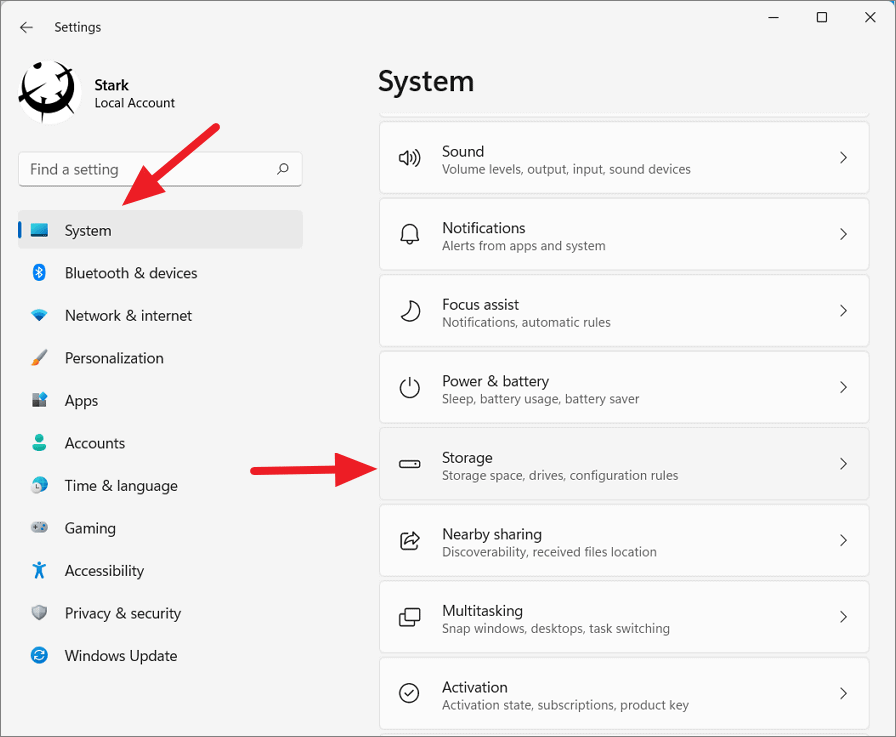
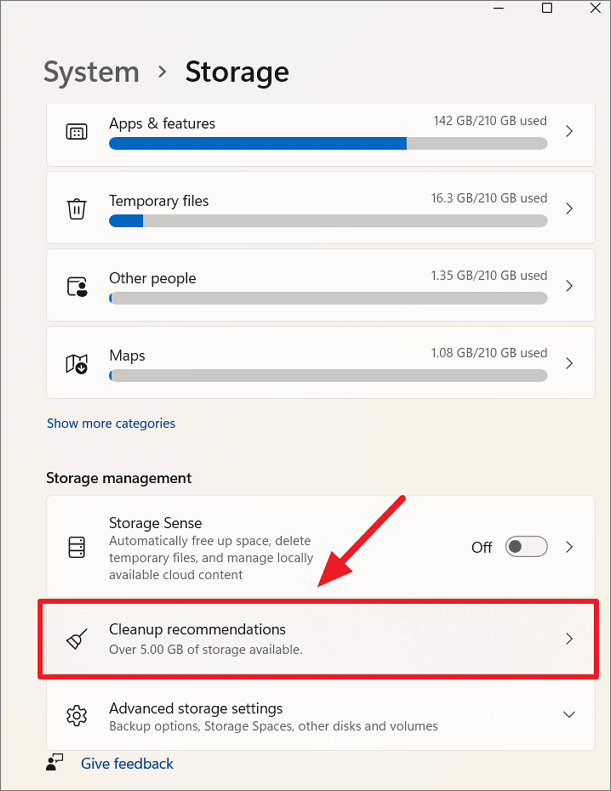
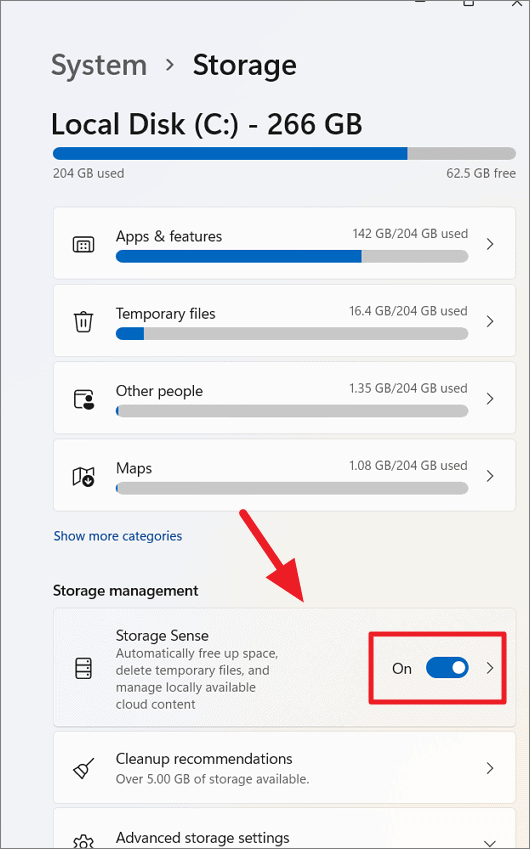
The Storage settings provide an overview of what’s using space on your primary drive. Click on Show more categories to get a detailed breakdown.
Advanced storage settings, then choose Storage used on other drives.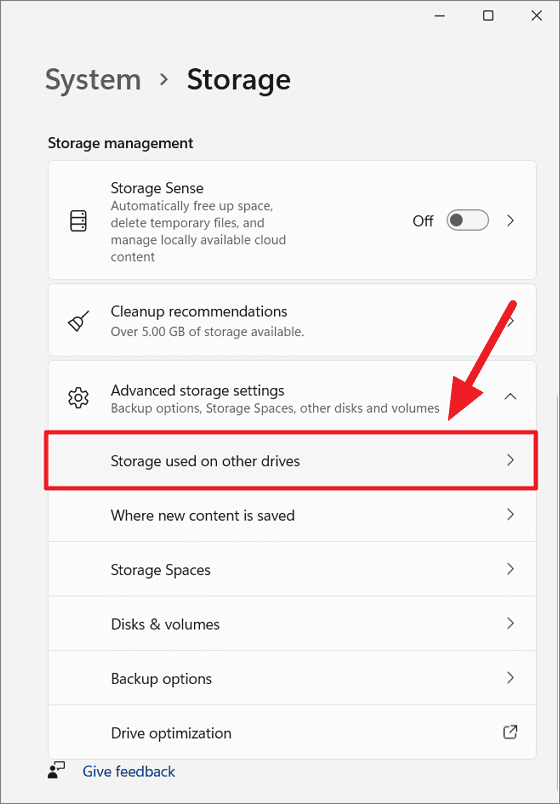
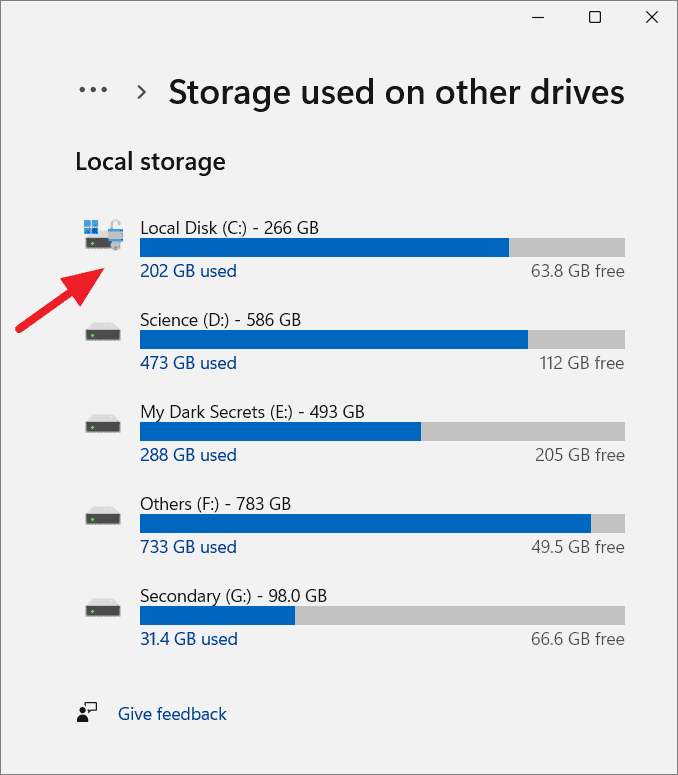
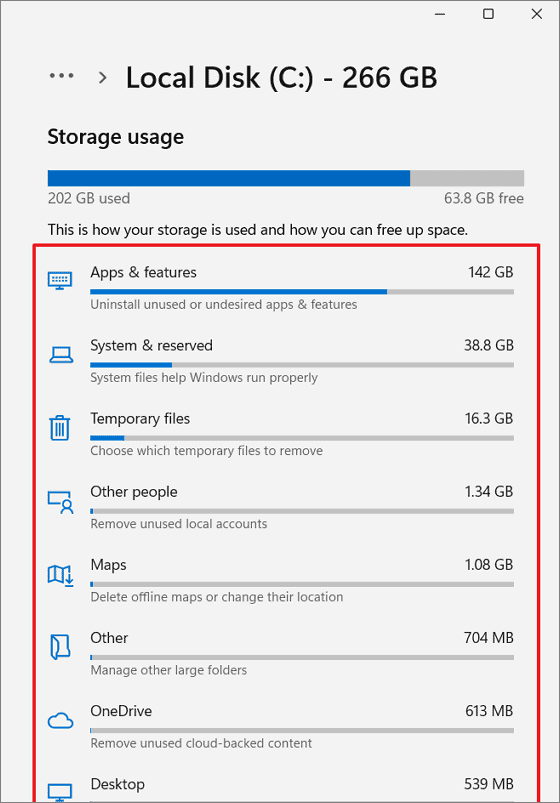
This section displays all connected drives with their used and available space. Click on a drive to see a category-wise breakdown of the storage usage.
You’ll see details like system files, apps, temporary files, documents, and more.
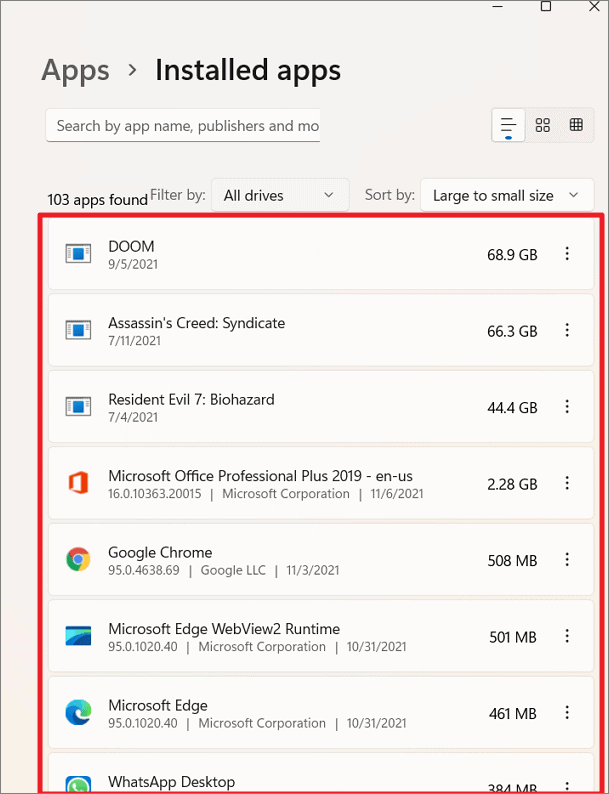
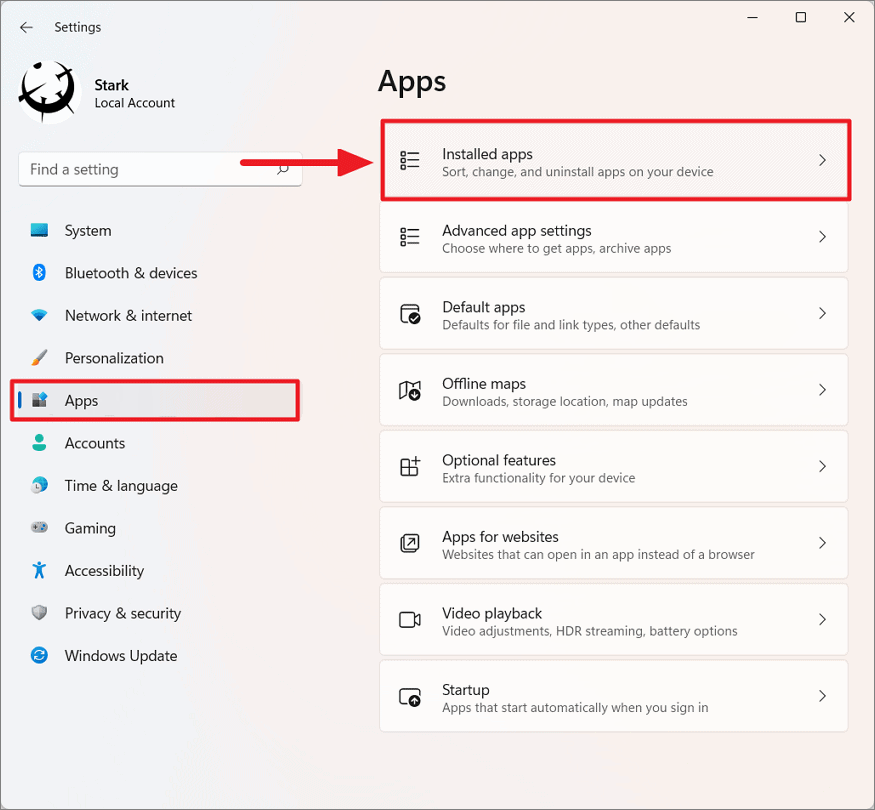
Checking Apps Disk Usage
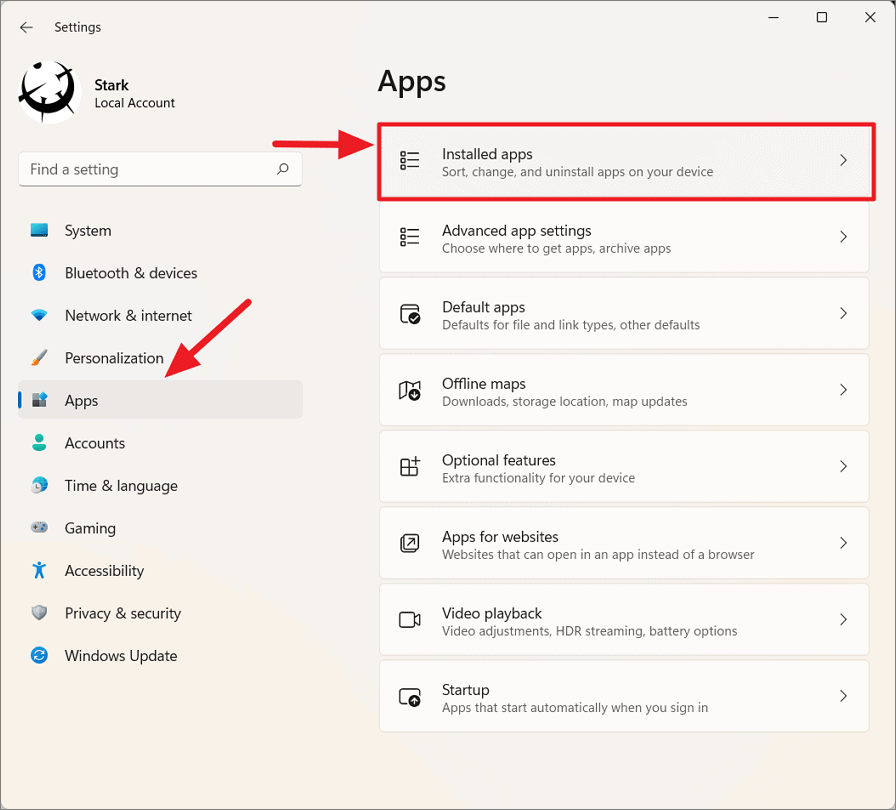
This section lists all installed applications along with their size. You can sort them by size to identify large apps that may no longer be needed.
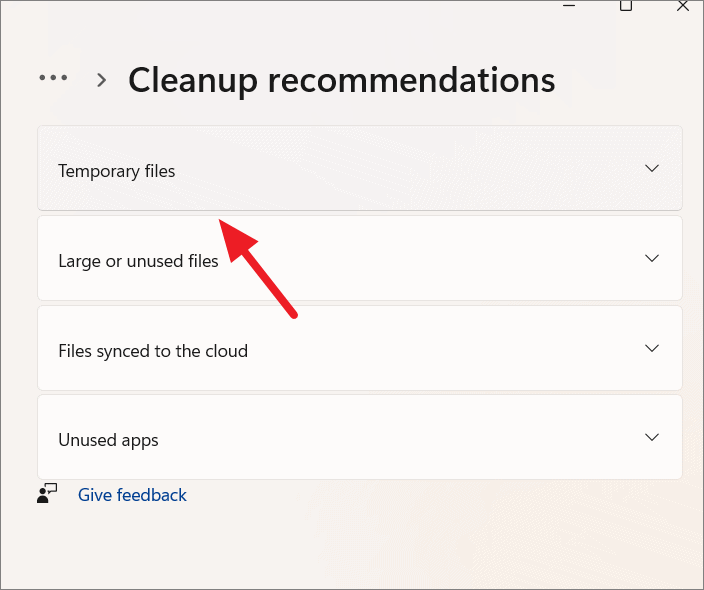
Freeing Up Disk Space on Windows 11
When your storage is nearing capacity, it’s crucial to clean up unnecessary files and applications. Here are the most effective methods to free up disk space on your Windows 11 PC.
Removing Old Windows Installations
After upgrading to Windows 11, your system retains a copy of the previous Windows version in a folder named Windows.old. This folder can consume significant space, typically between 12 to 20 GB.
Previous Windows installation(s), then click on Clean up. This action can free up a considerable amount of space.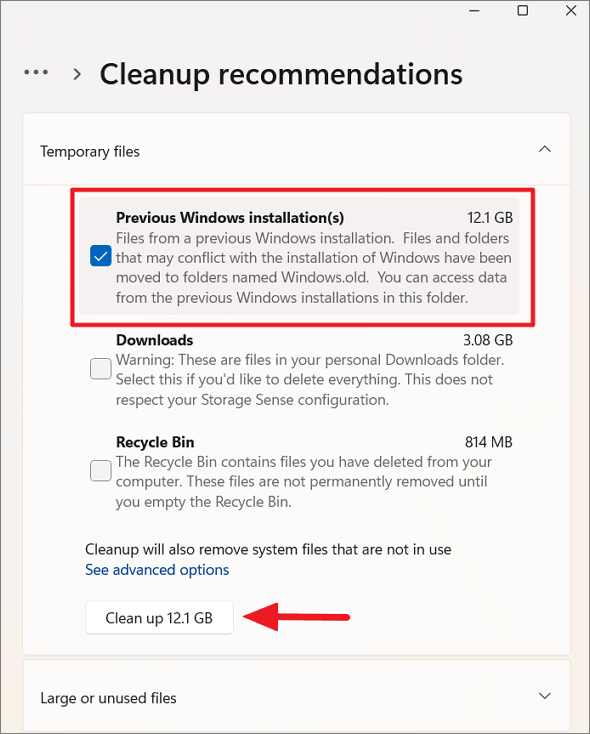
Wait for the process to complete. Deleting the old installation will prevent you from rolling back to the previous Windows version.
Using Storage Sense to Automate Cleanup
Windows 11 includes a feature called Storage Sense that can automatically free up space by deleting unnecessary files.
Automatic User content cleanup to allow Storage Sense to run automatically based on your preferences.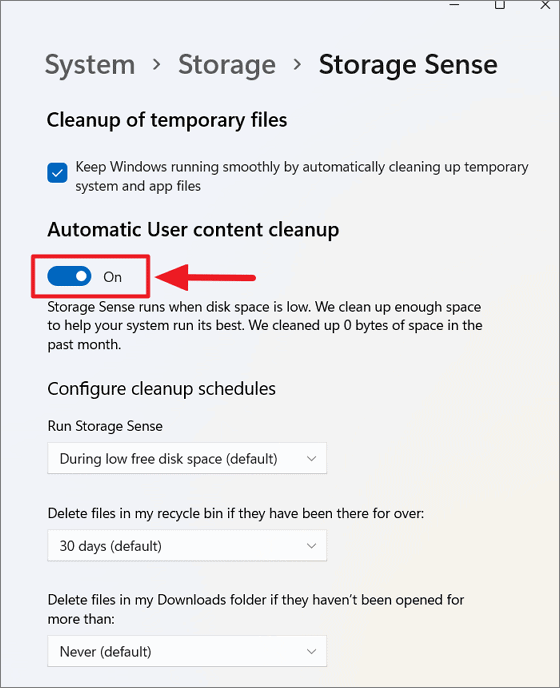
Configure cleanup schedules, set how often you want Storage Sense to run and specify when to delete files from the Recycle Bin and Downloads folder.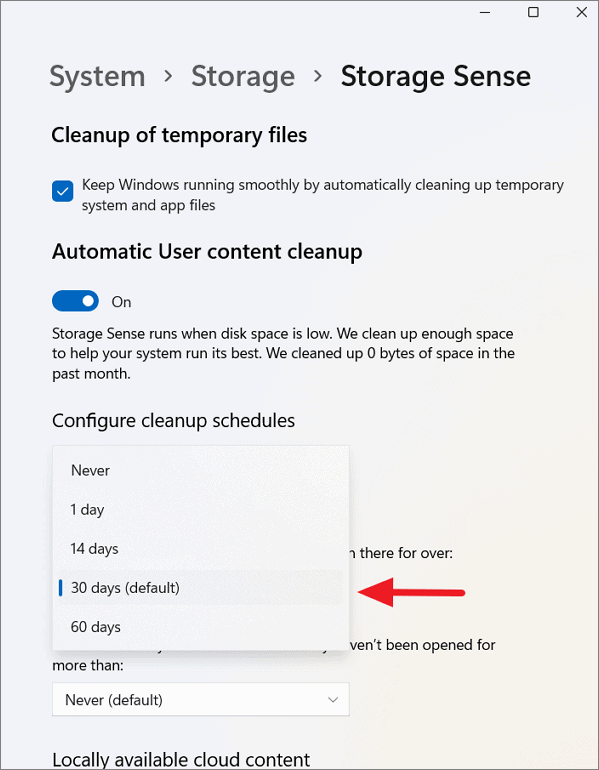
By customizing these settings, you can automate the cleanup process and maintain adequate free space on your drives.
Uninstalling Unused Applications
Removing applications that you no longer use can free up significant space.
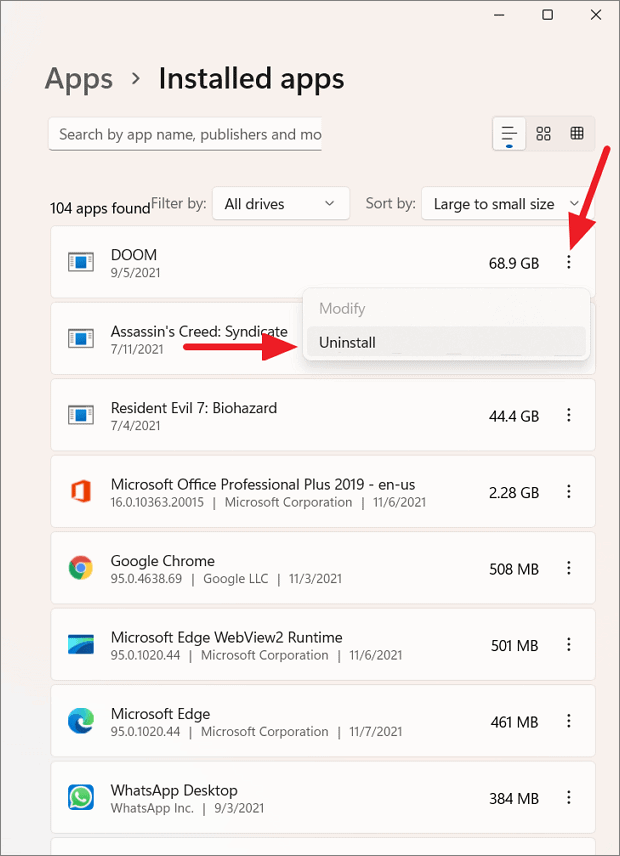
Confirm the uninstallation to remove the app from your system.
Using Disk Cleanup
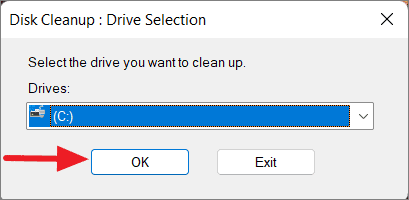
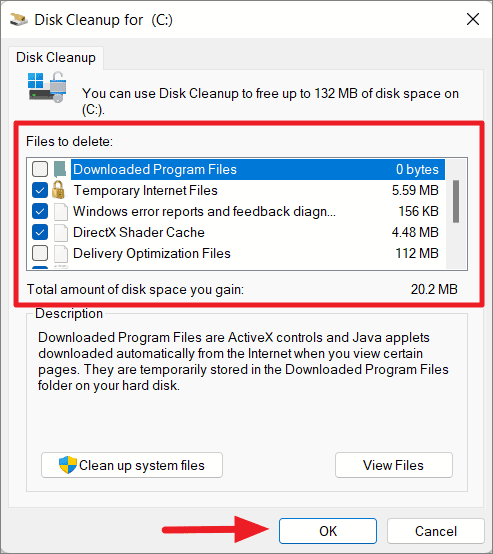
Clean up system files to include system-related files like Windows Update cleanup and previous Windows installations.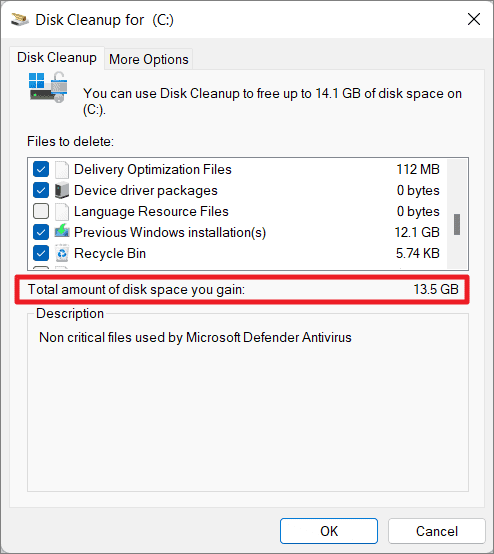
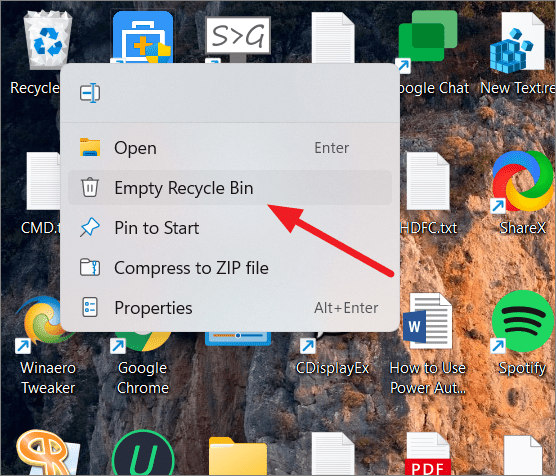
Emptying the Recycle Bin
Files in the Recycle Bin continue to consume disk space until they are permanently deleted.
Managing Downloads Folder
The Downloads folder often accumulates files that are no longer needed.
Clearing Temporary Files
Temporary files can consume a significant amount of space over time.
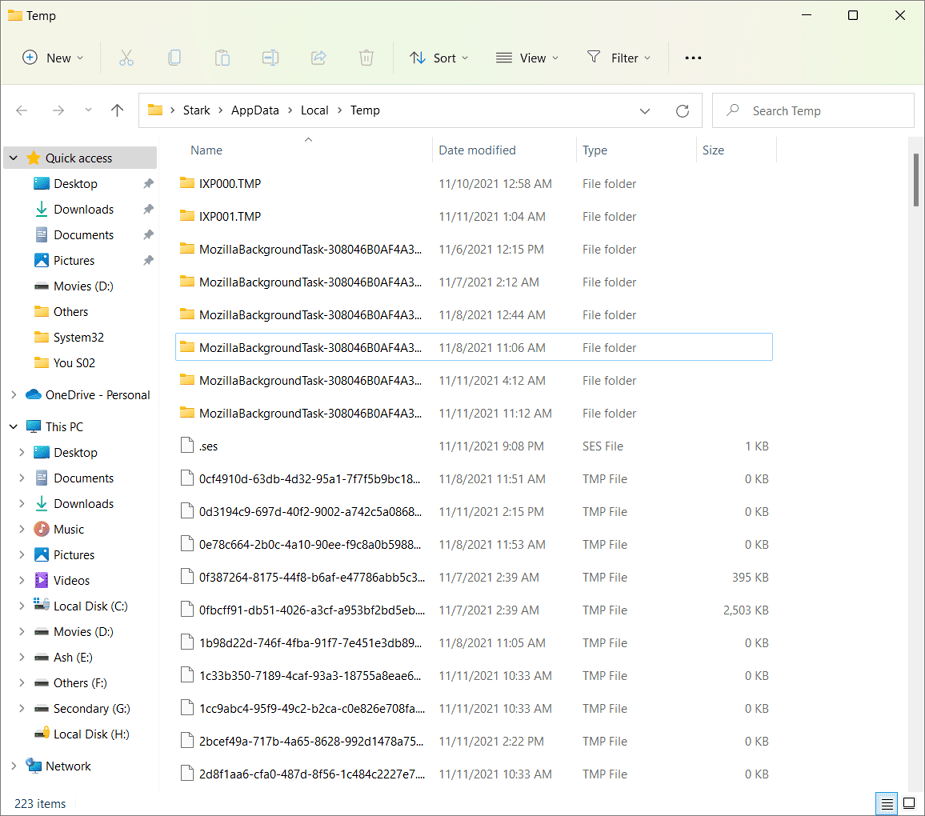
You may receive prompts about files in use; select Skip to bypass those files.
Disabling Hibernation
The hibernation feature reserves disk space equivalent to your system’s RAM. Disabling it can free up significant space.
Command Prompt as an administrator by searching for cmd, right-clicking on it, and selecting Run as administrator.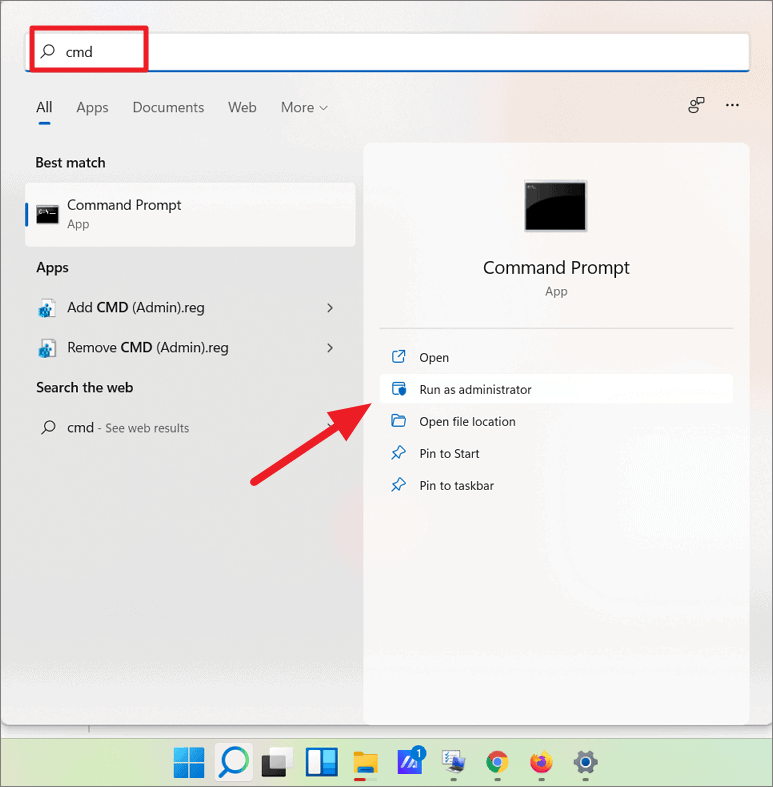
powercfg.exe /hibernate off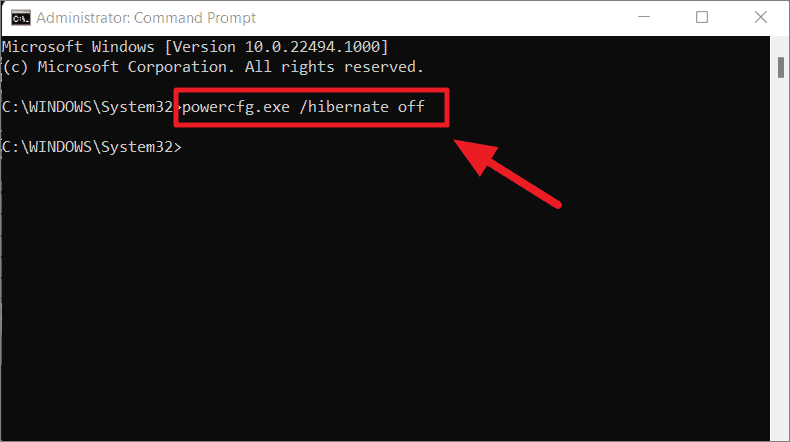
This command disables hibernation and deletes the hiberfil.sys file, freeing up space.
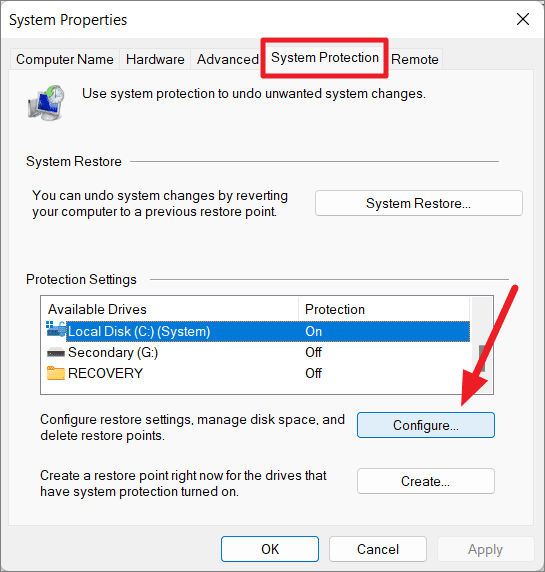
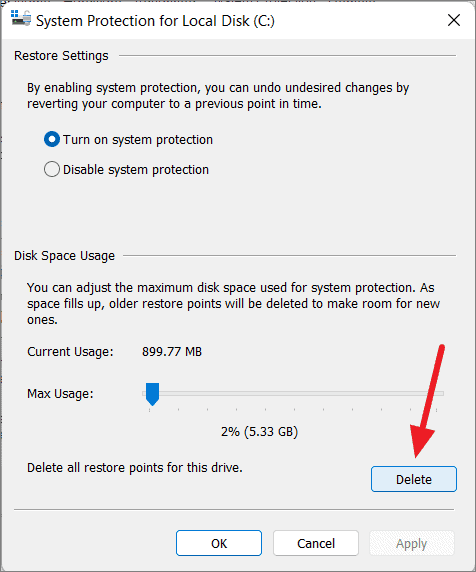
Deleting System Restore Points
System Restore points can use considerable storage space.
Clearing Browser Cache
Browser caches and temporary files can consume space over time.
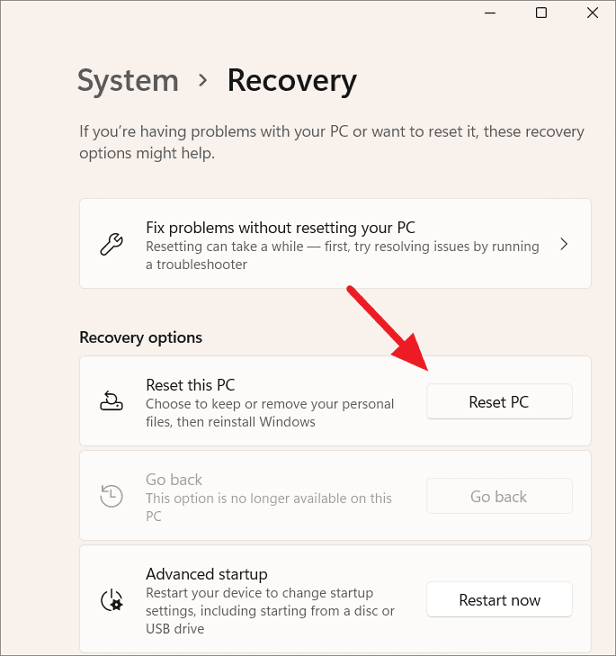
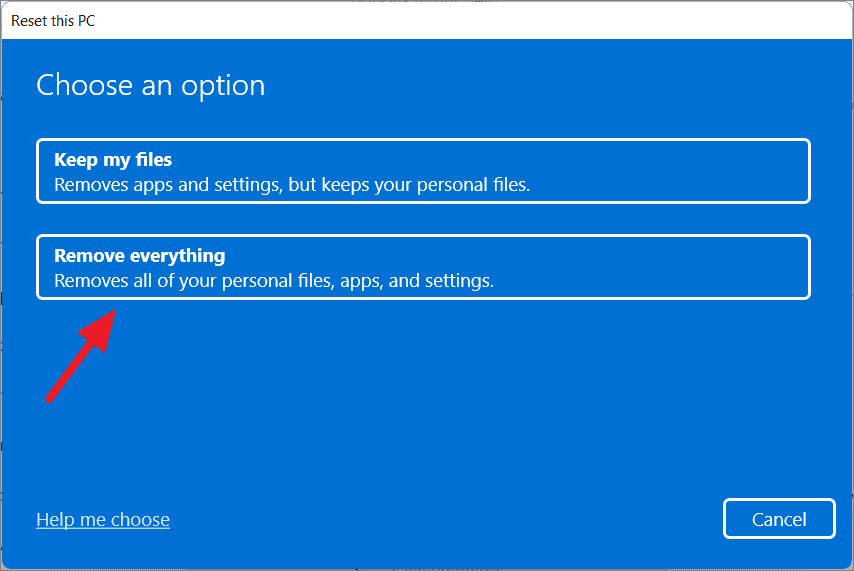
Resetting Windows 11
If you’re still low on space after trying the above methods, resetting Windows 11 can help. This action reinstalls the operating system, removing all applications and personal files.
By implementing these methods, you can effectively manage and free up disk space on your Windows 11 PC. Regular maintenance ensures optimal performance and prolongs the lifespan of your system.