Frequent pop-ups and sounds from Windows 11 notifications can interrupt concentration and clutter your workflow. Windows 11 provides a robust system for managing notifications, allowing you to decide which alerts appear, when they interrupt, and how they notify you. By fine-tuning these settings, you can reduce unnecessary interruptions, keep essential alerts visible, and maintain privacy on shared devices. Below are detailed instructions to customize notification behavior in Windows 11 using detailed options available in the system settings and app-specific controls.
Global Notification Controls
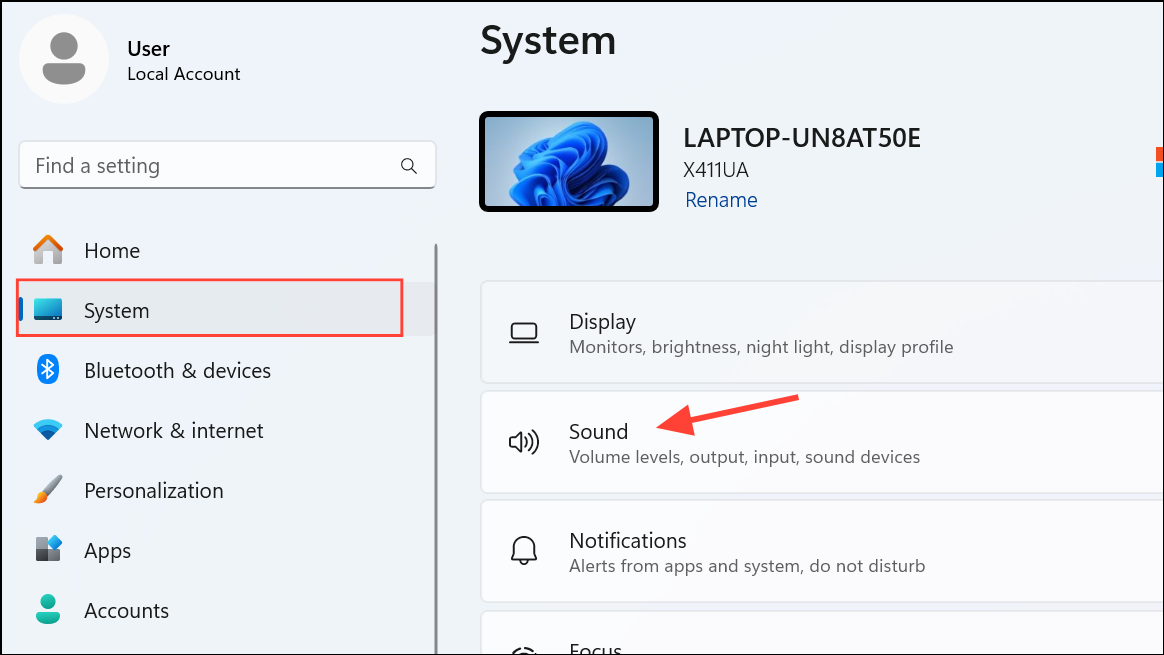
Settings, or by pressing Windows + I on your keyboard. This brings up the main configuration hub for your PC.System from the sidebar. Then click Notifications to access all notification-related options.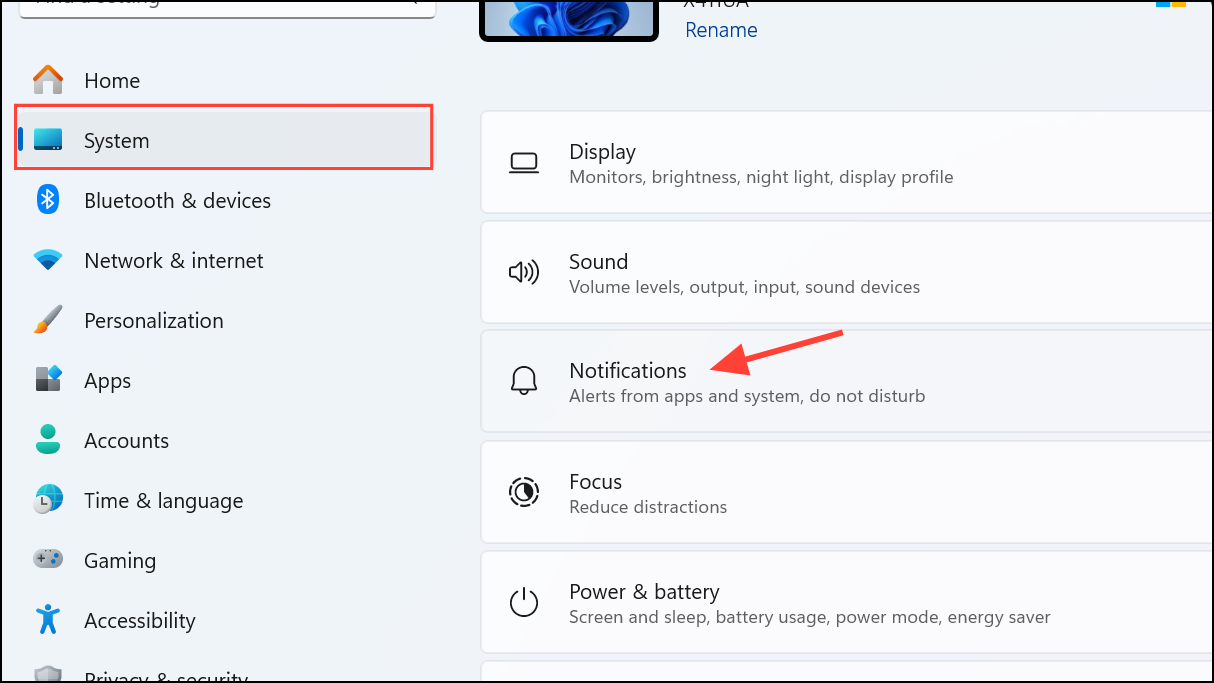
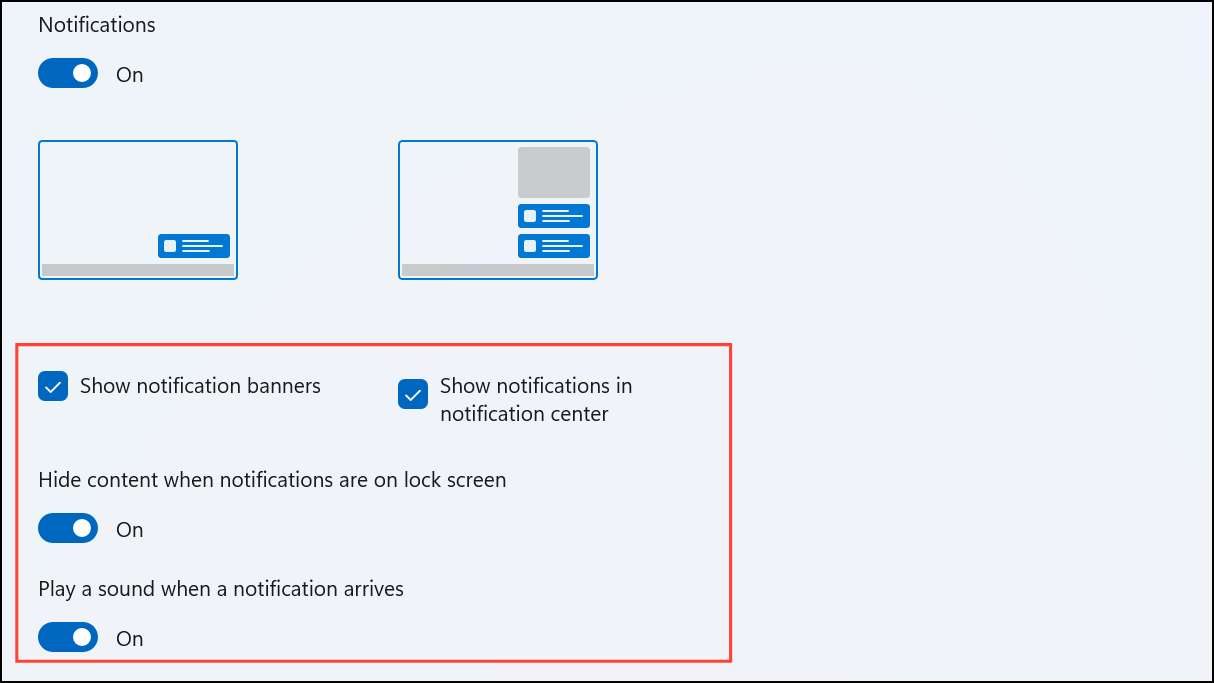
Notifications. Turning this off silences all notifications system-wide, including those from apps and Windows features. If you want to keep notifications on but with more control, leave this enabled and continue to the following steps.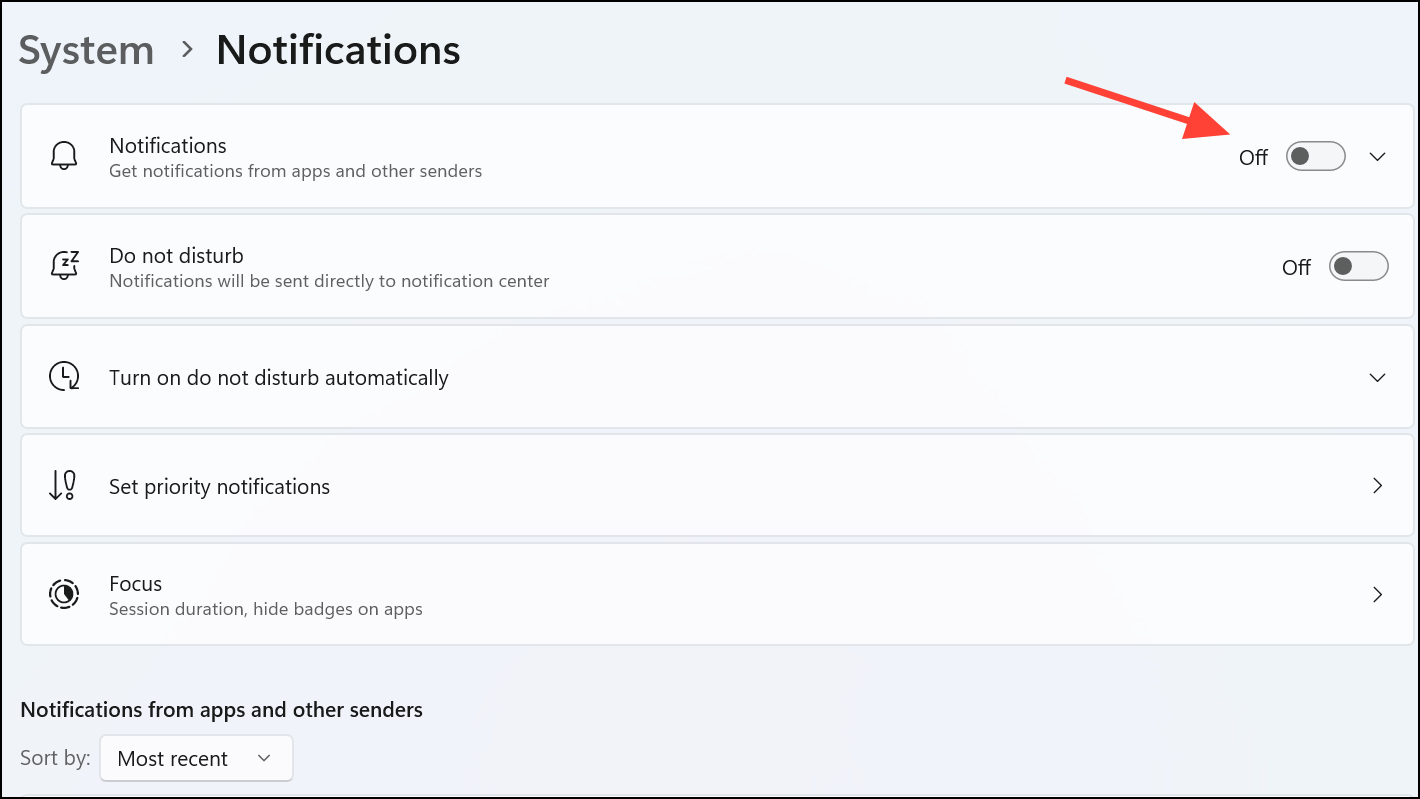
Show notification bell icon to display a bell in the system tray when new notifications arrive. This makes it easier to spot pending alerts without opening the notification center.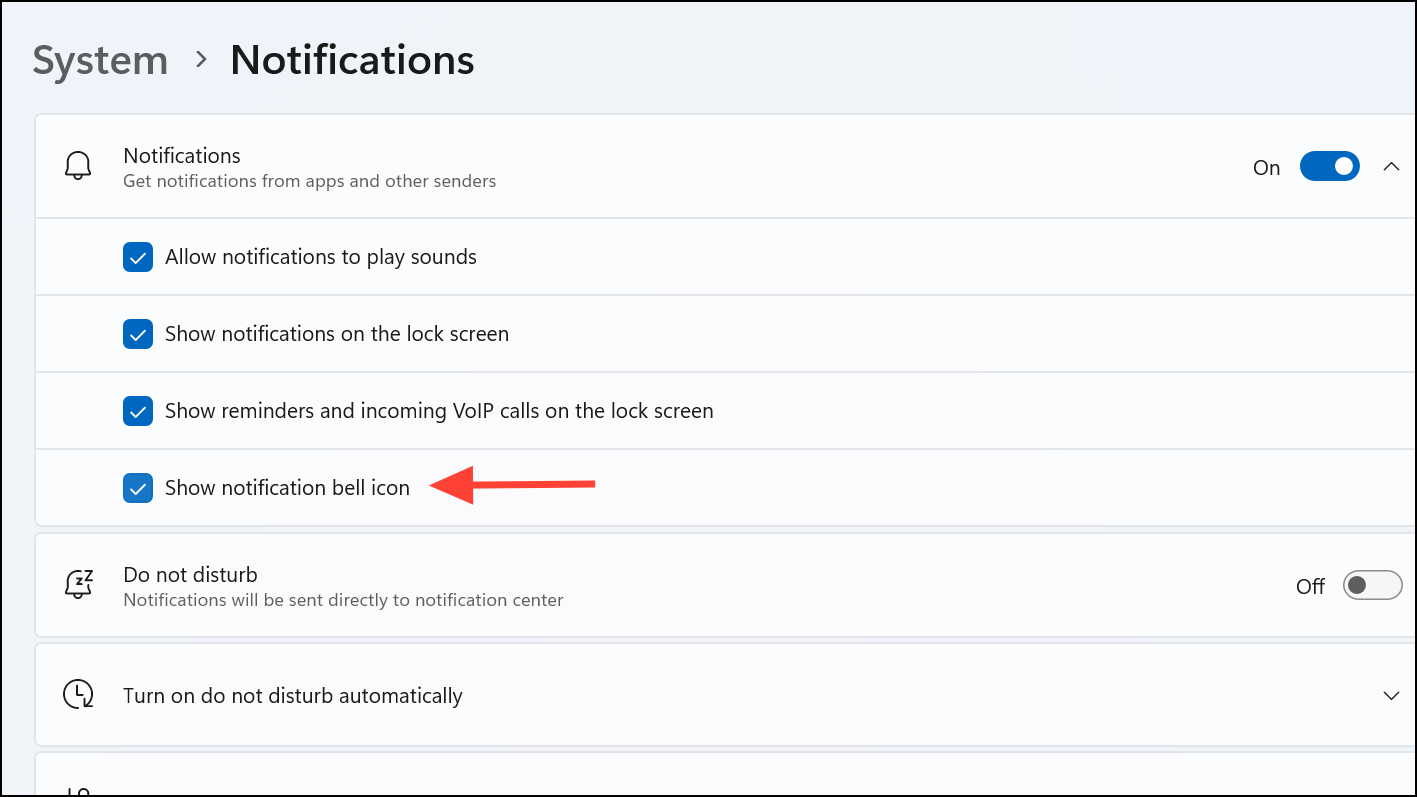
Show notifications on the lock screen. This prevents notification content from appearing when your device is locked, ensuring sensitive information isn’t visible to others.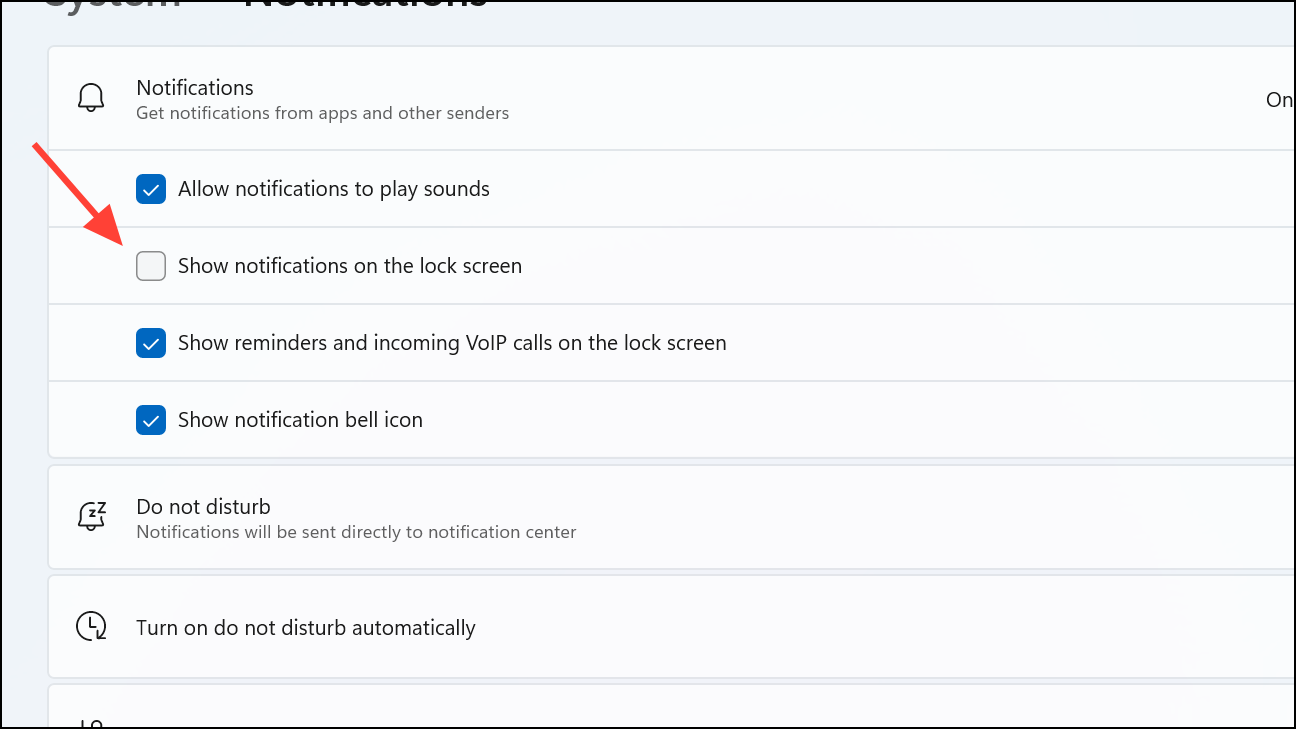
Do Not Disturb and Automatic Rules
Do not disturb toggle. Activating this option silences all notifications until you manually turn it off, ideal for meetings or focused work periods. You can also access this quickly from the notification panel by clicking the bell icon in the lower-right corner.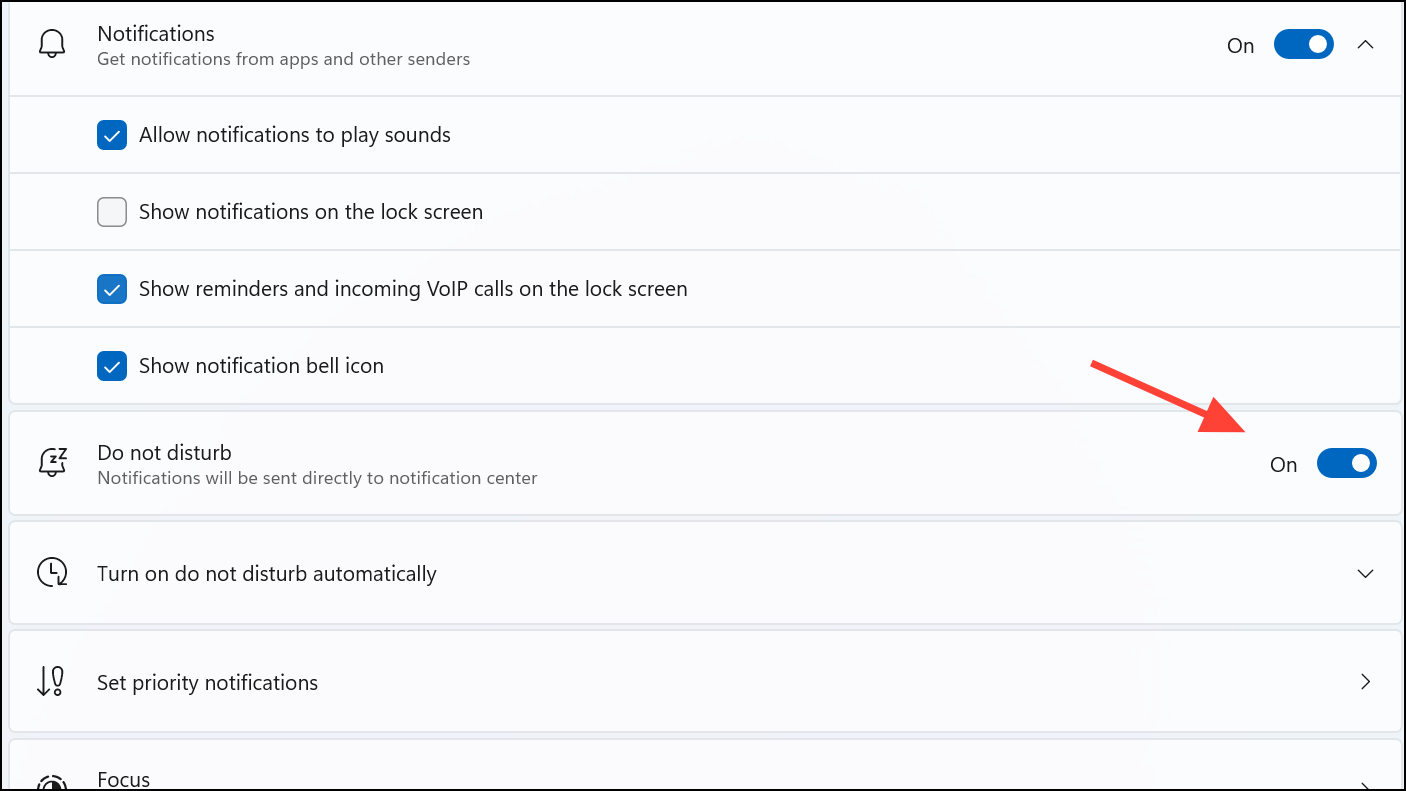
Turn on do not disturb automatically. Here, configure rules to activate Do Not Disturb during specific times, while gaming, or when duplicating your display. For example, you might set Do Not Disturb to engage every weekday from 9 a.m. to 5 p.m. to avoid interruptions during work hours.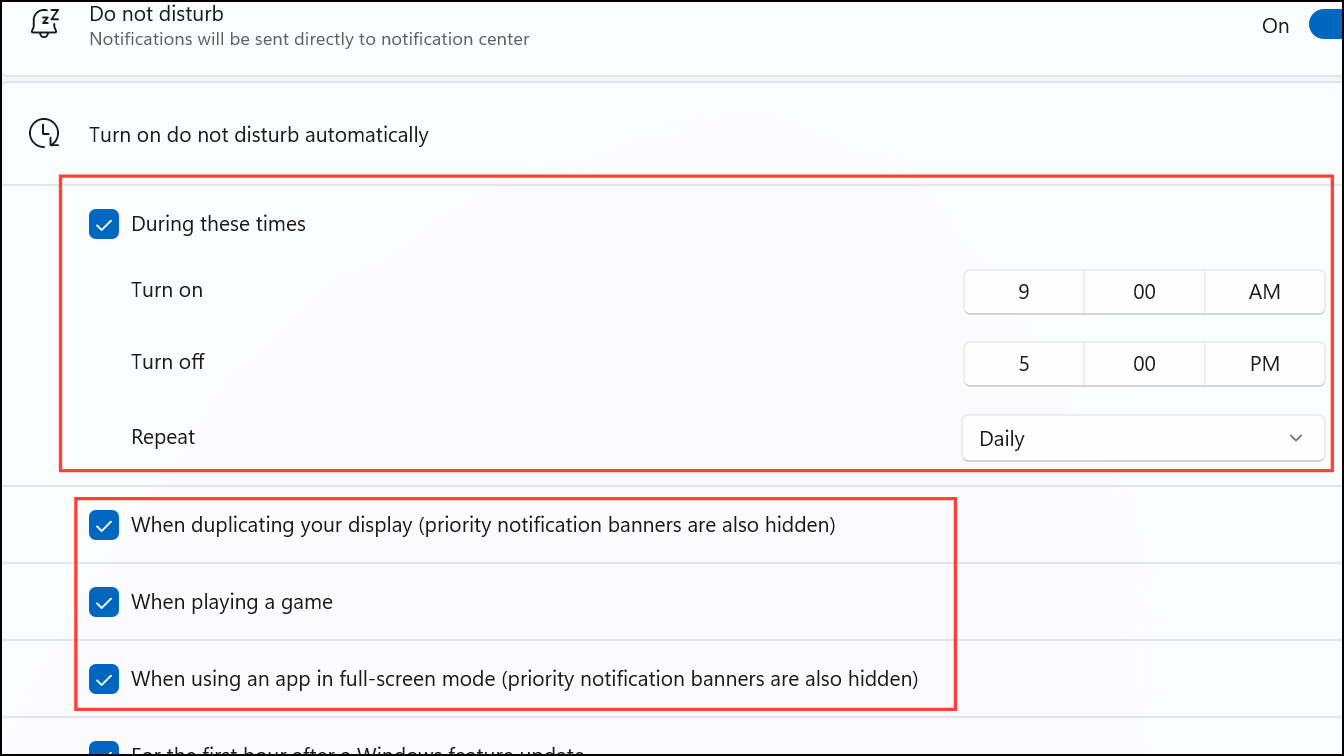
Set priority notifications to specify which apps or contacts can bypass Do Not Disturb. By default, reminders and alarms are allowed, but you can add or remove apps so that only critical alerts break through during quiet times. This is especially useful for ensuring you never miss urgent messages from select sources.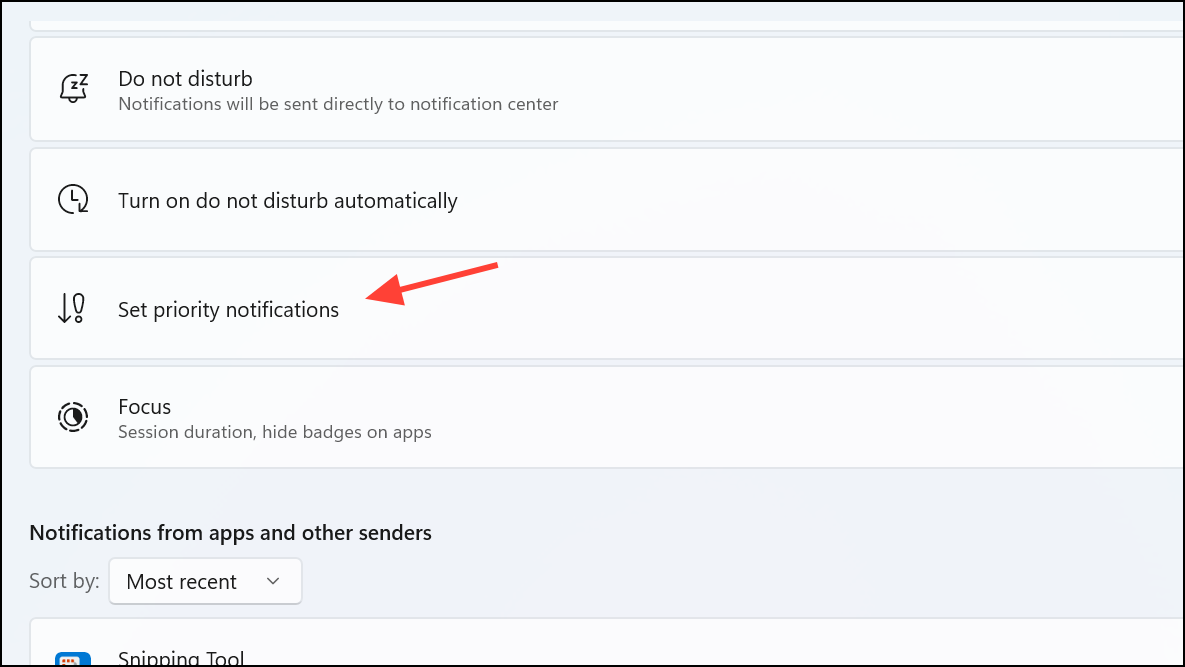
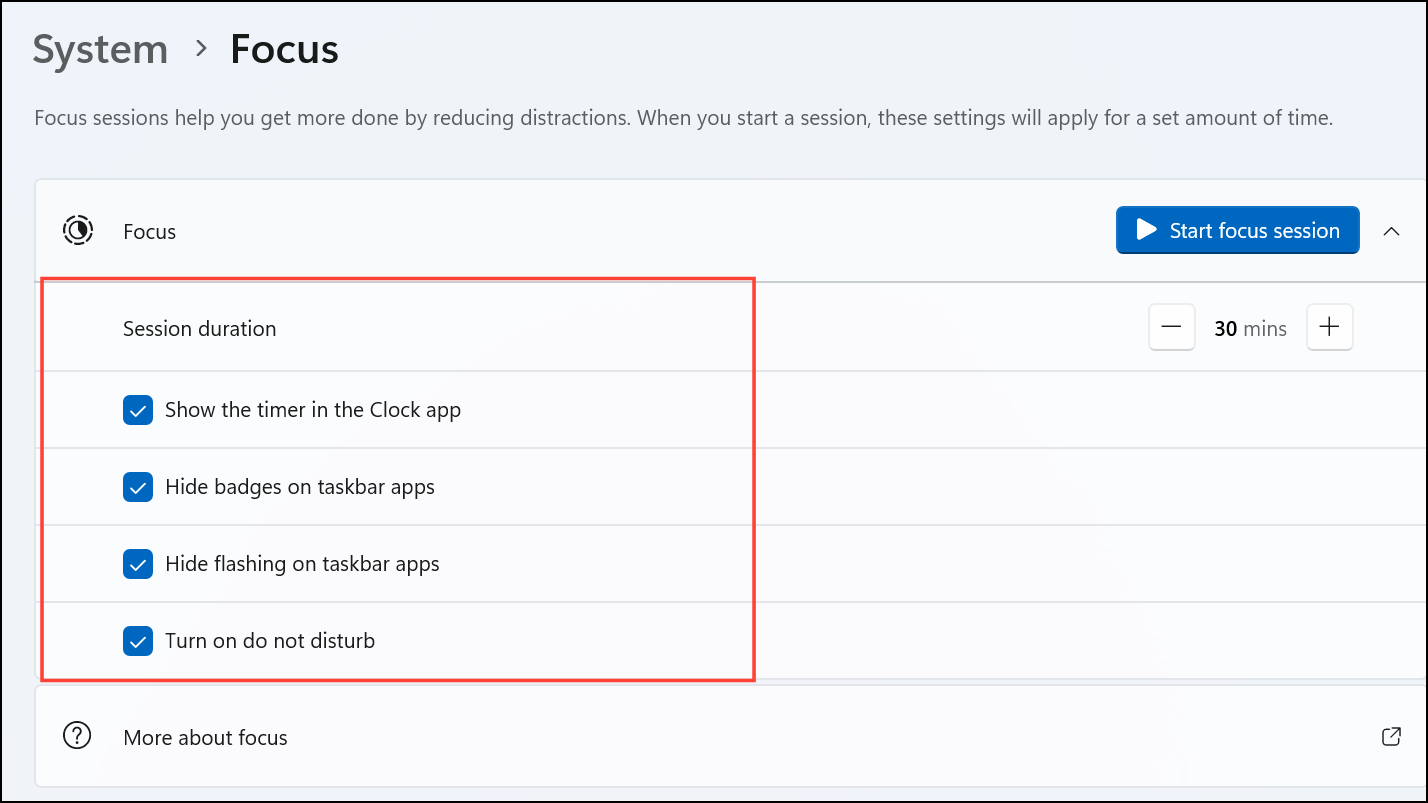
Focus Sessions for Distraction-Free Work
Focus to set up dedicated focus periods. Focus sessions temporarily suppress notifications, badge icons, and taskbar flashes, helping you stay in the zone for a set duration.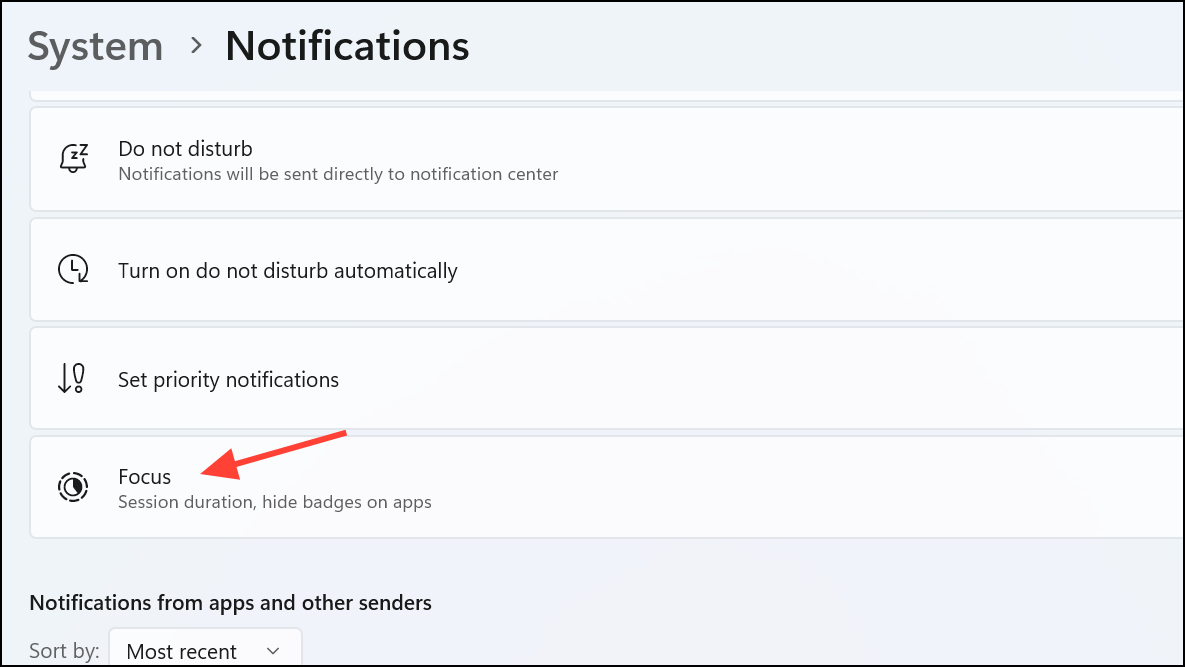
Focus. The Clock app will open to manage your session, optionally providing a timer and integration with productivity tools like Spotify.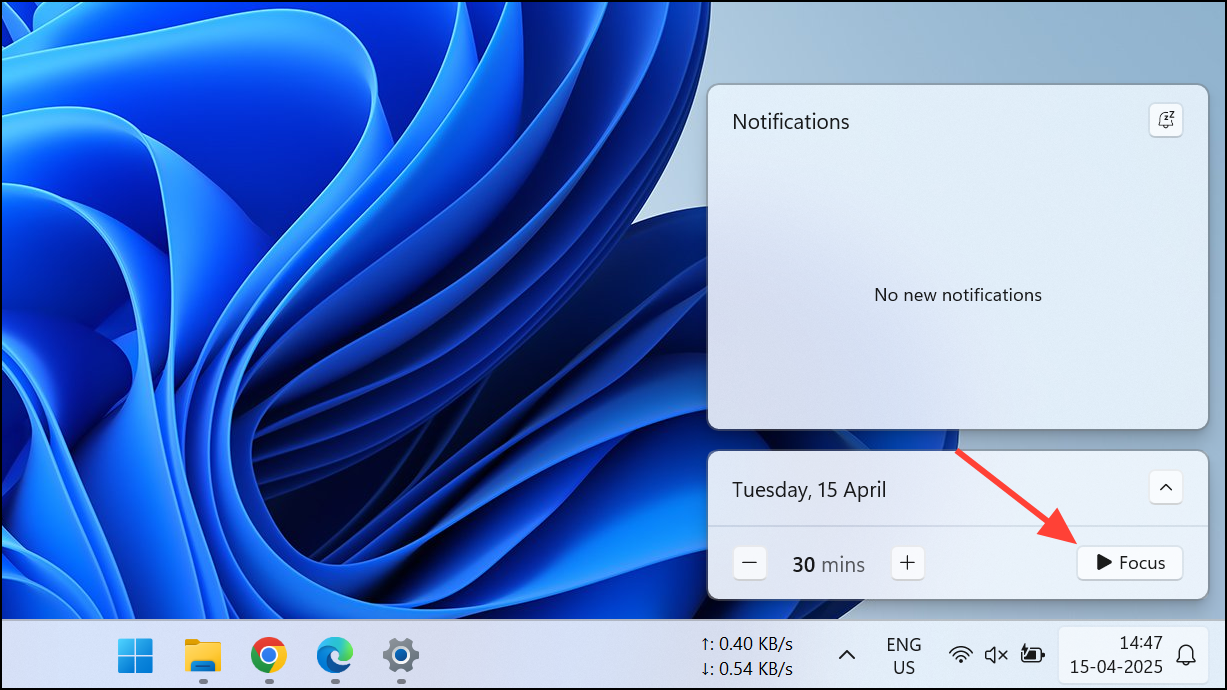
App-Specific Notification Settings
- Disable
Show notification bannersto prevent pop-up messages on your screen. - Turn off
Play a soundfor that app to silence its alerts while leaving visual notifications active. - Set the
Priority(Top, High, Normal) for how prominently the app’s notifications appear in the notification center. - Hide notification content on the lock screen for that app by enabling
Hide content when notifications are on the lock screen.
Adjusting Notification Sounds
More sound settings under the Advanced section. This opens the classic Sound control panel.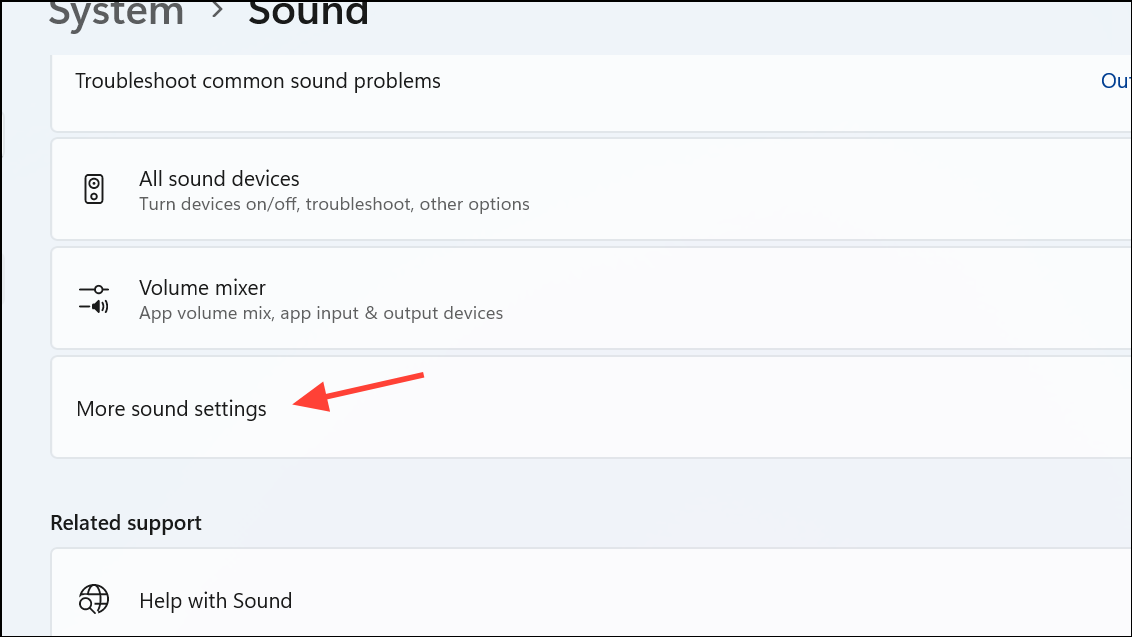
Sounds tab, select Notification under Program Events. Choose a new sound from the dropdown or click Browse to pick a custom .wav file.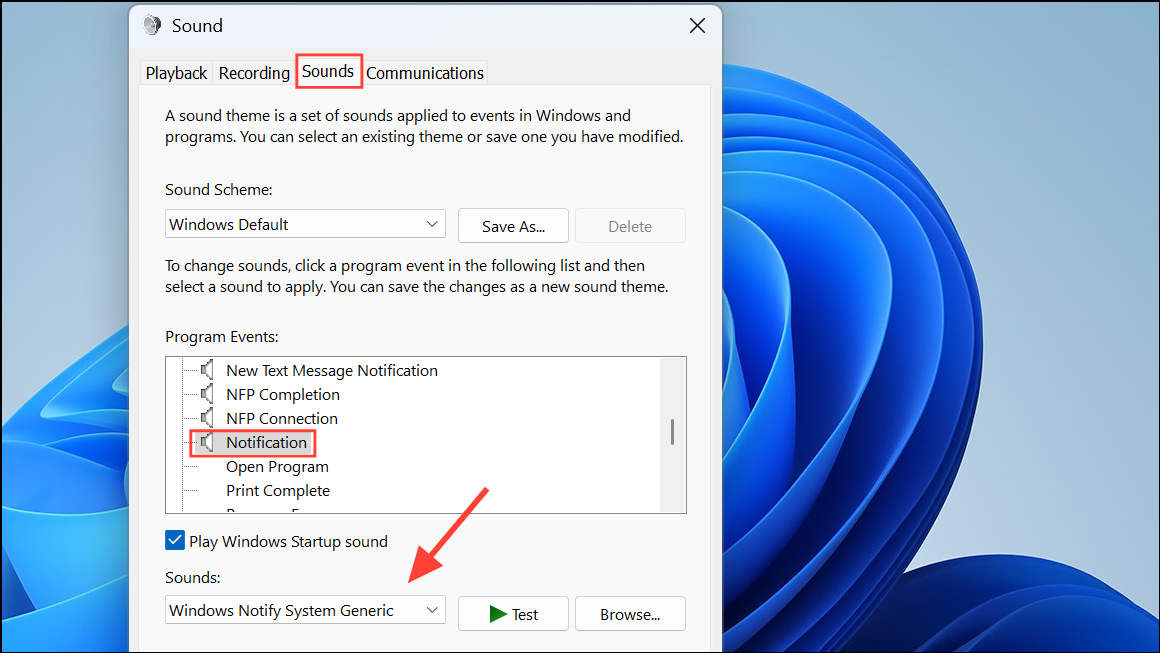
Test to hear the new sound, then confirm with Apply and OK. This change helps you instantly recognize important alerts or opt for a more subdued tone.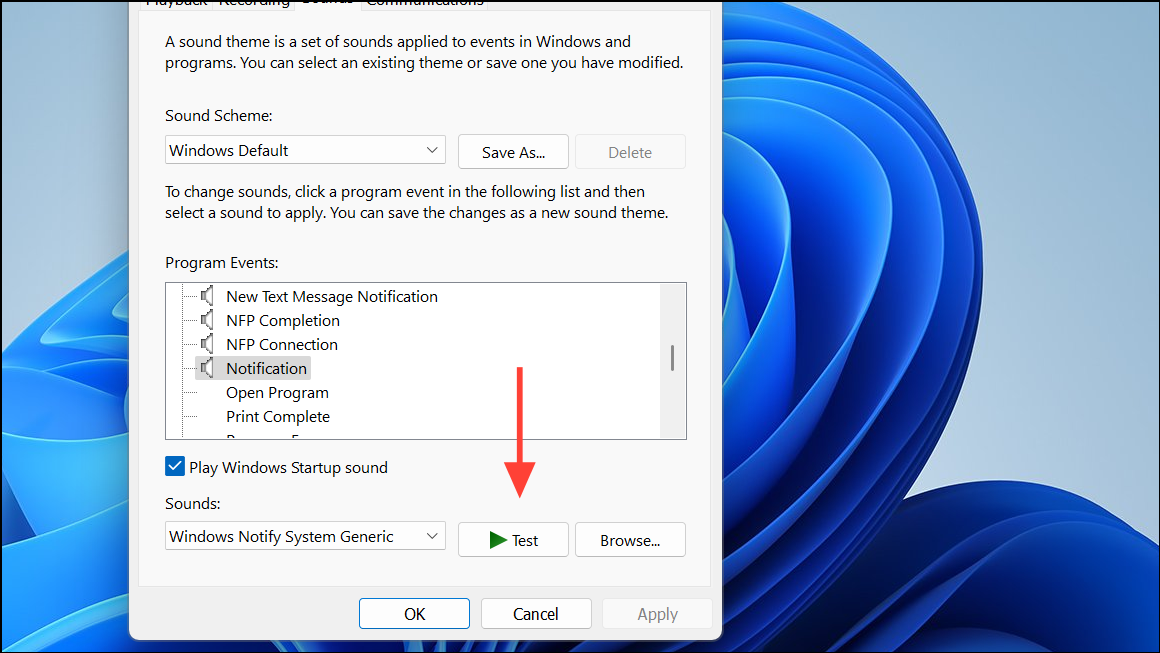
Managing Notification Duration and Visual Effects
Settings and go to Accessibility > Visual effects.
Dismiss notifications after this amount of time dropdown. Select your preferred duration—options range from a few seconds to several minutes. This is useful if you need longer to read or act on alerts.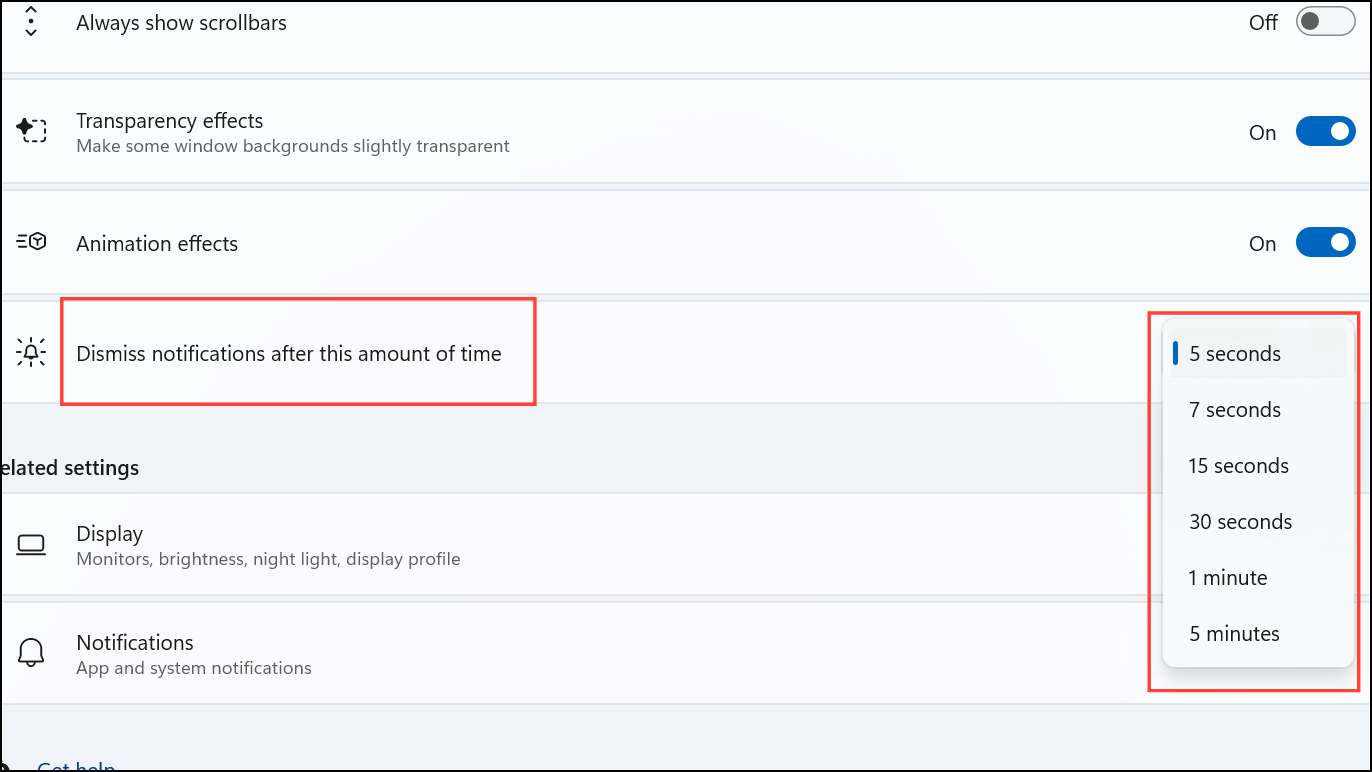
Third-Party Notification Managers
For those needing even more control, third-party tools such as Toastify or Notification Manager offer advanced features. These apps allow you to set custom themes, manage pop-up timing, and filter notifications based on custom rules. Consider these solutions if built-in settings don’t provide the granularity you require.
Refining notification preferences in Windows 11 cuts down on interruptions, keeps essential information front and center, and protects your privacy. Regularly reviewing these settings ensures your alerts remain useful as your workflow and priorities evolve.


