
Bloatware, or unwanted pre-installed software, often burdens Windows 11 systems by consuming valuable resources and storage space. This can lead to reduced performance and a cluttered user experience. Removing these unnecessary applications, known as debloating, can enhance your PC’s speed and efficiency. This guide provides detailed methods to effectively debloat your Windows 11 computer and optimize its performance.
Debloat Windows 11 using third-party tools
One of the most efficient ways to remove bloatware is by using third-party debloating tools. These tools automate the process of identifying and removing unnecessary apps and services from your system.
Using ThisIsWin11 to debloat Windows 11
ThisIsWin11 is a free optimization tool that allows you to customize and streamline your Windows 11 installation. It provides a user-friendly interface to tweak settings, remove unwanted applications, and enhance system performance.
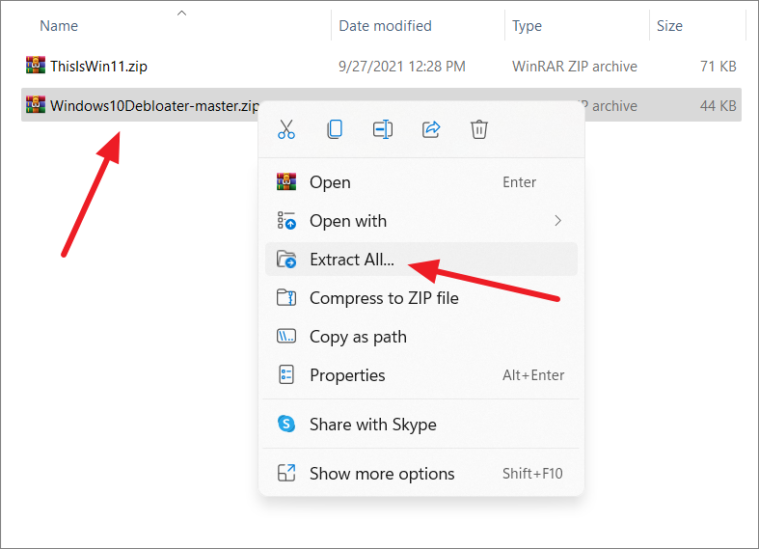
Code button and select Download ZIP to save the file to your computer.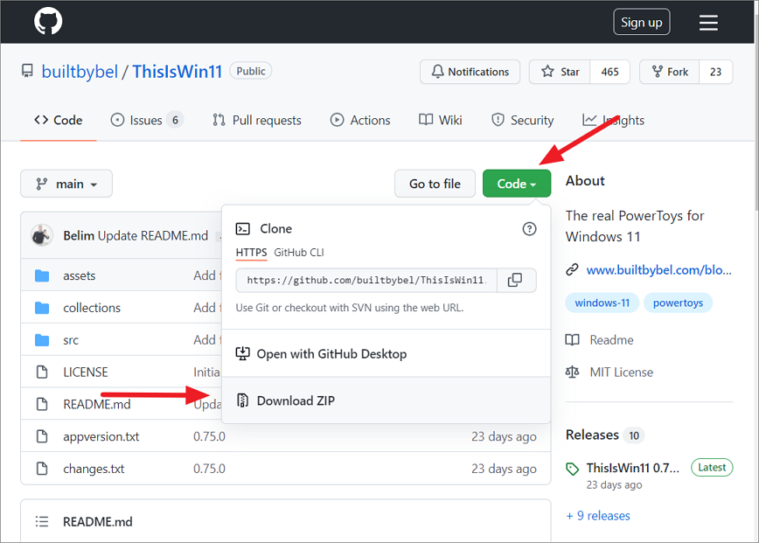
Extract All, and select the destination folder.
ThisIsWin11.exe. If prompted by User Account Control, click Yes to allow the app to make changes.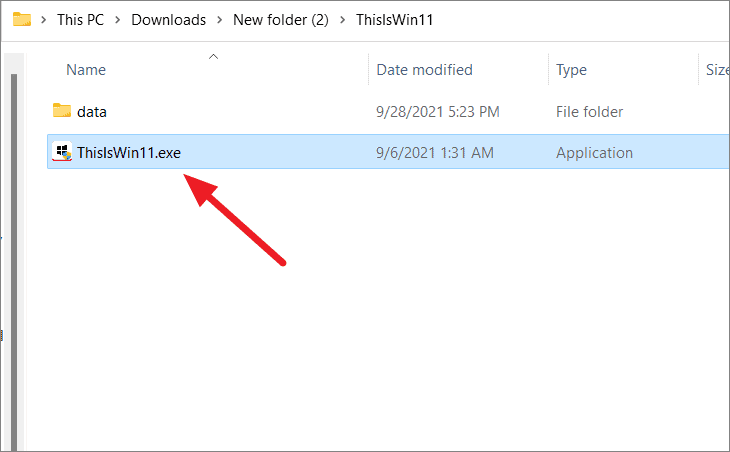

Apps section. Here, you’ll see a list of installed apps. Select the apps you wish to remove by highlighting them and clicking the Add selected >> button to move them to the Recycle Bin pane.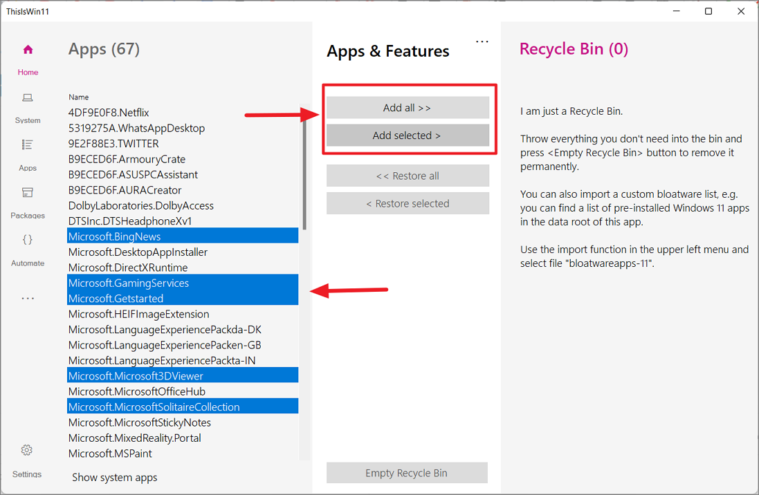
<< Restore selected. Once you’re ready, click on Empty Recycle Bin to uninstall the selected apps.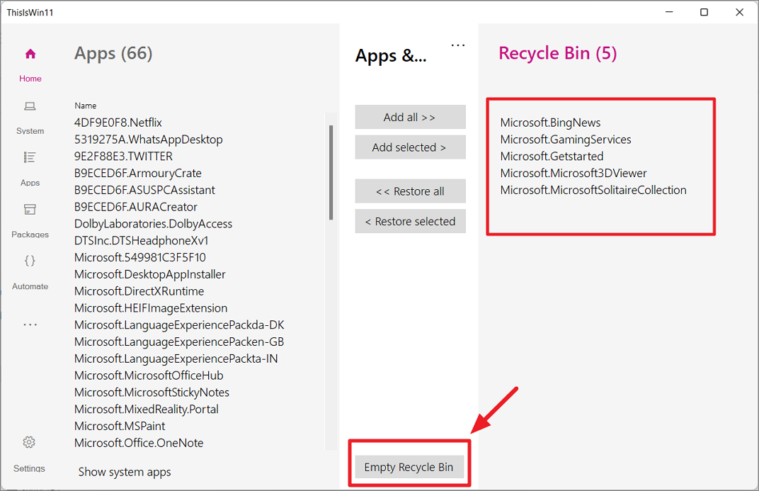
Yes. The tool will proceed to remove the selected bloatware from your system.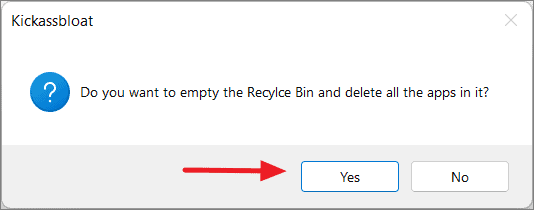
ThisIsWin11 also offers options to tweak system settings, disable unnecessary services, and install useful applications to further optimize your PC.
Automating debloat process with ThisIsWin11
The tool provides automation features to streamline the debloating process.
Automate tab within ThisIsWin11. Here, you can select from predefined tasks such as removing provisioned apps, disabling telemetry, and cleaning up the system.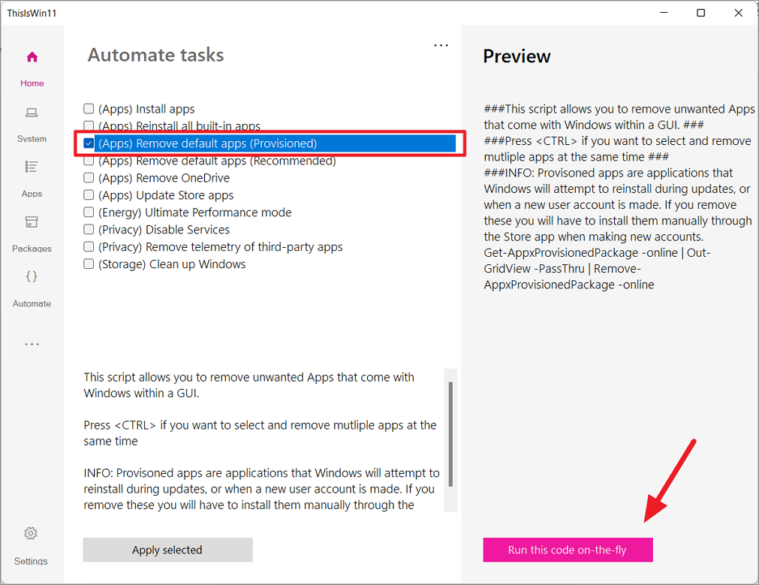
(Apps) Remove default apps (Provisioned) to permanently remove built-in apps from the system image.Run this code on-the-fly to execute the selected tasks. A window may appear allowing you to select specific apps or services to remove or disable.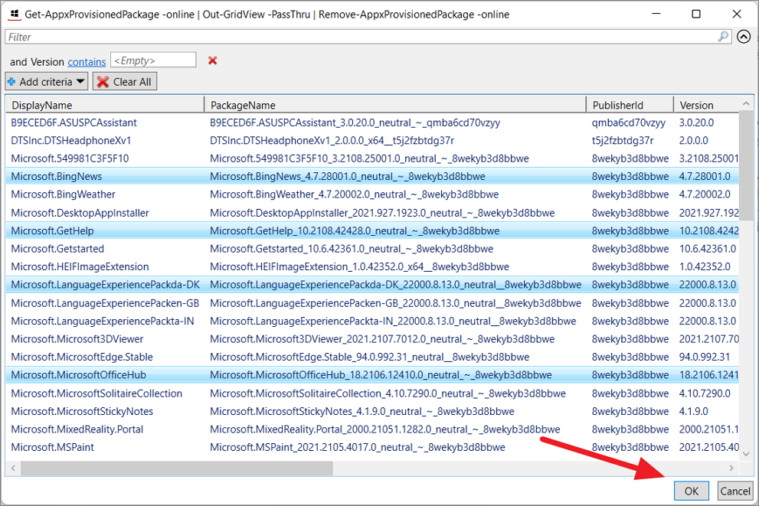
Using Windows10Debloater script to remove bloatware
Another effective tool is the Windows10Debloater script by Sycnex, which also works with Windows 11 to remove unwanted applications and services.
Code button and select Download ZIP.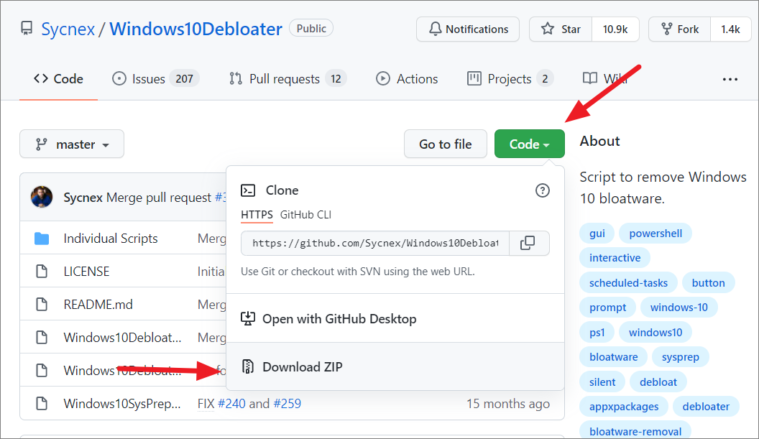
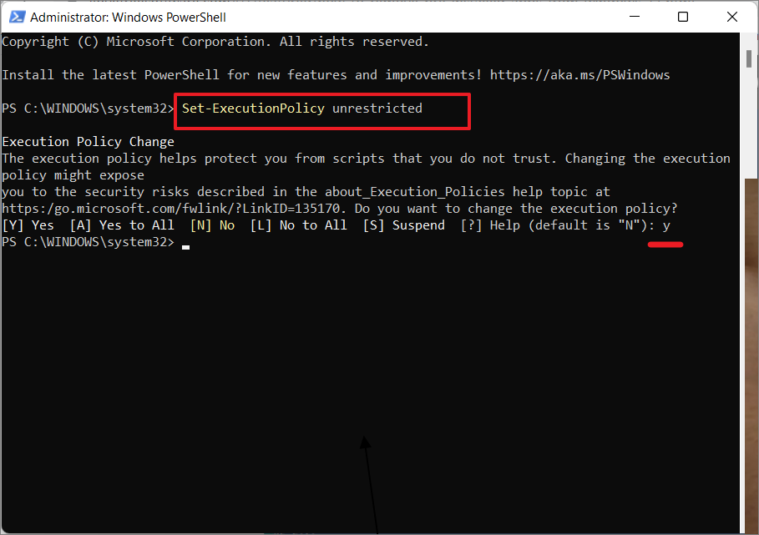
PowerShell in the Start menu, right-click it, and select Run as administrator.Set-ExecutionPolicy UnrestrictedType Y to confirm.
Windows10DebloaterGUI.ps1 file. Select Run with PowerShell to execute the script.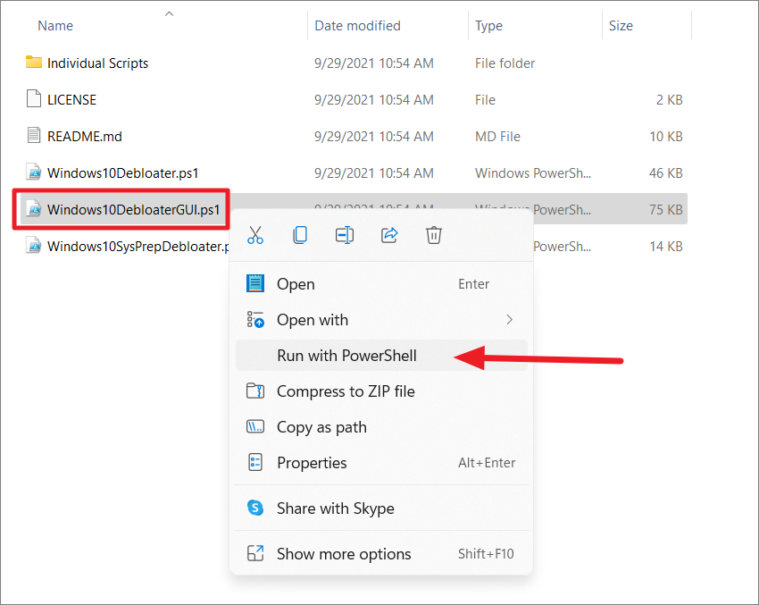
Enter to execute.
REMOVE ALL BLOATWARE or customize the apps to be removed.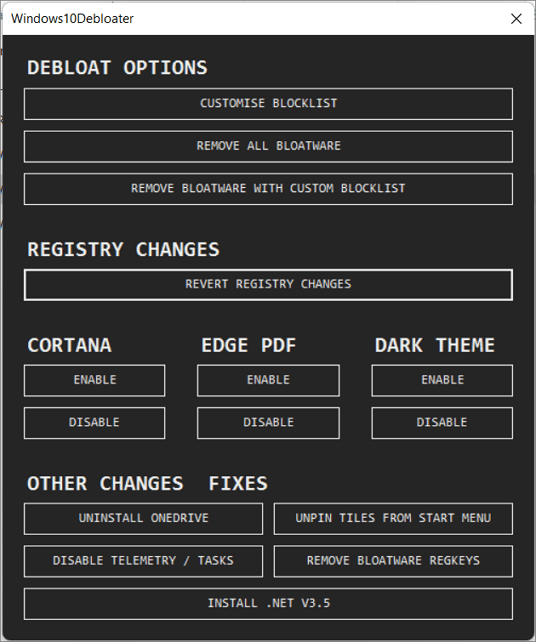
CUSTOMISE BLOCKLIST. In the window that appears, check or uncheck the apps you wish to remove or keep. Once done, click on SAVE CUSTOM LIST if desired, then close the window.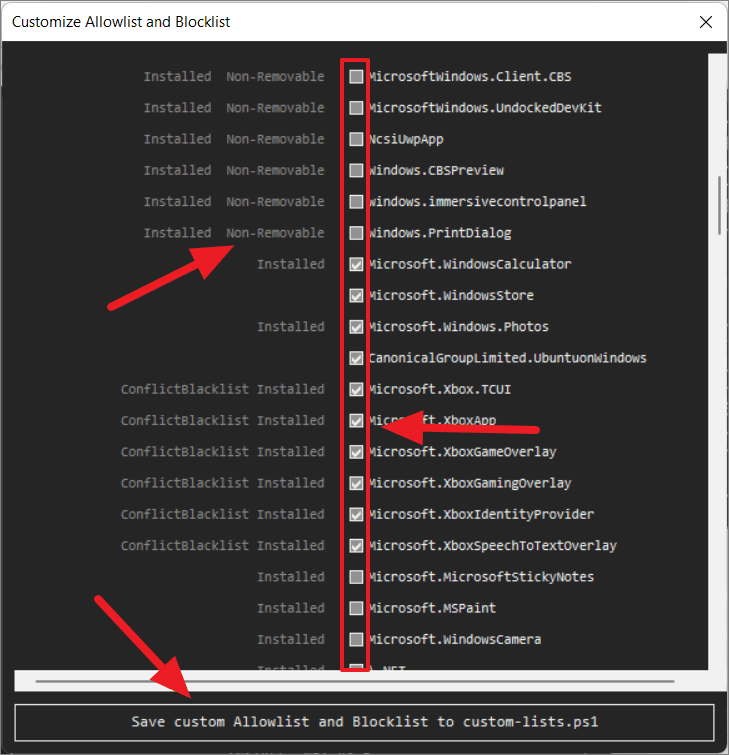
REMOVE BLOATWARE WITH CUSTOM BLOCKLIST to remove the selected apps. The script will execute and remove the bloatware accordingly.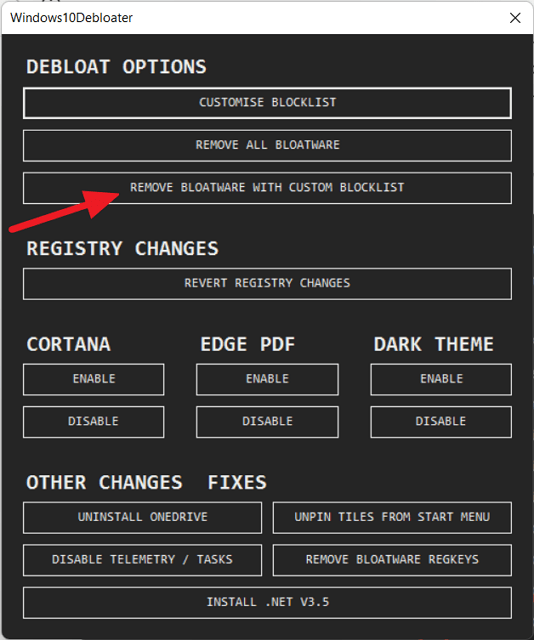
This script also offers options to disable Cortana, OneDrive, and other services that may not be essential to your usage, further optimizing your system.
Remove bloatware using PowerShell commands
If you prefer not to use third-party tools, you can manually remove unwanted apps using PowerShell commands. This method allows you to uninstall apps that are not easily removable via the traditional uninstall process.
Using Remove-AppxPackage command
Get-AppxPackage | Select Name, PackageFullName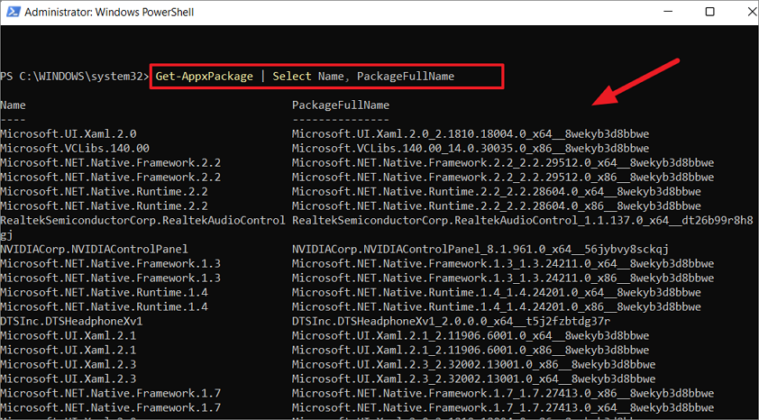
Get-AppxPackage *appname* | Remove-AppxPackageFor example, to remove the Xbox app:
Get-AppxPackage *Xbox* | Remove-AppxPackage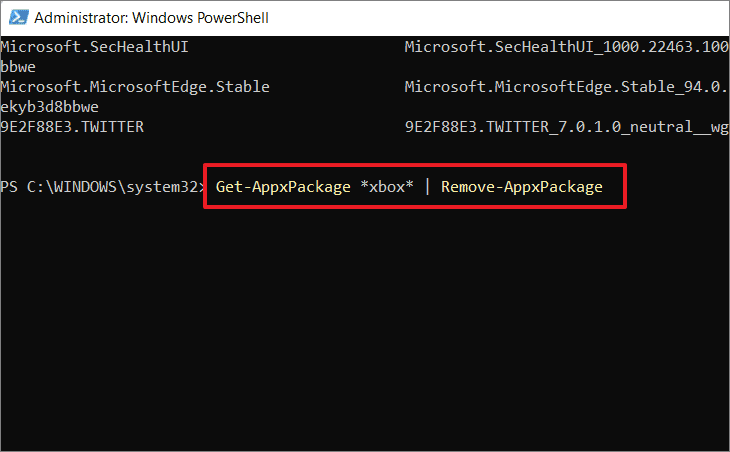
Removing provisioned apps with DISM
To permanently remove bloatware so it doesn’t reappear for new users or after updates, you can use the Deployment Imaging Service and Management (DISM) tool.
DISM /Online /Get-ProvisionedAppxPackages | Select-String PackageName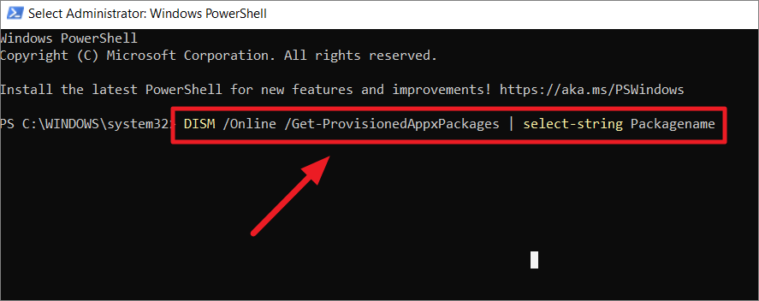
DISM /Online /Remove-ProvisionedAppxPackage /PackageName:PackageName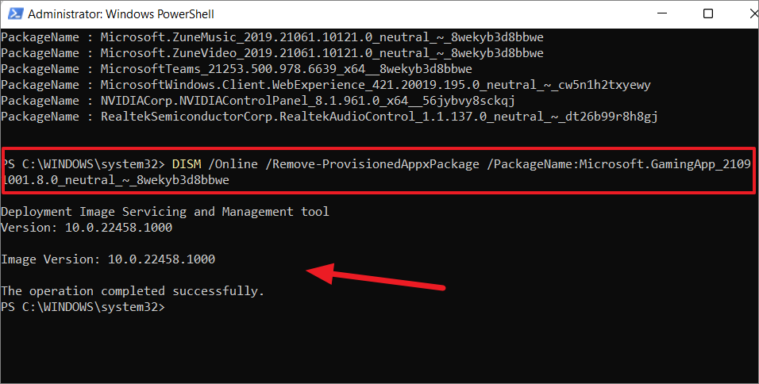
This will permanently remove the app from the system image.
Remove bloatware using traditional uninstall
Some pre-installed apps can be uninstalled using the standard method through the Settings app.
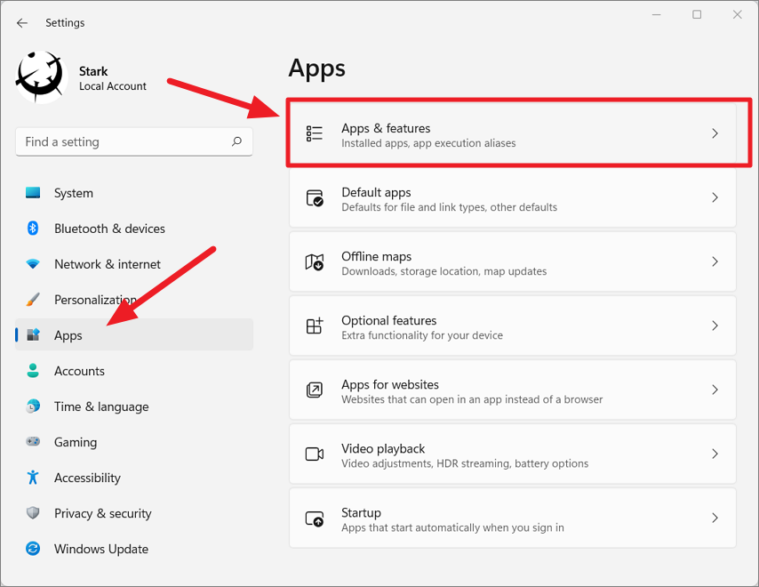
Uninstall.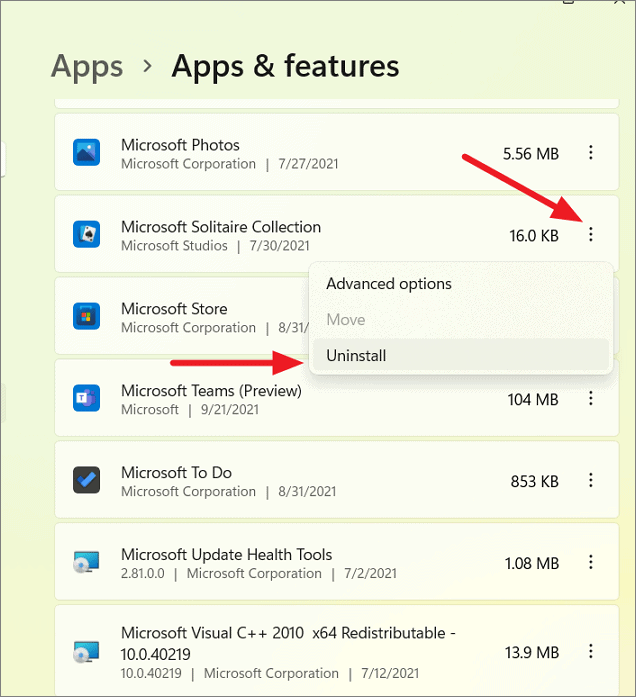
Note that this method may not work for all built-in apps, as some do not provide an uninstall option.
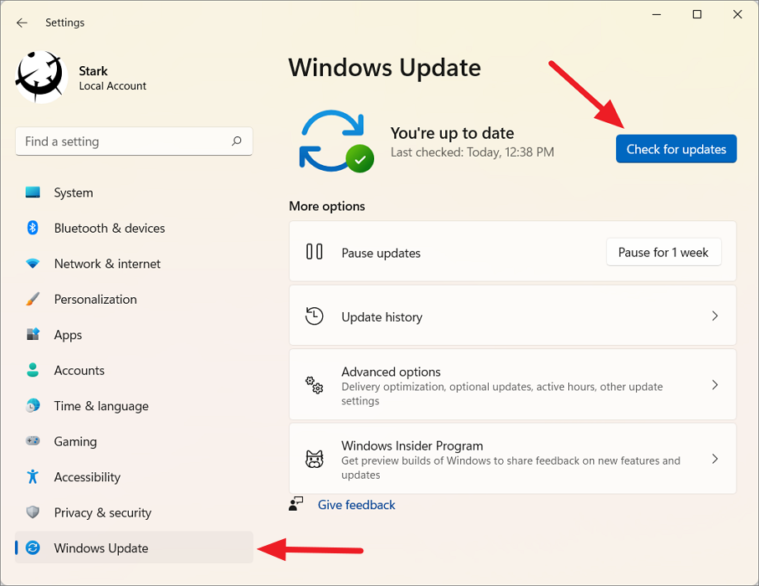
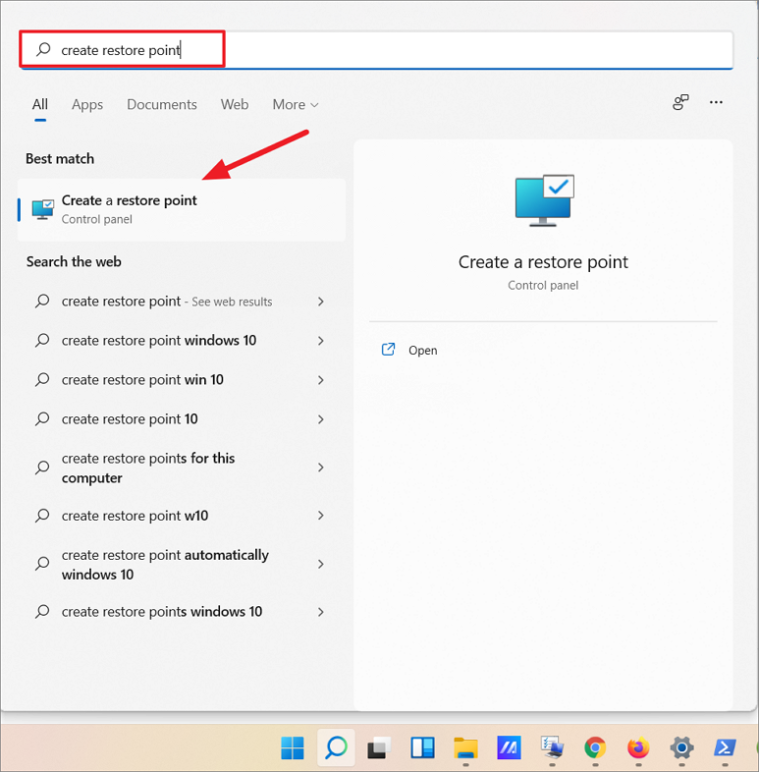
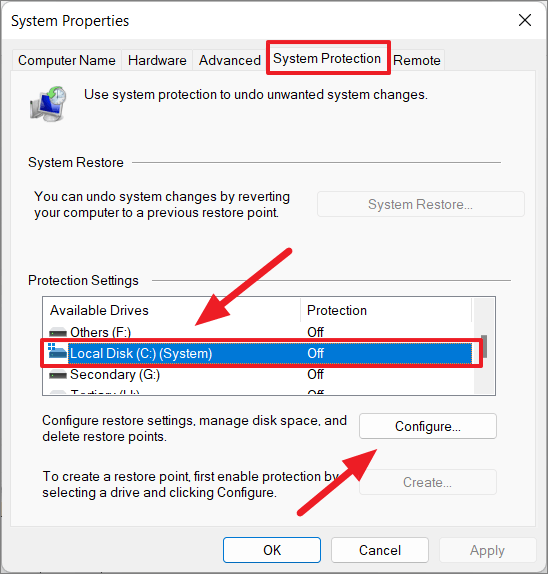
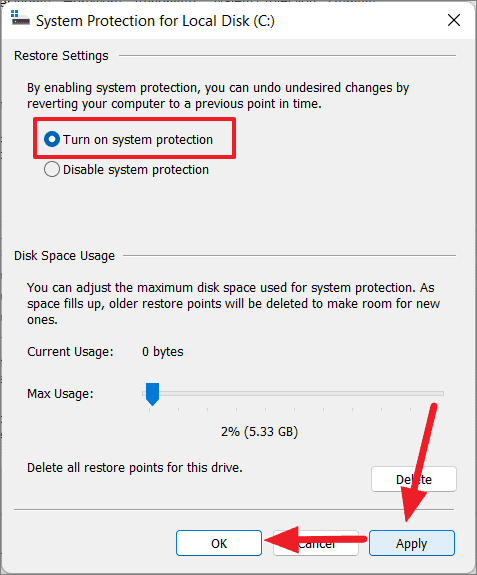
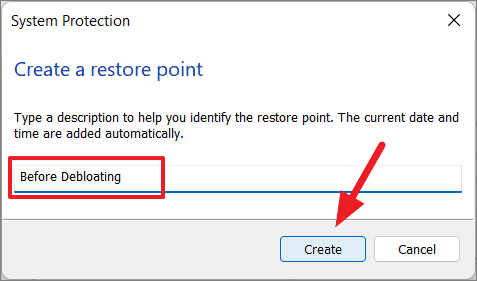
Prepare your system before debloating
Before removing bloatware, it’s advisable to update your system and create a restore point in case you need to revert changes.
Install the latest Windows updates
Create a system restore point
By following these methods, you can effectively remove bloatware from your Windows 11 PC, enhancing its performance and freeing up valuable resources.


