Web browsers on your iPhone automatically keep track of the websites you visit, storing this information as 'History.' This feature allows you to quickly access previously visited sites without retyping full URLs, saving you time and effort.

Despite its convenience, there are times when you might want to erase your browsing history—perhaps to maintain privacy if others use your device. Although iPhones are known for their robust security features, personal browsing data can still be accessed if not properly managed.

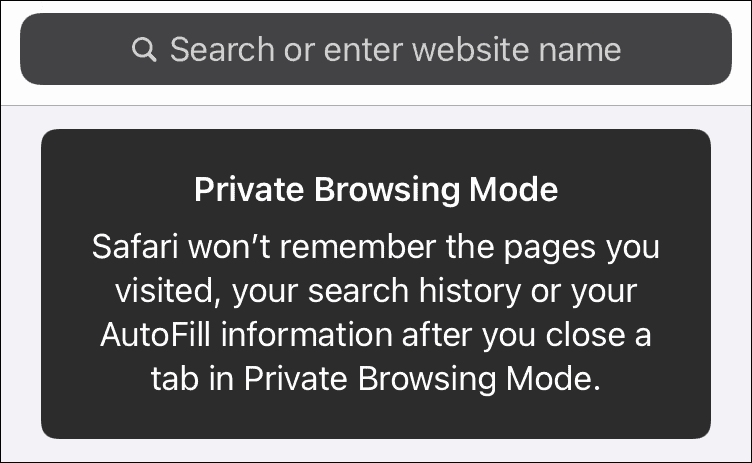
Regularly clearing your browsing history can be time-consuming and impractical. A more efficient solution is to use Private or Incognito mode, which prevents the browser from recording your online activity. Keep in mind, though, that while this mode hides your history from others using your device, your internet service provider may still monitor your visited websites.

The following sections explain how to delete browsing history on your iPhone for Safari, Microsoft Edge, Google Chrome, and Mozilla Firefox. Remember, once the history is cleared, it cannot be restored.

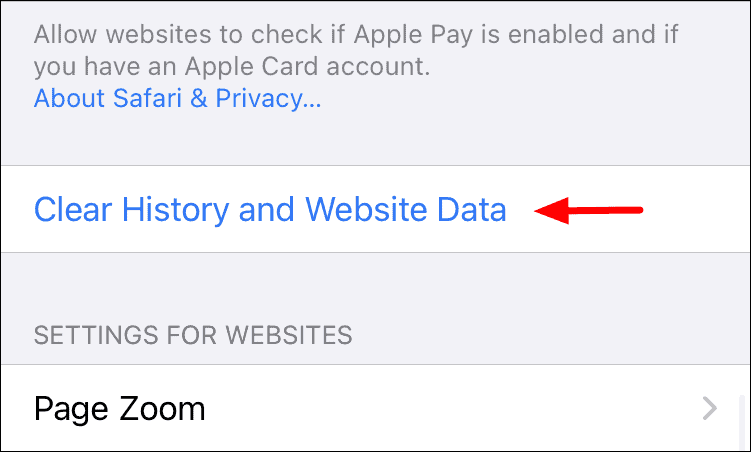
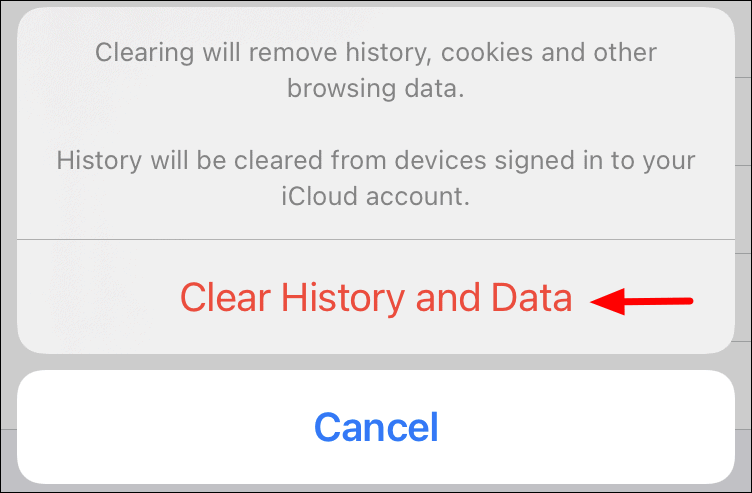
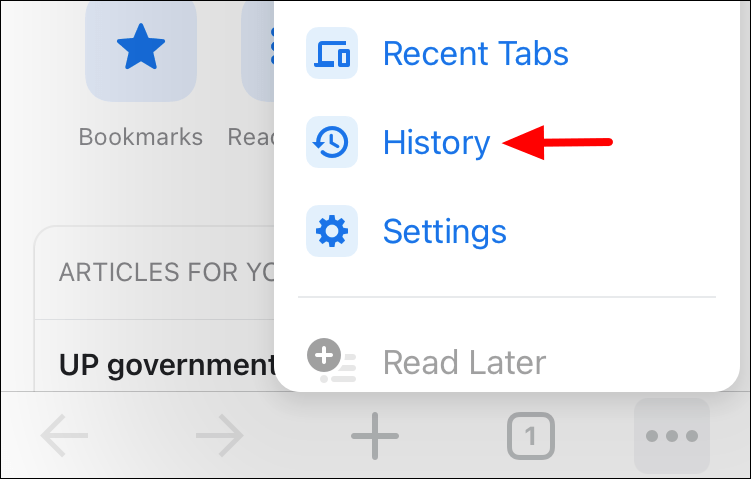
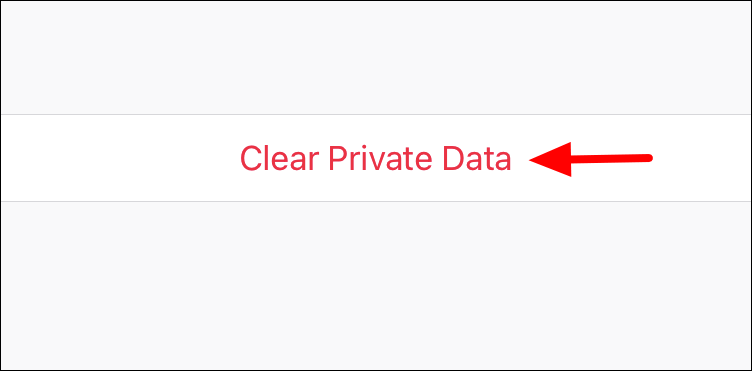
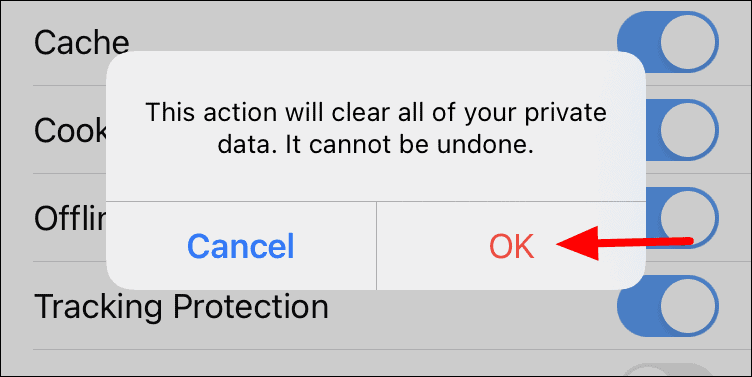
Deleting history for Safari on iPhone

Step 1: Open the 'Settings' app from your home screen.

Step 2: Scroll down and tap on 'Safari' in the list of installed apps.

Step 3: Under the 'Privacy & Security' section, tap 'Clear History and Website Data.'

Step 4: In the confirmation prompt, select 'Clear History and Data' to finalize the process.


Deleting history for Microsoft Edge on iPhone

Step 1: Open Microsoft Edge and tap the three-dot menu icon at the bottom of the screen.

Step 2: From the menu, tap on the 'History' icon, which is the second option from the left.

Step 3: In the History view, tap the 'Delete' icon (shaped like a trash bin) in the upper-right corner.

Step 4: When the confirmation dialog appears, select 'Clear' to erase your browsing history.


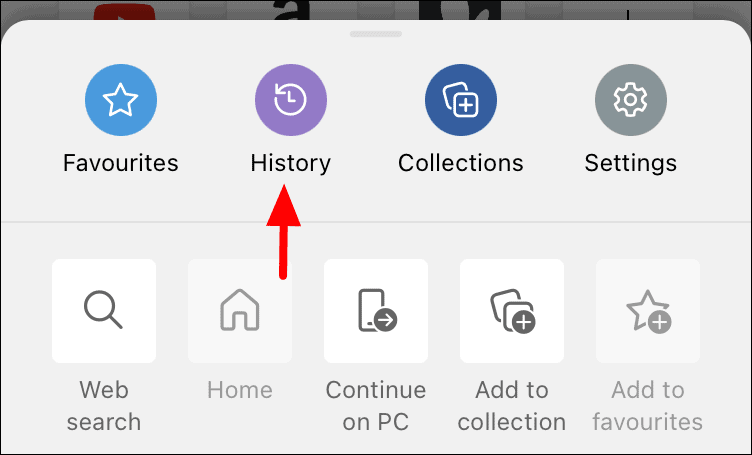
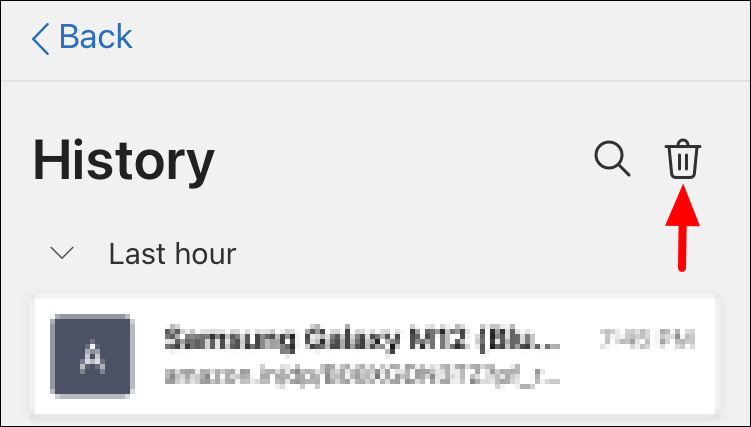
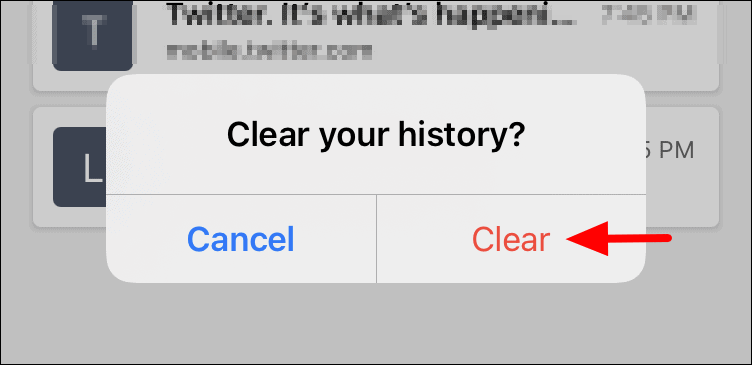
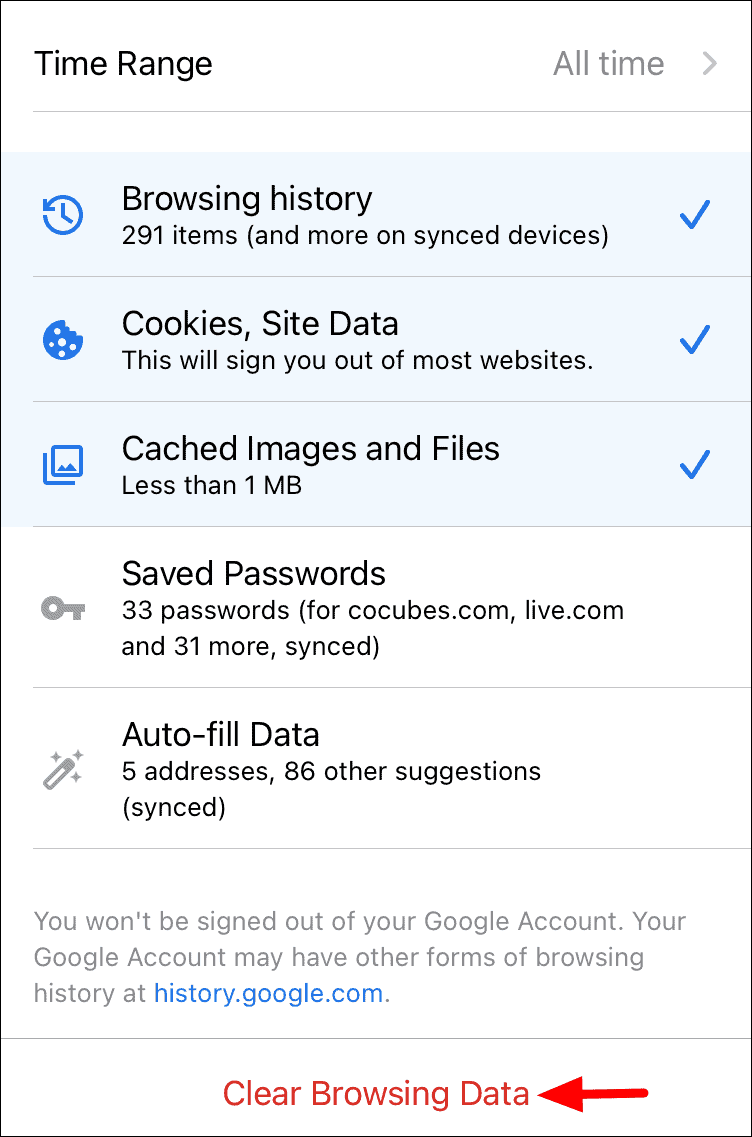
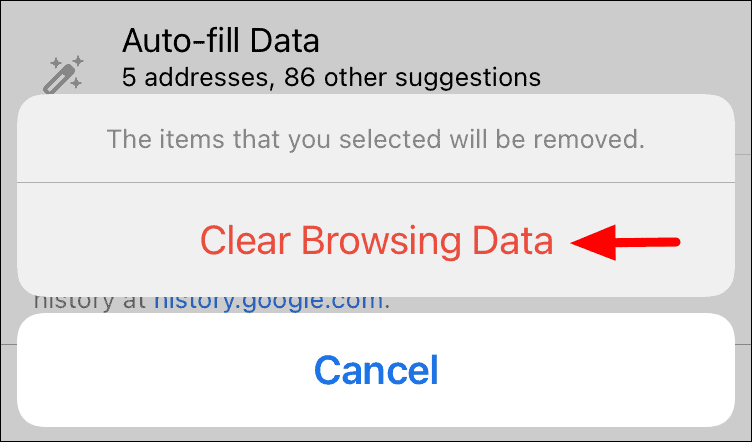
Deleting history for Google Chrome on iPhone

Step 1: Open Google Chrome and tap the three-dot menu icon in the bottom-right corner.

Step 2: From the menu, select 'History.'

Step 3: In the History view, tap 'Clear Browsing Data' at the bottom of the screen.

Step 4: Choose the desired time range and select the types of data to delete. Then, tap 'Clear Browsing Data' at the bottom.

Step 5: In the confirmation prompt, tap 'Clear Browsing Data' again to confirm.


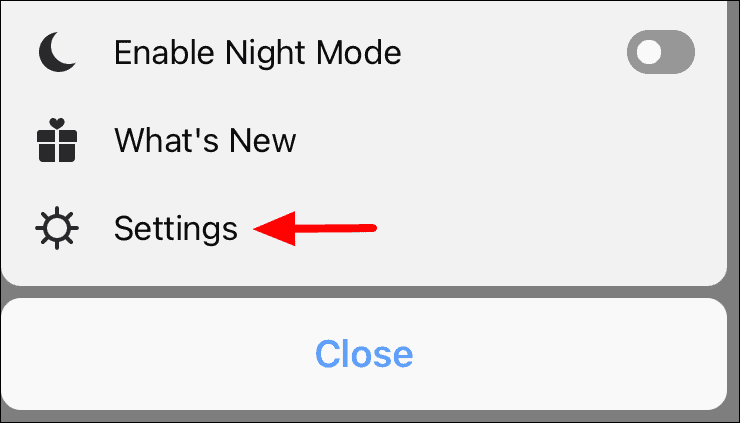
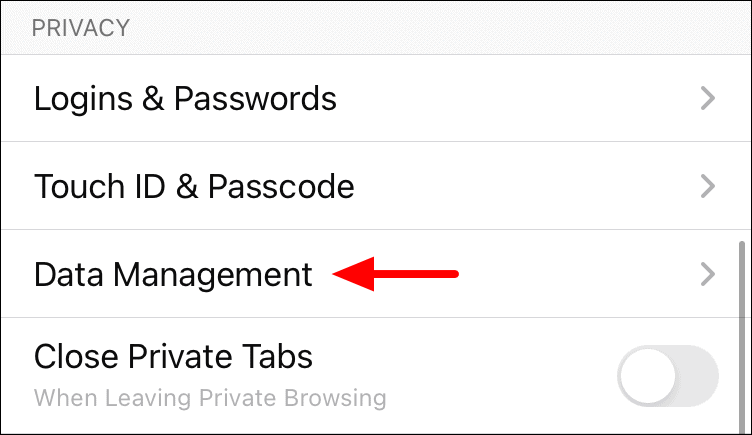
Deleting history for Firefox on iPhone

Step 1: Launch Mozilla Firefox and tap the three-line menu icon in the bottom-right corner.

Step 2: From the menu, tap on 'Settings.'

Step 3: Under the 'Privacy' section, select 'Data Management.'

Step 4: Scroll down and tap 'Clear Private Data' at the bottom of the screen.

Step 5: When the confirmation dialog appears, tap 'OK' to erase your browsing data.


While clearing your browsing history enhances privacy, using Private or Incognito mode prevents the browser from saving your history in the first place. Most browsers on the App Store offer this feature. Here's how to activate it in Safari and Google Chrome.

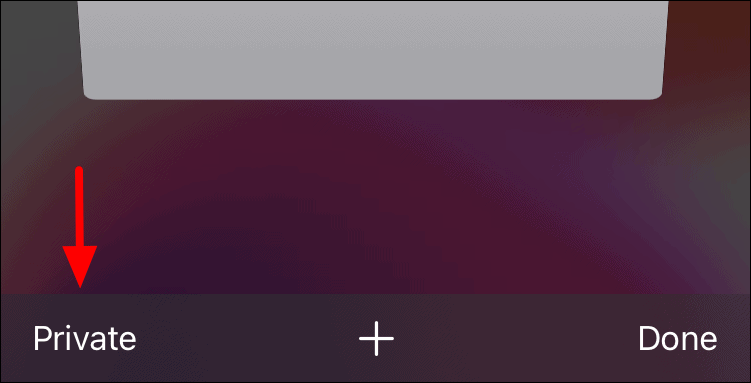
Switching to private/incognito mode on Safari

Step 1: Open Safari and tap the 'Tabs' icon in the bottom-right corner.

Step 2: In the Tabs view, tap 'Private' located at the bottom-left corner.

Step 3: Tap the '+' icon to open a new private browsing tab.

Step 4: 'Private Browsing Mode' will appear below the address bar, indicating that you are now browsing privately.


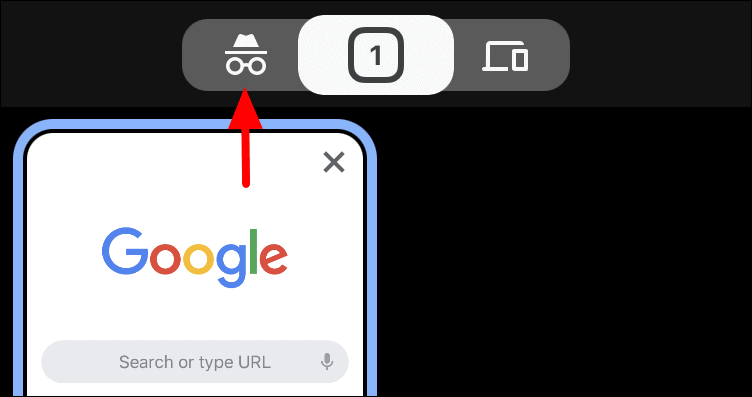
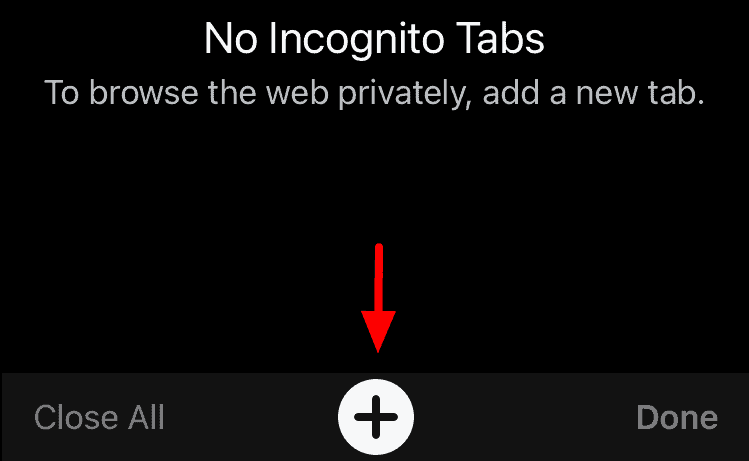
Switching to private/incognito mode on Google Chrome

Step 1: Open Google Chrome and tap the 'Tabs' icon at the bottom of the screen.

Step 2: In the Tabs view, tap the 'Incognito' icon located to the left of the tab count at the top.

Step 3: Tap the '+' icon at the bottom to open a new incognito tab.

Step 4: You are now browsing in incognito mode; your history won't be saved on the device.

Other browsers offer similar private browsing features, allowing you to maintain your privacy without manually deleting your history.


Managing your browsing history on your iPhone is essential for maintaining privacy. Whether you choose to delete your history or browse in private mode, these steps can help protect your personal information.