
Disabling a user account on Windows 11 quickly restricts access for specific users without permanently deleting their data or profile. This is particularly useful if you temporarily need to restrict someone's access without losing their files or settings, such as when employees leave temporarily or for security reasons. Follow the steps below to disable user accounts effectively.
Method 1: Disable a User Account Using Computer Management
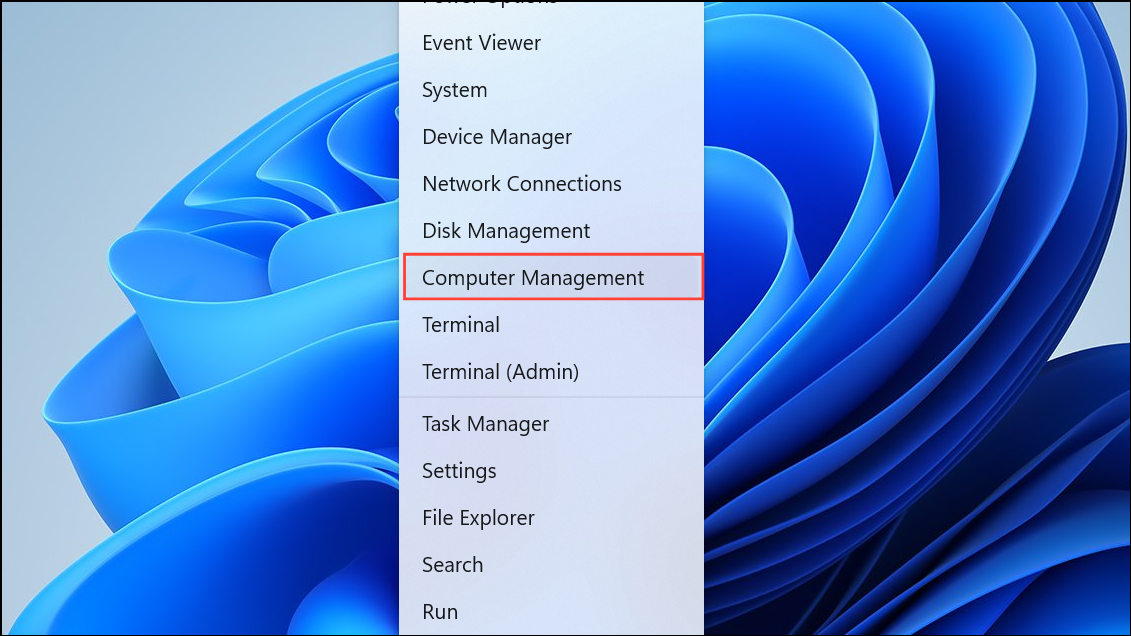
Step 1: Open the Computer Management tool by right-clicking the Start button on the taskbar and selecting Computer Management from the menu. Alternatively, press Windows key + X and select Computer Management from the list.
Step 2: In the Computer Management window, expand the Local Users and Groups section from the left pane, then click on Users.
Step 3: Locate the user account you want to disable in the central pane. Right-click the username and select Properties from the context menu.
Step 4: In the Properties window, under the General tab, check the box labeled Account is disabled. Click Apply, then OK to save your changes.
After completing these steps, the user account is disabled and the user will no longer be able to log in until the account is re-enabled.
Method 2: Disable a User Account Using Command Prompt
If you prefer using command-line tools, Windows 11 allows you to disable user accounts quickly using Command Prompt.
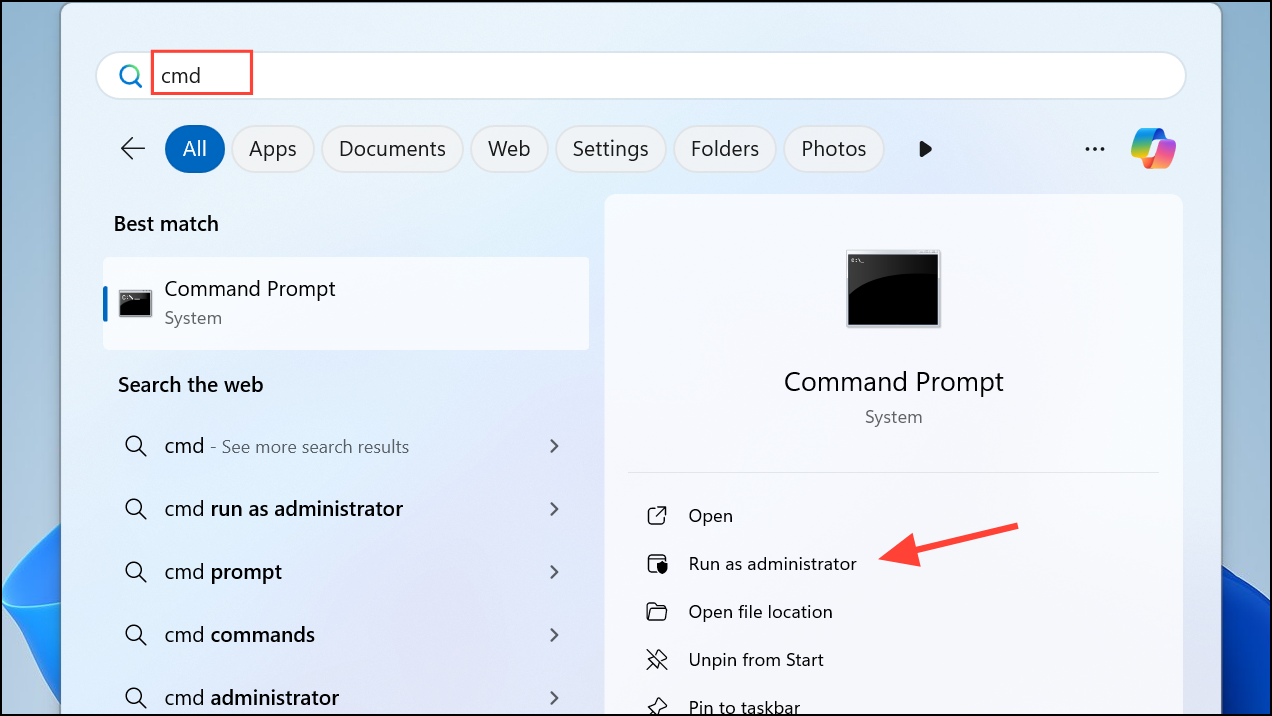
Step 1: Open Command Prompt as an administrator by clicking the Start button, typing cmd, then right-clicking Command Prompt and selecting Run as administrator.
Step 2: In the Command Prompt window, type the following command to disable the user account, replacing username with the actual username you wish to disable:
net user username /active:no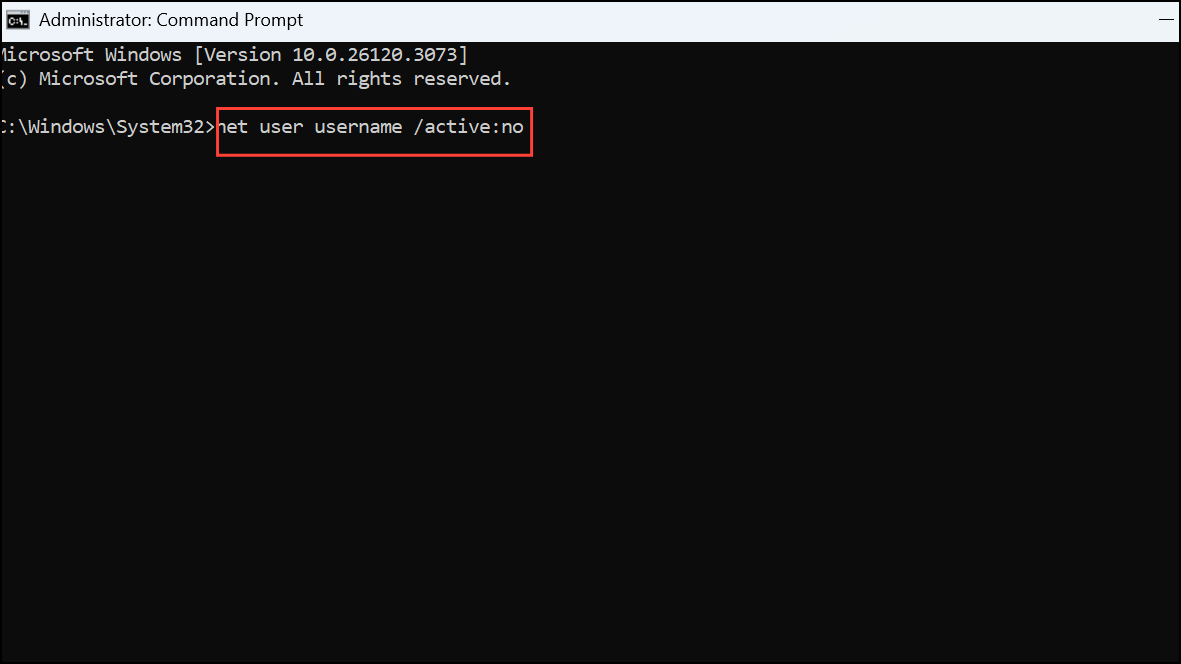
Press Enter to execute the command. You will see a confirmation message indicating the command completed successfully.
To verify the account is disabled, you can run the following command:
net user username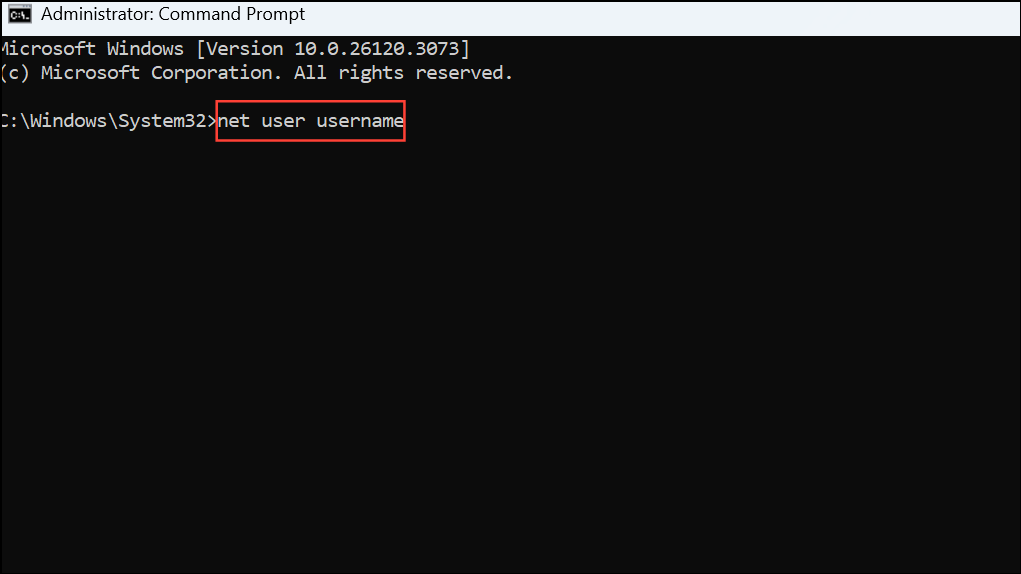
Look for the line that says Account active; it should indicate No.
Method 3: Disable a User Account Using PowerShell
Windows PowerShell provides another quick and efficient way to disable user accounts.
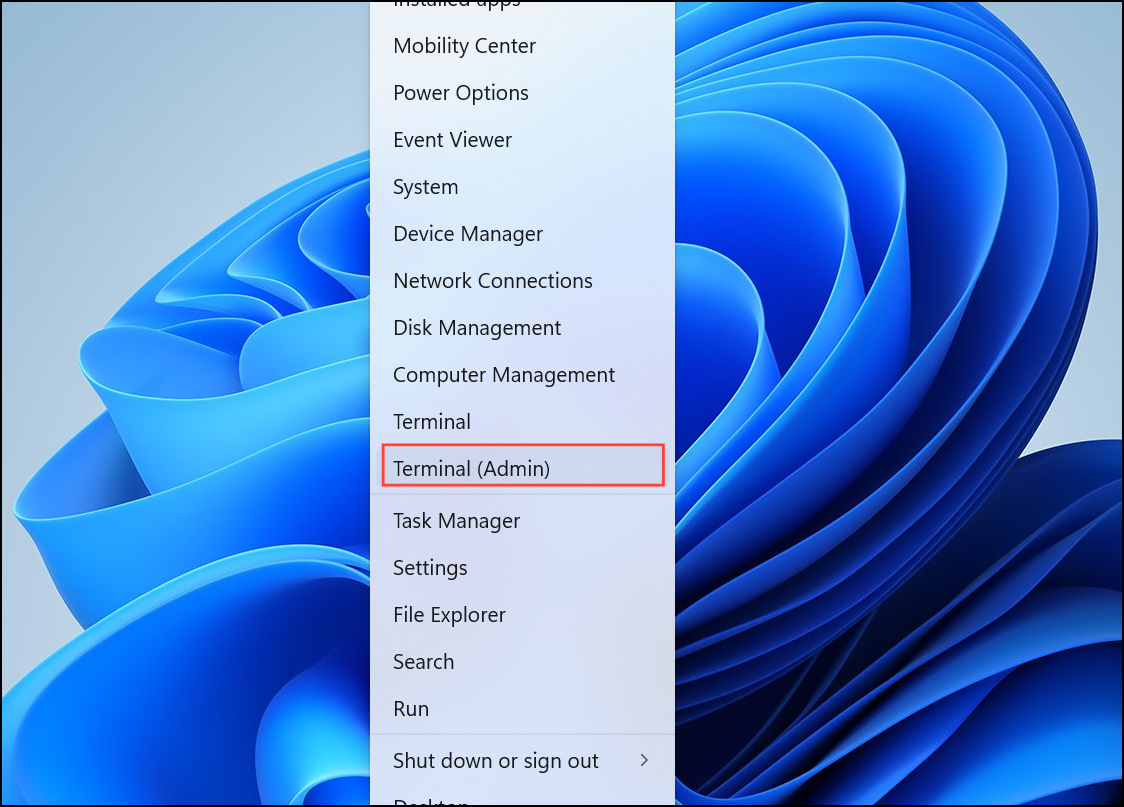
Step 1: Open PowerShell as an administrator by right-clicking the Start button and selecting Windows Terminal (Admin) or Windows PowerShell (Admin).
Step 2: In the PowerShell window, enter the following command, replacing username with the name of the account you wish to disable:
Disable-LocalUser -Name "username"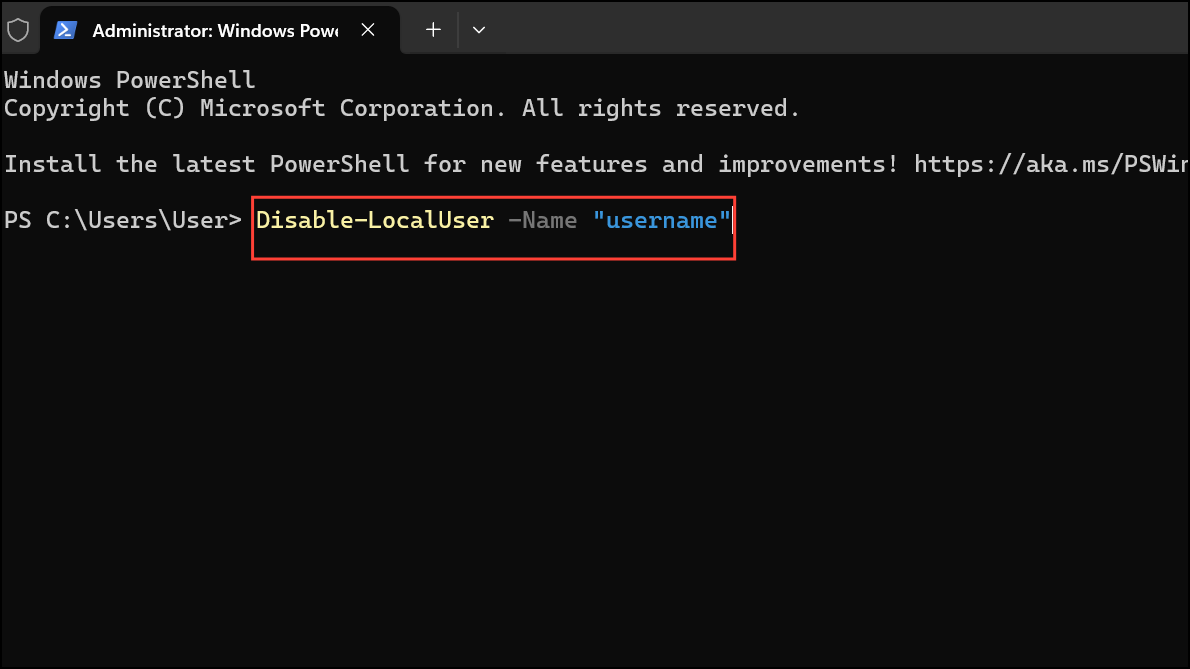
Press Enter to run the command. The selected user account will now be disabled.
To confirm the account has been disabled, use the following command:
Get-LocalUser -Name "username"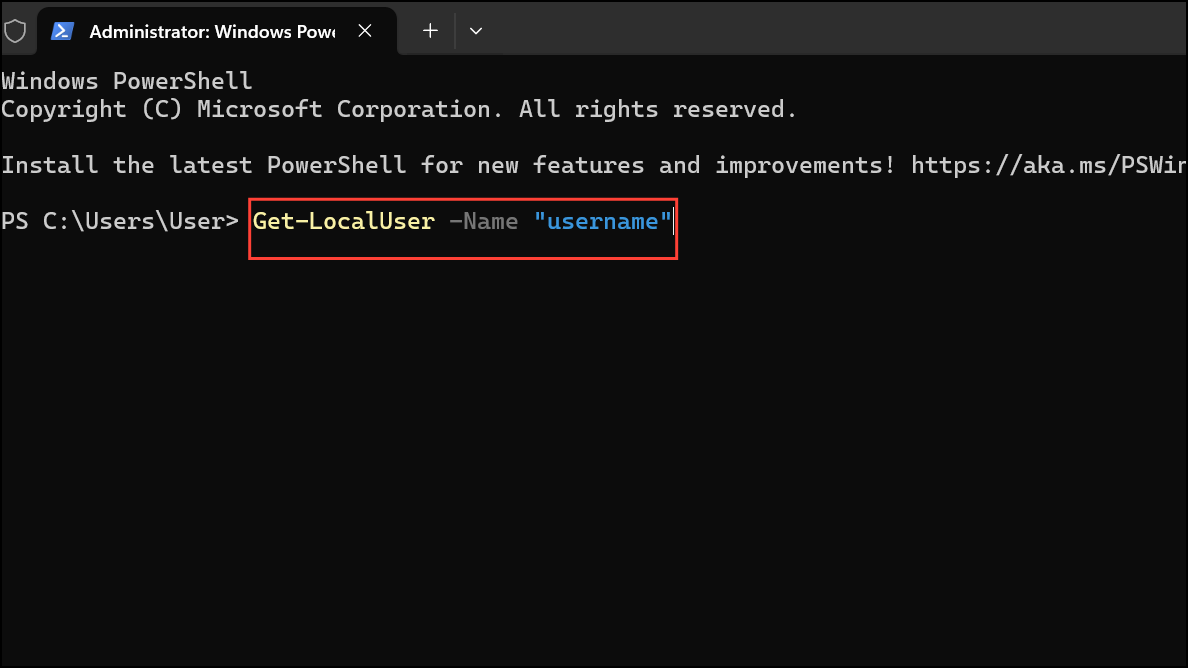
The output will show Enabled: False, confirming the account is disabled.
Disabling user accounts in Windows 11 is straightforward, and you can easily reactivate them later if needed. Choose the method that best fits your workflow and manage user account access efficiently.