If you're using Windows 11 but prefer the classic File Explorer without tabs, there's a way to revert to the traditional look. Although Windows doesn't provide a built-in option to disable the tabbed interface, you can use a third-party tool called ViveTool to achieve this. Below are two methods to disable File Explorer tabs using ViveTool: the GUI version and the Command Prompt version.
Use ViveTool GUI to Disable File Explorer Tabs
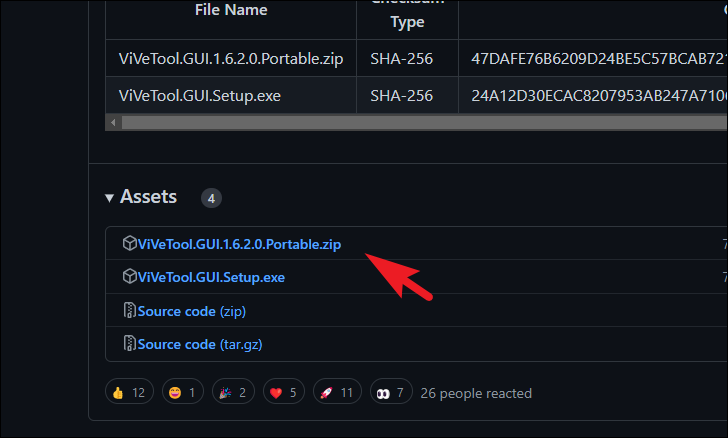
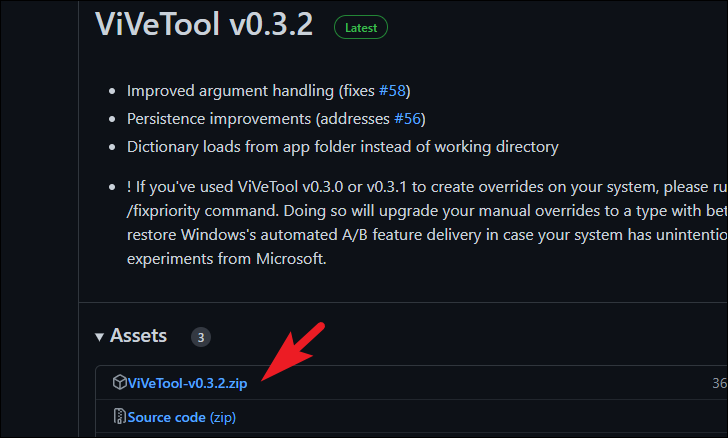
Step 1: Download the ViveTool GUI from its GitHub page. Click on the .ZIP file under the Assets section to start the download.
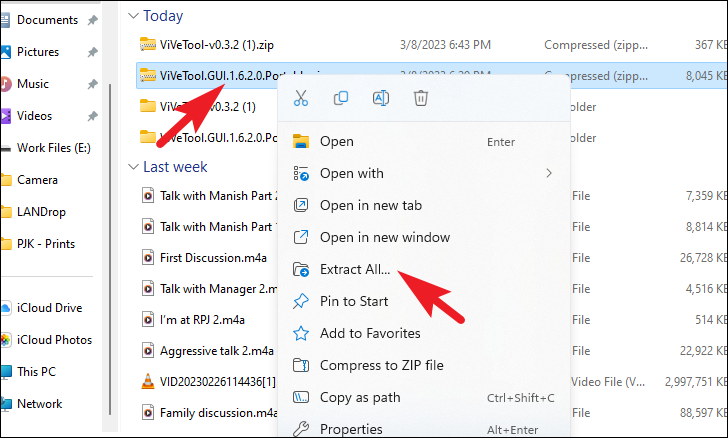
Step 2: After the download completes, navigate to your Downloads folder. Right-click on the downloaded ZIP file and select Extract all from the context menu.
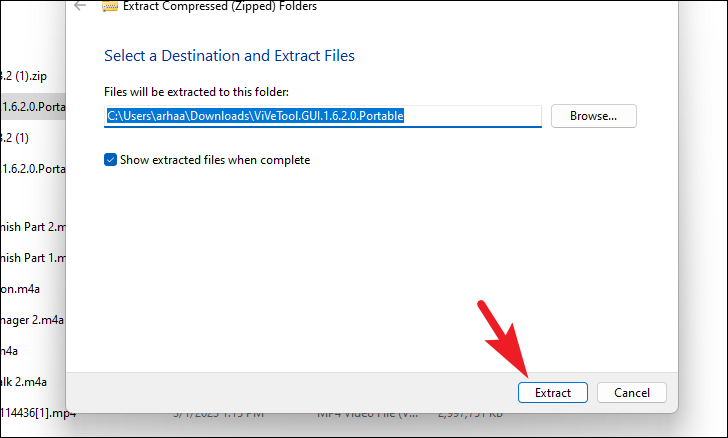
Step 3: In the extraction window, click the Extract button to unzip the contents to the specified location.
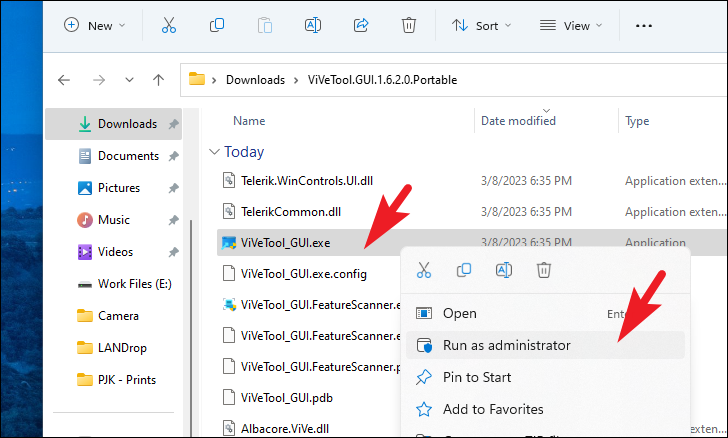
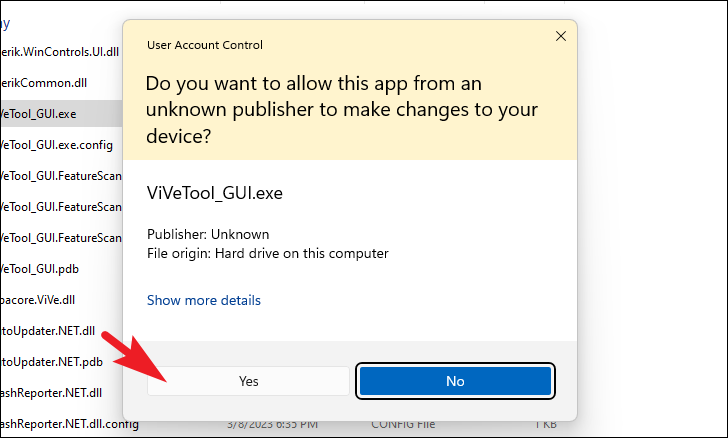
Step 4: Open the extracted folder, locate the ViveTool_GUI.exe file, right-click on it, and choose Run as administrator.
Step 5: If prompted by the User Account Control (UAC), click Yes to allow the application to make changes to your device.
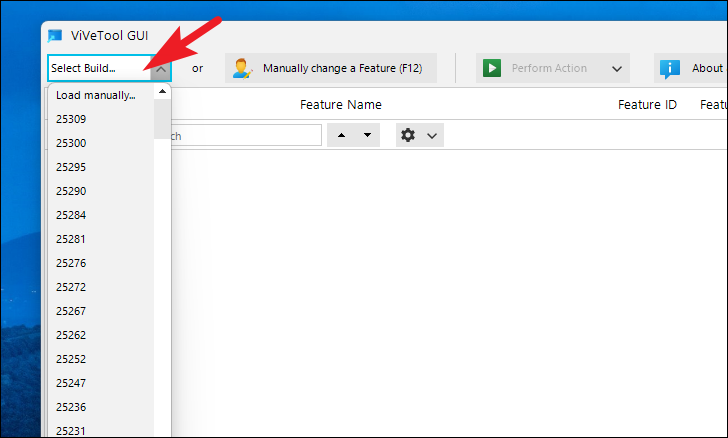
Step 6: In the ViveTool GUI window, select your Windows build version from the dropdown menu at the top. This will display a list of features available for your system.
Step 7: Use the search bar to find the feature by entering the code 37634385. Once found, select the feature, click on Perform Action, and then choose Disable Feature.
37634385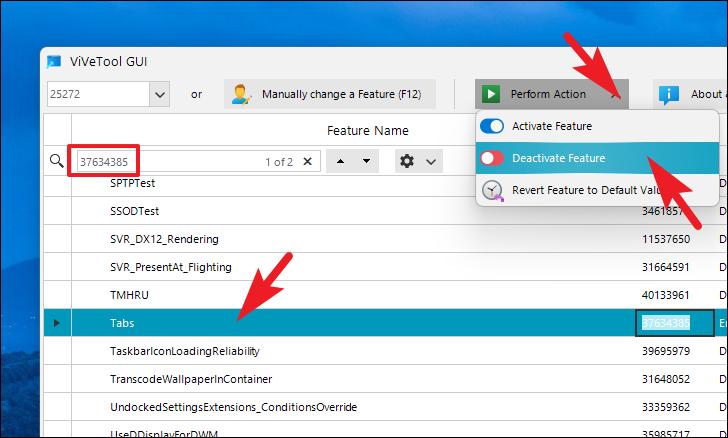
Step 8: Repeat the process for the code 36354489 to disable this feature as well.
36354489Step 9: After disabling both features, restart your computer to apply the changes. When your PC restarts, open File Explorer to verify that the tabs have been removed.
Use ViveTool with Command Prompt to Disable File Explorer Tabs
Step 1: Download the ViveTool ZIP file from its GitHub page. Click on the .ZIP file under the Assets section to initiate the download.
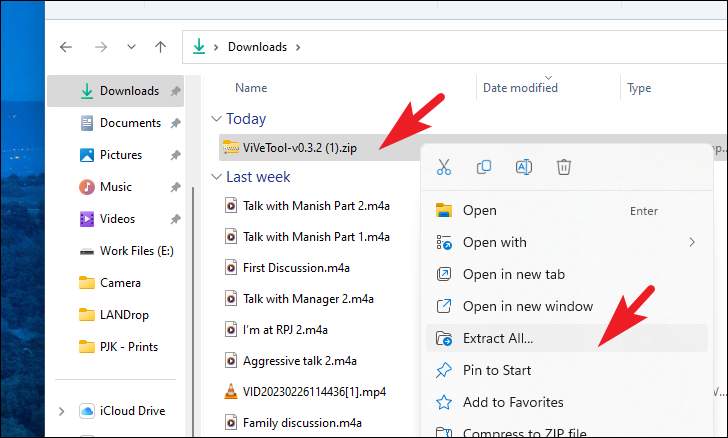
Step 2: Once the download is complete, go to your Downloads folder. Right-click on the ZIP file and select Extract All from the context menu.
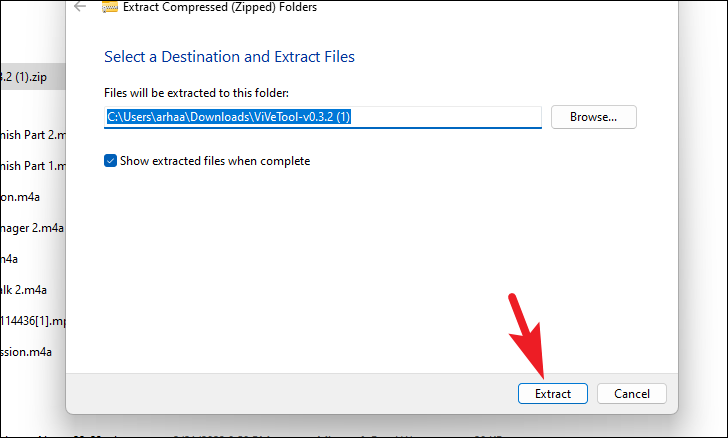
Step 3: In the extraction dialog, click the Extract button to unzip the files.
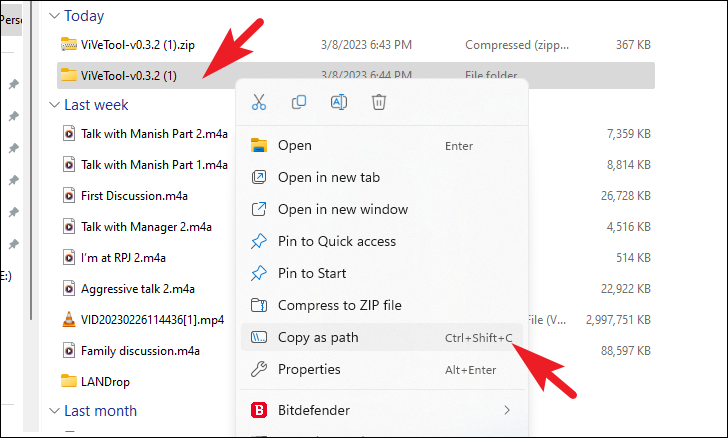
Step 4: After extraction, locate the extracted folder, right-click on it, and choose Copy as path. This copies the folder path to your clipboard.
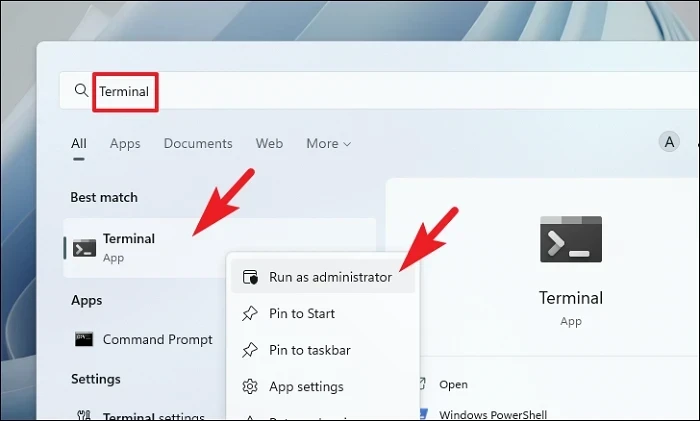
Step 5: Open the Start Menu, type Terminal, right-click on the Terminal app in the search results, and select Run as administrator.
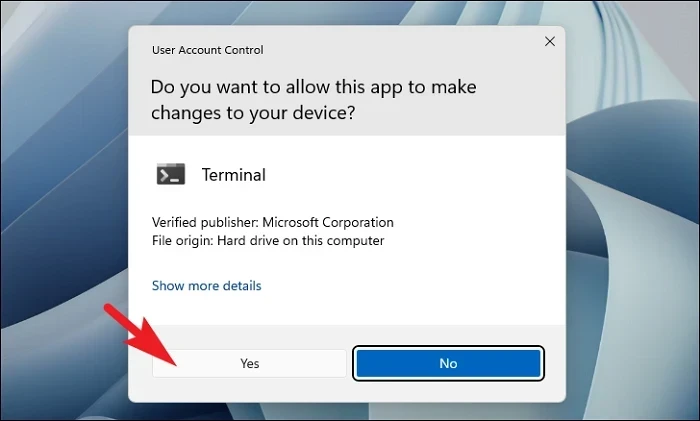
Step 6: When the User Account Control prompt appears, click Yes to grant administrative privileges.
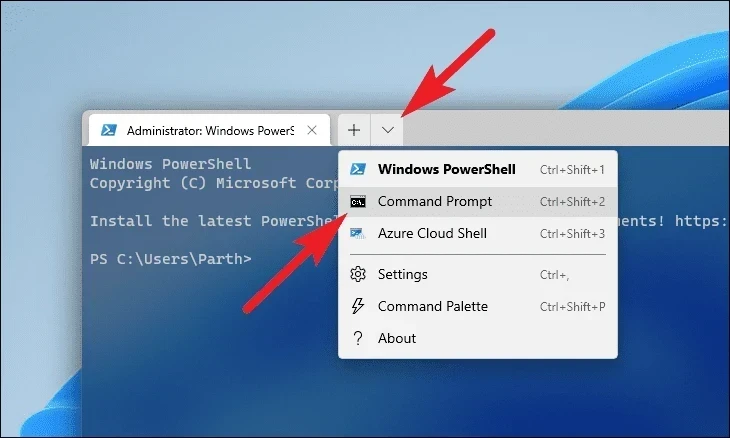
Step 7: In the Terminal window, click the down arrow icon next to the tab name and select Command Prompt from the dropdown menu to switch to the Command Prompt environment.
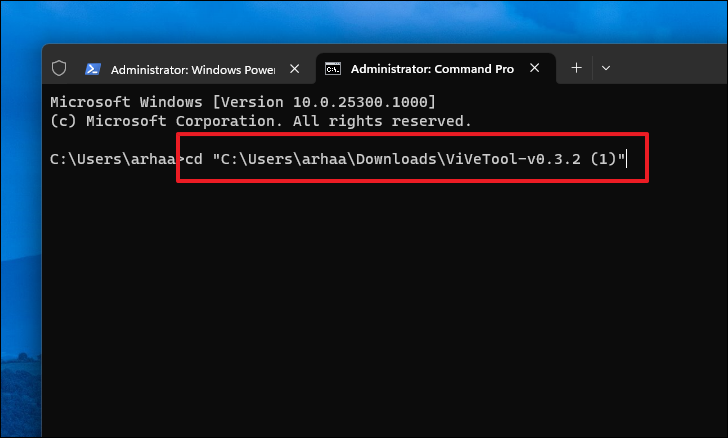
Step 8: Type the following command, replacing <copied path> with the path you copied earlier (ensure you include the quotation marks), and press Enter:
cd "<copied path>"Note: The quotation marks are important if the path contains spaces.
Step 9: Execute the following commands one at a time by typing them and pressing Enter after each:
vivetool /disable /id:37634385vivetool /disable /id:36354489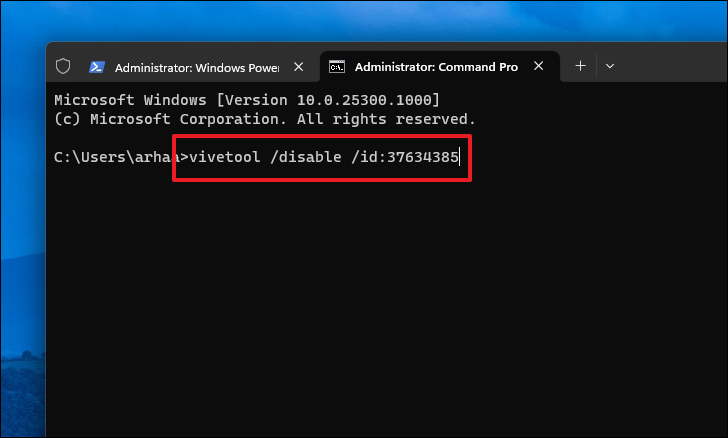
Step 10: Once both commands have been successfully executed, restart your computer to apply the changes. After rebooting, open File Explorer to check that the tabs are now disabled.
By following these steps, you can disable the tabbed interface in Windows 11's File Explorer and return to the traditional multi-window experience.


