
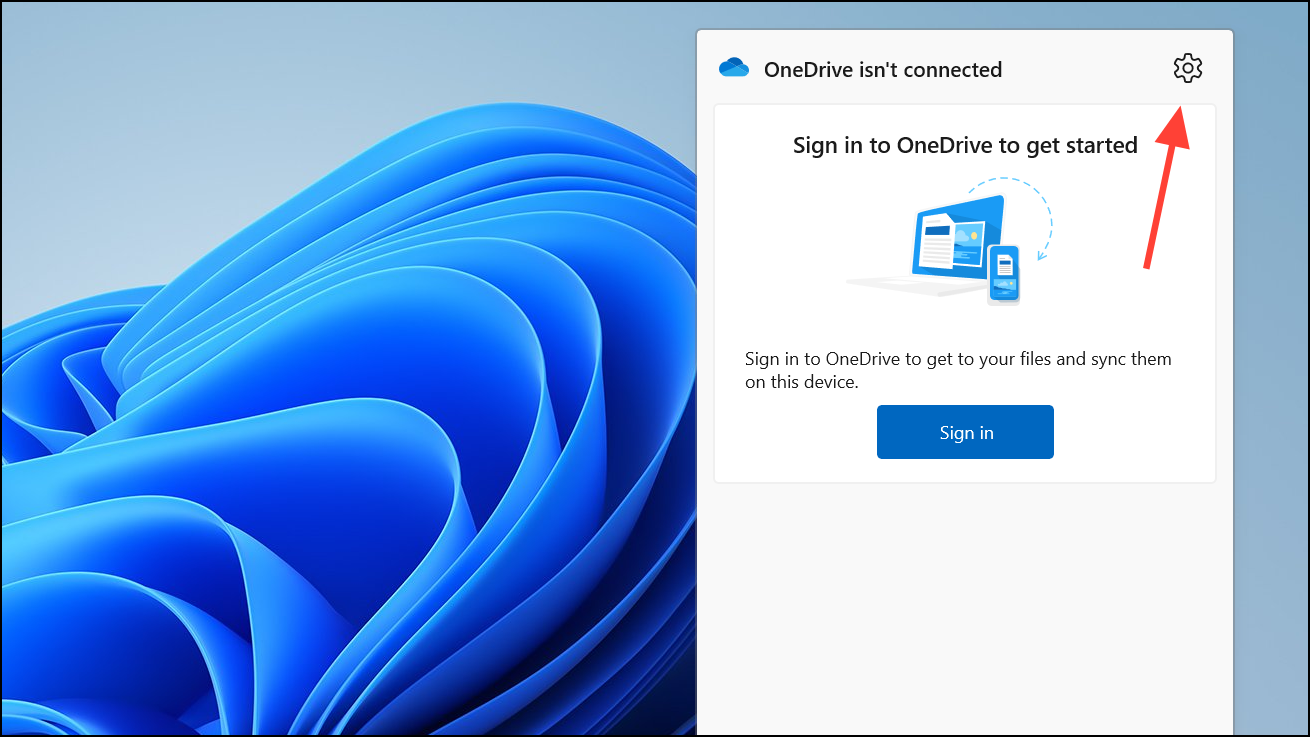
OneDrive is Microsoft's built-in cloud storage solution, pre-installed on Windows devices. While convenient, some users prefer not to use it or might want to temporarily pause syncing activities due to bandwidth constraints or privacy concerns. Fortunately, Windows provides several straightforward options to pause, disable, or completely remove OneDrive from your system.
How to Pause OneDrive Syncing Temporarily
Pausing OneDrive syncing temporarily stops the application from uploading or downloading files for a set amount of time, ideal for situations when you're performing tasks that require high bandwidth or uninterrupted system performance.
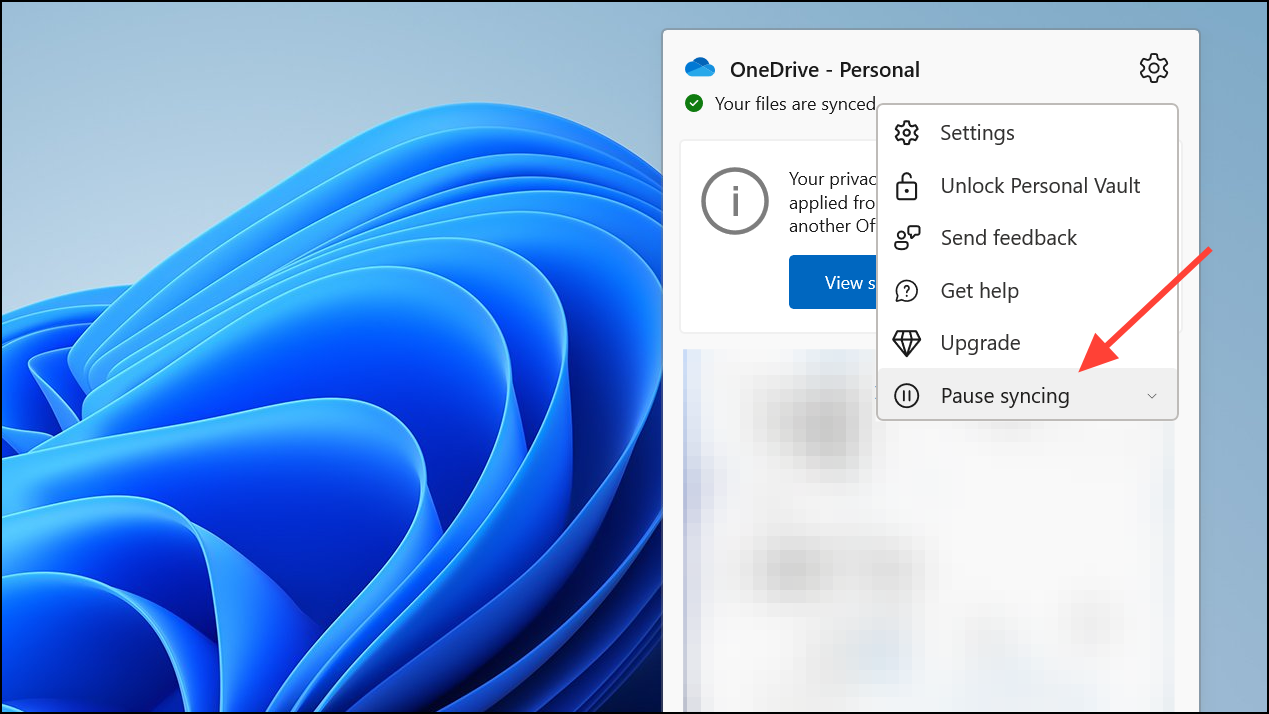
Step 1: Locate the OneDrive icon in the notification area at the bottom-right corner of your Windows desktop. If you don't see it immediately, click the small upward-facing arrow to reveal hidden icons.
Step 2: Click the OneDrive cloud icon to open its menu, then select the gear-shaped "Settings" icon.
Step 3: In the menu that appears, choose "Pause syncing" and select your desired duration: two hours, eight hours, or 24 hours. Once selected, OneDrive will halt sync operations for that period and resume automatically afterward.
How to Disable OneDrive Temporarily
If you're seeking a more definitive but reversible solution, you can disable OneDrive entirely until you manually restart the application or reboot your computer.
Step 1: Click the OneDrive cloud icon in the notification area, or click the upward-facing arrow if it's hidden.
Step 2: Click the gear-shaped "Settings" icon in the OneDrive menu.
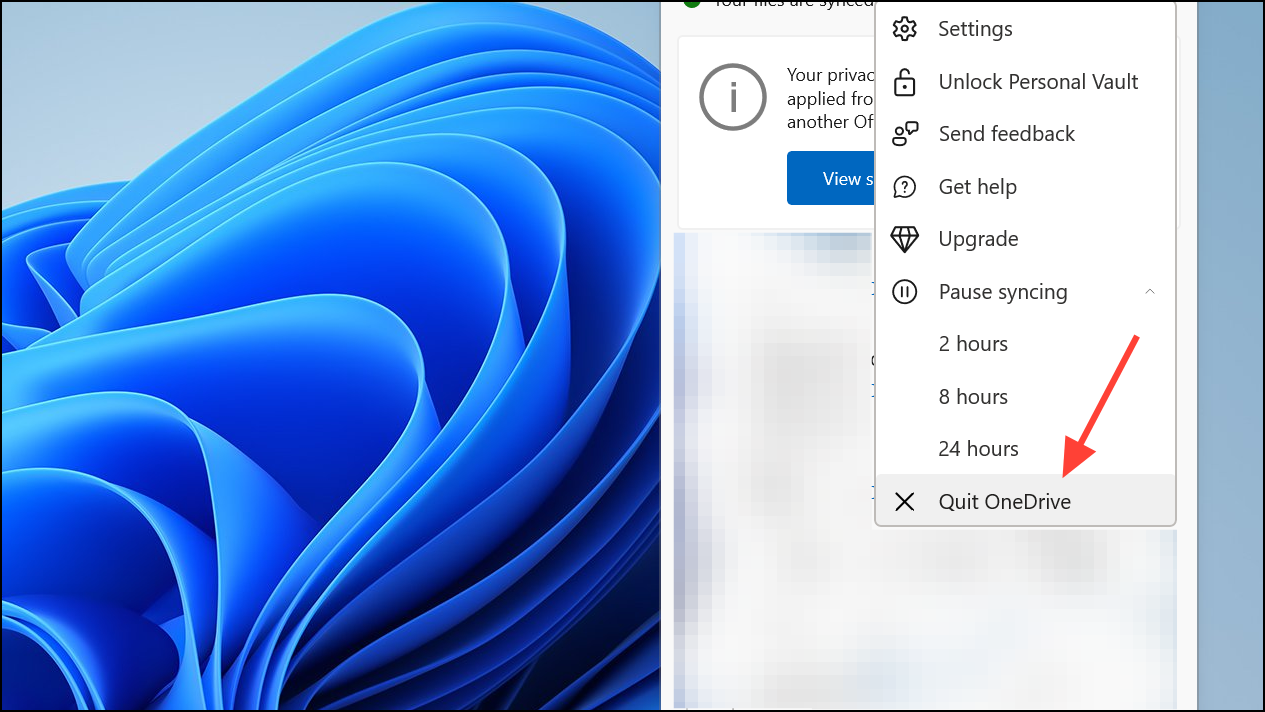
Step 3: Select "Pause syncing," then click on "Quit OneDrive." A confirmation prompt will appear; confirm by clicking "Close OneDrive." The app will now remain inactive until manually restarted or upon your next system reboot.
How to Completely Uninstall OneDrive from Windows
If you have no intention of using OneDrive and prefer to remove it entirely from your system, Windows 11 allows you to uninstall the application permanently. This method stops all OneDrive activities and removes the app from your device.
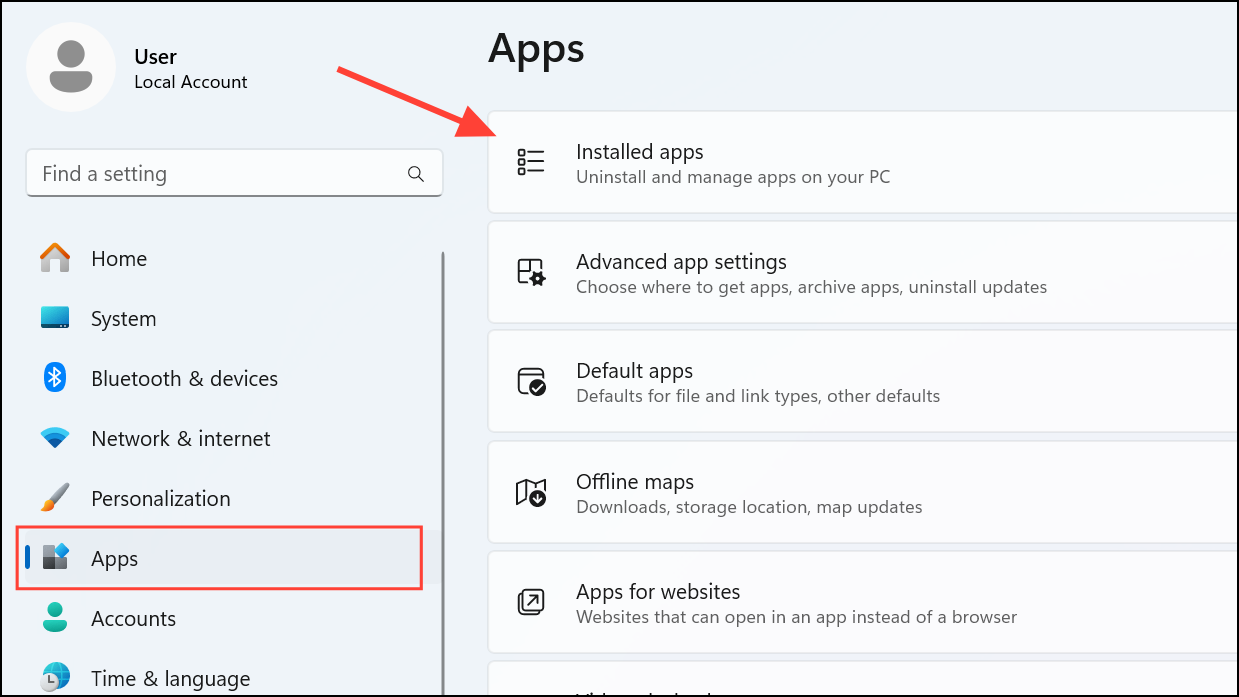
Step 1: Open the Windows Settings menu by pressing Windows key + I or by selecting the Settings icon from the Start menu.
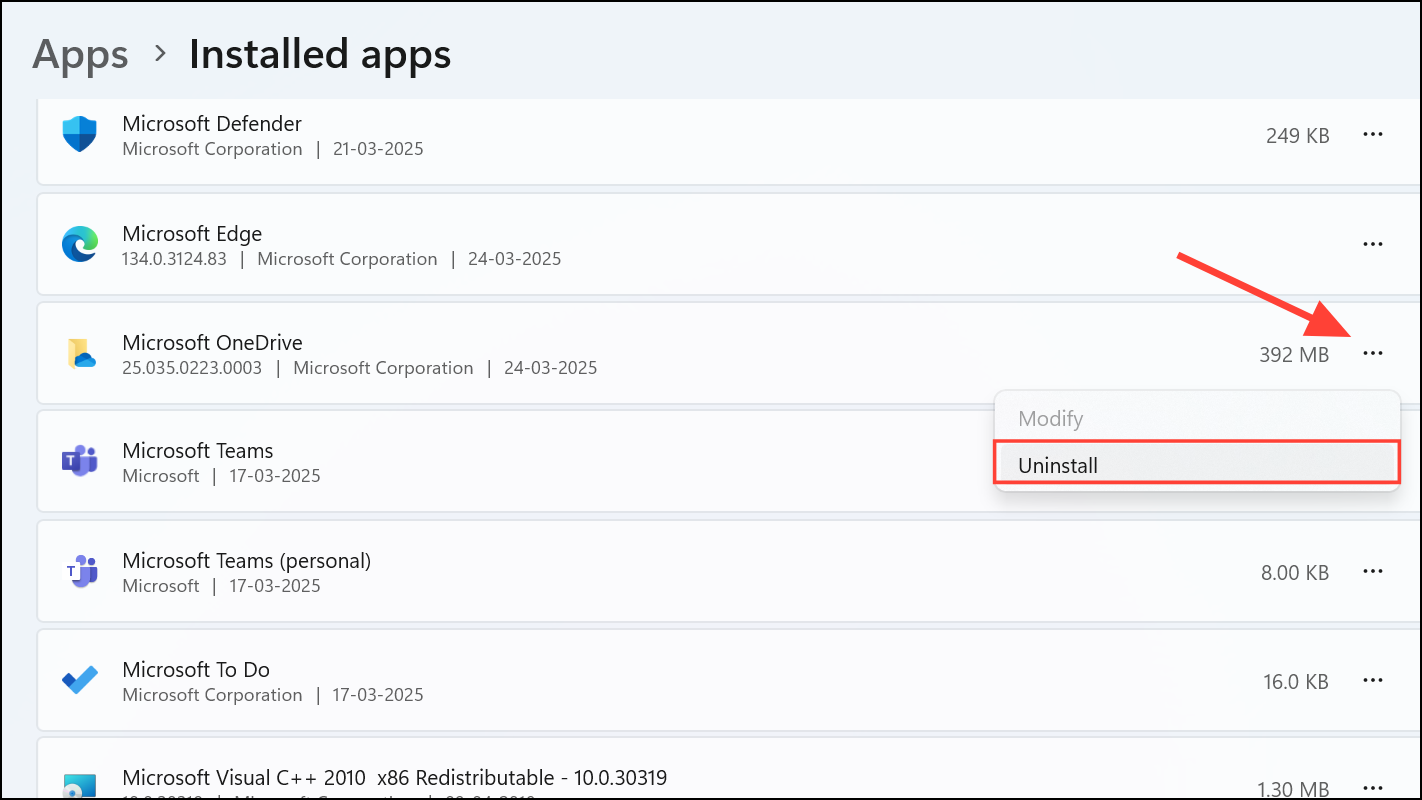
Step 2: In the Settings window, navigate to "Apps," then select "Installed apps."
Step 3: Locate "Microsoft OneDrive" by scrolling through the list or typing "OneDrive" into the search bar.
Step 4: Click the three-dot menu next to "Microsoft OneDrive" and choose "Uninstall." Confirm your choice when prompted. If the "Uninstall" option is greyed out, select "Modify" instead and then choose to disable OneDrive. After completing these steps, you may need to restart your system to finalize the removal.
By following these steps, you can easily control how OneDrive interacts with your Windows device, whether you prefer a temporary pause or a permanent removal. Remember, uninstalling OneDrive does not delete your files stored in the cloud—you can still access them anytime by logging into your account on OneDrive.com.