Using iTunes on a Windows 11 PC bridges the gap between your Apple devices and your Windows environment, allowing you to manage your media collection effortlessly. Whether you have an iPhone, iPad, or iPod Touch, iTunes provides a seamless way to organize and enjoy your media across devices. This guide will walk you through downloading, installing, and using iTunes on Windows 11.
What is iTunes for Windows?
iTunes for Windows is an application that brings the functionality of Apple’s media management to your PC. With iTunes, you can access your entire music library, including songs from Apple Music if you’re a subscriber. It also allows you to purchase or rent movies, TV shows, and audiobooks, as well as download free podcasts directly to your computer.
Beyond just managing your media, iTunes enables you to sync content between your PC and your Apple devices. This means you can transfer music, videos, and more from your computer to your iPhone, iPad, or iPod Touch, ensuring your favorite media is always at your fingertips.
Downloading iTunes on Windows 11
To get started with iTunes on your Windows 11 PC, follow these simple steps:
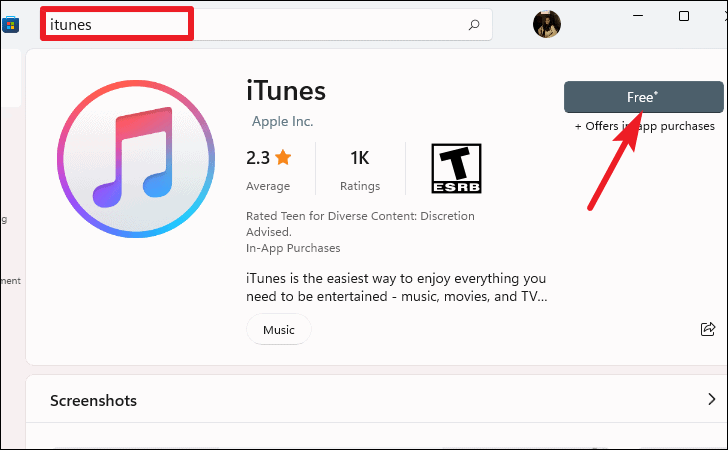
- Open the Microsoft Store from the Start menu.
- In the search bar, type
iTunesand press Enter. - Select the iTunes app from the search results.
- Click the Get or Install button to download and install iTunes.
Once the installation is complete, you can launch iTunes directly from the Microsoft Store or find it in your list of installed apps.
Setting Up iTunes
After installing iTunes, you’ll need to sign in with your Apple ID to access your purchased content and Apple Music subscription:
- Open iTunes on your PC.
- Click on the Account menu at the top of the window.
- Select Sign In from the dropdown menu.

- Enter your Apple ID and password, then click Sign In.
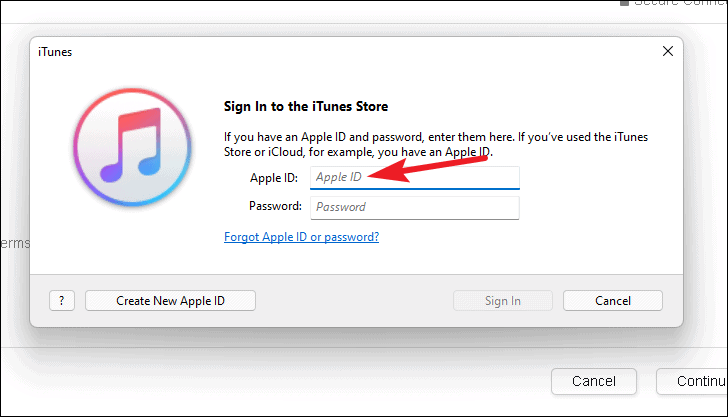
If you don’t have an Apple ID, you can create one by clicking on the Create New Apple ID button in the sign-in window and following the on-screen instructions.
Navigating the iTunes Interface
Getting familiar with iTunes will help you manage your media efficiently:
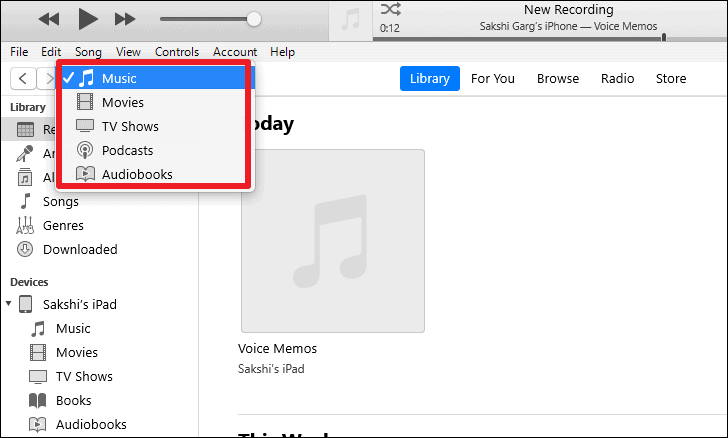
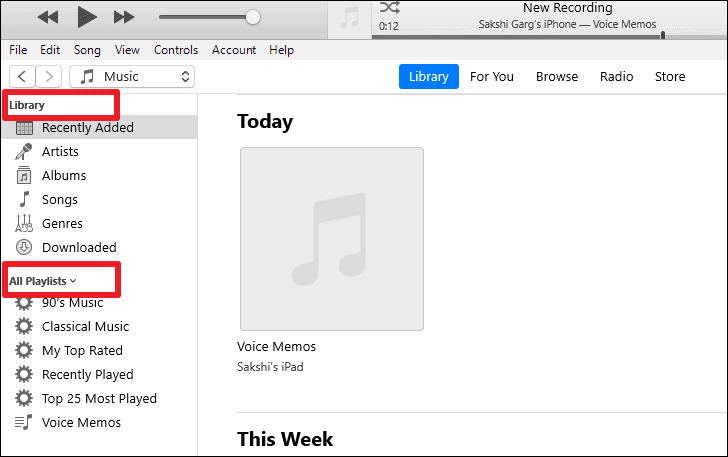
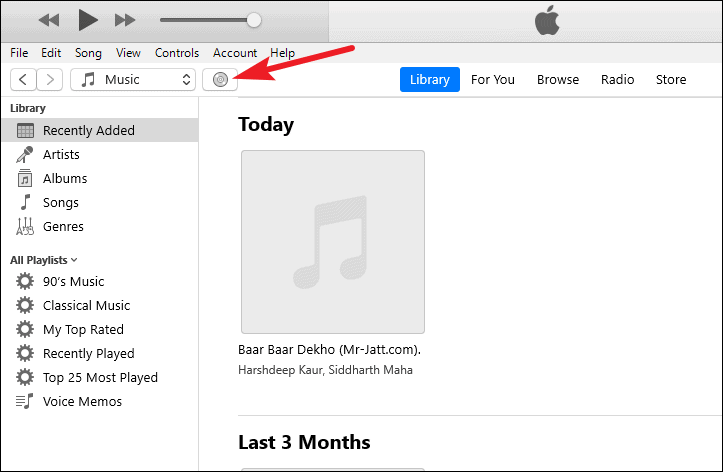
- When you open iTunes, it typically displays your Music library by default.
- To switch between different types of media, click the dropdown menu at the top left that says Music.
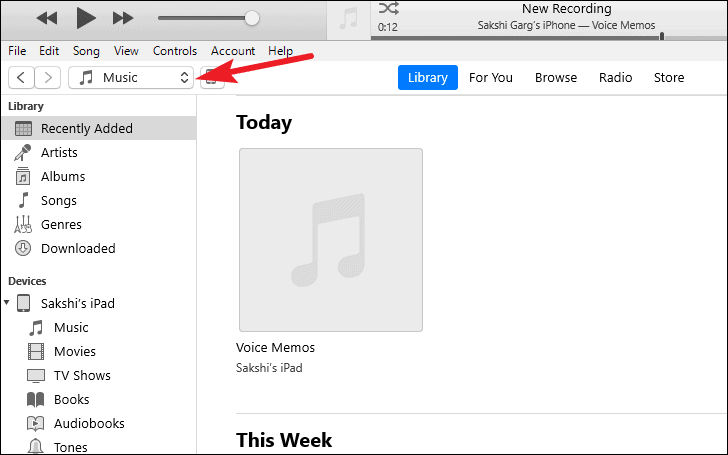
- Choose from options like Movies, TV Shows, Podcasts, or Audiobooks to navigate to that section.
You can also use keyboard shortcuts to navigate quickly: press Ctrl + 1 for Music, Ctrl + 2 for Movies, and so on.
Exploring Your Music Library
Within the Music section, you can view your library in different ways:
- Use the left panel to browse through playlists, artists, albums, and genres.
- Select how you want to view your music by choosing options like Songs, Albums, or Artists from the top of the left panel.
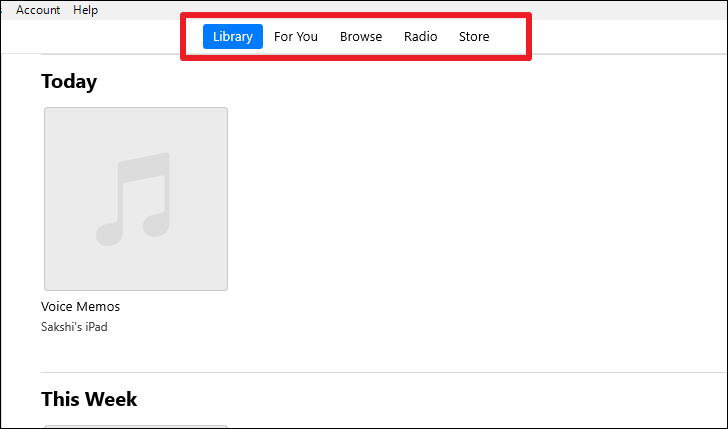
Accessing the iTunes Store and More
iTunes also provides access to the iTunes Store and other features:
- Click on Store in the top menu to browse and purchase music, movies, and more.
- Use the For You tab to see personalized recommendations.
- Select Browse to explore new and popular content.
Adding Media to Your iTunes Library
You can import music and videos from your PC into iTunes:
Importing Music from Your Computer
- In iTunes, select File from the menu bar.
- Choose Add File to Library to add individual songs, or Add Folder to Library to import entire folders.
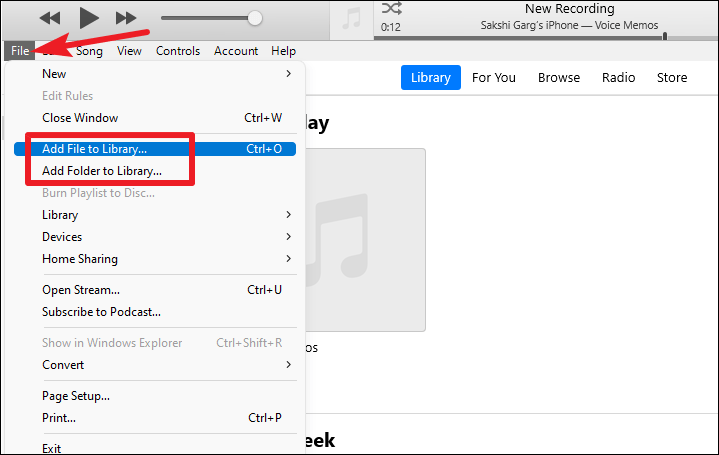
- Navigate to the location of your music files, select them, and click Open.
Importing Videos and Movies
- Switch to the Movies section by selecting it from the dropdown menu.
- Go to File > Add File to Library or Add Folder to Library.
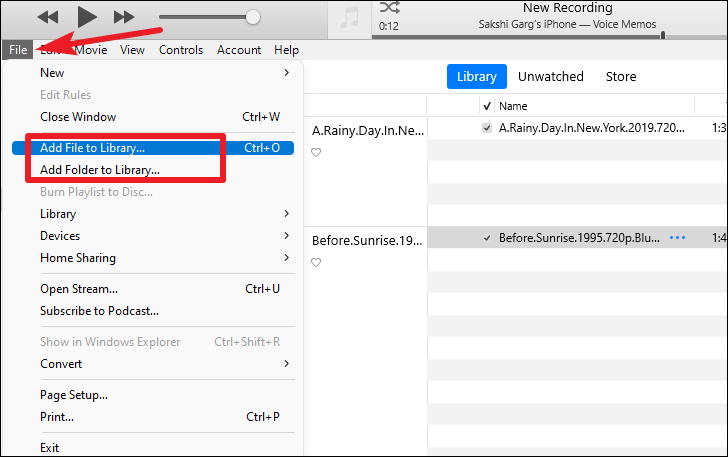
- Locate your video files, select them, and click Open.
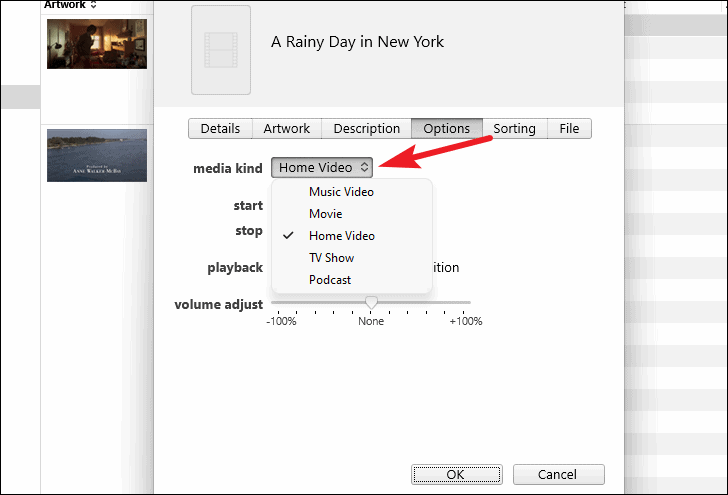
- The videos will appear under the Home Videos section. You can change their media type by right-clicking the video, selecting Video Info, and adjusting the Media Kind under the Options tab.
Importing Music from a CD
- Insert the audio CD into your computer’s CD/DVD drive.
- iTunes may prompt you to import the CD. If not, click on the CD icon that appears in iTunes.
- Click Import CD at the top right corner.
- In the Import Settings dialog, choose your preferences and click OK.

- Wait for iTunes to import the tracks. You can monitor the progress at the top of the iTunes window.
Syncing Your Apple Device with iTunes
To transfer content between your PC and your Apple device, you’ll need to sync them. You can do this using a USB cable or over Wi-Fi.
Syncing via USB Cable
- Connect your iPhone, iPad, or iPod Touch to your PC using a USB cable.
- Unlock your device and tap Trust if prompted to trust the computer.
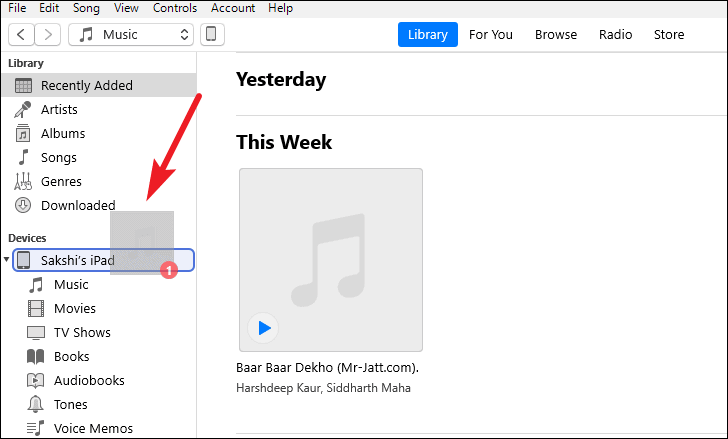
- In iTunes, click on the device icon that appears near the top left corner.
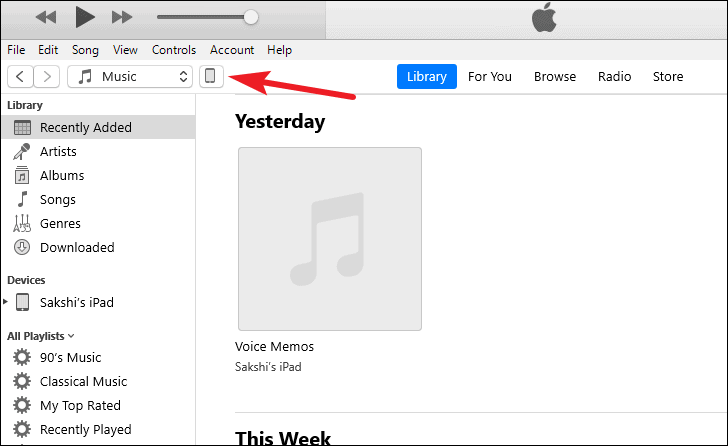
- Select the type of content you want to sync from the left sidebar (e.g., Music, Movies).
- Check the box next to Sync to enable syncing for that content type.
- Choose specific items or select to sync your entire library.
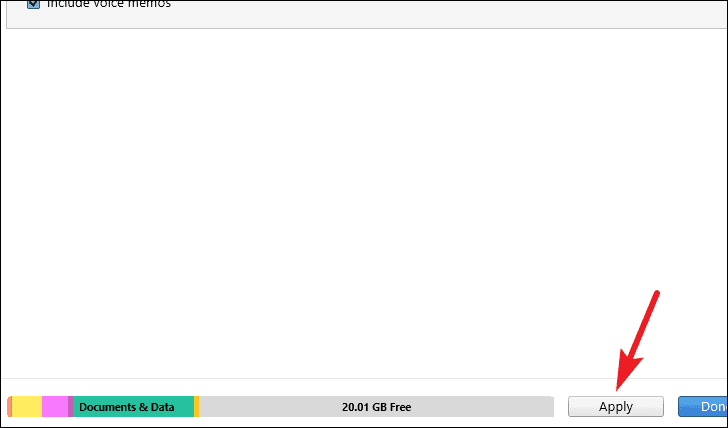
- Click Apply to start syncing.
Syncing Over Wi-Fi
- While your device is connected via USB, click on the device icon in iTunes.
- Select Summary from the sidebar.
- Scroll down to the Options section.
- Check the box next to Sync with this [device] over Wi-Fi.
- Click Apply.
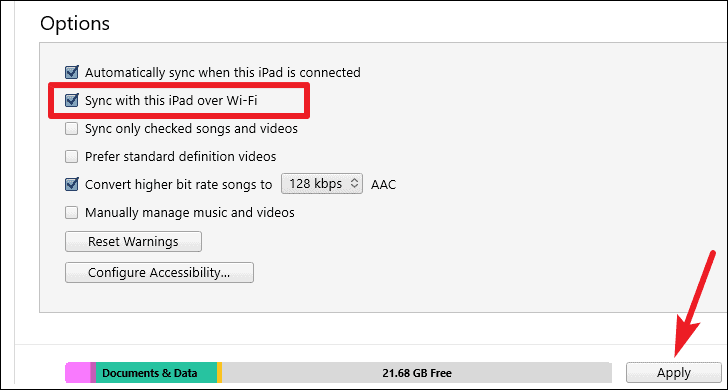
Now, your device will sync with iTunes whenever it’s connected to the same Wi-Fi network as your PC.
Manual Syncing
If you prefer more control over what gets synced to your device, you can manually manage your media:
- In iTunes, click on the device icon.
- Under Summary, uncheck Automatically sync when this [device] is connected and click Apply.
- Navigate to the content you want to add (e.g., Music library).
- Drag and drop items from your library onto your device in the sidebar.
Backing Up Your Apple Device Using iTunes
Creating backups of your iPhone, iPad, or iPod Touch ensures that you don’t lose important data. Here’s how to back up your device to your PC:
- Connect your Apple device to your PC using a USB cable.
- In iTunes, click the device icon near the top left corner.
- Select Summary from the sidebar.
- Under the Backups section, choose This Computer.
- To encrypt your backup and include sensitive data like passwords and Health data, check Encrypt local backup and create a password when prompted.
- Click Back Up Now to start the backup process.
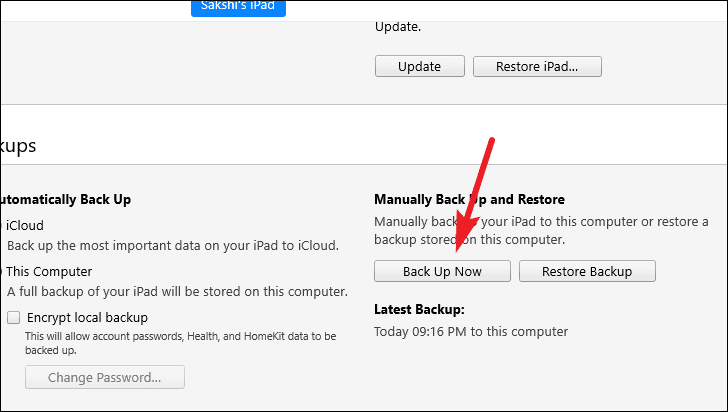
To restore your device from a backup in the future, simply connect it to your PC, go to the Summary tab, and click Restore Backup.
With iTunes on your Windows 11 PC, managing your Apple devices and media collection becomes straightforward and convenient. Whether you’re syncing music, backing up your device, or exploring new content, iTunes provides all the tools you need in one place.


