Windows 11 introduces an invaluable accessibility feature called Live Captions, which automatically transcribes spoken audio into text displayed on your screen. This feature is particularly helpful for users who are deaf, hard of hearing, or anyone who needs to read speech content due to noisy environments or personal preference. In this guide, we’ll show you how to enable Live Captions in Windows 11 and customize their settings for an optimal experience.
How Live Captions Work
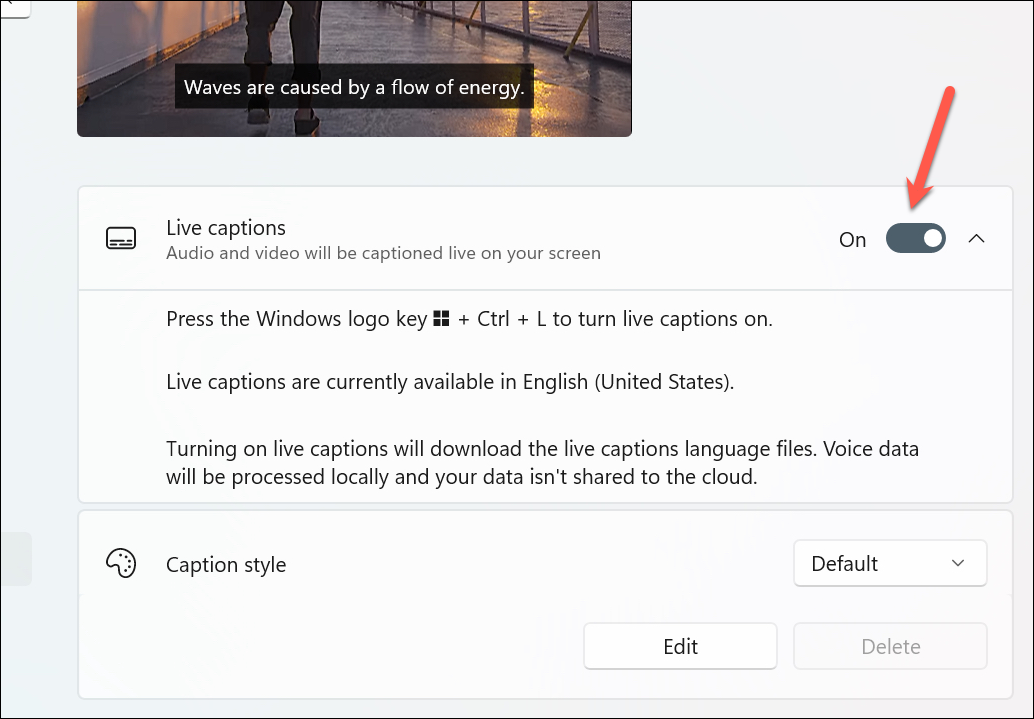
Live Captions in Windows 11 are available starting from version 22H2 or later and currently support audio content in English (United States). The feature transcribes spoken audio from any source on your device, including media played through speakers or audio captured via the microphone. However, it focuses solely on speech; other sounds like music or applause are not transcribed. While it can transcribe song lyrics, the accuracy may not be as reliable as it is for spoken words.
Privacy is a significant consideration with Live Captions. All audio processing and transcription occur locally on your device, ensuring that no audio data is sent to Microsoft or any cloud service. This means your audio stays private and is not shared externally.
It’s important to note that resource-intensive applications may impact the performance of Live Captions. If you experience lag or dropped captions, consider closing other demanding programs or disabling features like virtual backgrounds during video calls to improve performance.
Enabling Live Captions in Windows 11
Method 1: Using Keyboard Shortcut
Windows + Ctrl + L on your keyboard. This will bring up the Live Captions window on your screen.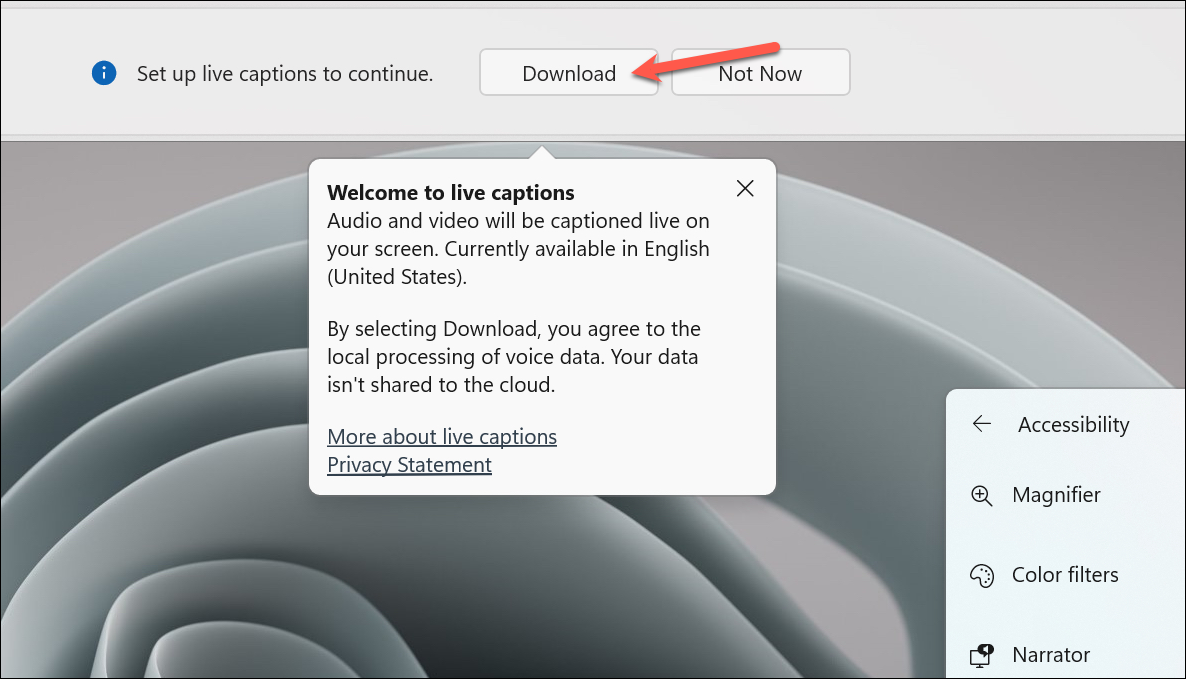
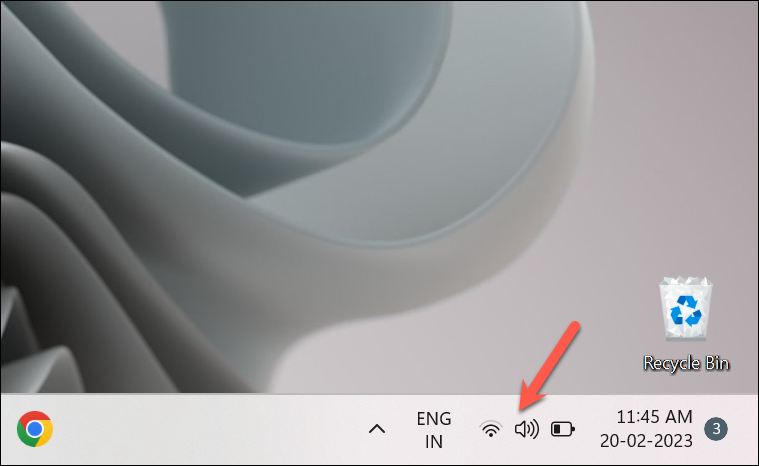
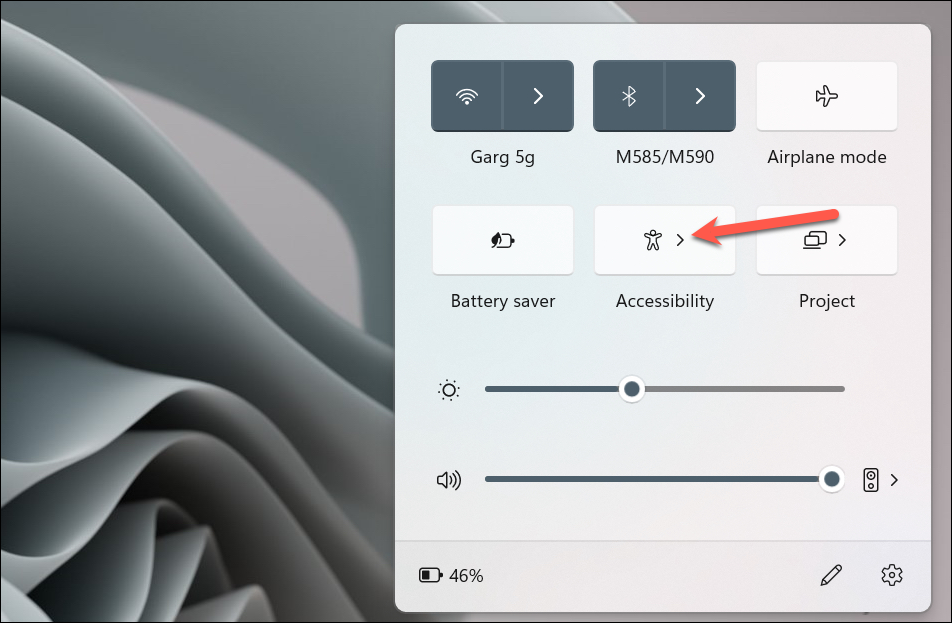
Method 2: Enabling via Quick Settings
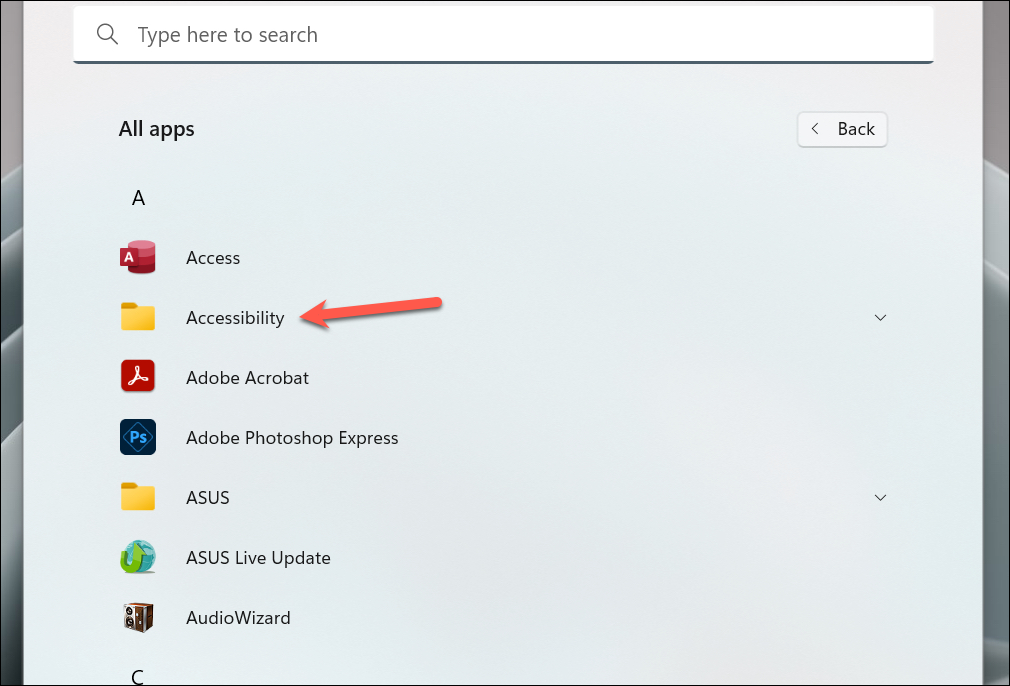
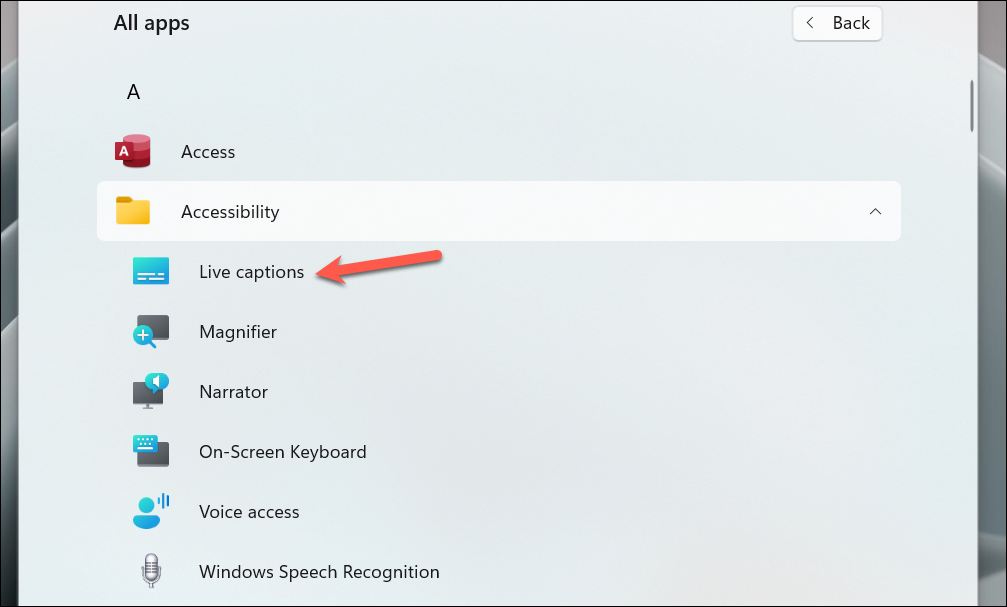
Method 3: Using the Start Menu

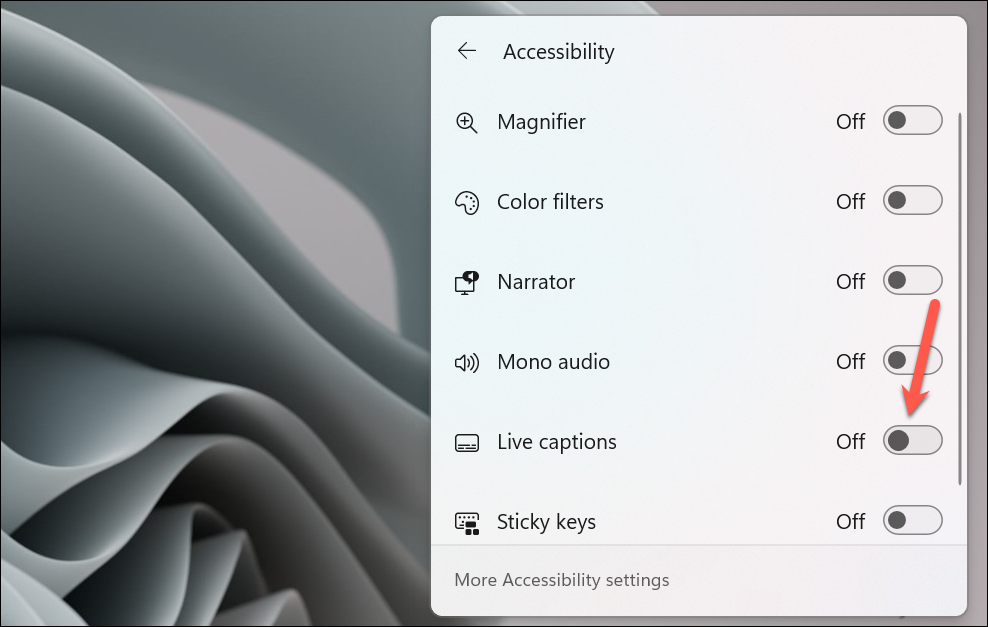
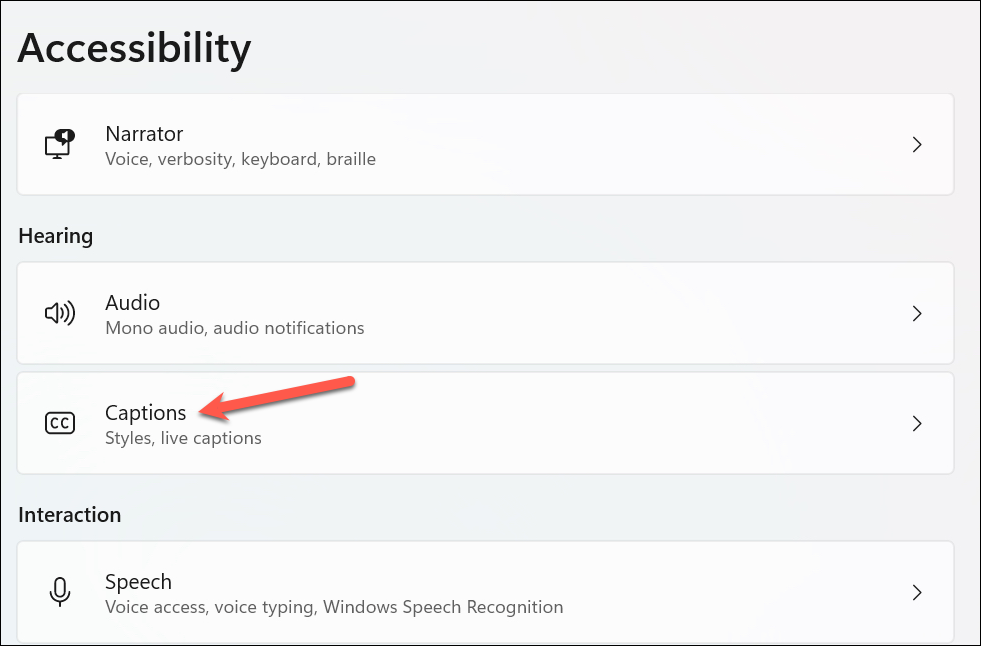
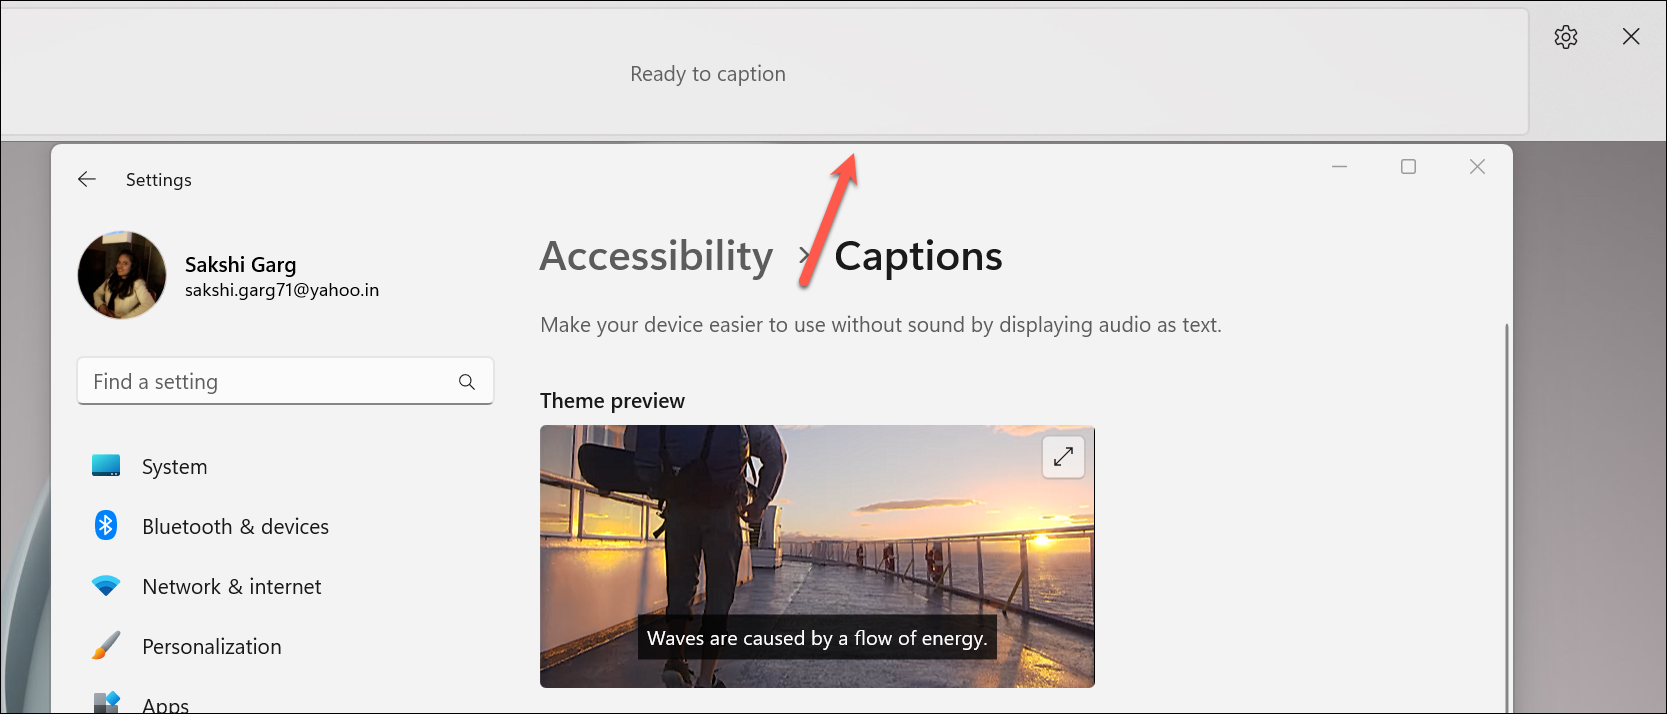
Method 4: Through the Settings App
Windows + I on your keyboard.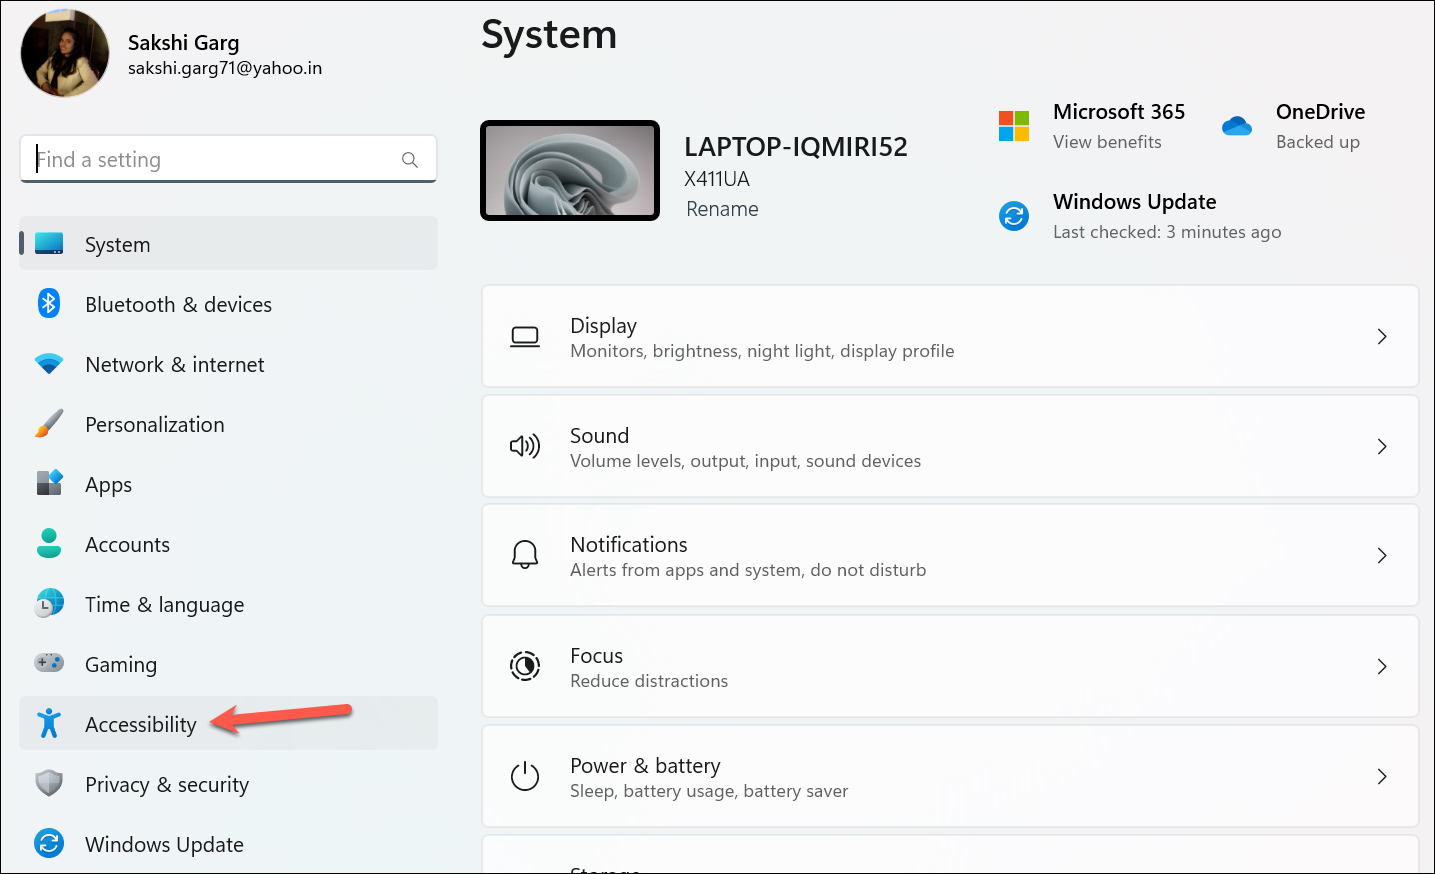
Customizing Live Captions Position
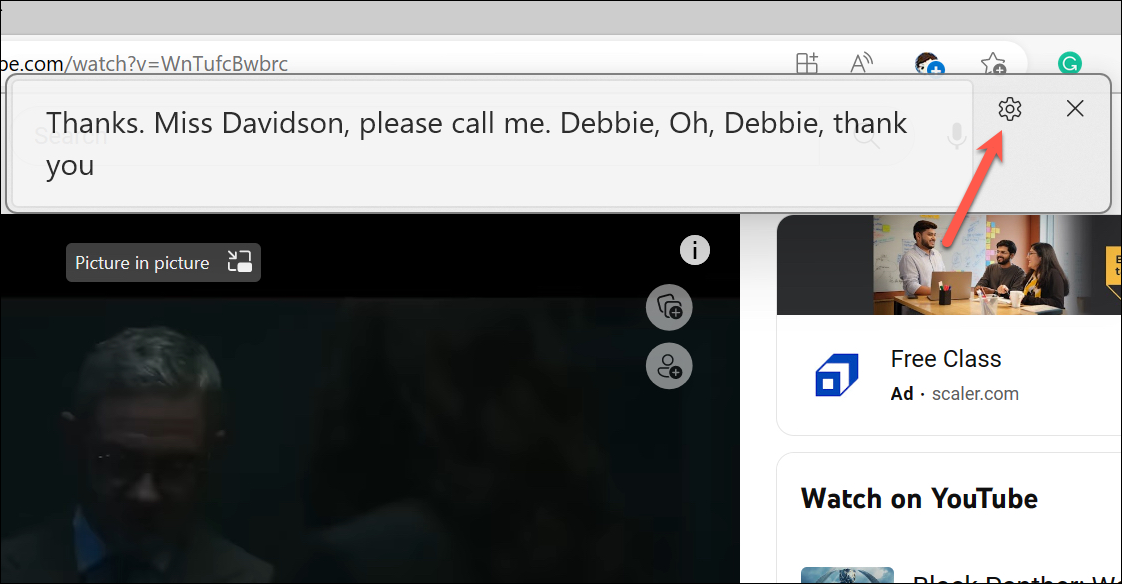
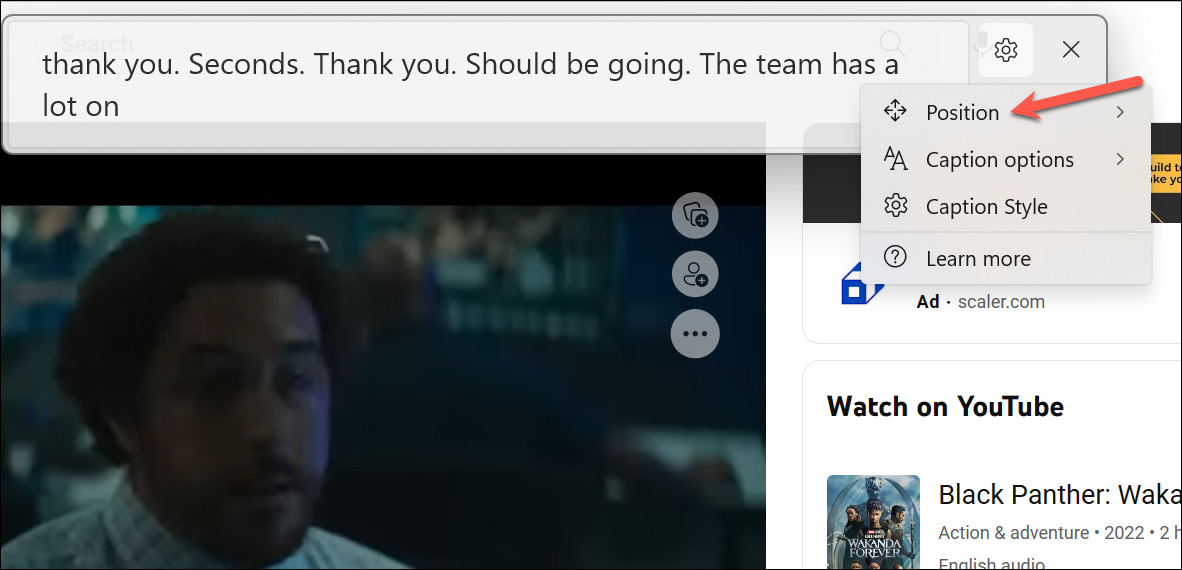
After enabling Live Captions, they appear in a floating window by default, which you can drag to any location on the screen. You can also change the default position of the captions to be docked at the top or bottom of your screen. Here’s how you can customize the position:
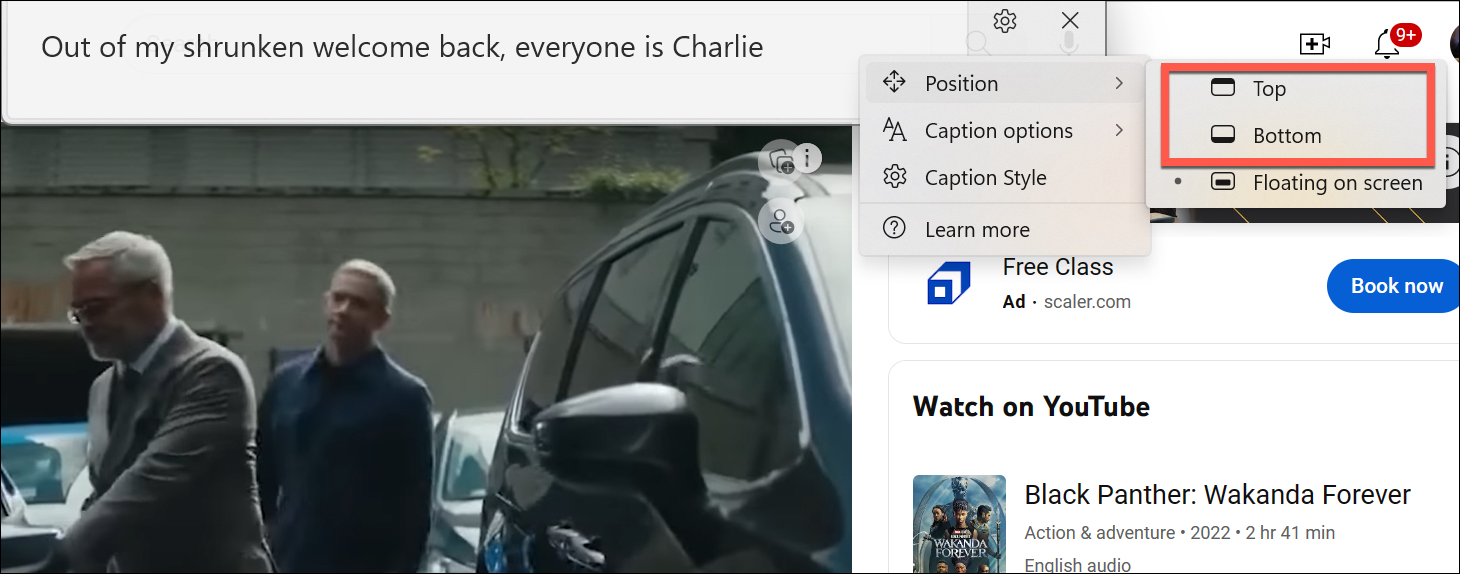
When docked, Live Captions will appear at the chosen edge of your screen, and Windows will adjust open applications so they do not overlap with the captions area.
To return to the floating window mode, select ‘Floating on Screen‘ from the ‘Position‘ menu.
You can also access other settings from the same menu, such as changing the caption style, managing profanity filters, and including microphone audio in the captions.
Enabling Live Captions in Windows 11 enhances the accessibility of your device, making it easier to follow along with audio content in various settings. With multiple ways to activate and customize Live Captions, you can choose the method that best fits your workflow and preferences.