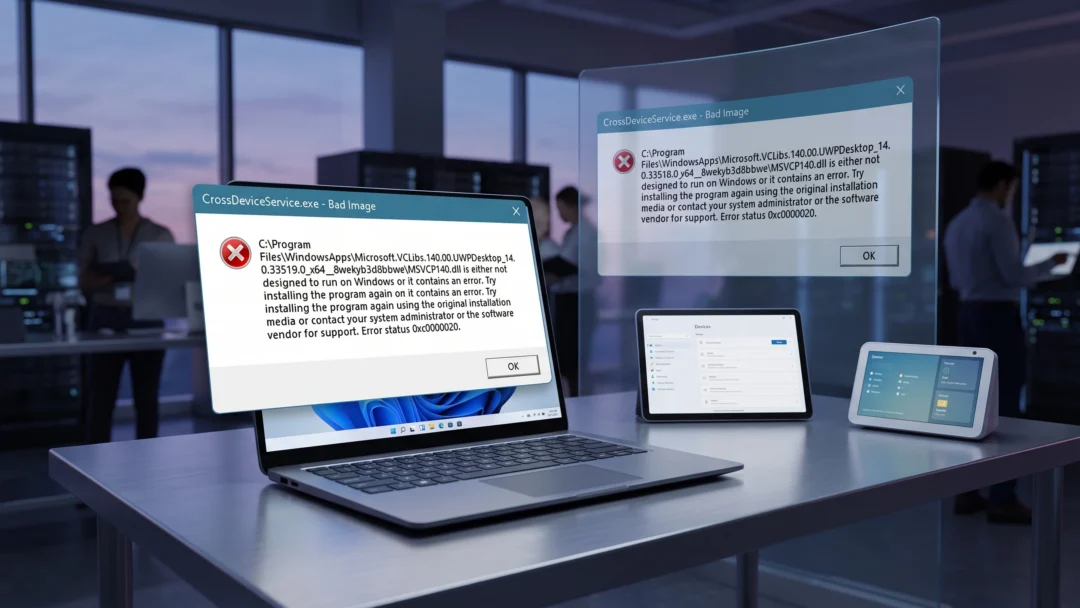
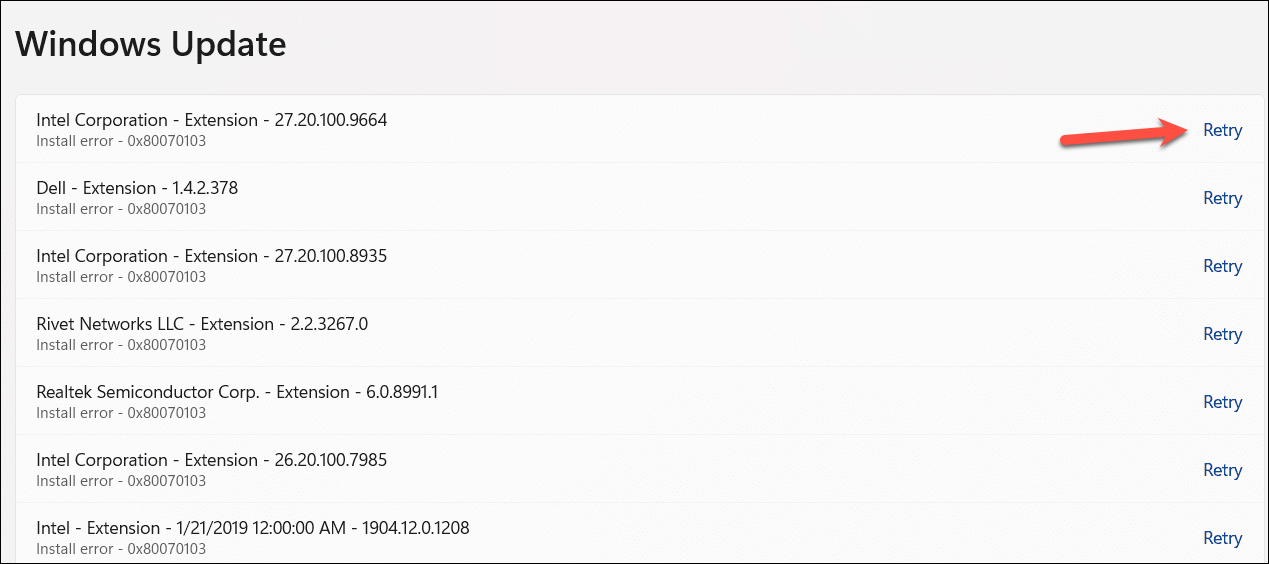
The Windows 11 update process is generally smooth, but sometimes users encounter the install error 0x80070103. This error often arises when Windows tries to install a driver that’s already present or incompatible with your system. While Microsoft notes that this error is harmless and won’t affect your regular usage, it can be frustrating. Fortunately, there are several methods to resolve this issue and ensure your system updates successfully.
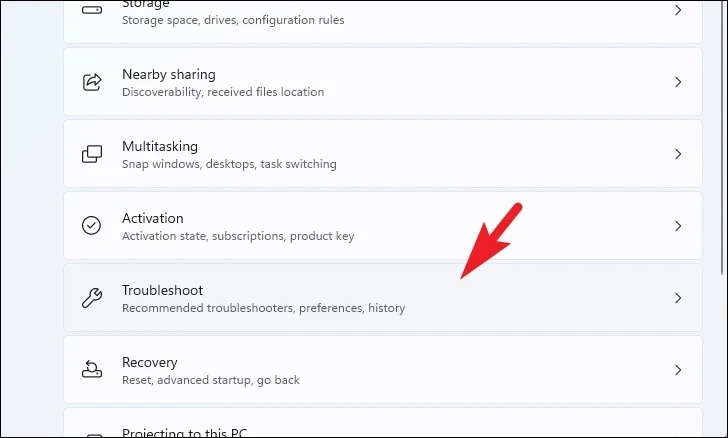
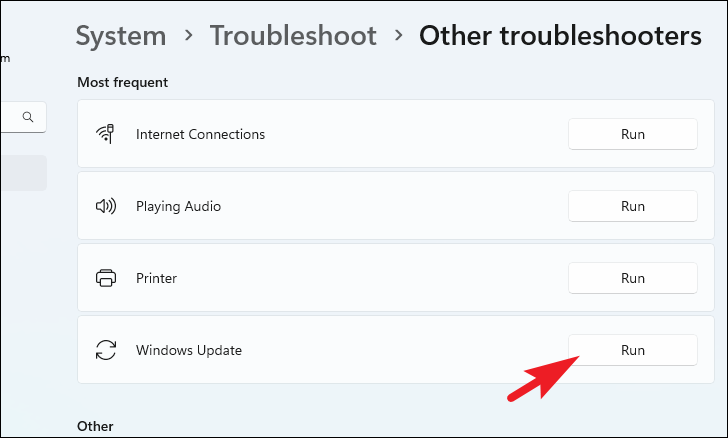
Run Update Troubleshooter
The built-in Windows Update Troubleshooter can automatically detect and fix common problems with your system updates and configurations.

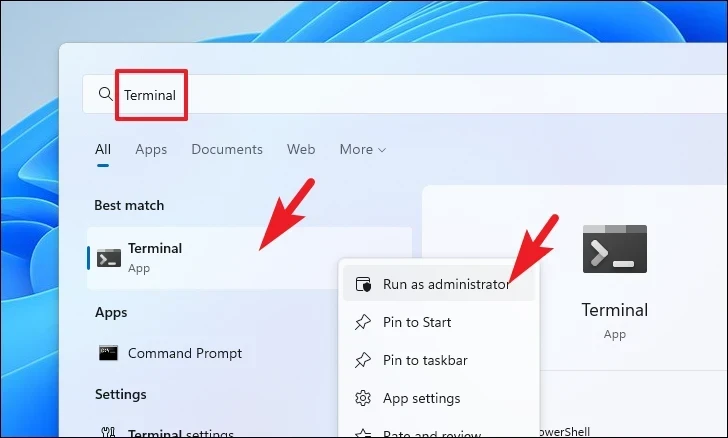
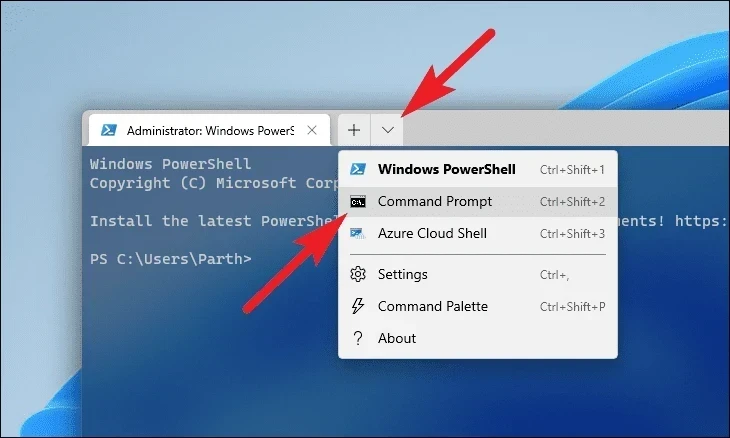
Reset Windows Update Service
If the troubleshooter doesn’t resolve the issue, resetting the Windows Update services can help. This process will clear any corrupted update files and reset update components.
Enter after each:net stop bitsnet stop wuaservnet stop cryptsvc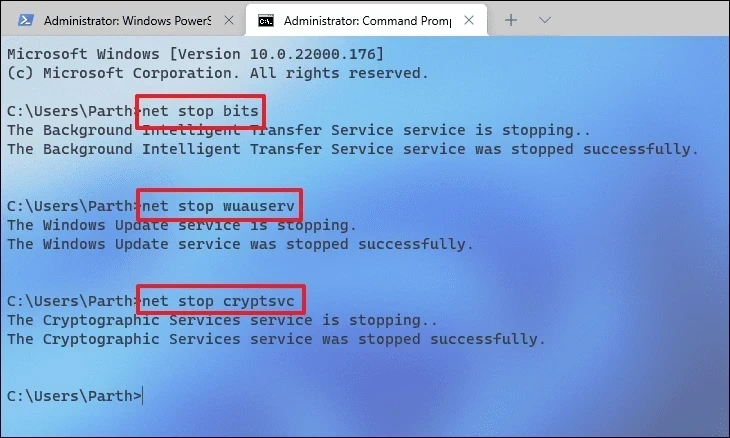
C:\Windows\SoftwareDistribution\DataStore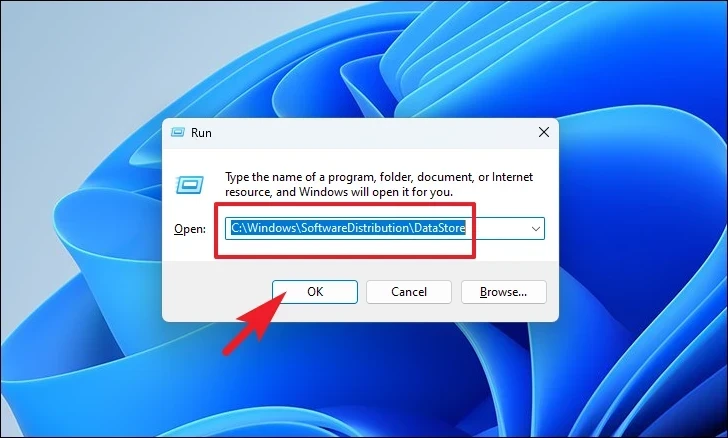
Ctrl + A to select all files, then press Shift + Delete to permanently delete them.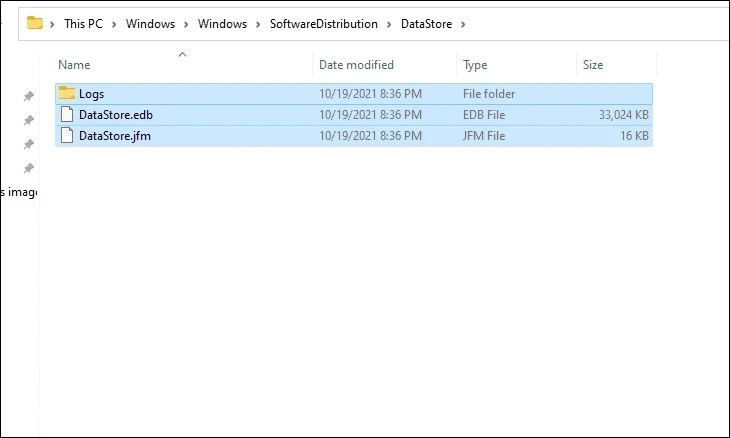
Del "%AllUSERSPROFILE%\Application Data\Microsoft\Network\Downloader\*.*"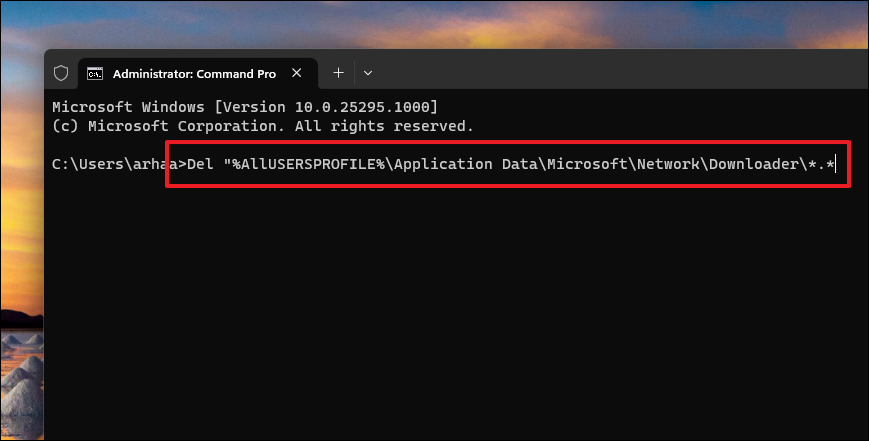
rmdir %systemroot%\system32\catroot2 /S /Q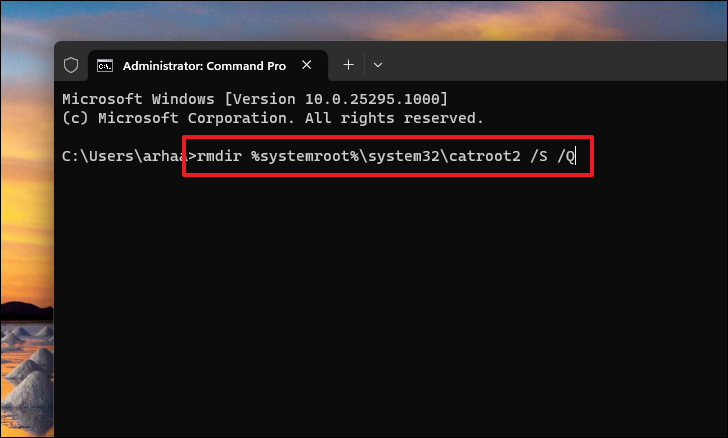
sc.exe sdset bits D:(A;;CCLCSWRPWPDTLOCRRC;;;SY)
(A;;CCDCLCSWRPWPDTLOCRSDRCWDWO;;;BA)
(A;;CCLCSWLOCRRC;;;AU)
(A;;CCLCSWRPWPDTLOCRRC;;;PU)
sc.exe sdset wuauserv D:(A;;CCLCSWRPWPDTLOCRRC;;;SY)
(A;;CCDCLCSWRPWPDTLOCRSDRCWDWO;;;BA)
(A;;CCLCSWLOCRRC;;;AU)
(A;;CCLCSWRPWPDTLOCRRC;;;PU)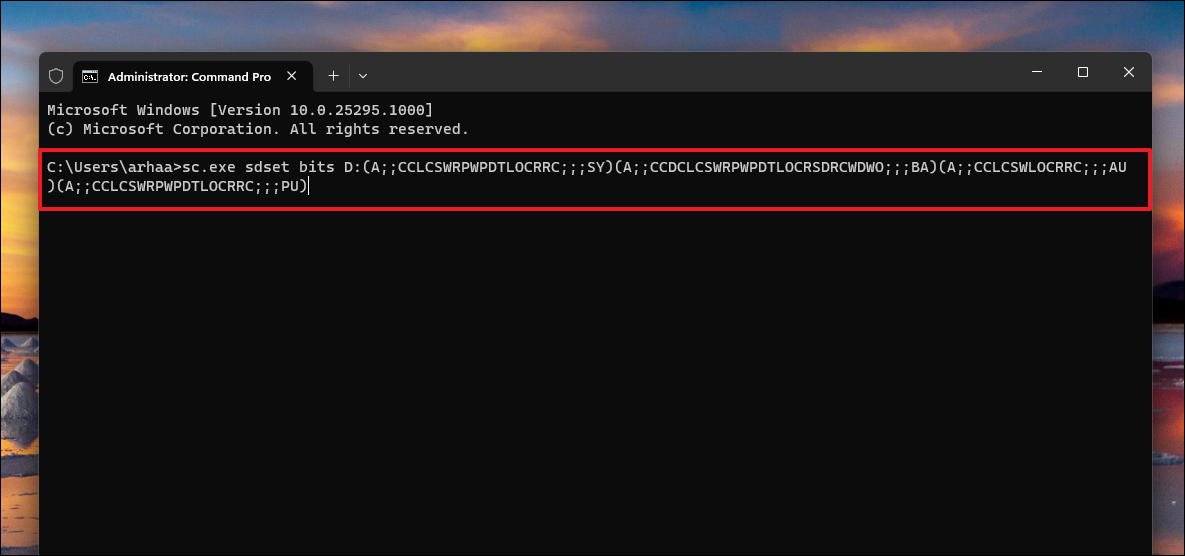
cd /d %windir%\system32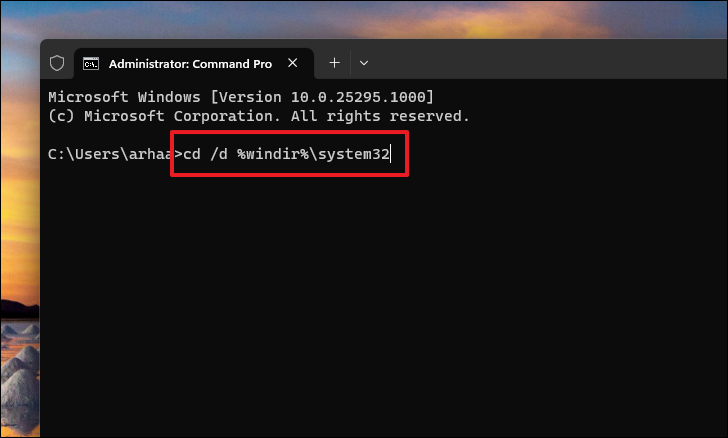
Enter after each:regsvr32.exe /s atl.dllregsvr32.exe /s urlmon.dllregsvr32.exe /s mshtml.dllregsvr32.exe /s shdocvw.dllregsvr32.exe /s browseui.dllregsvr32.exe /s jscript.dllregsvr32.exe /s vbscript.dllregsvr32.exe /s scrrun.dllregsvr32.exe /s msxml.dllregsvr32.exe /s msxml3.dllregsvr32.exe /s msxml6.dllregsvr32.exe /s actxprxy.dllregsvr32.exe /s softpub.dllregsvr32.exe /s wintrust.dllregsvr32.exe /s dssenh.dllregsvr32.exe /s rsaenh.dllregsvr32.exe /s gpkcsp.dllregsvr32.exe /s sccbase.dllregsvr32.exe /s slbcsp.dllregsvr32.exe /s cryptdlg.dllregsvr32.exe /s oleaut32.dllregsvr32.exe /s ole32.dllregsvr32.exe /s shell32.dllregsvr32.exe /s initpki.dllregsvr32.exe /s wuapi.dllregsvr32.exe /s wuaueng.dllregsvr32.exe /s wuaueng1.dllregsvr32.exe /s wucltui.dllregsvr32.exe /s wups.dllregsvr32.exe /s wups2.dllregsvr32.exe /s wuweb.dllregsvr32.exe /s wucltux.dllregsvr32.exe /s wuwebv.dllregsvr32.exe /s qmgr.dllregsvr32.exe /s qmgrprxy.dll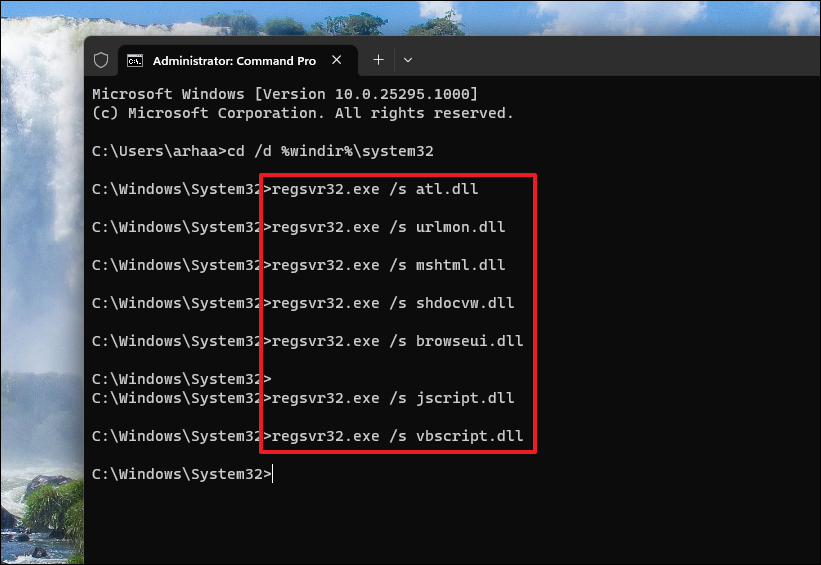
net start bitsnet start wuaservnet start cryptsvc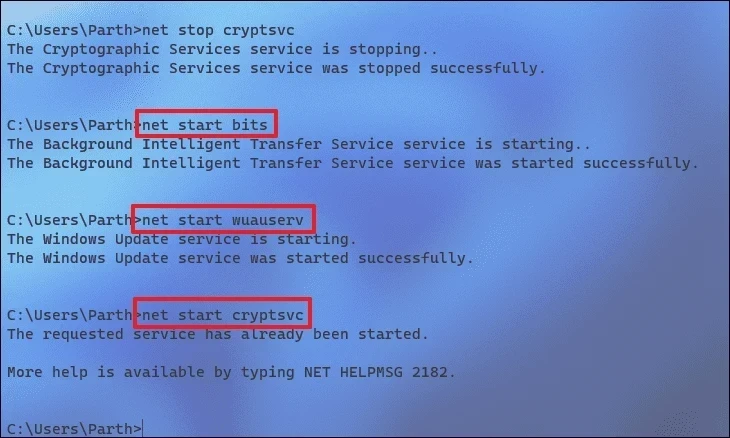
Run DISM and SFC Scan to Fix Corrupted System Files
Corrupted system files can interfere with Windows Update. Running DISM and SFC scans can repair these files.
DISM /Online /Cleanup-Image /RestoreHealth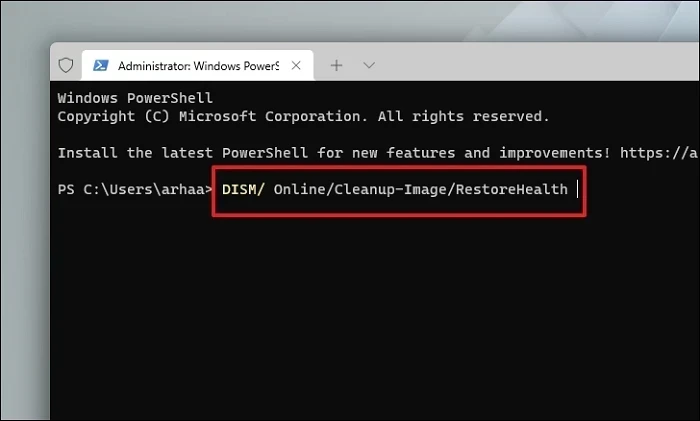
SFC /scannow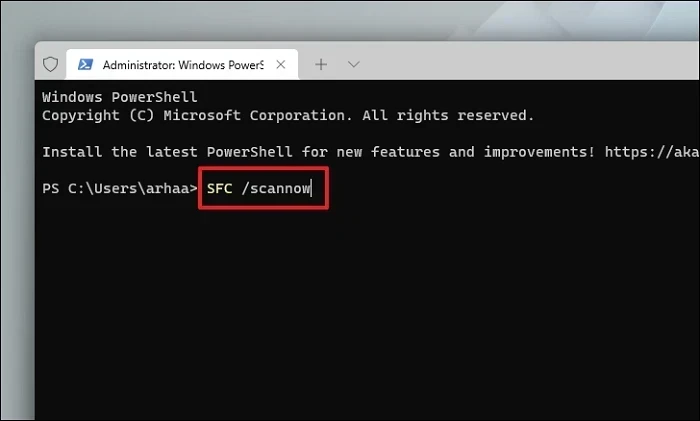
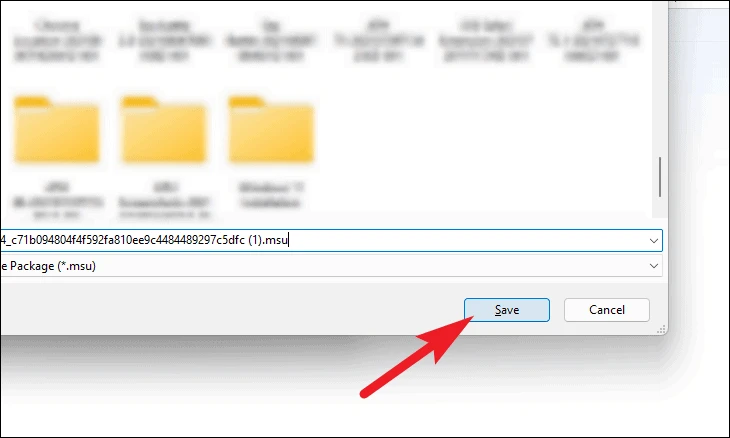
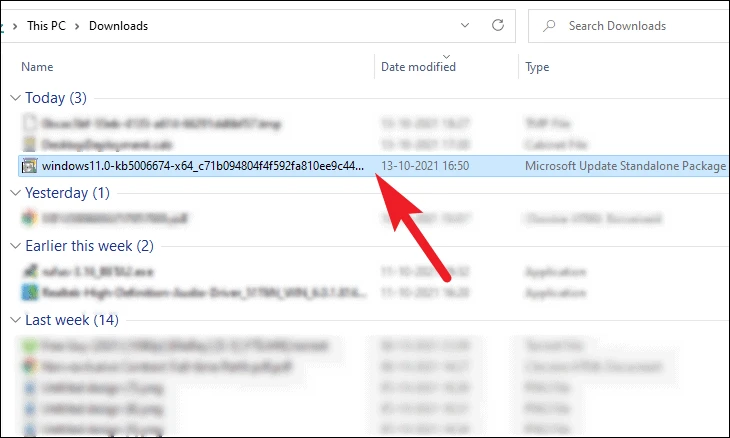
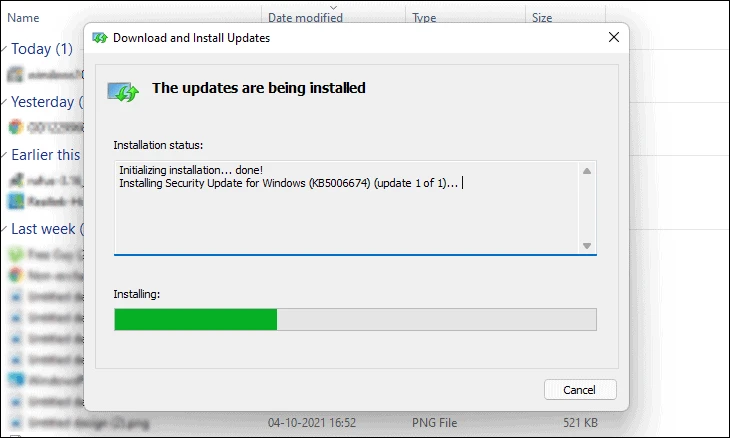
Manually Install the Update
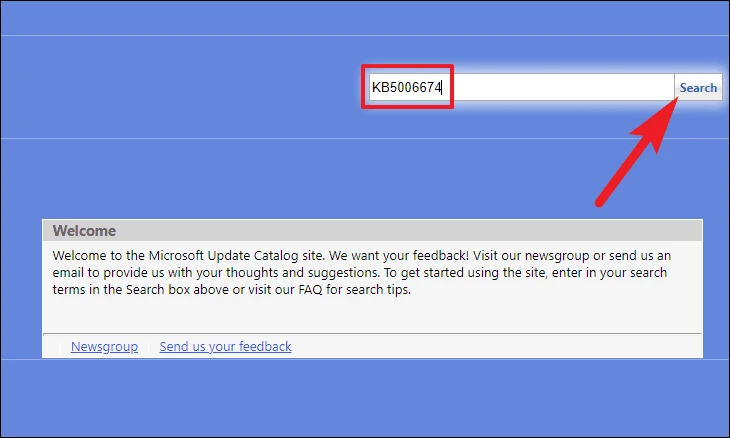
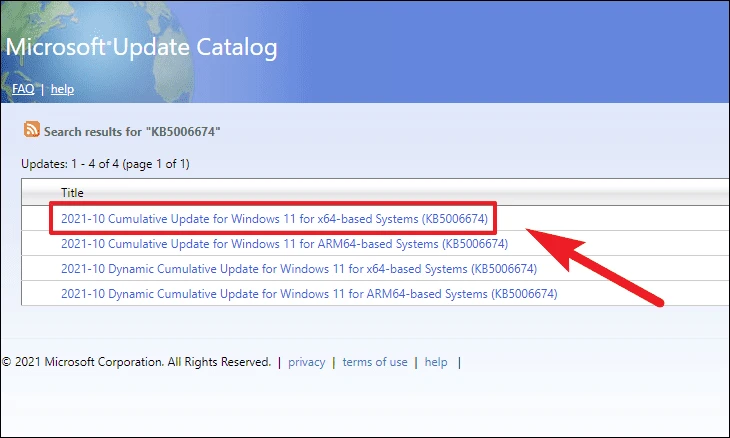
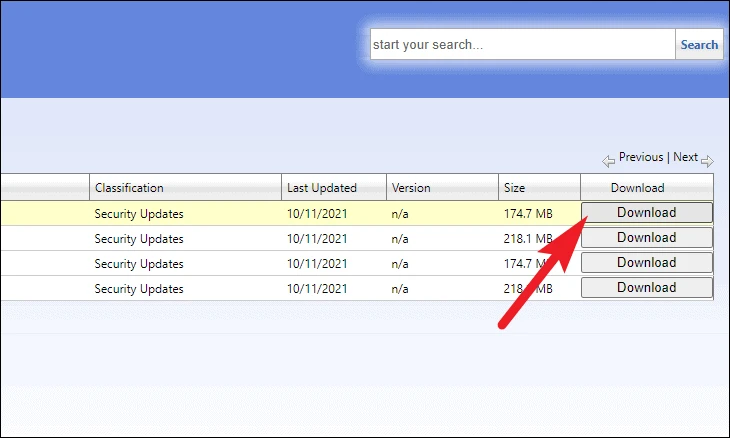
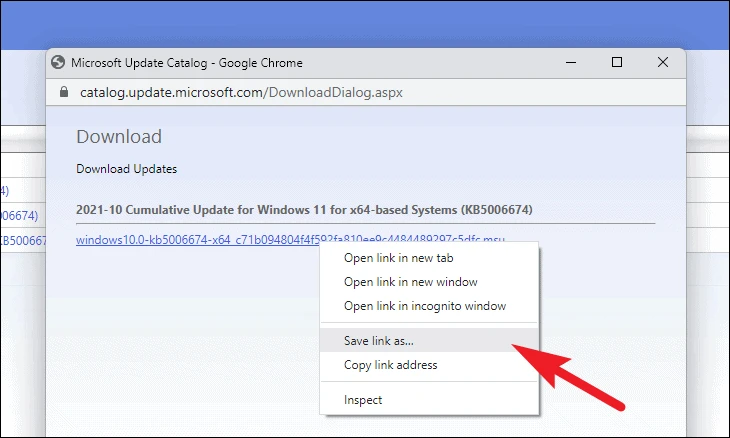
If Windows Update continues to fail, you can manually download and install the update from the Microsoft Update Catalog.
Pause and Resume the Update
Sometimes, a simple pause and resume can fix update errors.
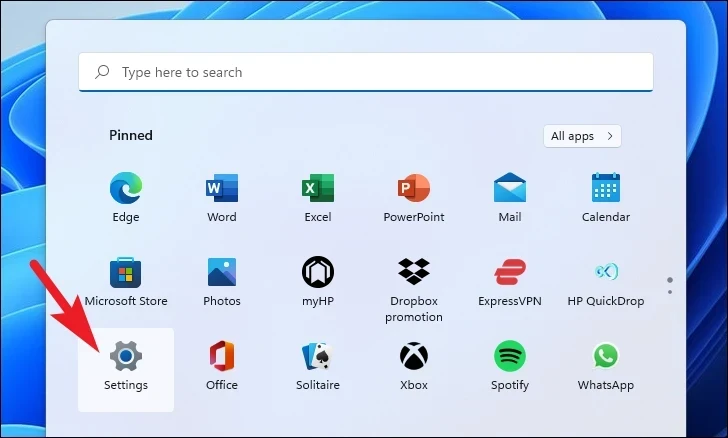
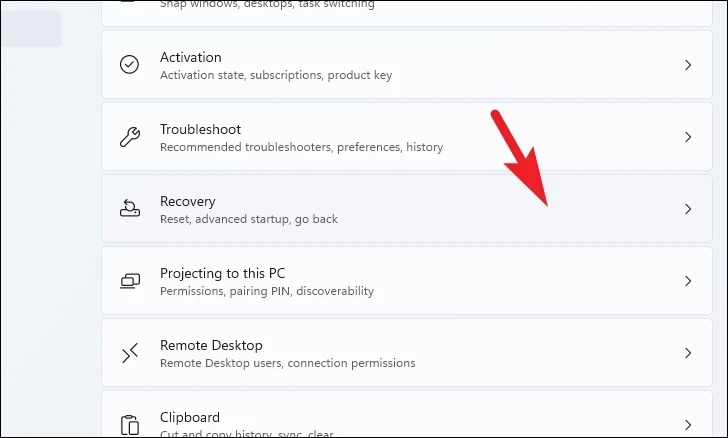
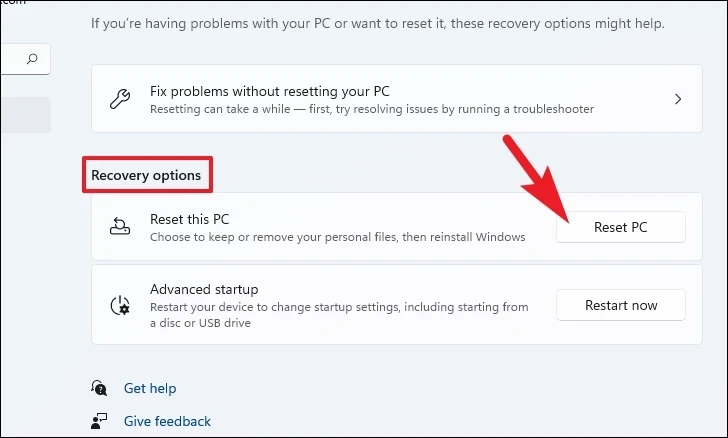
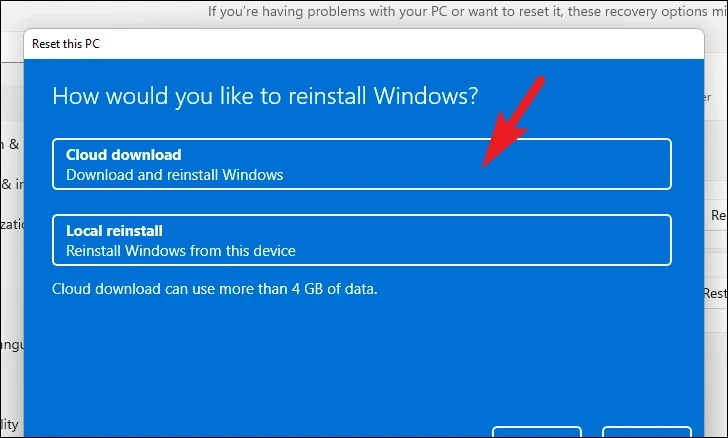
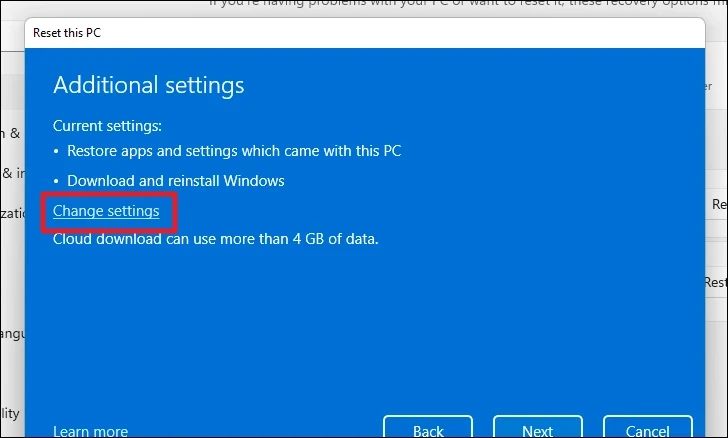
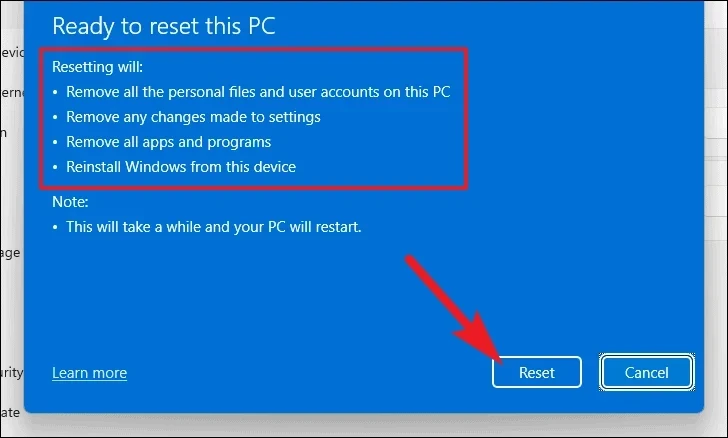
Reset Your PC
If all else fails, resetting your PC can resolve deep-rooted issues. This process will reinstall Windows while keeping your personal files intact, but it will remove installed applications.
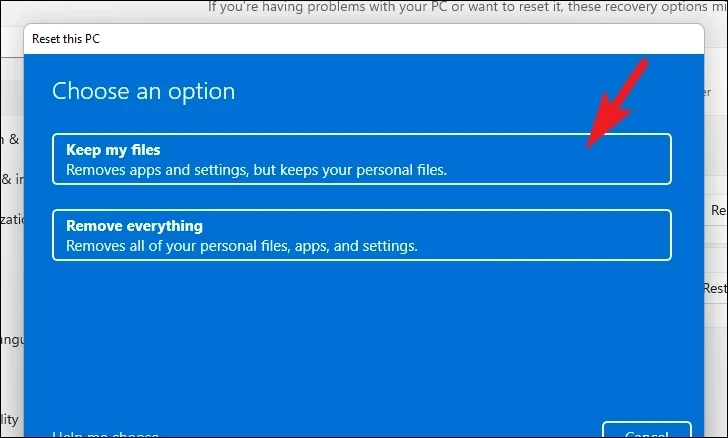
Note: This will require an internet connection and may use over 4 GB of data.
By following these methods, you should be able to resolve the install error 0x80070103 in Windows 11 and successfully update your system.