
Enabling macros in Microsoft Excel allows you to automate repetitive and complex tasks, enhancing your productivity. However, since macros can pose security risks by potentially containing malicious code, Excel disables them by default. This guide explains how to enable macros safely in Excel, whether for individual files, all workbooks, or specific trusted locations.
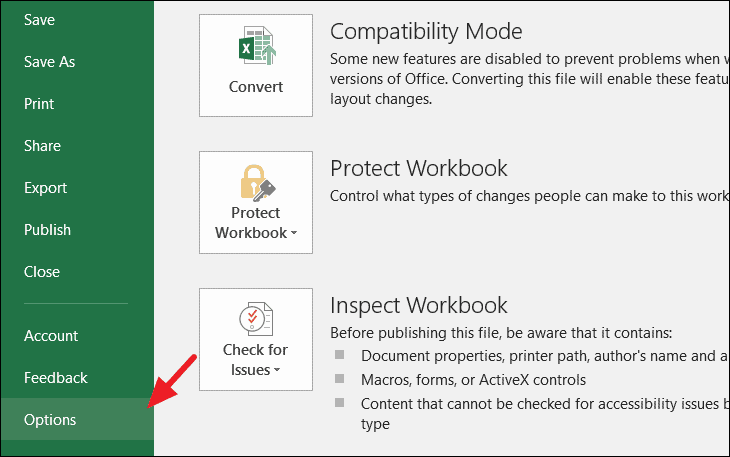
Enable macros on individual files
You can enable macros for specific Excel documents using the message bar or through the backstage view.
Enable macros from the message bar
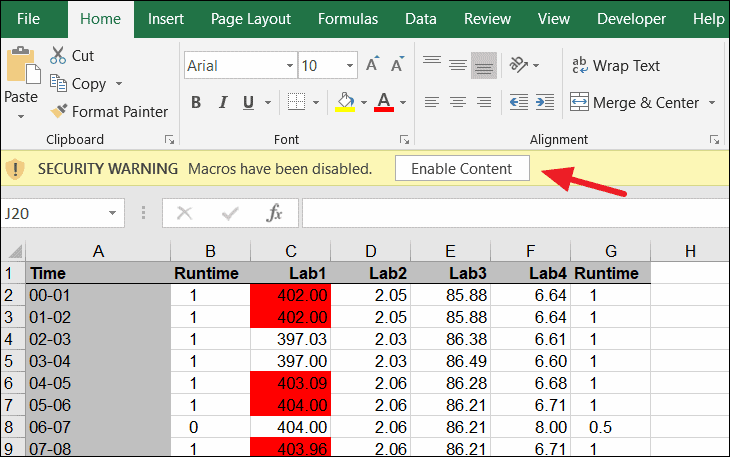
When you open an Excel file that contains macros, a yellow message bar appears below the ribbon indicating that macros have been disabled.
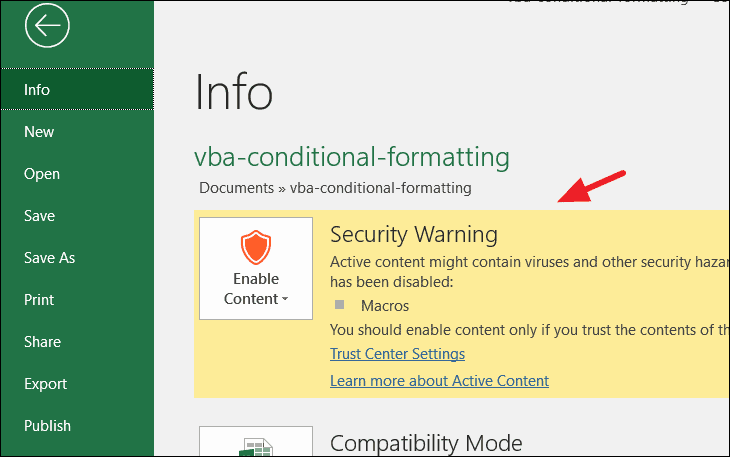
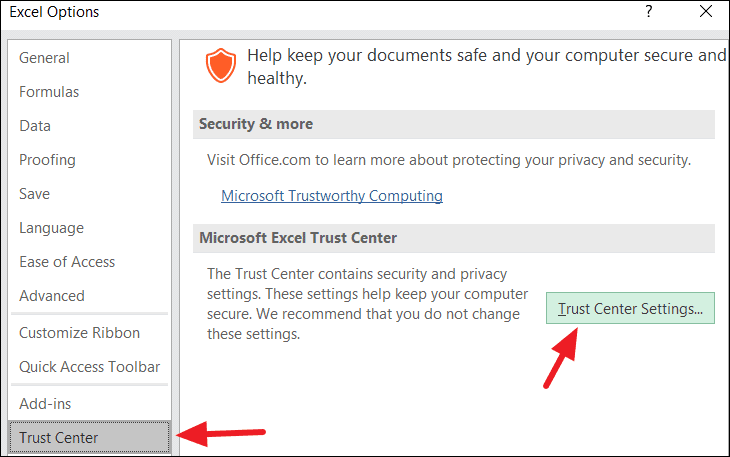
Enable macros in the backstage view
If the message bar is not visible, you can enable macros through the backstage view.
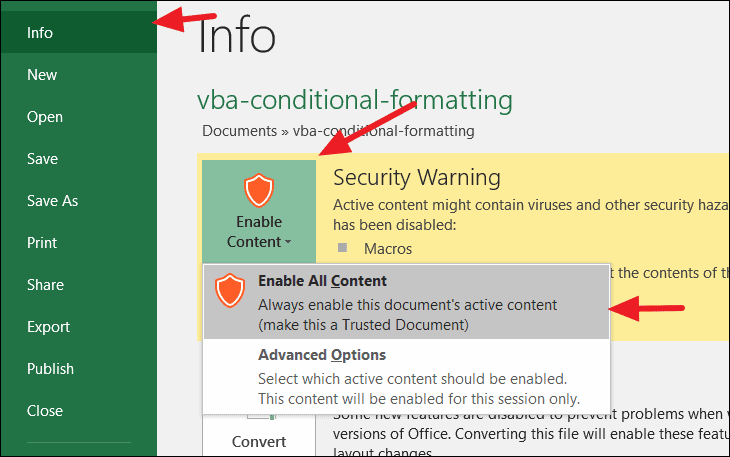
Once macros are enabled, Excel designates the document as trusted, so you won’t receive security warnings for it in the future.
Enable macros for one session
If you prefer to enable macros temporarily without designating the file as trusted, you can enable them for the current session only.

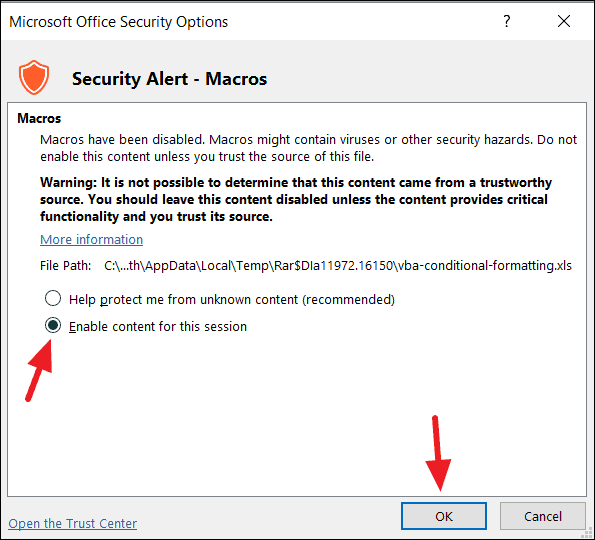
Macros will now run in the document for the current session. The next time you open the file, macros will be disabled again unless you repeat these steps.
Enable macros in all workbooks
If you frequently work with macros and want to enable them in all Excel workbooks by default, you can adjust your Trust Center settings. Be cautious with this option, as it can expose your system to security risks from malicious macros.
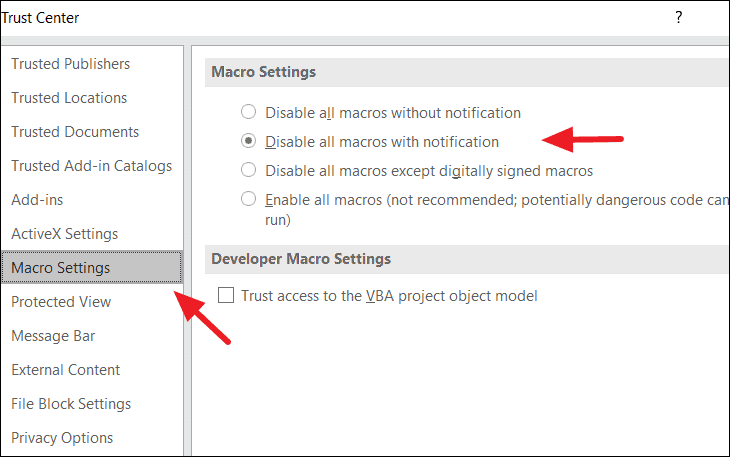
The four macro settings are:
- Disable all macros without notification: Blocks all macros without providing any alerts.
- Disable all macros with notification: The default setting; macros are disabled, but you receive notifications with the option to enable them.
- Disable all macros except digitally signed macros: Disables macros, except those with a trusted digital signature.
- Enable all macros: Allows all macros to run without warnings, which can pose significant security risks.
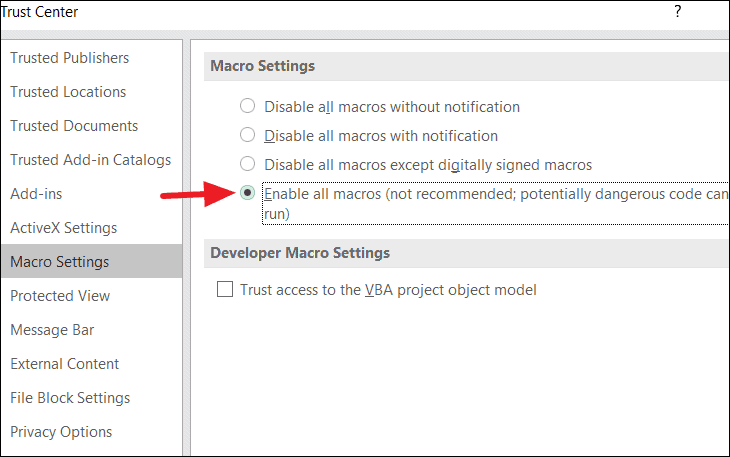
With this setting enabled, all macros in any workbook will run automatically without prompts. To revert this change, return to the macro settings and select a different option.
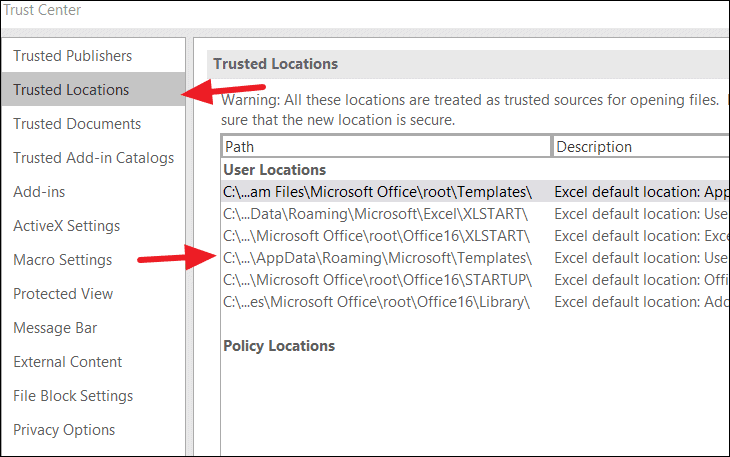
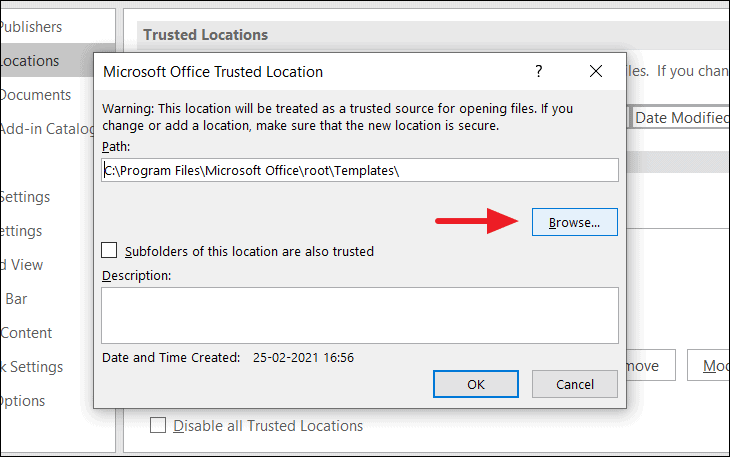
Enable macros in trusted locations
You can designate specific folders as trusted locations, allowing Excel to run macros in any files stored there without security warnings. This method provides a balance between convenience and security.


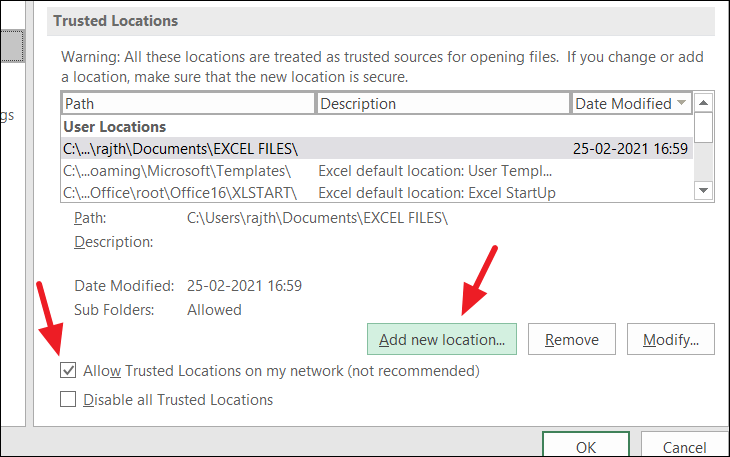
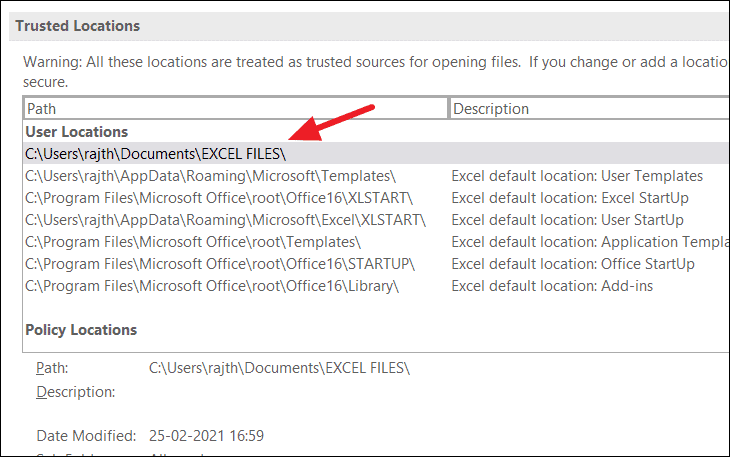
Any macro-enabled files saved in this trusted location will run macros without any security warnings. Be cautious when adding network locations as trusted, as this can increase the risk of running malicious macros.
Remove trusted documents
If you have previously trusted documents but now want to ensure that macros do not run automatically, you can clear your list of trusted documents.
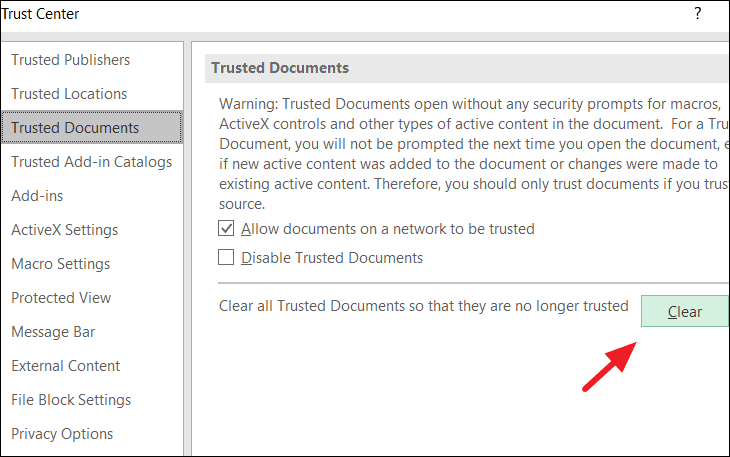
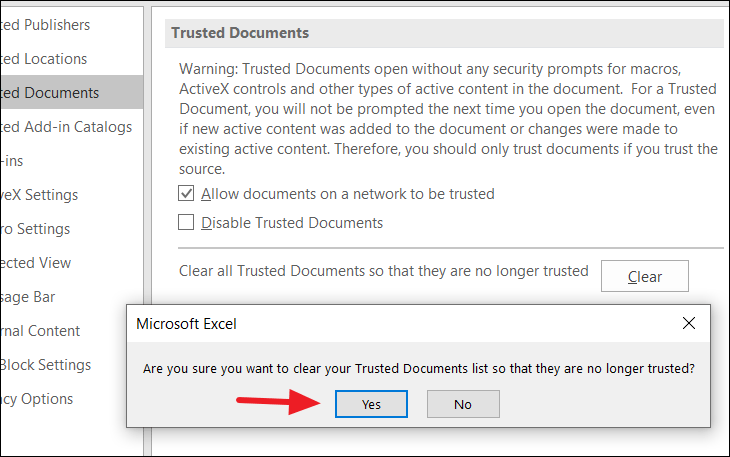
After clearing trusted documents, Excel will no longer automatically allow macros, ActiveX controls, or other active content in previously trusted files.
By understanding how to enable macros safely in Excel, you can automate tasks effectively while maintaining your system’s security. Always ensure that you trust the source of any macros before enabling them.


