Experiencing frequent crashes, unexpected errors, or the infamous blue screen on your Windows 11 PC can be alarming. These issues are often caused by corrupted or missing system files. Such corruption can result from power outages, malware infections, hardware failures, or unsuccessful updates. Fortunately, Windows 11 provides several tools to help you repair or replace these problematic files and restore your system’s stability.
Run DISM Commands to Restore Corrupted Files
The Deployment Image Servicing and Management (DISM) tool is a powerful utility that can scan and repair damaged system files by downloading the necessary replacements from Microsoft’s servers. This method is particularly effective when the System File Checker (SFC) fails to fix the issues.
Command Prompt or cmd, and select Run as administrator.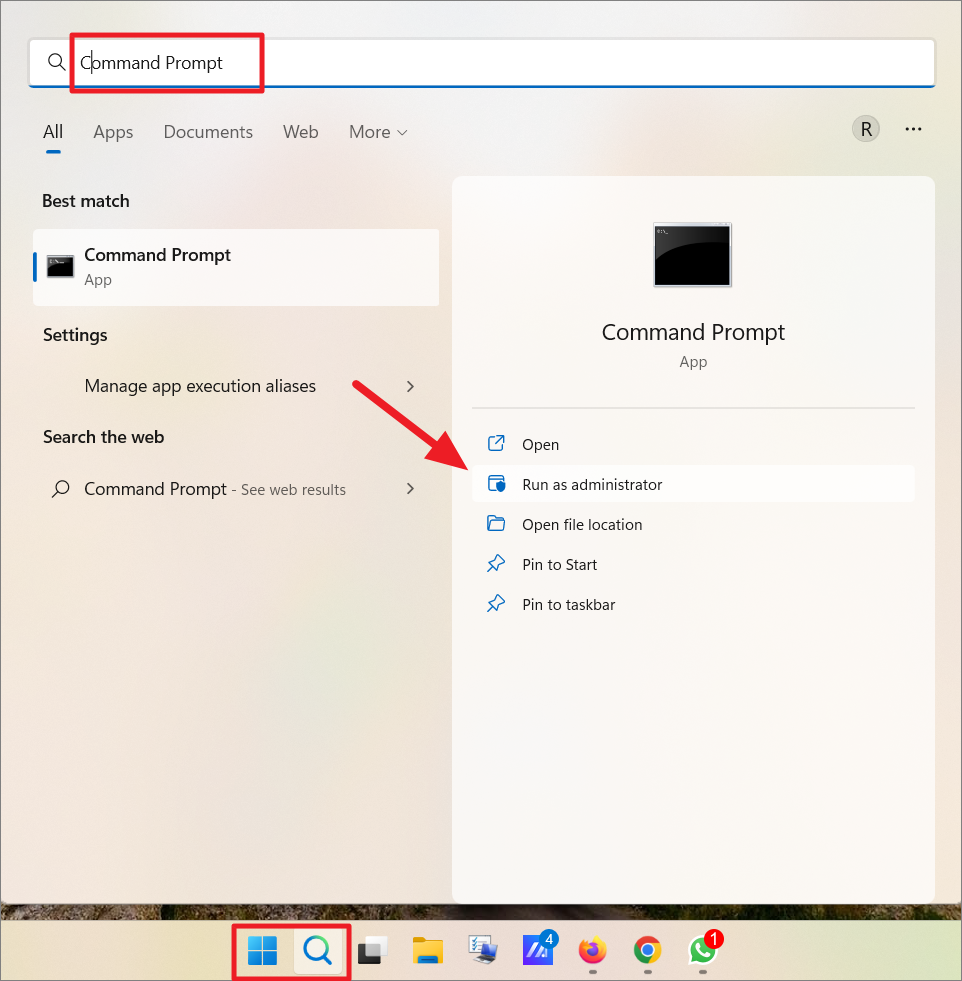
DISM /Online /Cleanup-image /Scanhealth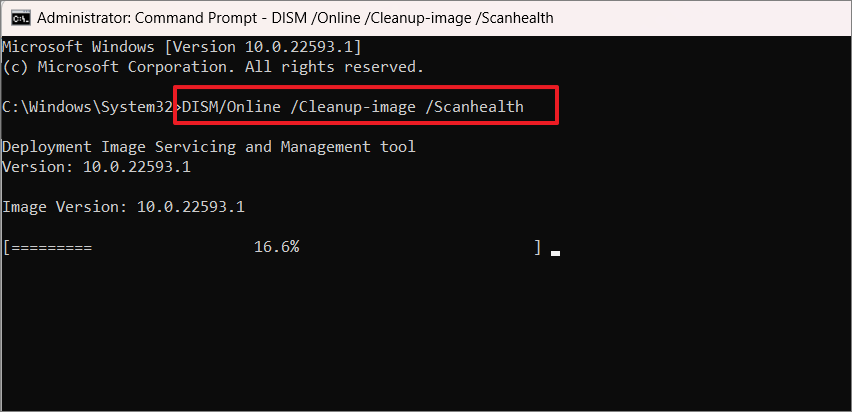
DISM /Online /Cleanup-Image /RestoreHealth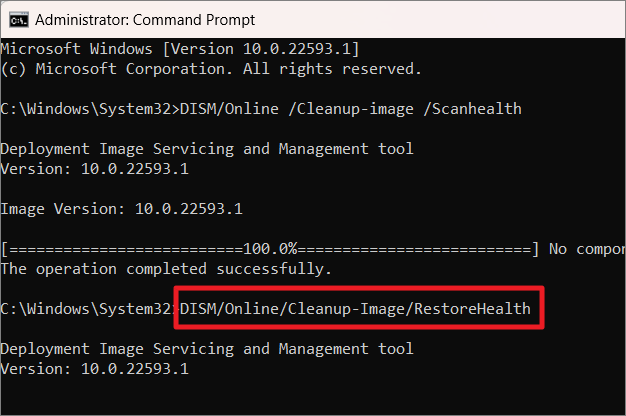
Allow the process to finish uninterrupted. DISM will connect to Windows Update servers to download and replace damaged files. Once completed, restart your computer to apply the changes.
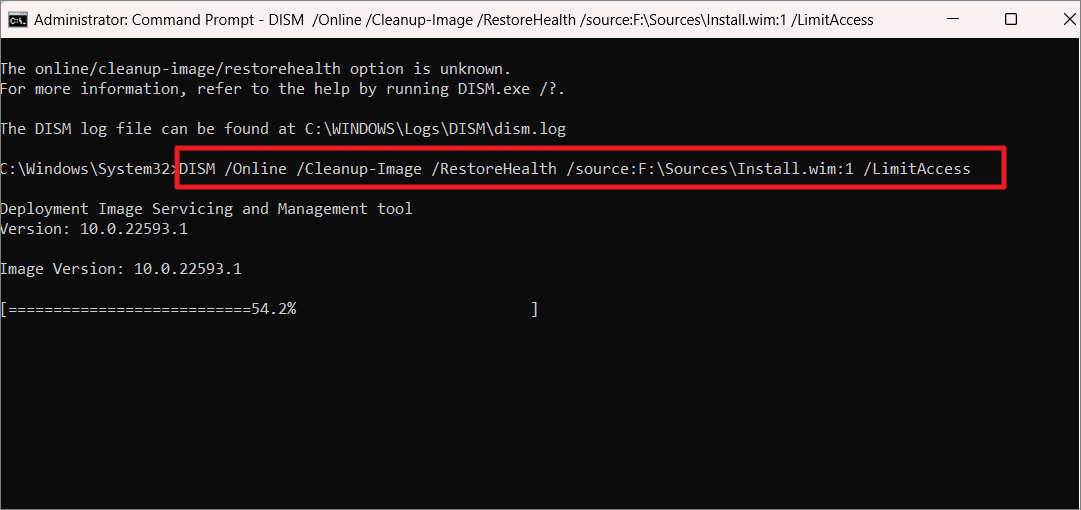
Note: If you lack an internet connection, you can perform an offline repair using a Windows installation media. Insert the media and adjust the command to specify the source:
DISM /Online /Cleanup-Image /RestoreHealth /Source:F:\Sources\Install.wim:1 /LimitAccessReplace F: with the drive letter of your installation media.
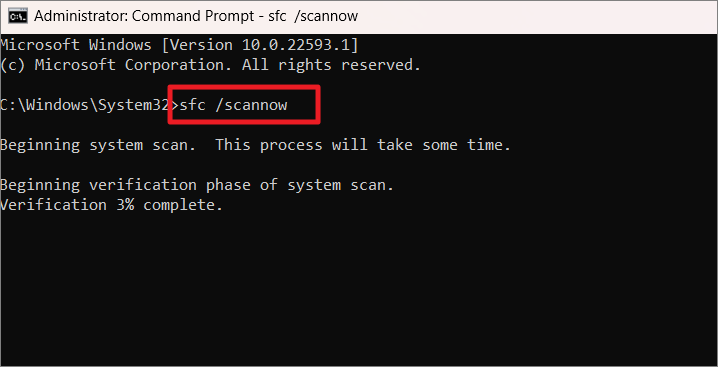
Scan for Corrupt Files and Fix Them
The System File Checker (SFC) is a built-in Windows utility that scans for and repairs corrupted system files by replacing them with cached copies.
Command Prompt or cmd, right-click it, and select Run as administrator.sfc /scannow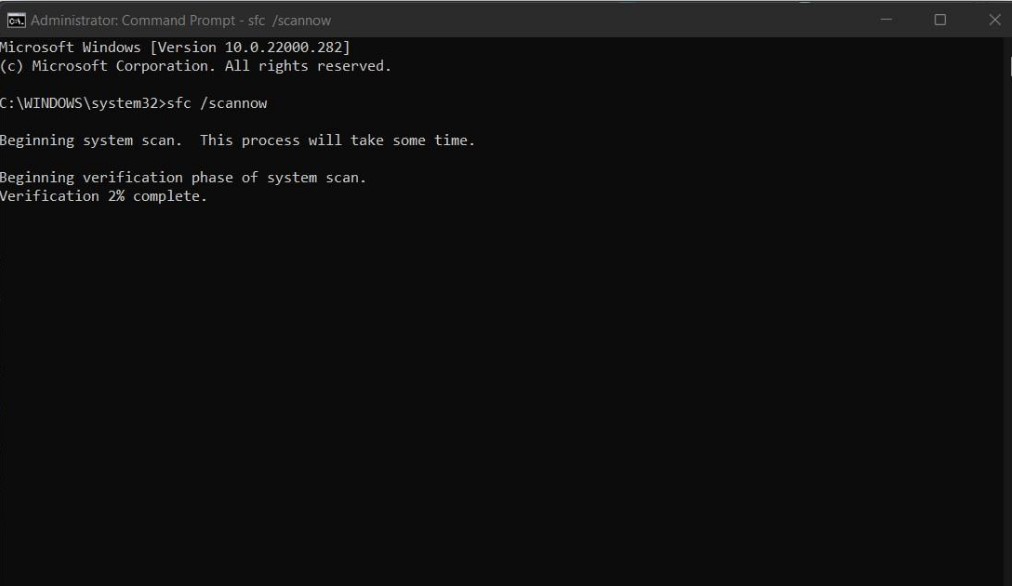
The SFC tool will scan all protected system files and replace any corrupted ones it finds.
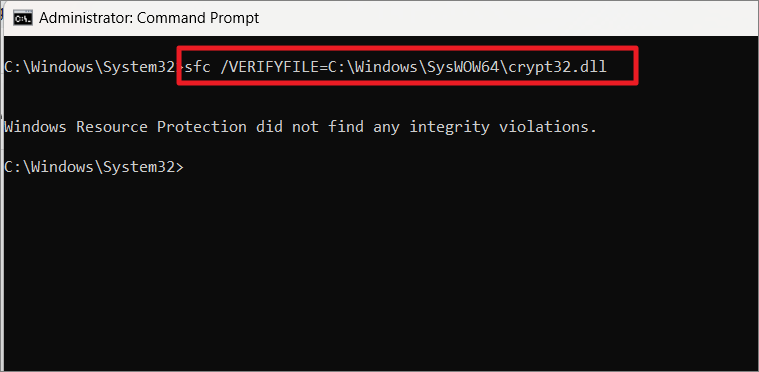
- “Windows Resource Protection did not find any integrity violations.”
- “Windows Resource Protection found corrupt files and successfully repaired them.”
- “Windows Resource Protection found corrupt files but was unable to fix some of them.”
If corrupted files were repaired, restart your computer. If issues remain, consider using the DISM tool as described earlier.
Different Parameters
The SFC command offers various parameters for specific scenarios:
sfc /verifyonly: Scans for issues without repairing.sfc /scanfile=<file>: Scans and repairs a specific file.sfc /verifyfile=<file>: Verifies a specific file without repairing.sfc /offbootdir=<bootdir> /offwindir=<windir>: Performs offline repair.
View and Analyze System File Checker Logs
SFC generates a log file with details of the scan and any repairs made.
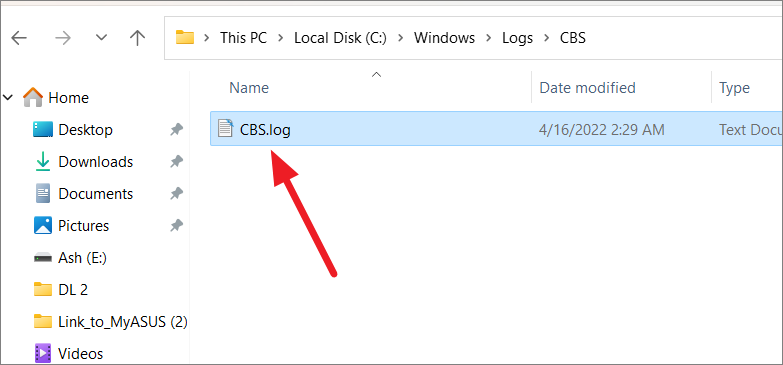
You can filter the log for relevant entries using:
findstr /c:"[SR]" %windir%\Logs\CBS\CBS.log > "C:\SFClogs\sfclogs.txt"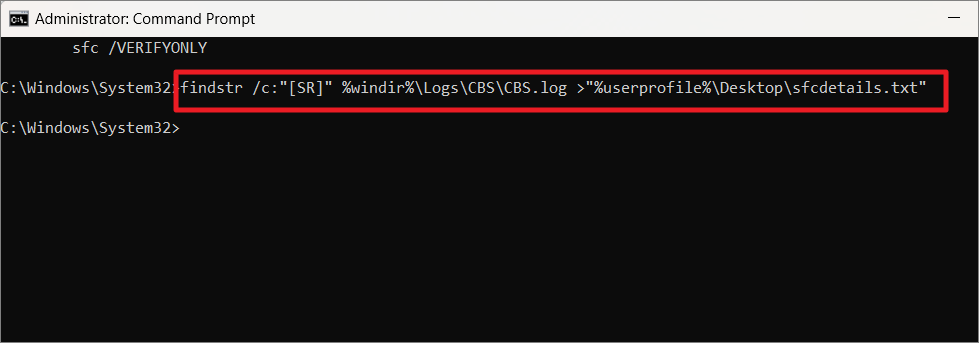
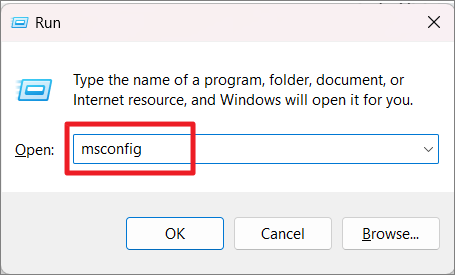
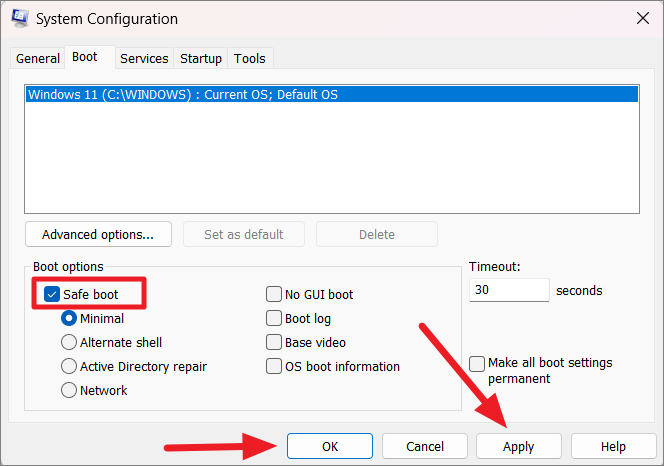
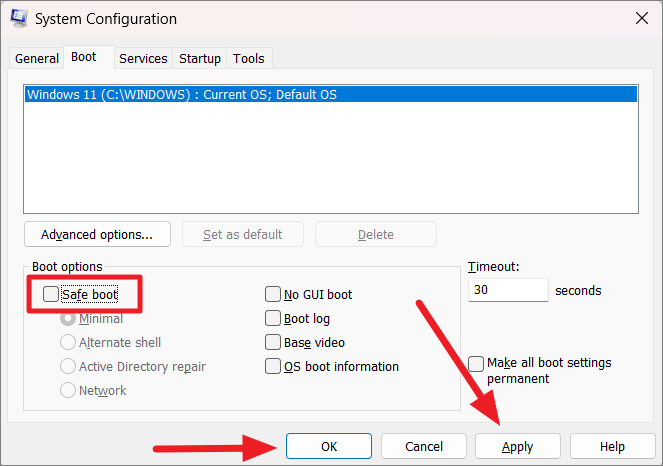
Run System File Checker (SFC Scan) in Safe Mode
Running SFC in Safe Mode can help if third-party applications are interfering with the repair process.
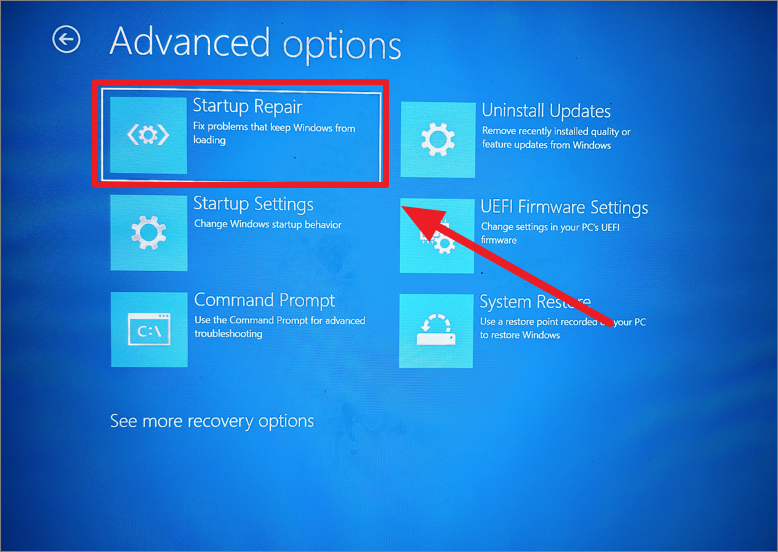
Use Startup Repair to Fix Corrupted Files
If your system struggles to boot due to corrupted files, the Startup Repair tool can diagnose and resolve issues preventing Windows from starting correctly.

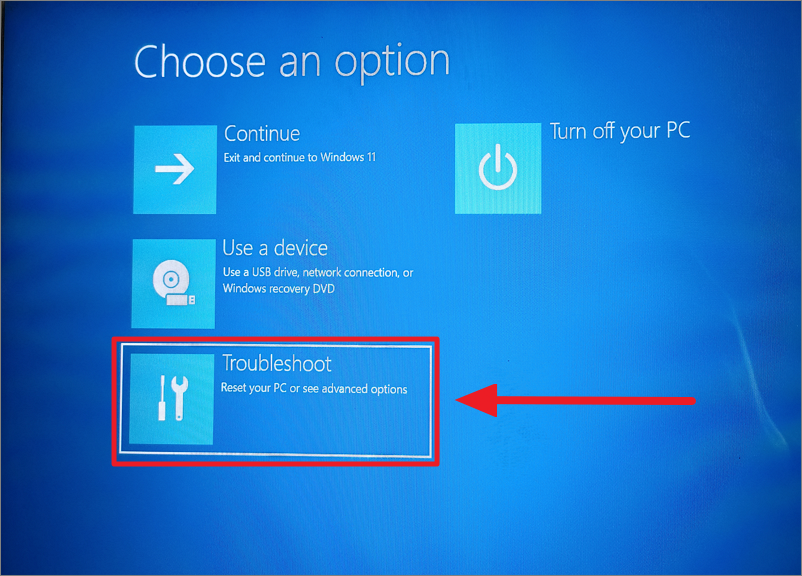
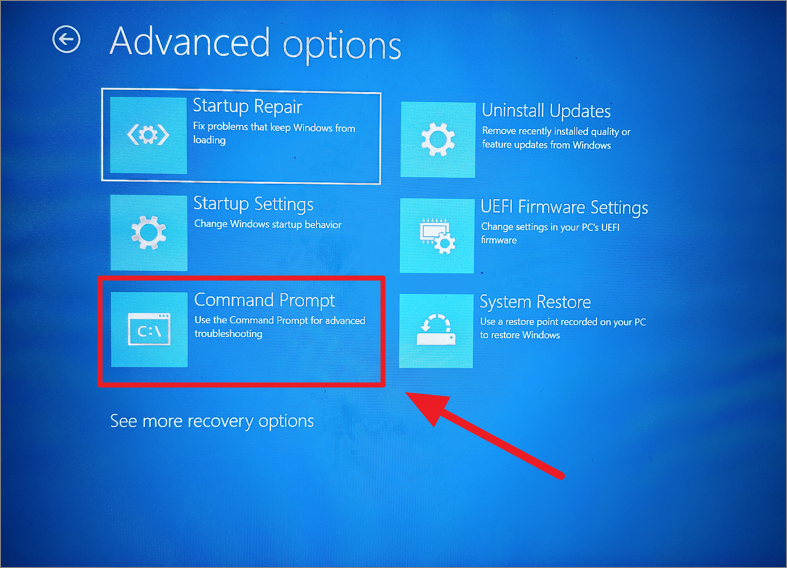
Run an SFC Scan Before Windows Starts
When SFC can’t repair files while Windows is running, try running it from the recovery environment.
wmic logicaldisk get deviceid, volumename, description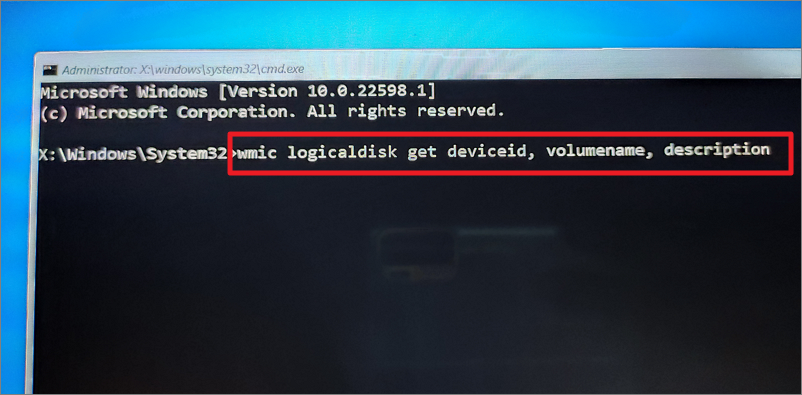
sfc /scannow /offbootdir=X:\ /offwindir=F:\Windows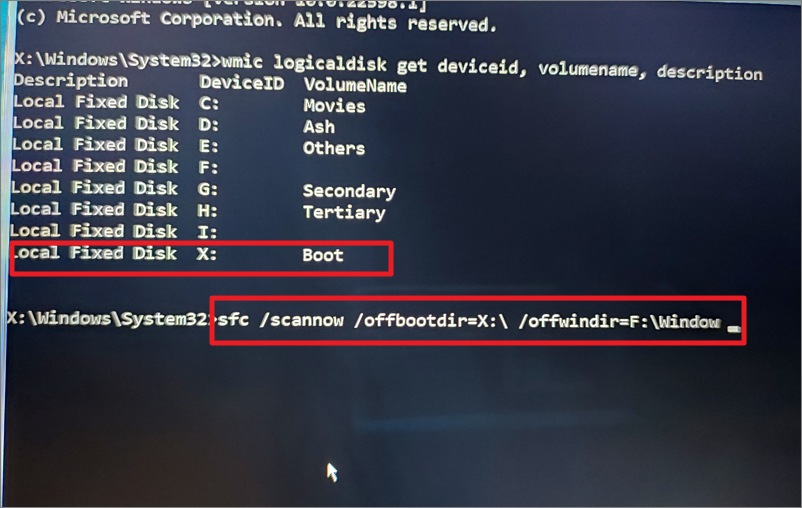
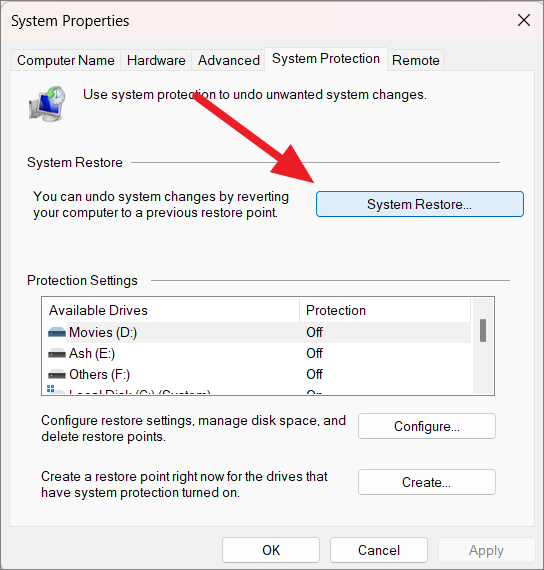
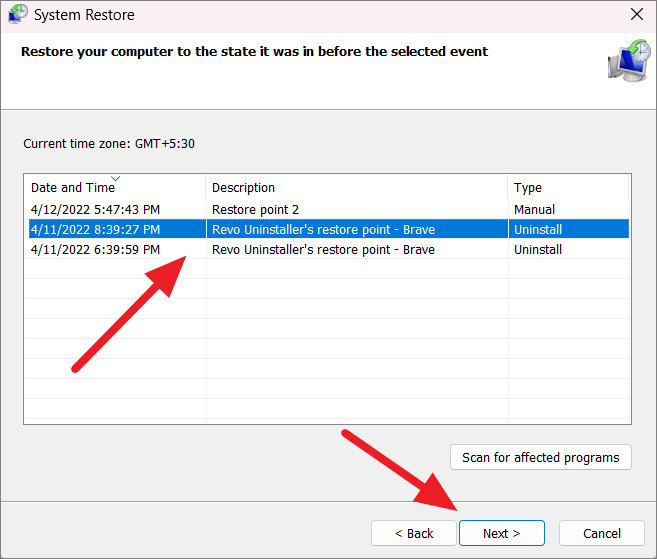
Perform System Restore
System Restore can roll back your system files and settings to a previous state, potentially resolving corruption issues.

Manually Replace the Corrupted Files
As a last resort, you can manually replace corrupted files with healthy copies.
takeown /f path\filenameExample:
takeown /f C:\Windows\System32\MUI\0409\mscorees.dll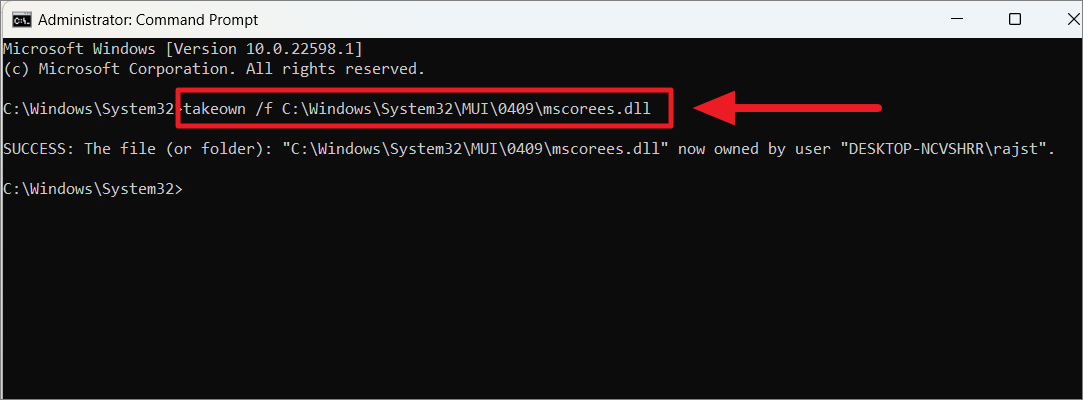
icacls path\filename /grant administrators:FExample:
icacls C:\Windows\System32\MUI\0409\mscorees.dll /grant administrators:F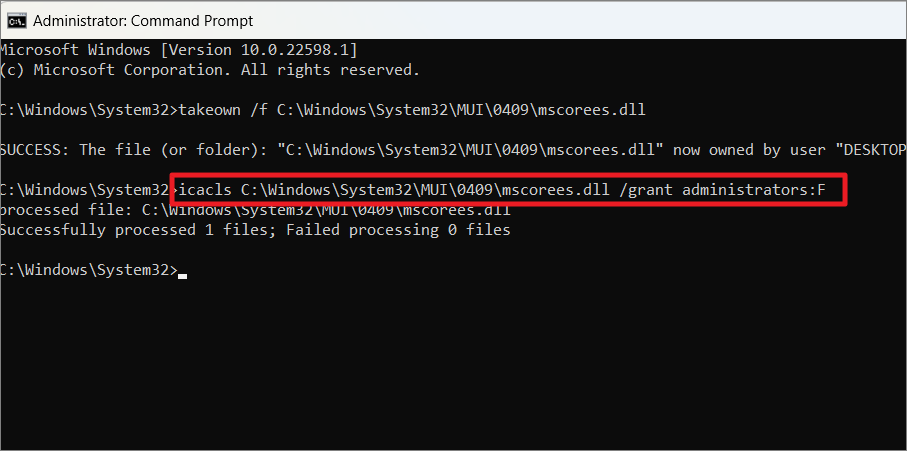
copy source path\filename destination path\filenameExample:
copy C:\Users\User\Downloads\mscorees.dll C:\Windows\System32\MUI\0409\mscorees.dllConfirm the overwrite when prompted.
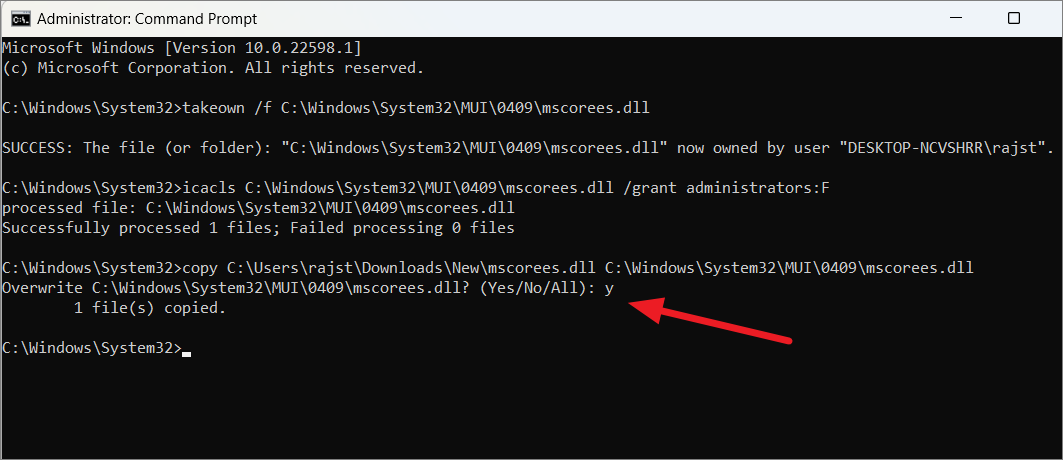
sfc /verifyfile=C:\Windows\System32\MUI\0409\mscorees.dll
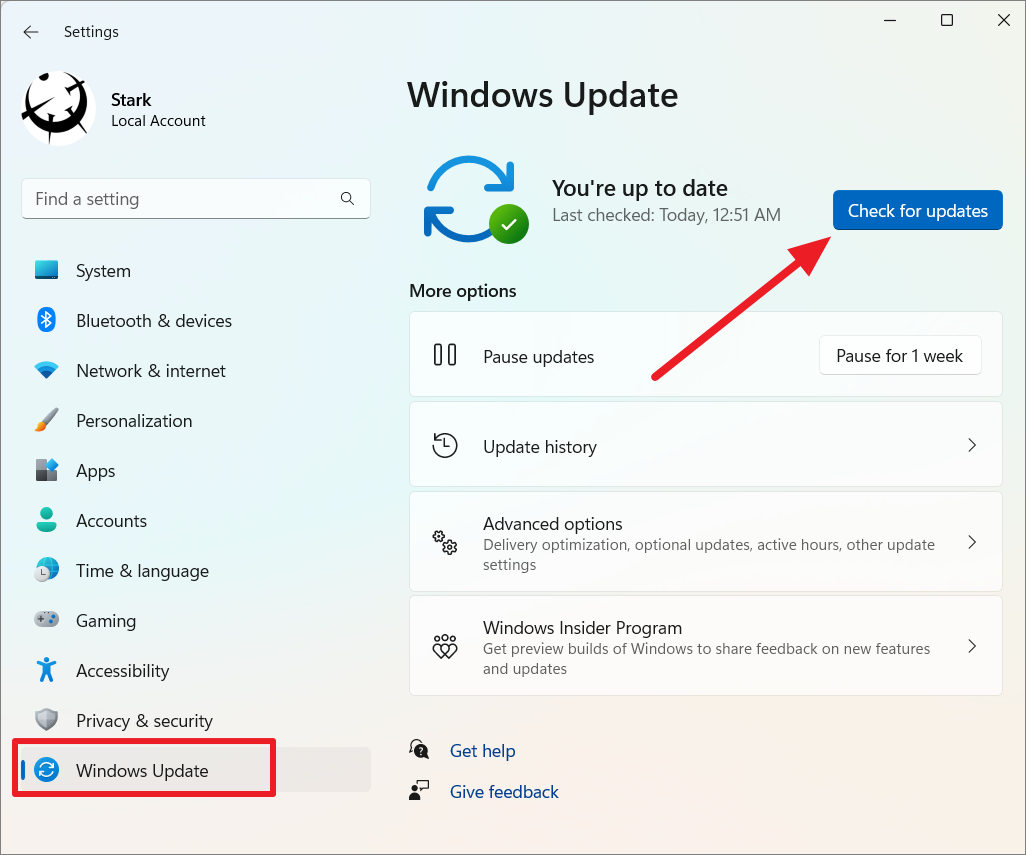
Check for Windows Updates
Updating Windows can fix known issues and vulnerabilities.
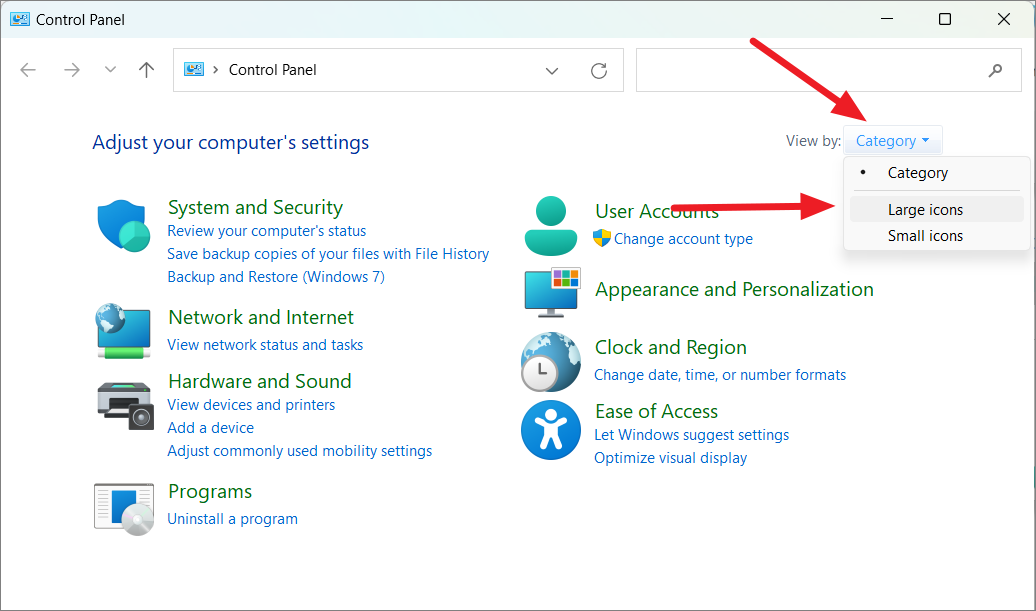
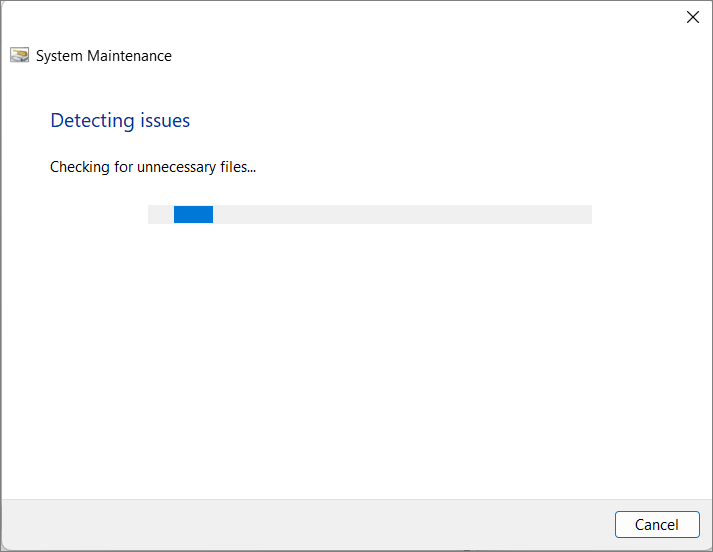
Run System Maintenance Troubleshooter
This troubleshooter can fix common system problems.
Run Check Disk Command (CHKDSK)
CHKDSK scans the file system and fixes logical file system errors.
chkdsk C: /f /r /x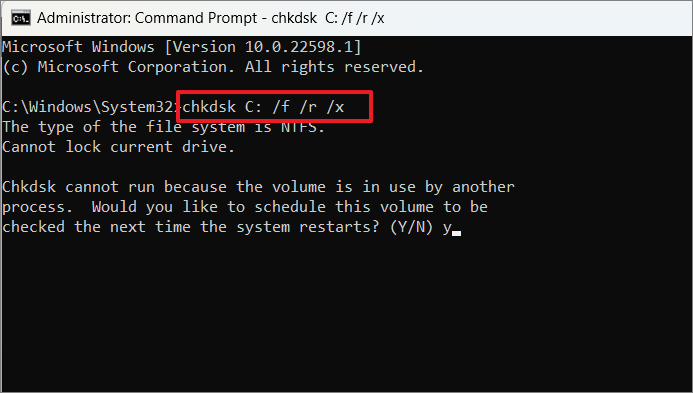
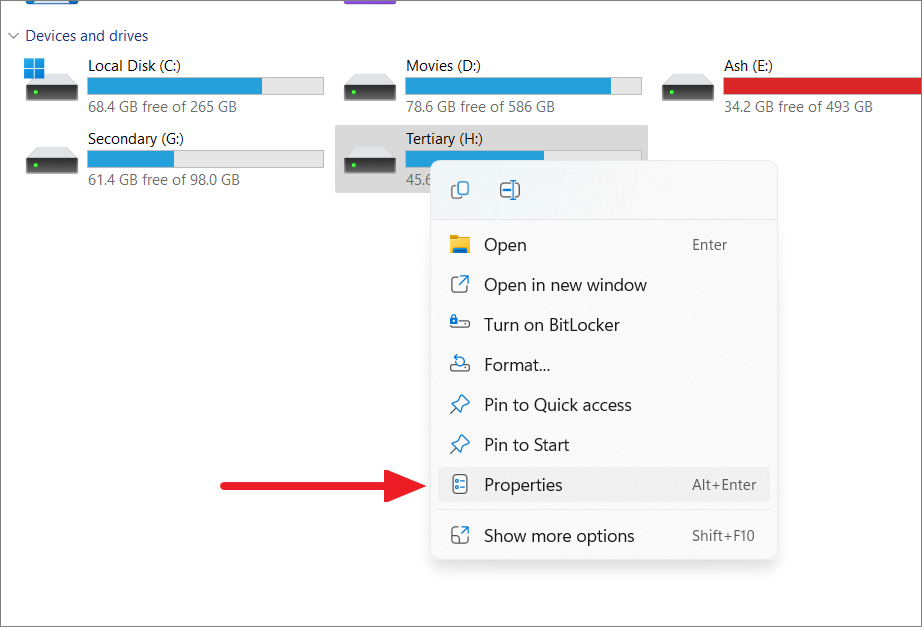
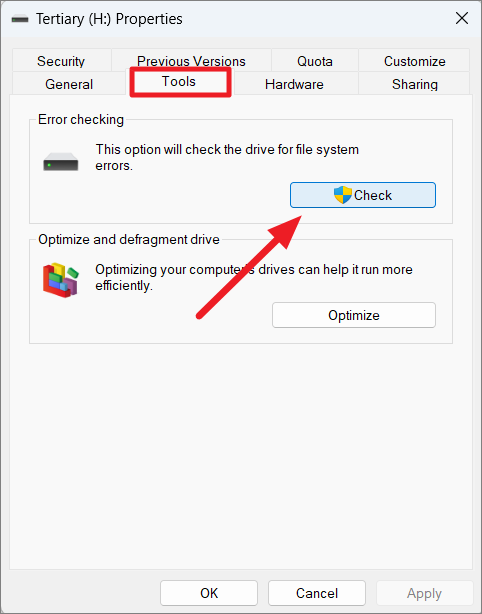
Perform a Check on the Drive Using the Error Check Function
You can also check for errors using the drive properties.
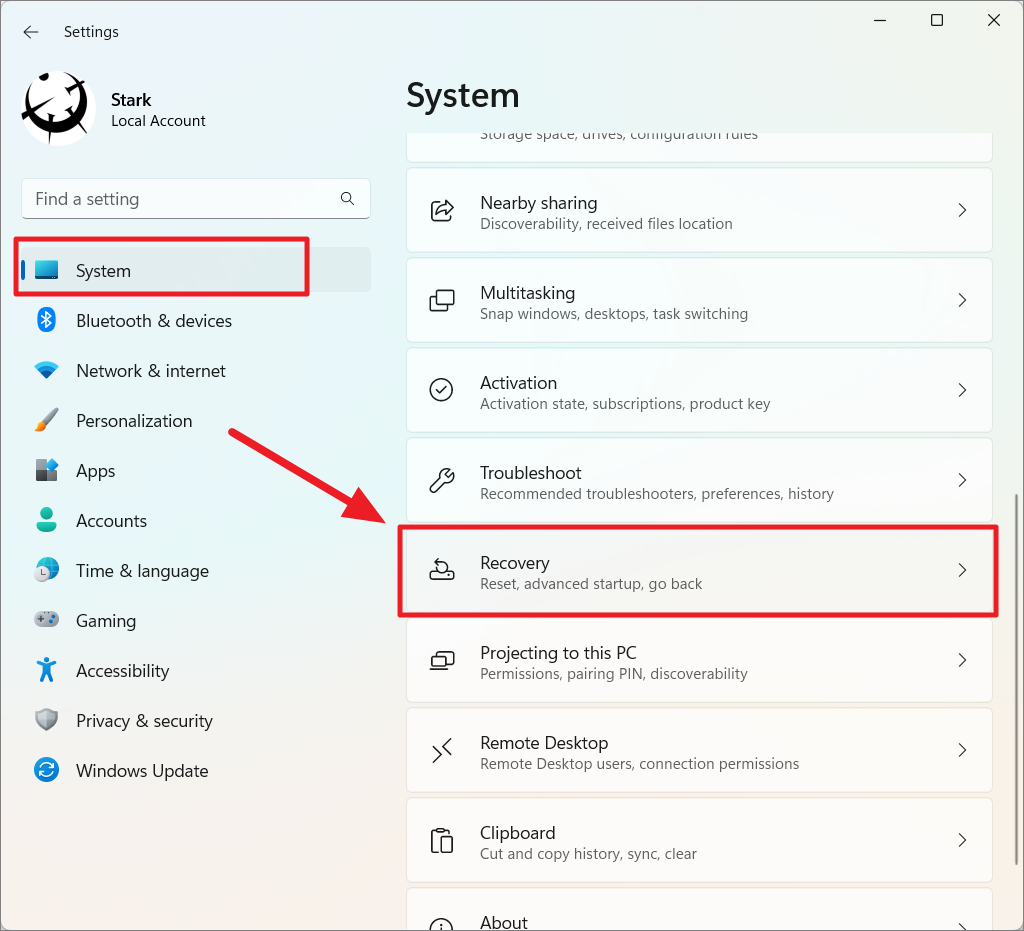
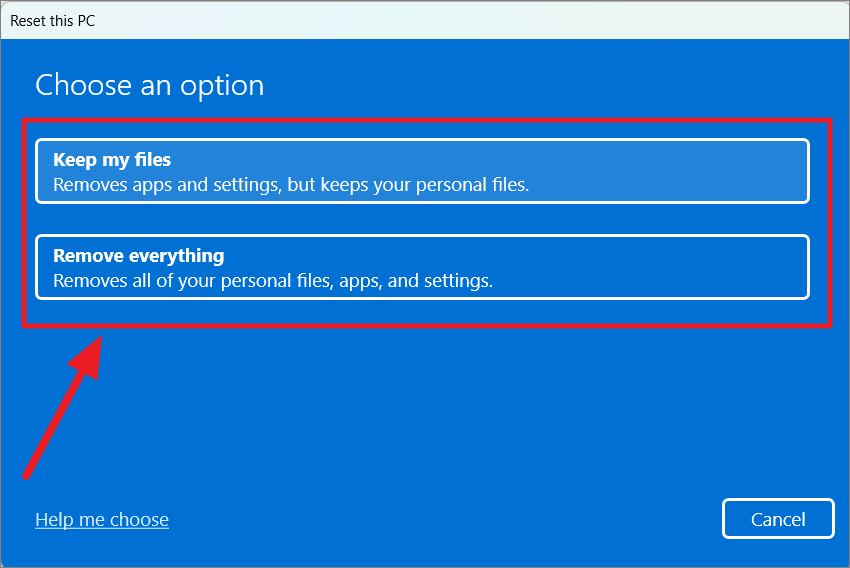
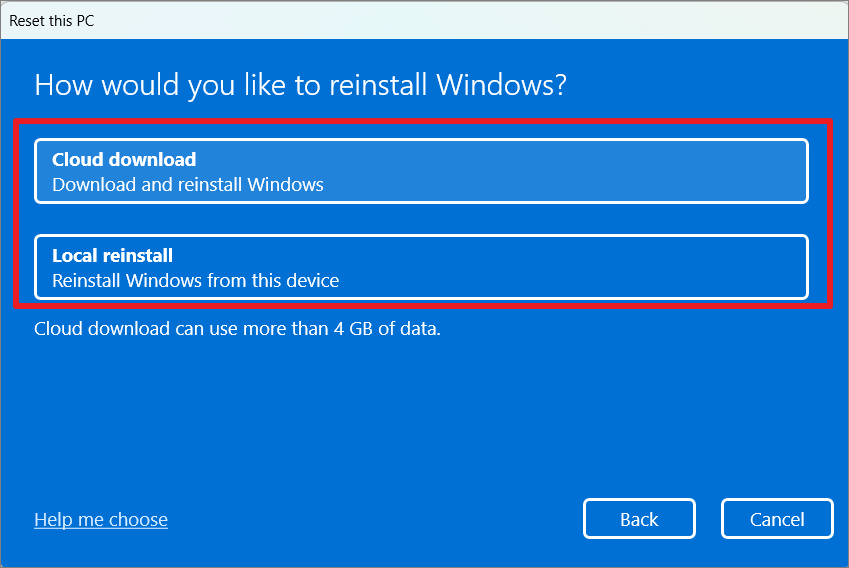
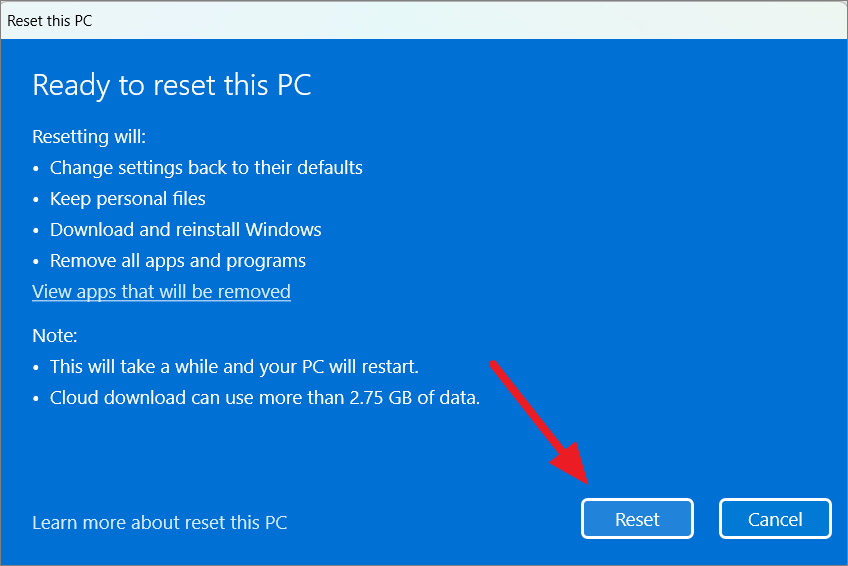
Reset Your Windows 11 PC
If persistent issues remain, resetting Windows reinstalls the operating system, potentially fixing deep-seated problems.

By utilizing these methods, you can effectively repair corrupted system files on your Windows 11 PC, ensuring smoother performance and enhanced stability.


