Wi-Fi networks are an integral part of our daily lives, connecting us to the internet at home, work, and public places. With numerous networks and passwords to remember, it's common to forget a Wi-Fi password when needed. If you need to share your Wi-Fi password or connect a new device but can't recall it, Windows 11 provides several ways to retrieve it. This guide will walk you through different methods to view your saved Wi-Fi passwords on a Windows 11 computer, whether for the network you're currently connected to or networks you've connected to in the past.
View All Saved Wi-Fi Passwords Using PowerShell
If you want to see the passwords of all Wi-Fi networks you've connected to on your Windows 11 PC, PowerShell offers a convenient method to do so. This approach allows you to retrieve a list of all saved Wi-Fi profiles and their corresponding passwords at once.
Step 1: Open PowerShell by searching for PowerShell in the Windows search bar and selecting the app.
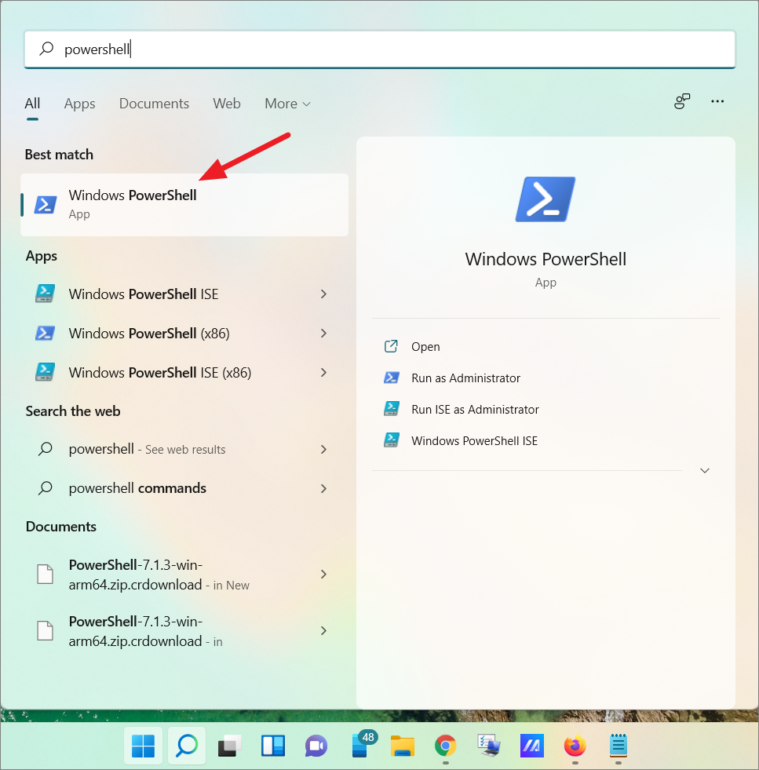
Step 2: In the PowerShell window, type or paste the following command and press Enter:
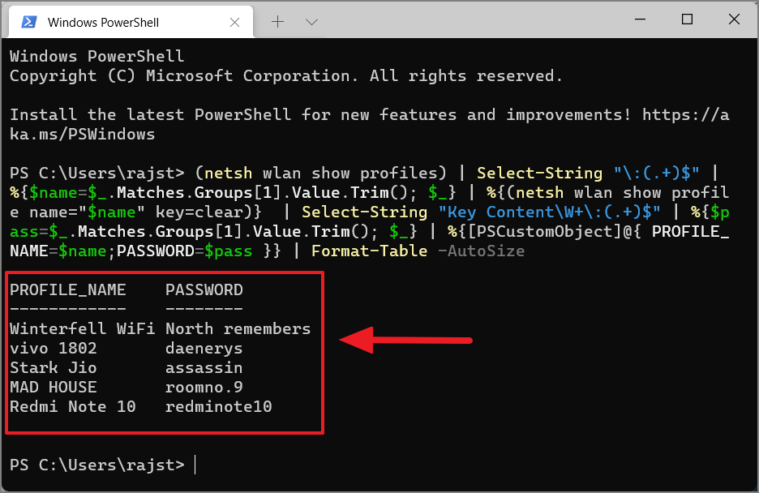
(netsh wlan show profiles) | Select-String "\:(.+)$" | %{$name=$_.Matches.Groups[1].Value.Trim(); $_} | %{(netsh wlan show profile name="$name" key=clear)} | Select-String "Key Content\W+\:(.+)$" | %{$pass=$_.Matches.Groups[1].Value.Trim(); $_} | %{[PSCustomObject]@{ PROFILE_NAME=$name;PASSWORD=$pass }} | Format-Table -AutoSize Step 3: PowerShell will display a table listing all the Wi-Fi profiles saved on your computer along with their passwords under the 'PASSWORD' column.
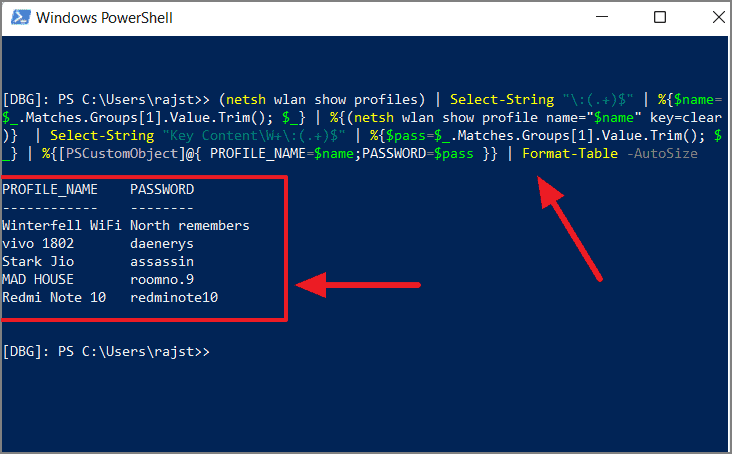
You can also run this command in PowerShell through Windows Terminal to achieve the same result.
Find Wi-Fi Password Using Command Prompt
The Command Prompt allows you to retrieve the password of any Wi-Fi network you've connected to in the past, even if you're not currently connected to it. This method is useful for finding passwords of networks that are out of range or disconnected.
Step 1: Open Command Prompt by searching for Command Prompt or CMD in the Windows search bar.
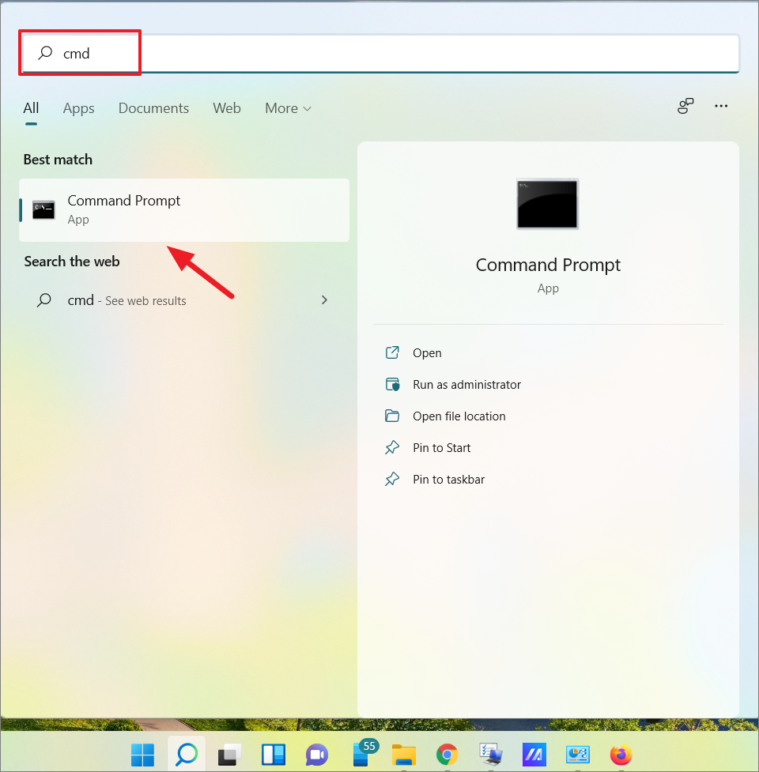
Step 2: In the Command Prompt window, type the following command and press Enter to display all the Wi-Fi profiles saved on your computer:
netsh wlan show profiles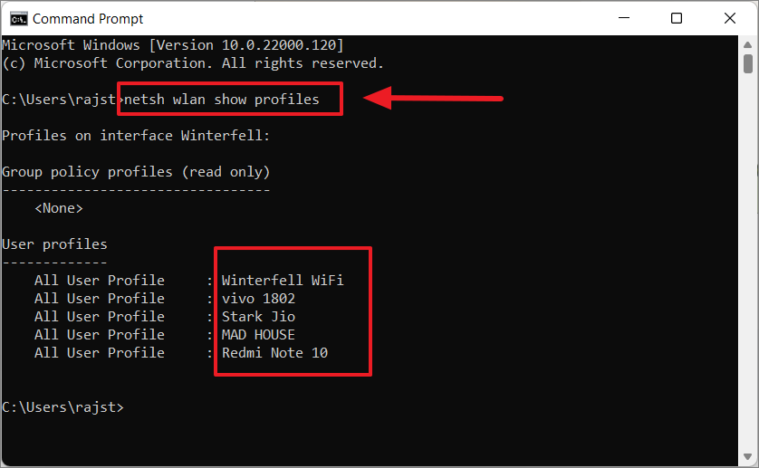
Step 3: To view the password of a specific Wi-Fi network, run the following command, replacing Wi-Fi Name with the name of the network from the list you obtained:
netsh wlan show profile name="Wi-Fi Name" key=clearFor example:
netsh wlan show profile name="MAD HOUSE" key=clear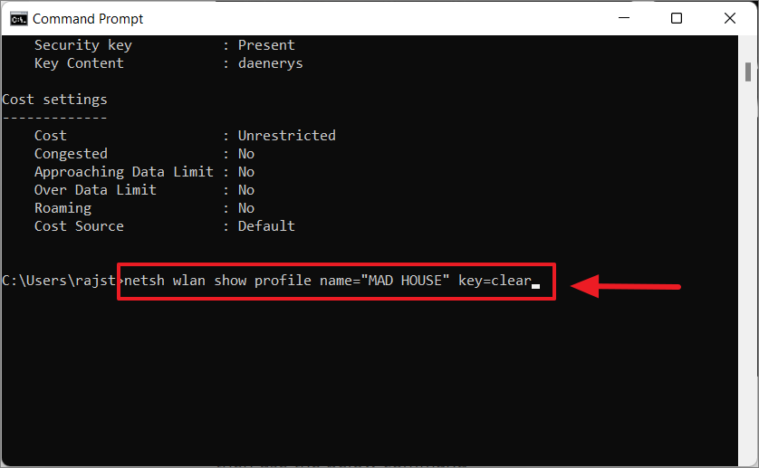
Step 4: Scroll down to the Security settings section, and you will find the Wi-Fi password next to Key Content.
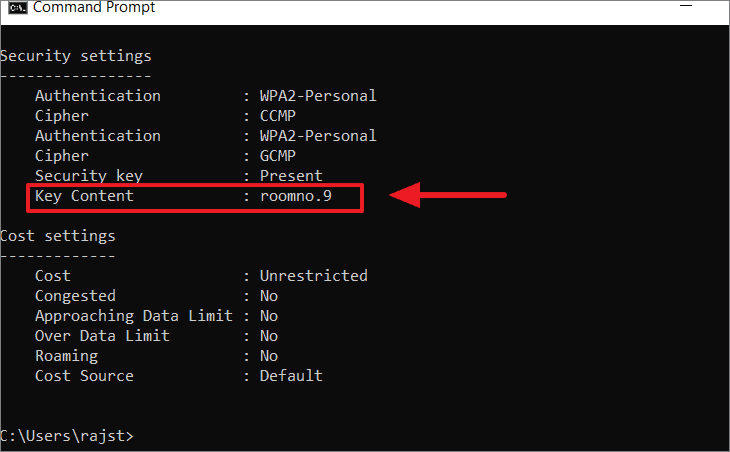
If you prefer to display only the password without additional information, you can use the following command:
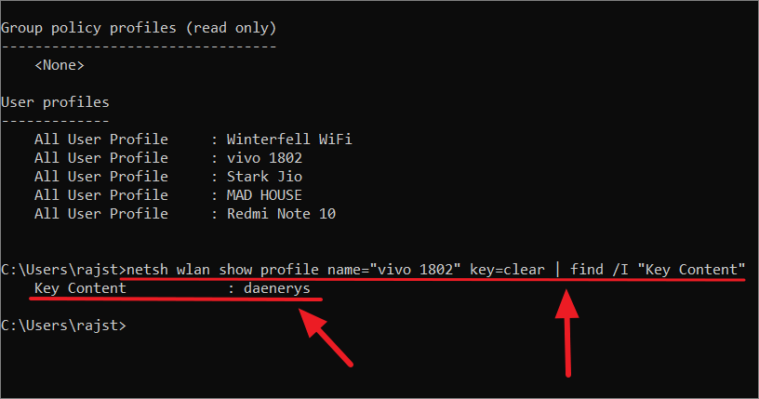
netsh wlan show profile name="Wi-Fi Name" key=clear | find /I "Key Content"For example:
netsh wlan show profile name="vivo 1802" key=clear | find /I "Key Content"This will display the password directly, as shown below:
Retrieve Current Wi-Fi Password Using Settings
If you are connected to a Wi-Fi network and need to know its password, you can easily find it using the Windows 11 Settings.
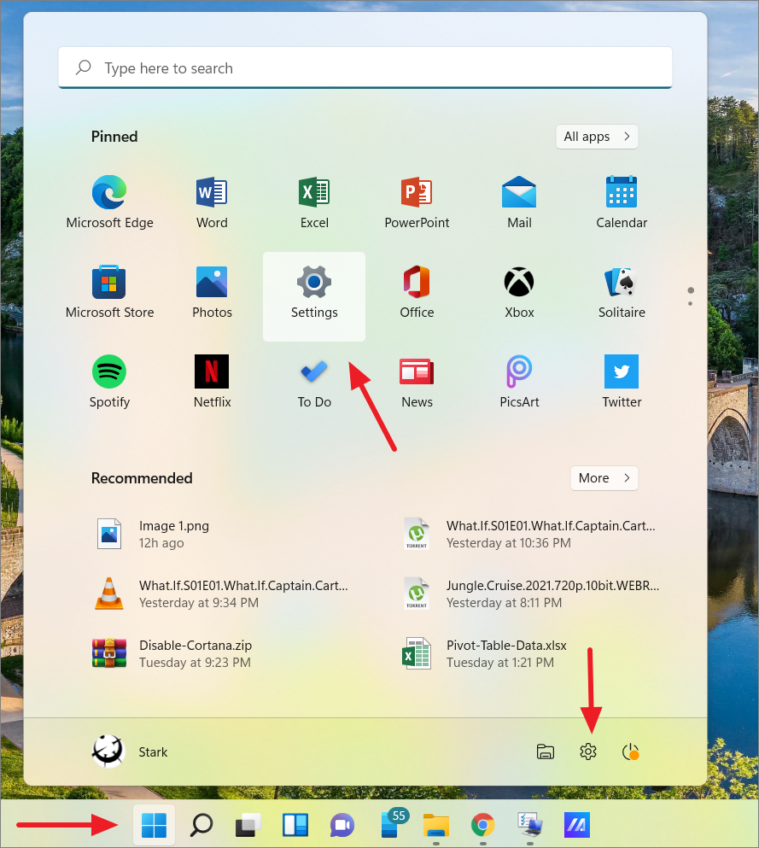
Step 1: Open the Settings app by clicking the Start button and selecting the Settings icon, or by pressing Windows + i on your keyboard.
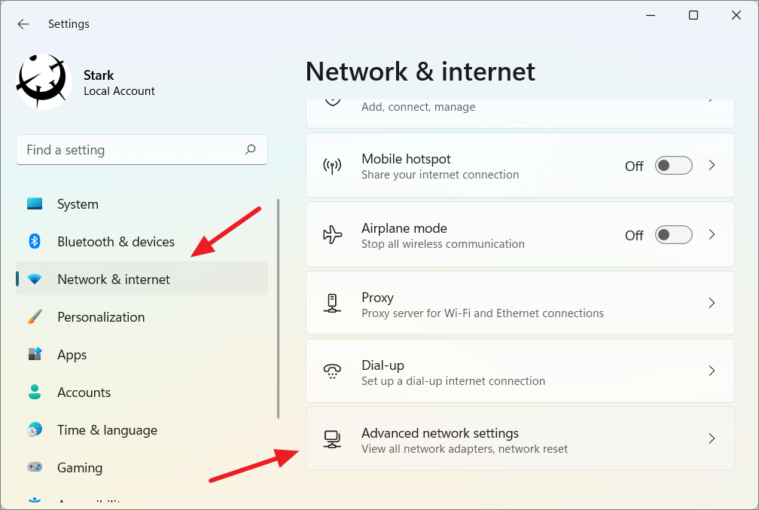
Step 2: In Settings, select the Network & internet tab on the left pane. Then, on the right, scroll down and click on Advanced network settings.
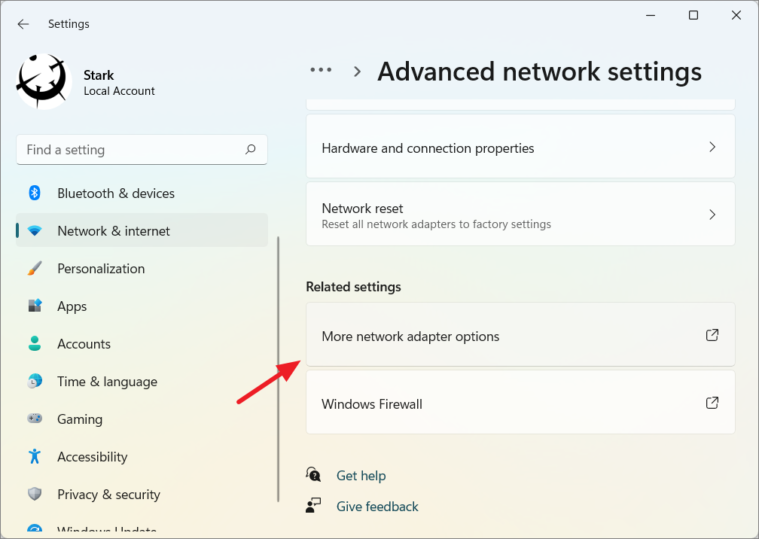
Step 3: Under the Advanced network settings, find and click on More network adapter options under the Related settings section.
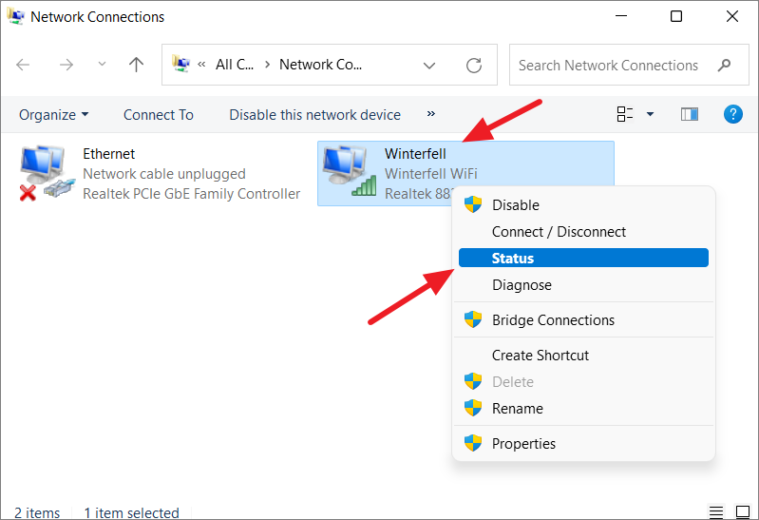
Step 4: In the Network Connections window that opens, right-click on your Wi-Fi adapter and select Status, or simply double-click on the Wi-Fi adapter.
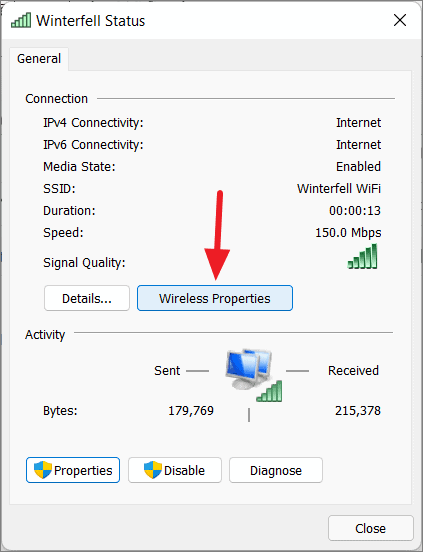
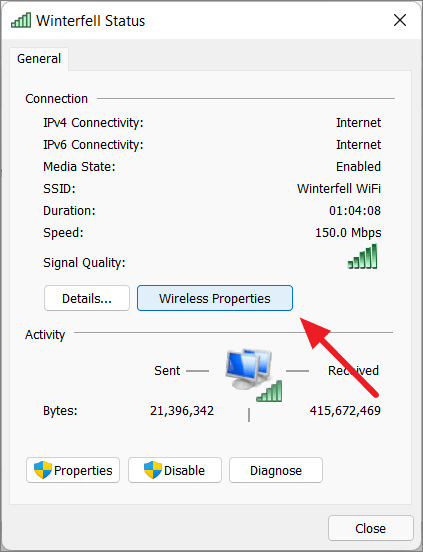
Step 5: In the Wi-Fi Status dialog box, click on Wireless Properties.
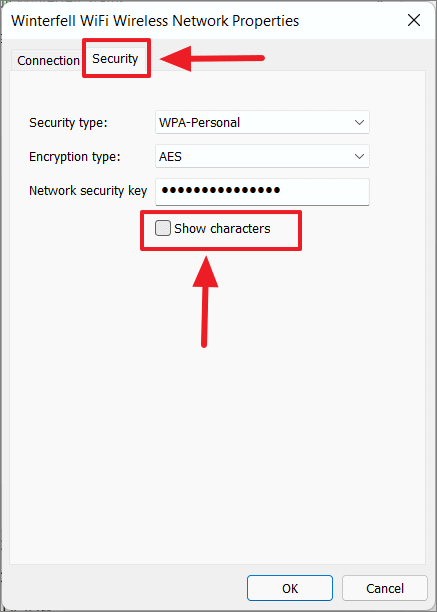
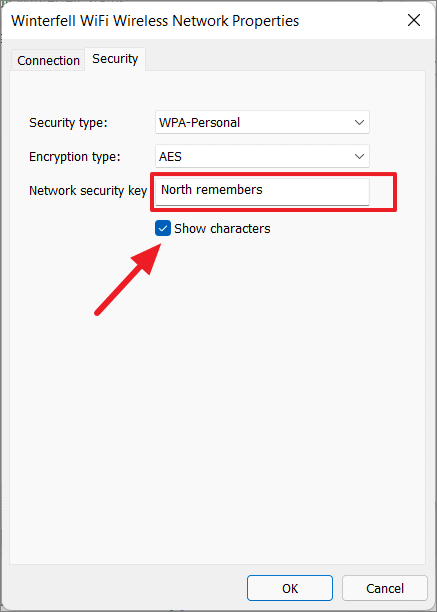
Step 6: Switch to the Security tab, and then check the box next to Show characters. This will reveal the Wi-Fi password in the Network security key field.
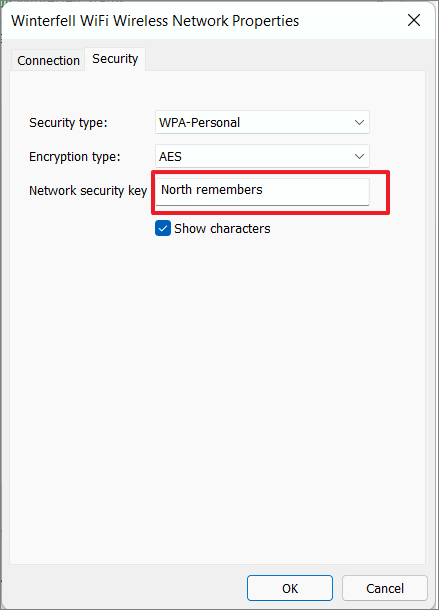
The password of your current Wi-Fi network will now be visible.
See Wi-Fi Password Using Control Panel
You can also find your Wi-Fi password through the Control Panel. This method is similar to the previous one but uses a different starting point.
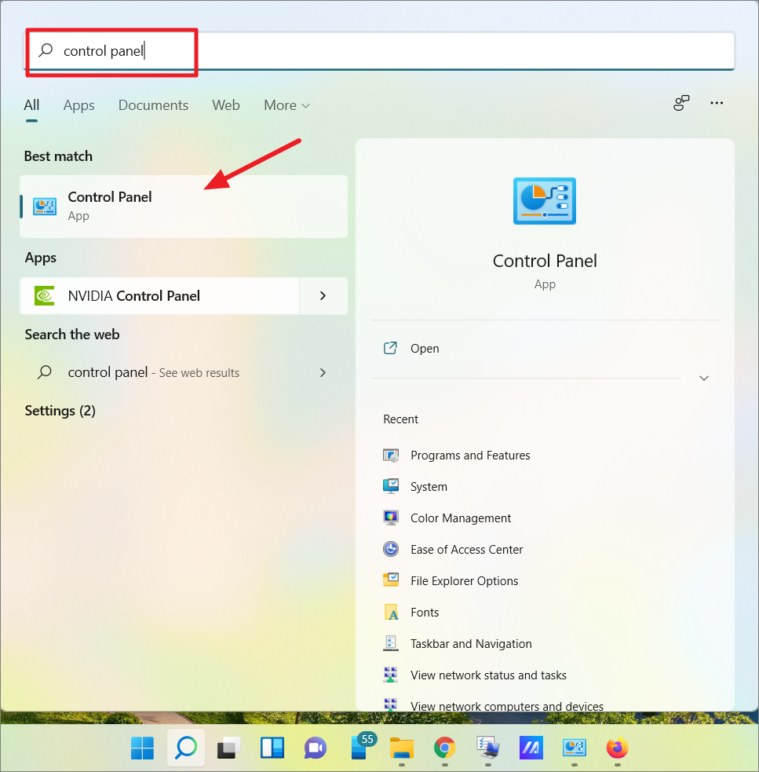
Step 1: Open the Control Panel by searching for Control Panel in the Windows search bar.
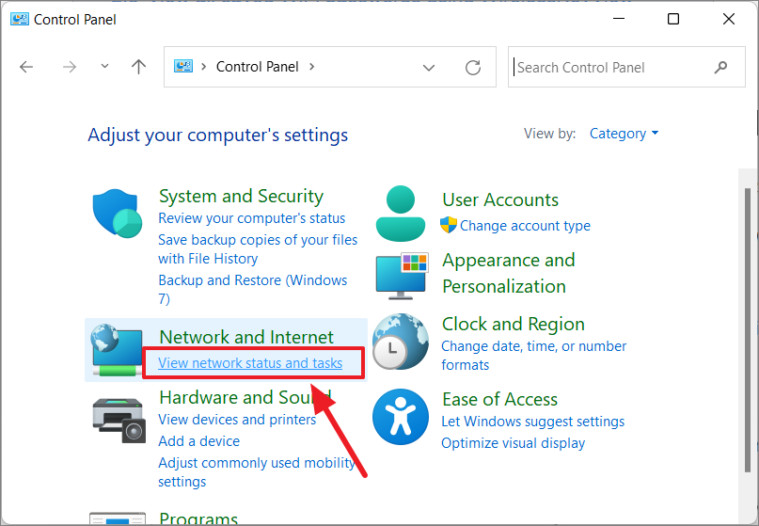
Step 2: In the Control Panel, click on View network status and tasks under the Network and Internet category.
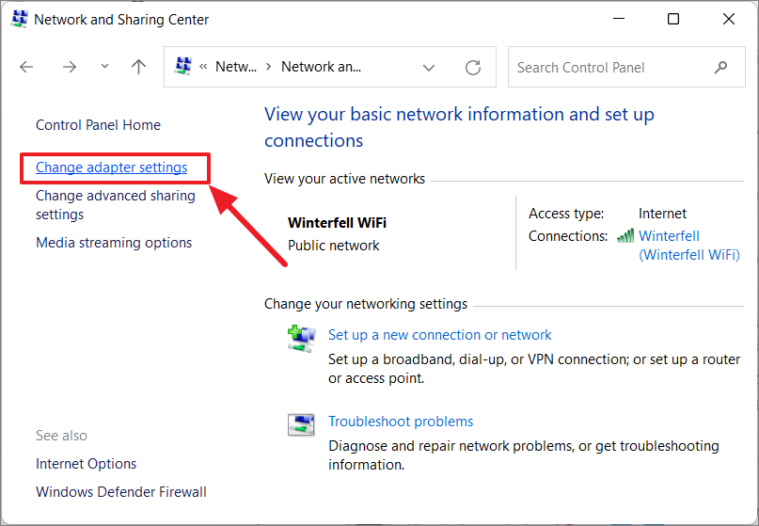
Step 3: In the Network and Sharing Center, click on Change adapter settings on the left pane.
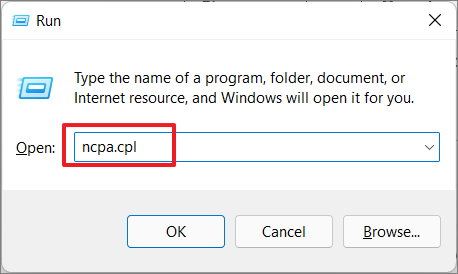
Tip: You can also access the Network Connections window directly by pressing Windows + R, typing ncpa.cpl into the Run dialog, and clicking OK.
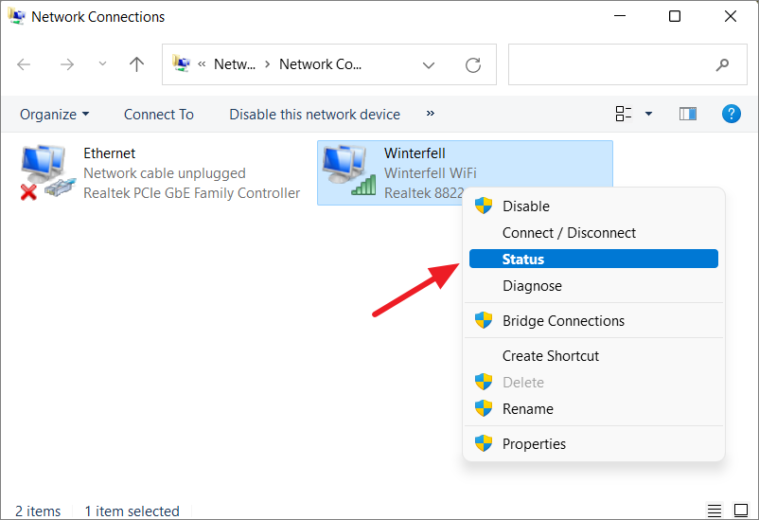
Step 4: In the Network Connections window, right-click on your Wi-Fi adapter and select Status, or double-click it.
Step 5: Click on Wireless Properties in the Wi-Fi Status dialog.
Step 6: Go to the Security tab and check the box next to Show characters to reveal your Wi-Fi password.
Use Third-Party Software to Reveal Wi-Fi Passwords
If you prefer using a dedicated tool to retrieve all your saved Wi-Fi passwords, there are free third-party applications available that can help. Two popular options are:
Simply download, install, and run one of these programs to view all the Wi-Fi passwords stored on your Windows 11 PC.
By following these methods, you can easily retrieve Wi-Fi passwords on your Windows 11 computer, whether it's for the network you're currently connected to or any network you've connected to in the past.


