If you’re encountering the 0x80042306 error when trying to create a System Restore point in Windows 11, you’re not alone. This error can prevent you from safeguarding your system, but there are several methods to fix it and get your System Restore functionality back on track.
1. Re-register the VSS Components
The Volume Shadow Copy Service (VSS) is crucial for creating System Restore points. If its components are not registered properly, you might face the 0x80042306 error. Re-registering these components can often resolve the issue.
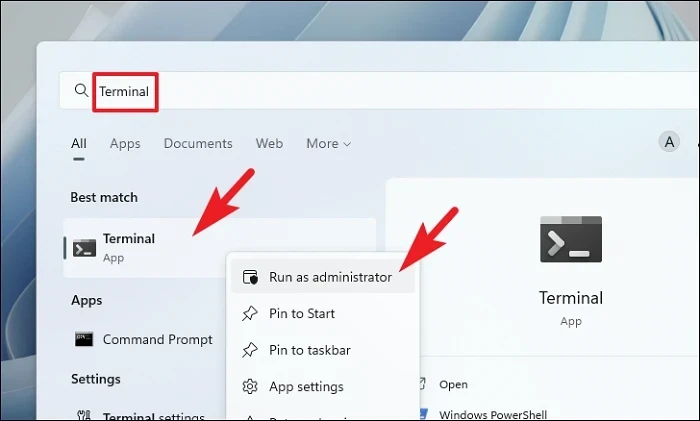
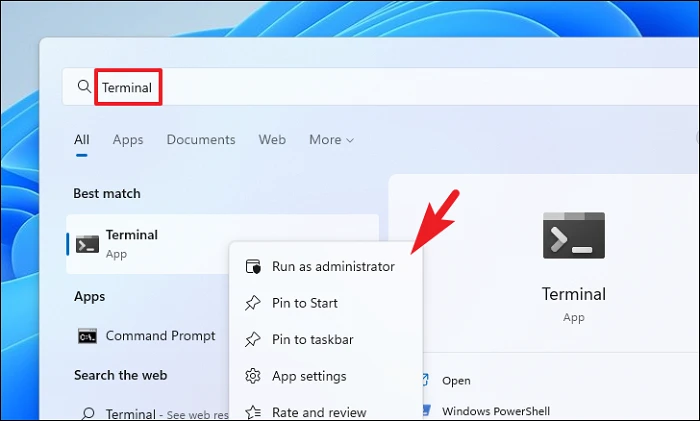
1 Open the Start Menu and type Terminal. Right-click on the Terminal app and select Run as administrator from the context menu.
2 If prompted by the User Account Control (UAC), click Yes to allow administrative permissions.
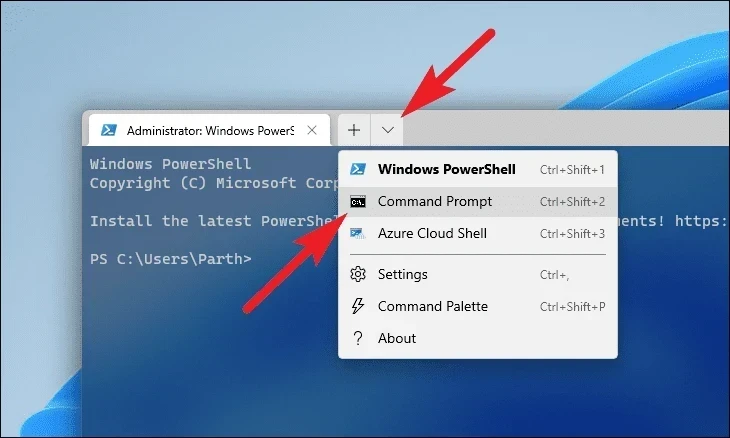
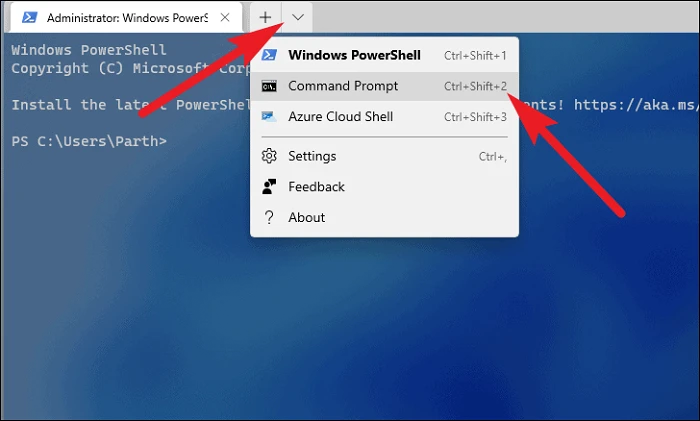
3 In the Terminal window, click the downward arrow (chevron) icon and choose Command Prompt to open it in a new tab.
4 Enter the following commands one by one, pressing Enter after each command to execute it:
cd /d %windir%\system32net stop vssnet stop swprvregsvr32 /s ole32.dllregsvr32 /s oleaut32.dllregsvr32 /s vss_ps.dllvssvc /registerregsvr32 /s /i swprv.dllregsvr32 /s /i eventcls.dllregsvr32 /s es.dllregsvr32 /s stdprov.dllregsvr32 /s vssui.dllregsvr32 /s msxml.dllregsvr32 /s msxml3.dllregsvr32 /s msxml4.dllvssvc /registernet start swprvnet start vss5 After executing all the commands, restart your computer. Try creating a System Restore point again to see if the error is resolved.
2. Restart the Volume Shadow Copy Service
The Volume Shadow Copy Service manages and implements shadow copies for backups. Restarting this service can fix issues related to System Restore.
1 Press Windows+R to open the Run dialog. Type services.msc and press Enter to open the Services window.
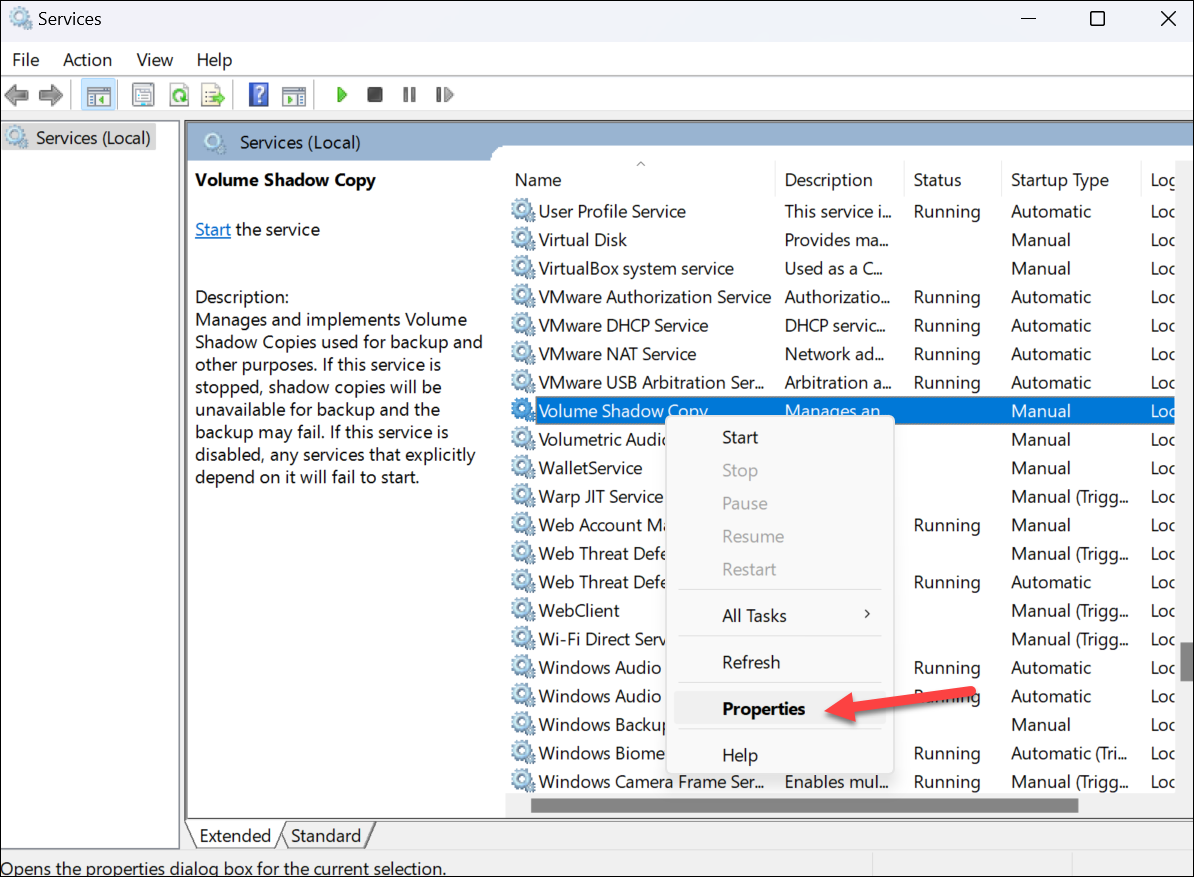
2 In the Services window, scroll down to locate Volume Shadow Copy . Alternatively, press the V key to jump to services starting with ‘V’.
3 Right-click on Volume Shadow Copy and select Properties from the context menu.
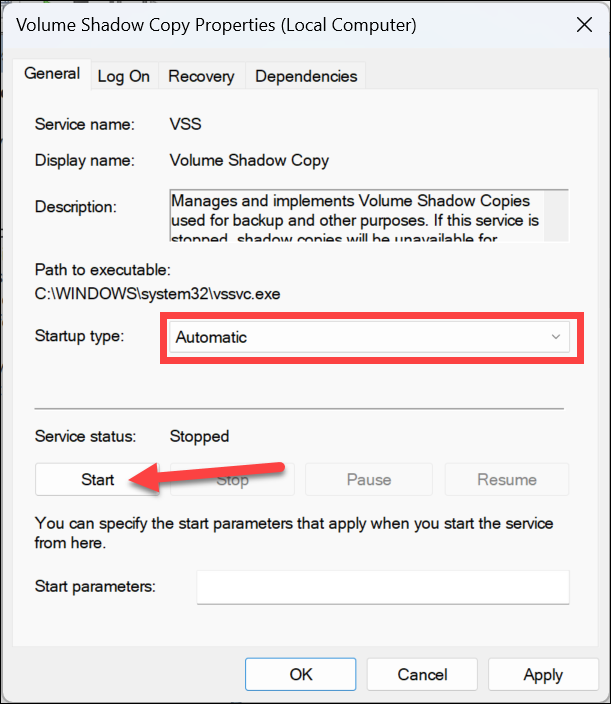
4 In the Properties window, click Stop to halt the service. Ensure the Startup type is set to Automatic ; if not, select it from the dropdown menu.
5 Wait for a couple of minutes, then click Start to restart the service. Click Apply and then OK to save the changes.
6 Restart your computer and attempt to create a System Restore point to check if the issue persists.
3. Ensure You Have Enough Disk Space
Low disk space can prevent the creation of System Restore points. Freeing up space on your drive might resolve the error.
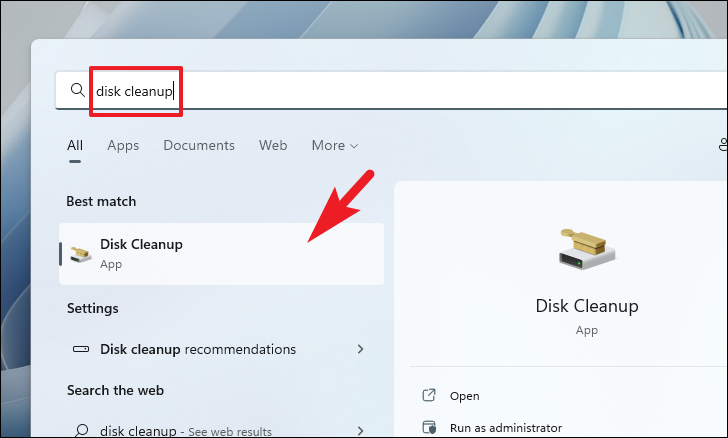
1 Click on the Start Menu and type Disk Cleanup. Select the Disk Cleanup app from the search results.
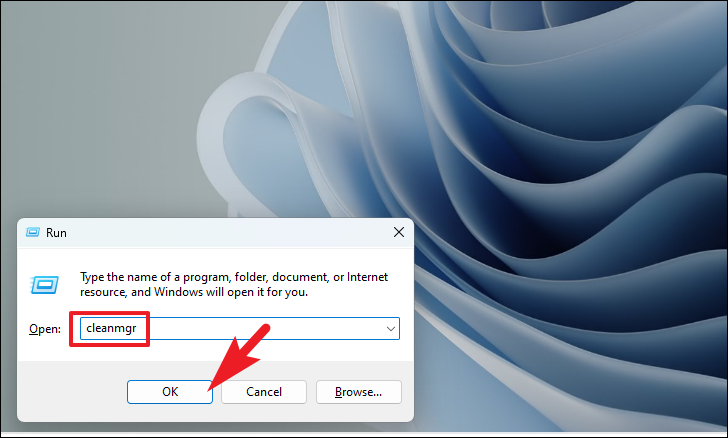
Alternative: Press Windows+R to open the Run dialog. Type cleanmgr and press Enter to launch Disk Cleanup.
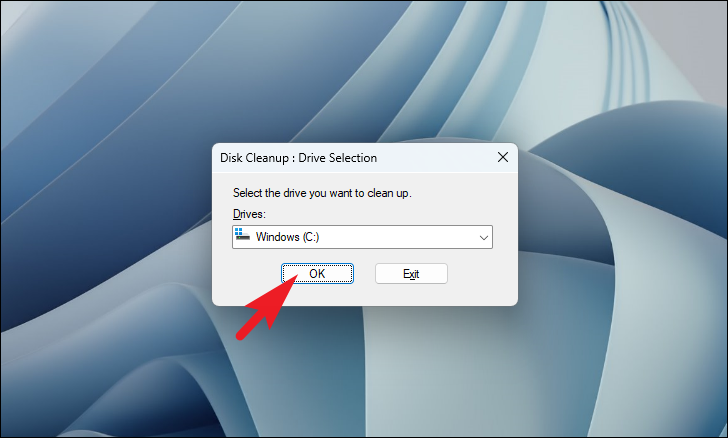
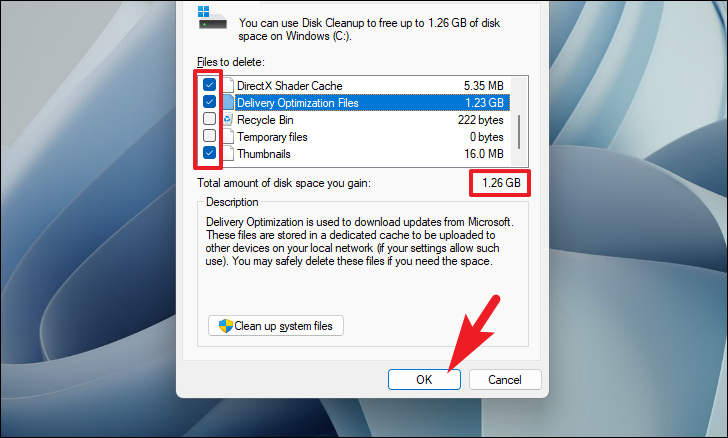
2 In the Disk Cleanup window, select the drive you want to clean (usually the system drive) and click OK .
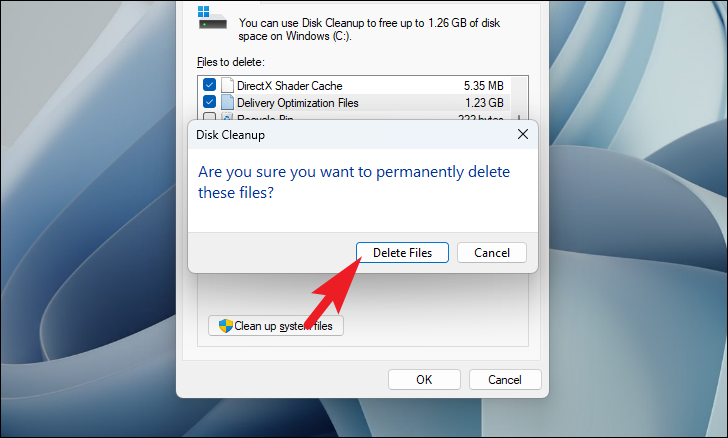
3 Check the boxes next to the types of files you want to delete. Review the total amount of space you will free up, then click OK .
4 Confirm the deletion by clicking Delete Files in the prompt.
5 Once the cleanup is complete, try creating a System Restore point to see if the error has been fixed.
4. Run SFC and DISM Scans
Corrupted system files can cause errors with System Restore. Running System File Checker (SFC) and Deployment Image Servicing and Management (DISM) scans can repair these files.
1 Open the Start Menu and type Terminal. Right-click on the Terminal app and choose Run as administrator .
2 If prompted by UAC, click Yes to proceed.
3 Click the chevron icon and select Command Prompt to open it.
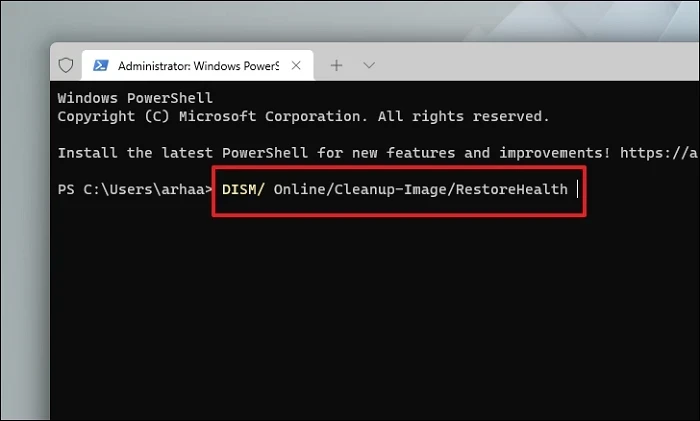
4 Type the following command and press Enter to run a DISM scan:
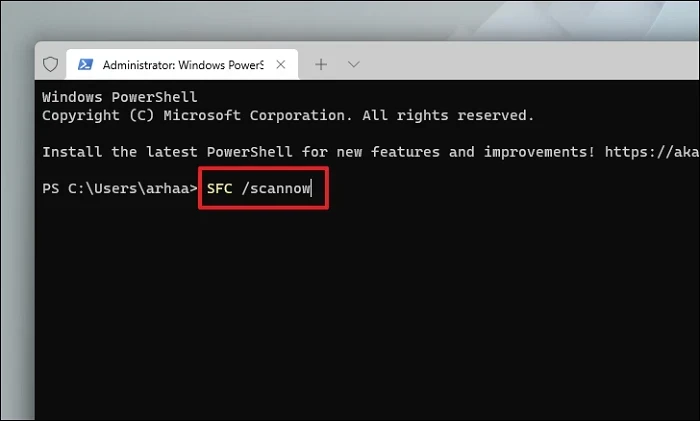
DISM /Online /Cleanup-Image /RestoreHealth5 After the DISM scan completes, run the SFC scan by entering the following command and pressing Enter:
sfc /scannow6 Wait for the scan to finish, then restart your computer. Check if the System Restore error has been resolved.
5. Run CHKDSK
Disk errors can interfere with System Restore. Running the Check Disk utility (CHKDSK) can identify and fix disk-related issues.
1 Open the Start Menu and type Terminal. Right-click on the Terminal app and select Run as administrator .
2 If prompted by UAC, click Yes to continue.
3 Click the chevron icon and select Command Prompt to open it.
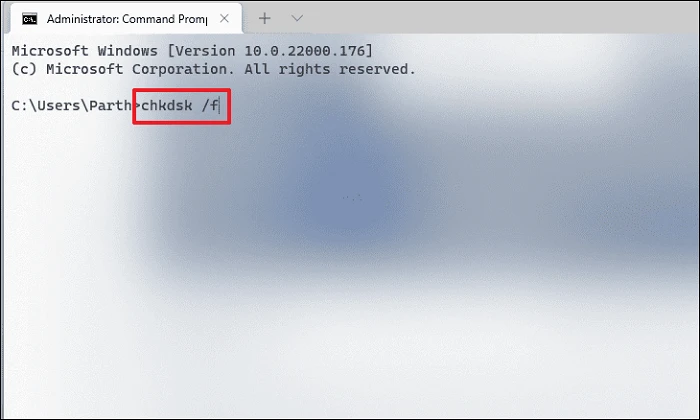
4 Type the following command and press Enter:
chkdsk /f5 When prompted, press Y to schedule the disk check on the next system restart.
6 Restart your computer to allow CHKDSK to run. Once complete, try creating a System Restore point again.
6. Disable Your Antivirus Temporarily
Sometimes, antivirus software can interfere with System Restore. Temporarily disabling it can help identify if it’s the cause of the error.
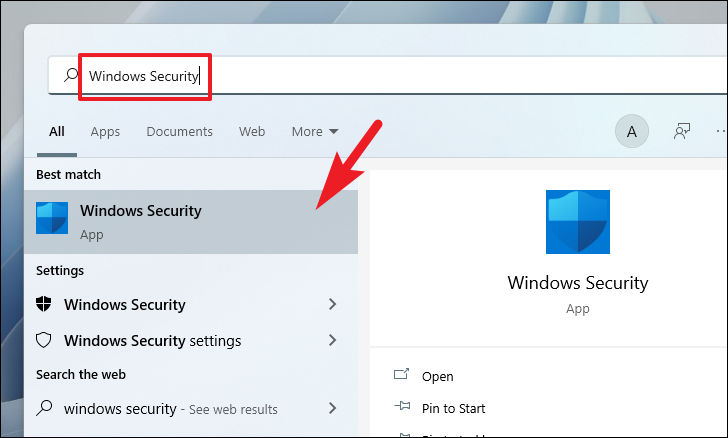
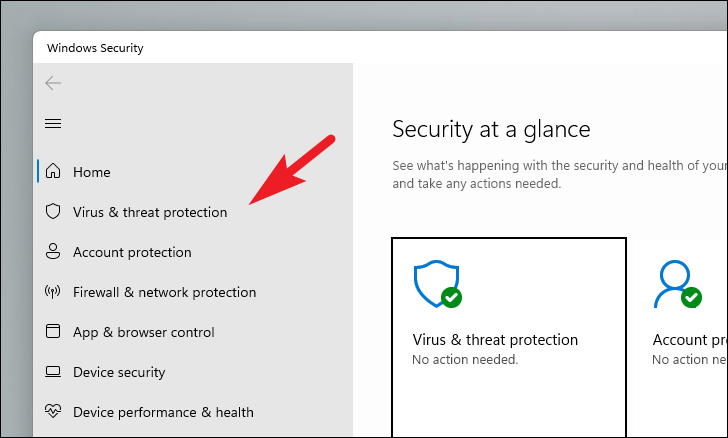
1 Open the Start Menu and type Windows Security. Click on the Windows Security app in the results.
2 In the Windows Security window, select Virus & threat protection from the left pane.
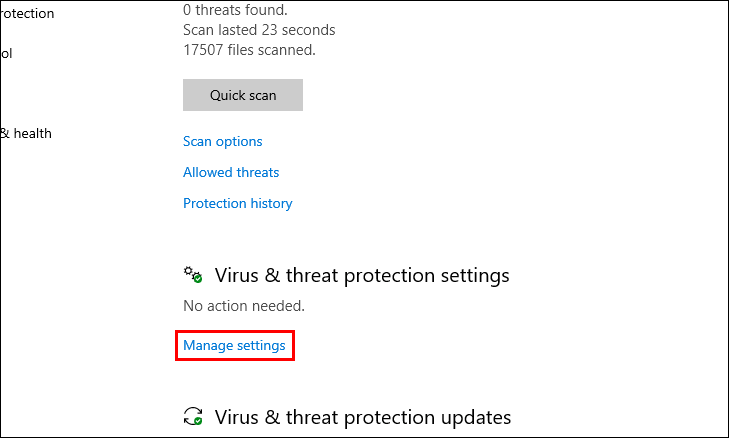
3 Click on Manage settings under the Virus & threat protection settings.
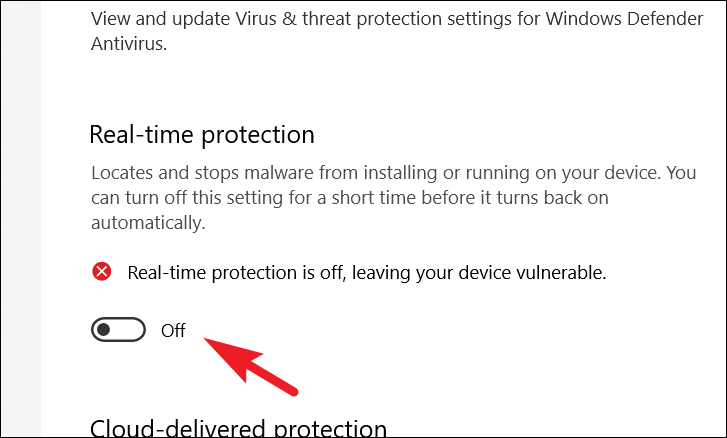
4 Toggle off Real-time protection . Note that this is temporary and will turn back on automatically.
Note: Disabling antivirus protection should be done cautiously. Remember to re-enable it after troubleshooting.
5 Try creating a System Restore point to see if the antivirus was causing the issue.
7. Create a Restore Point in Safe Mode
Booting into Safe Mode can help you bypass issues caused by third-party apps or drivers that might interfere with System Restore.
1 Turn on your computer. As it starts booting, press and hold the power button for about 30 seconds to force a shutdown. Repeat this process three times.
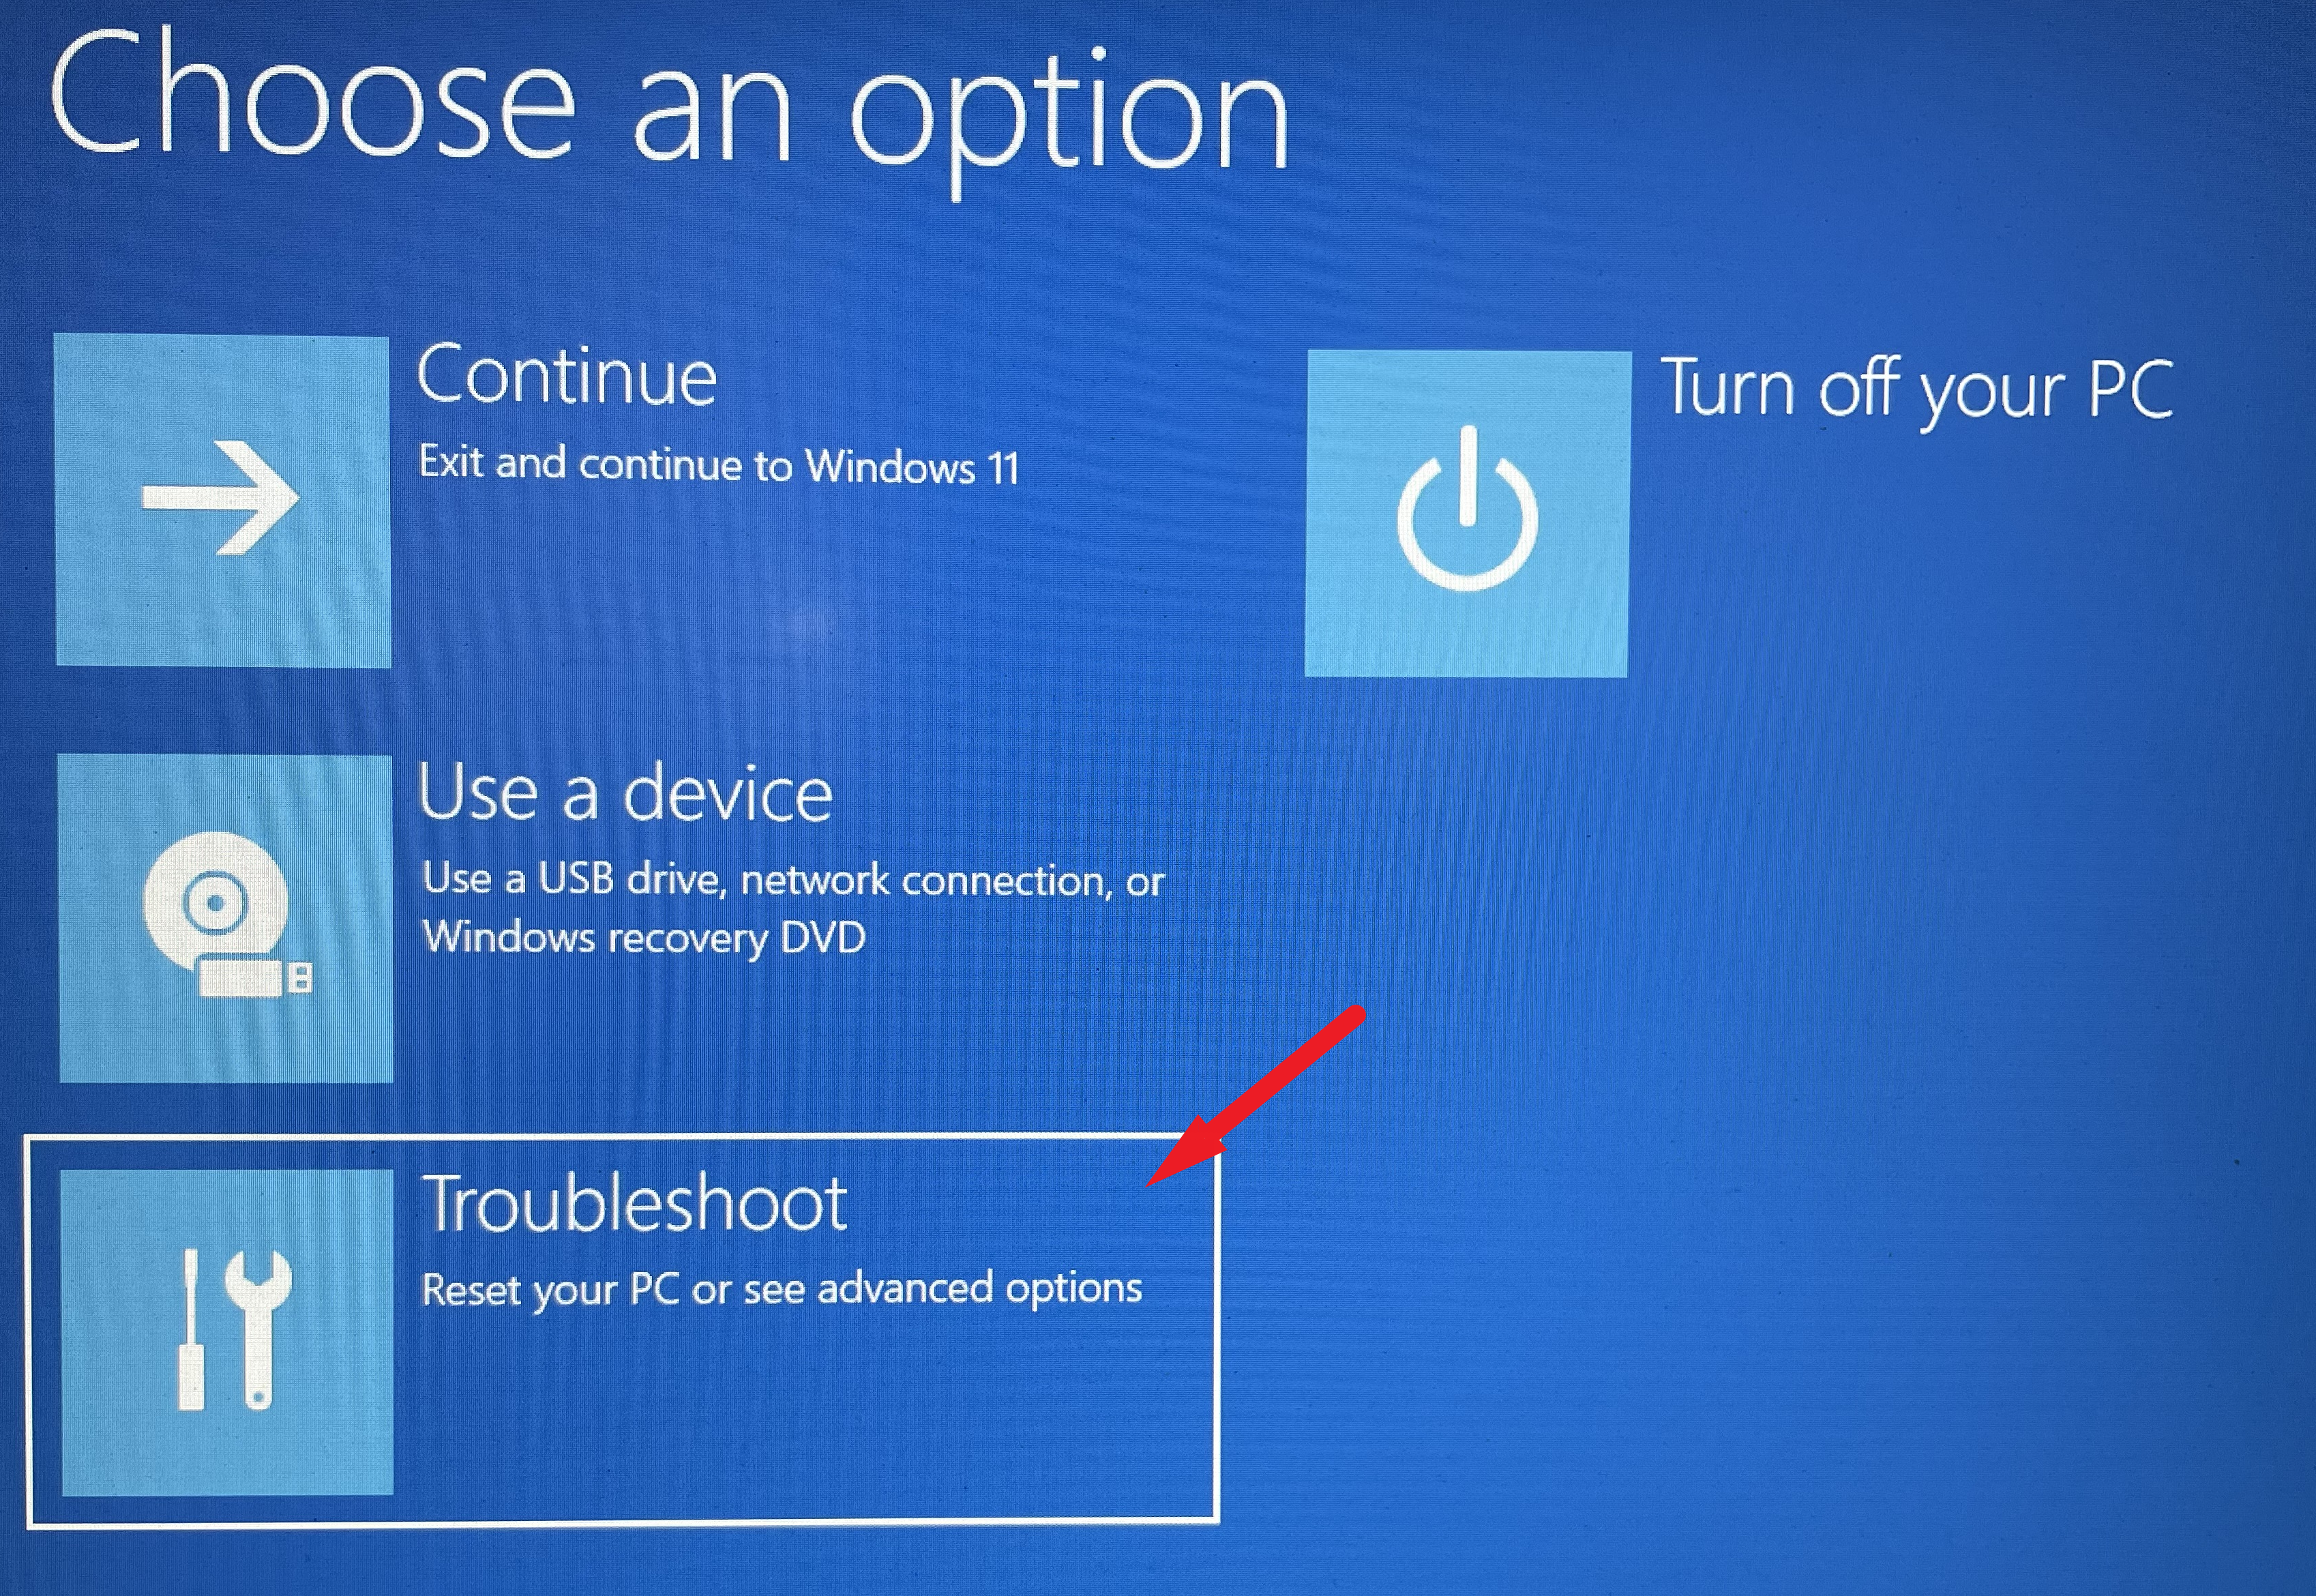
2 On the fourth boot, Windows will enter the Recovery Environment (WinRE). If you see the Automatic Repair screen, click on Advanced Options .
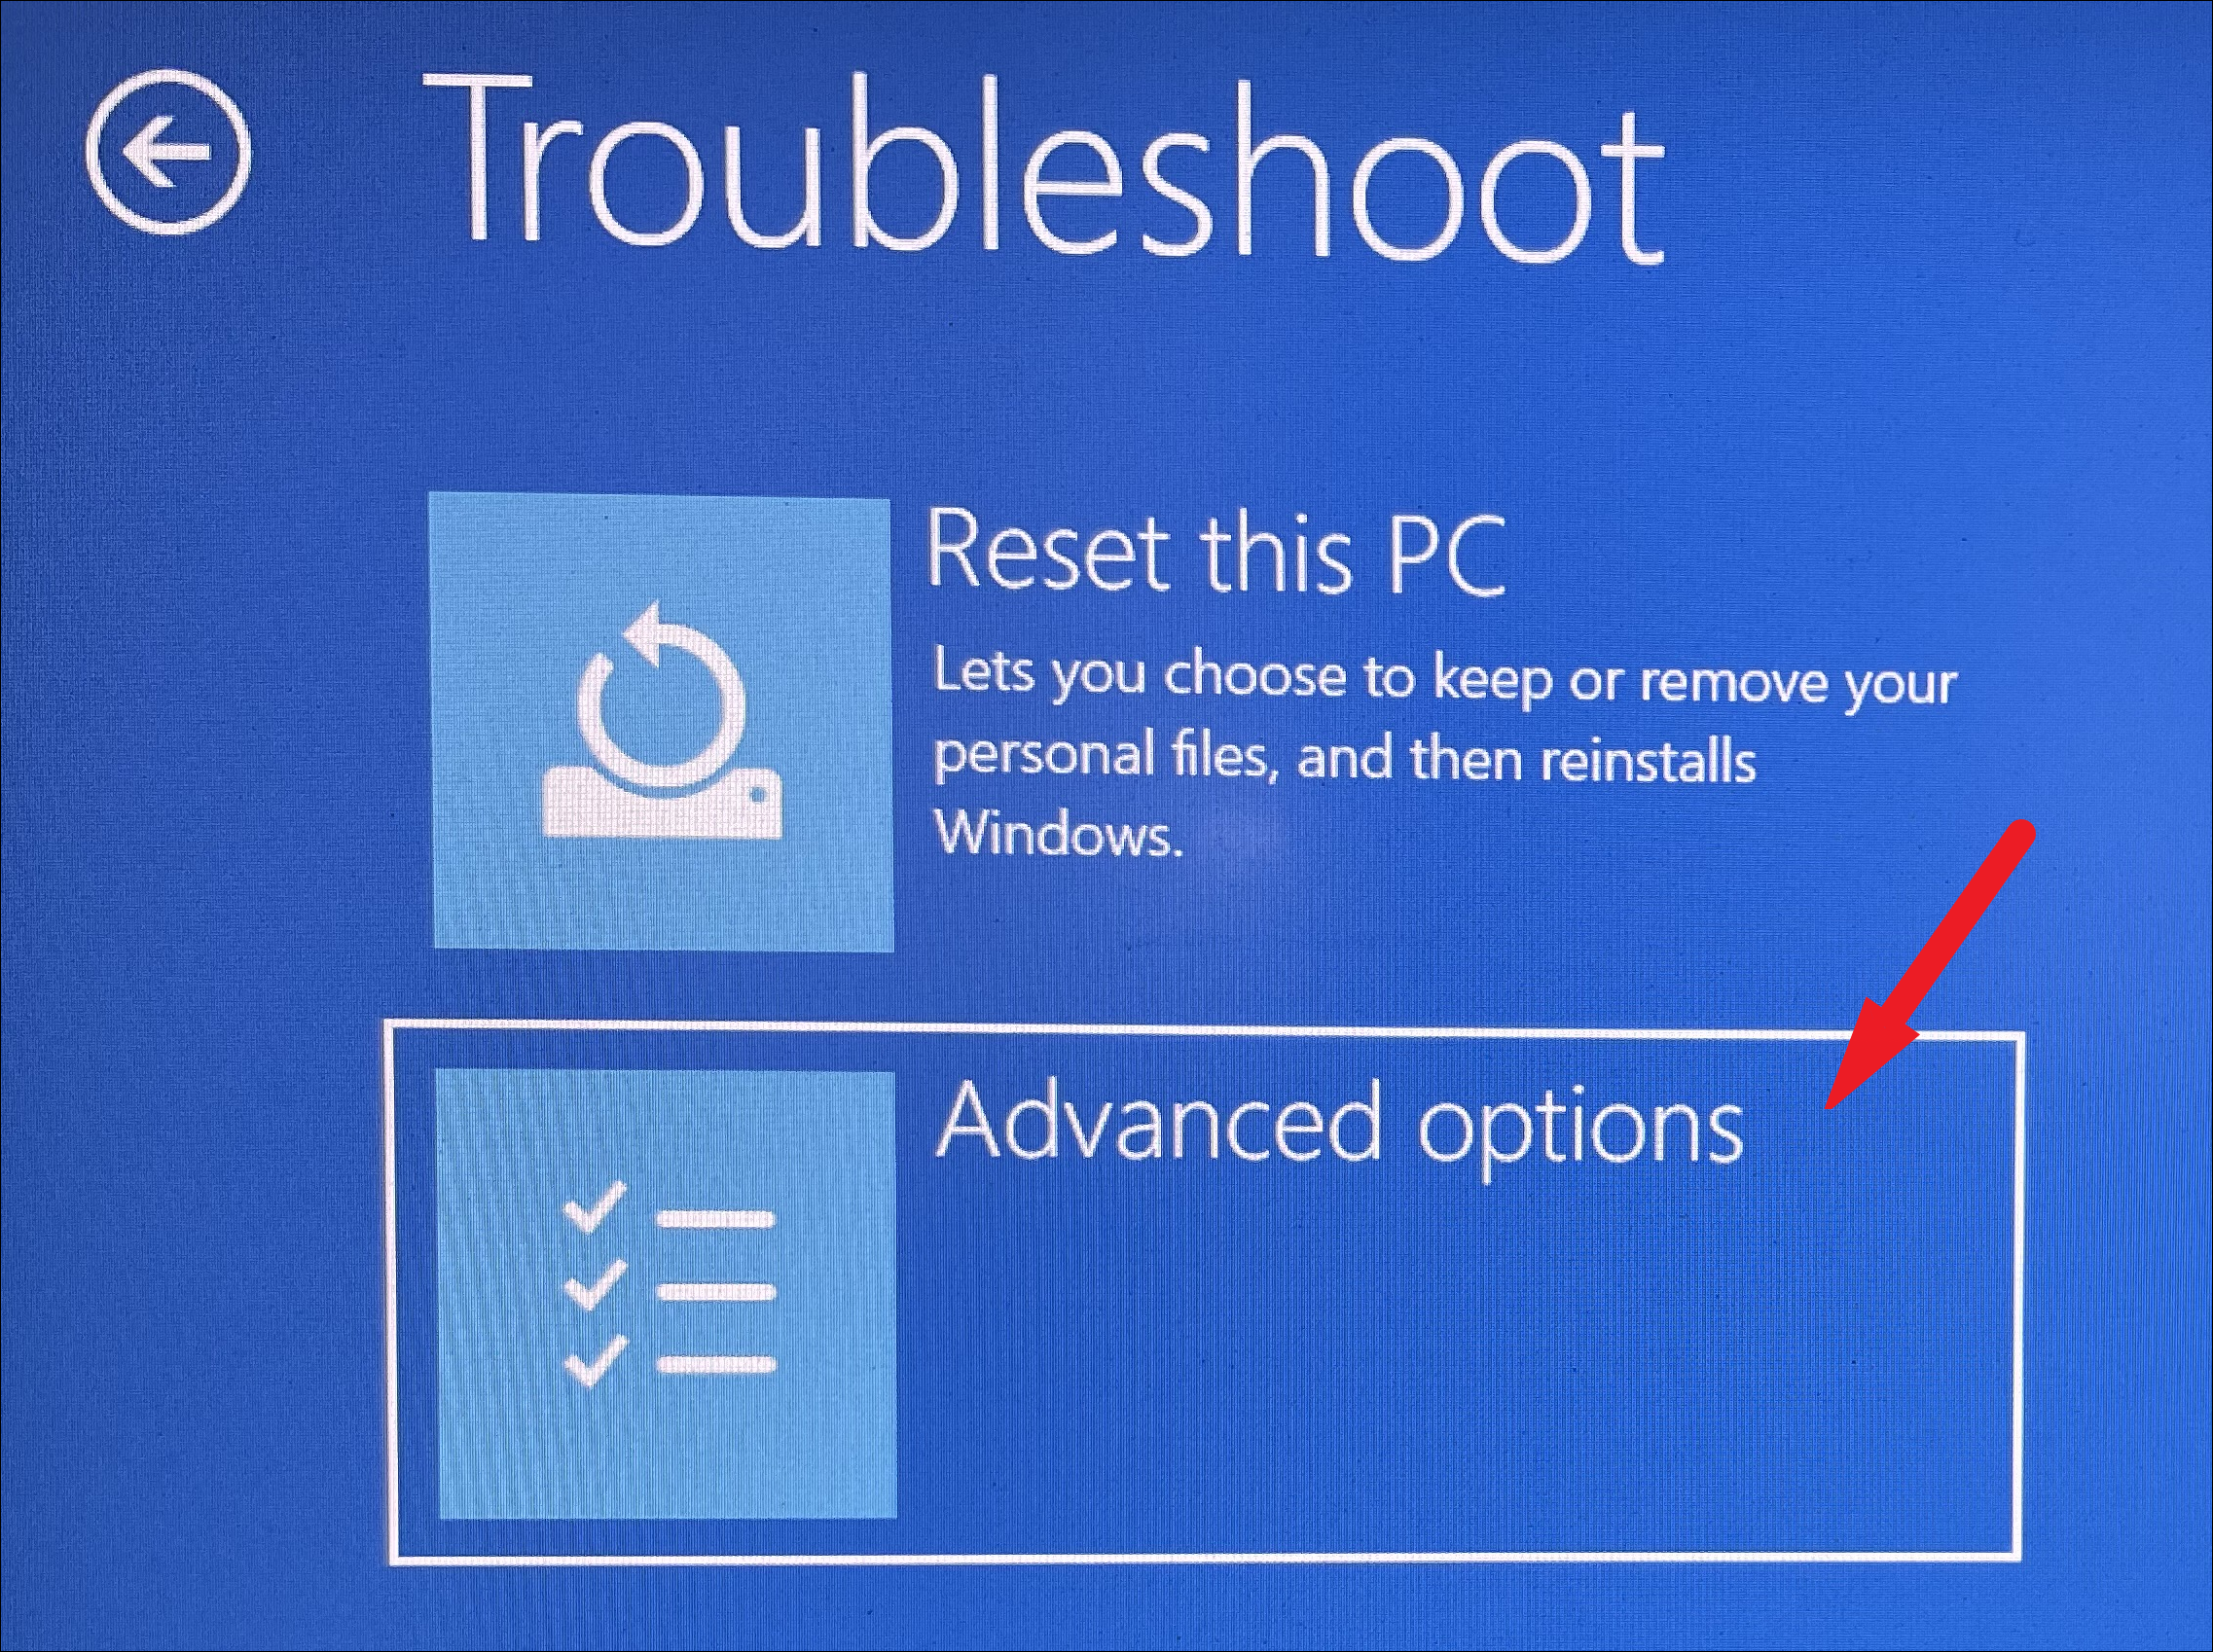
3 In the Choose an option screen, select Troubleshoot .
4 Click on Advanced options .
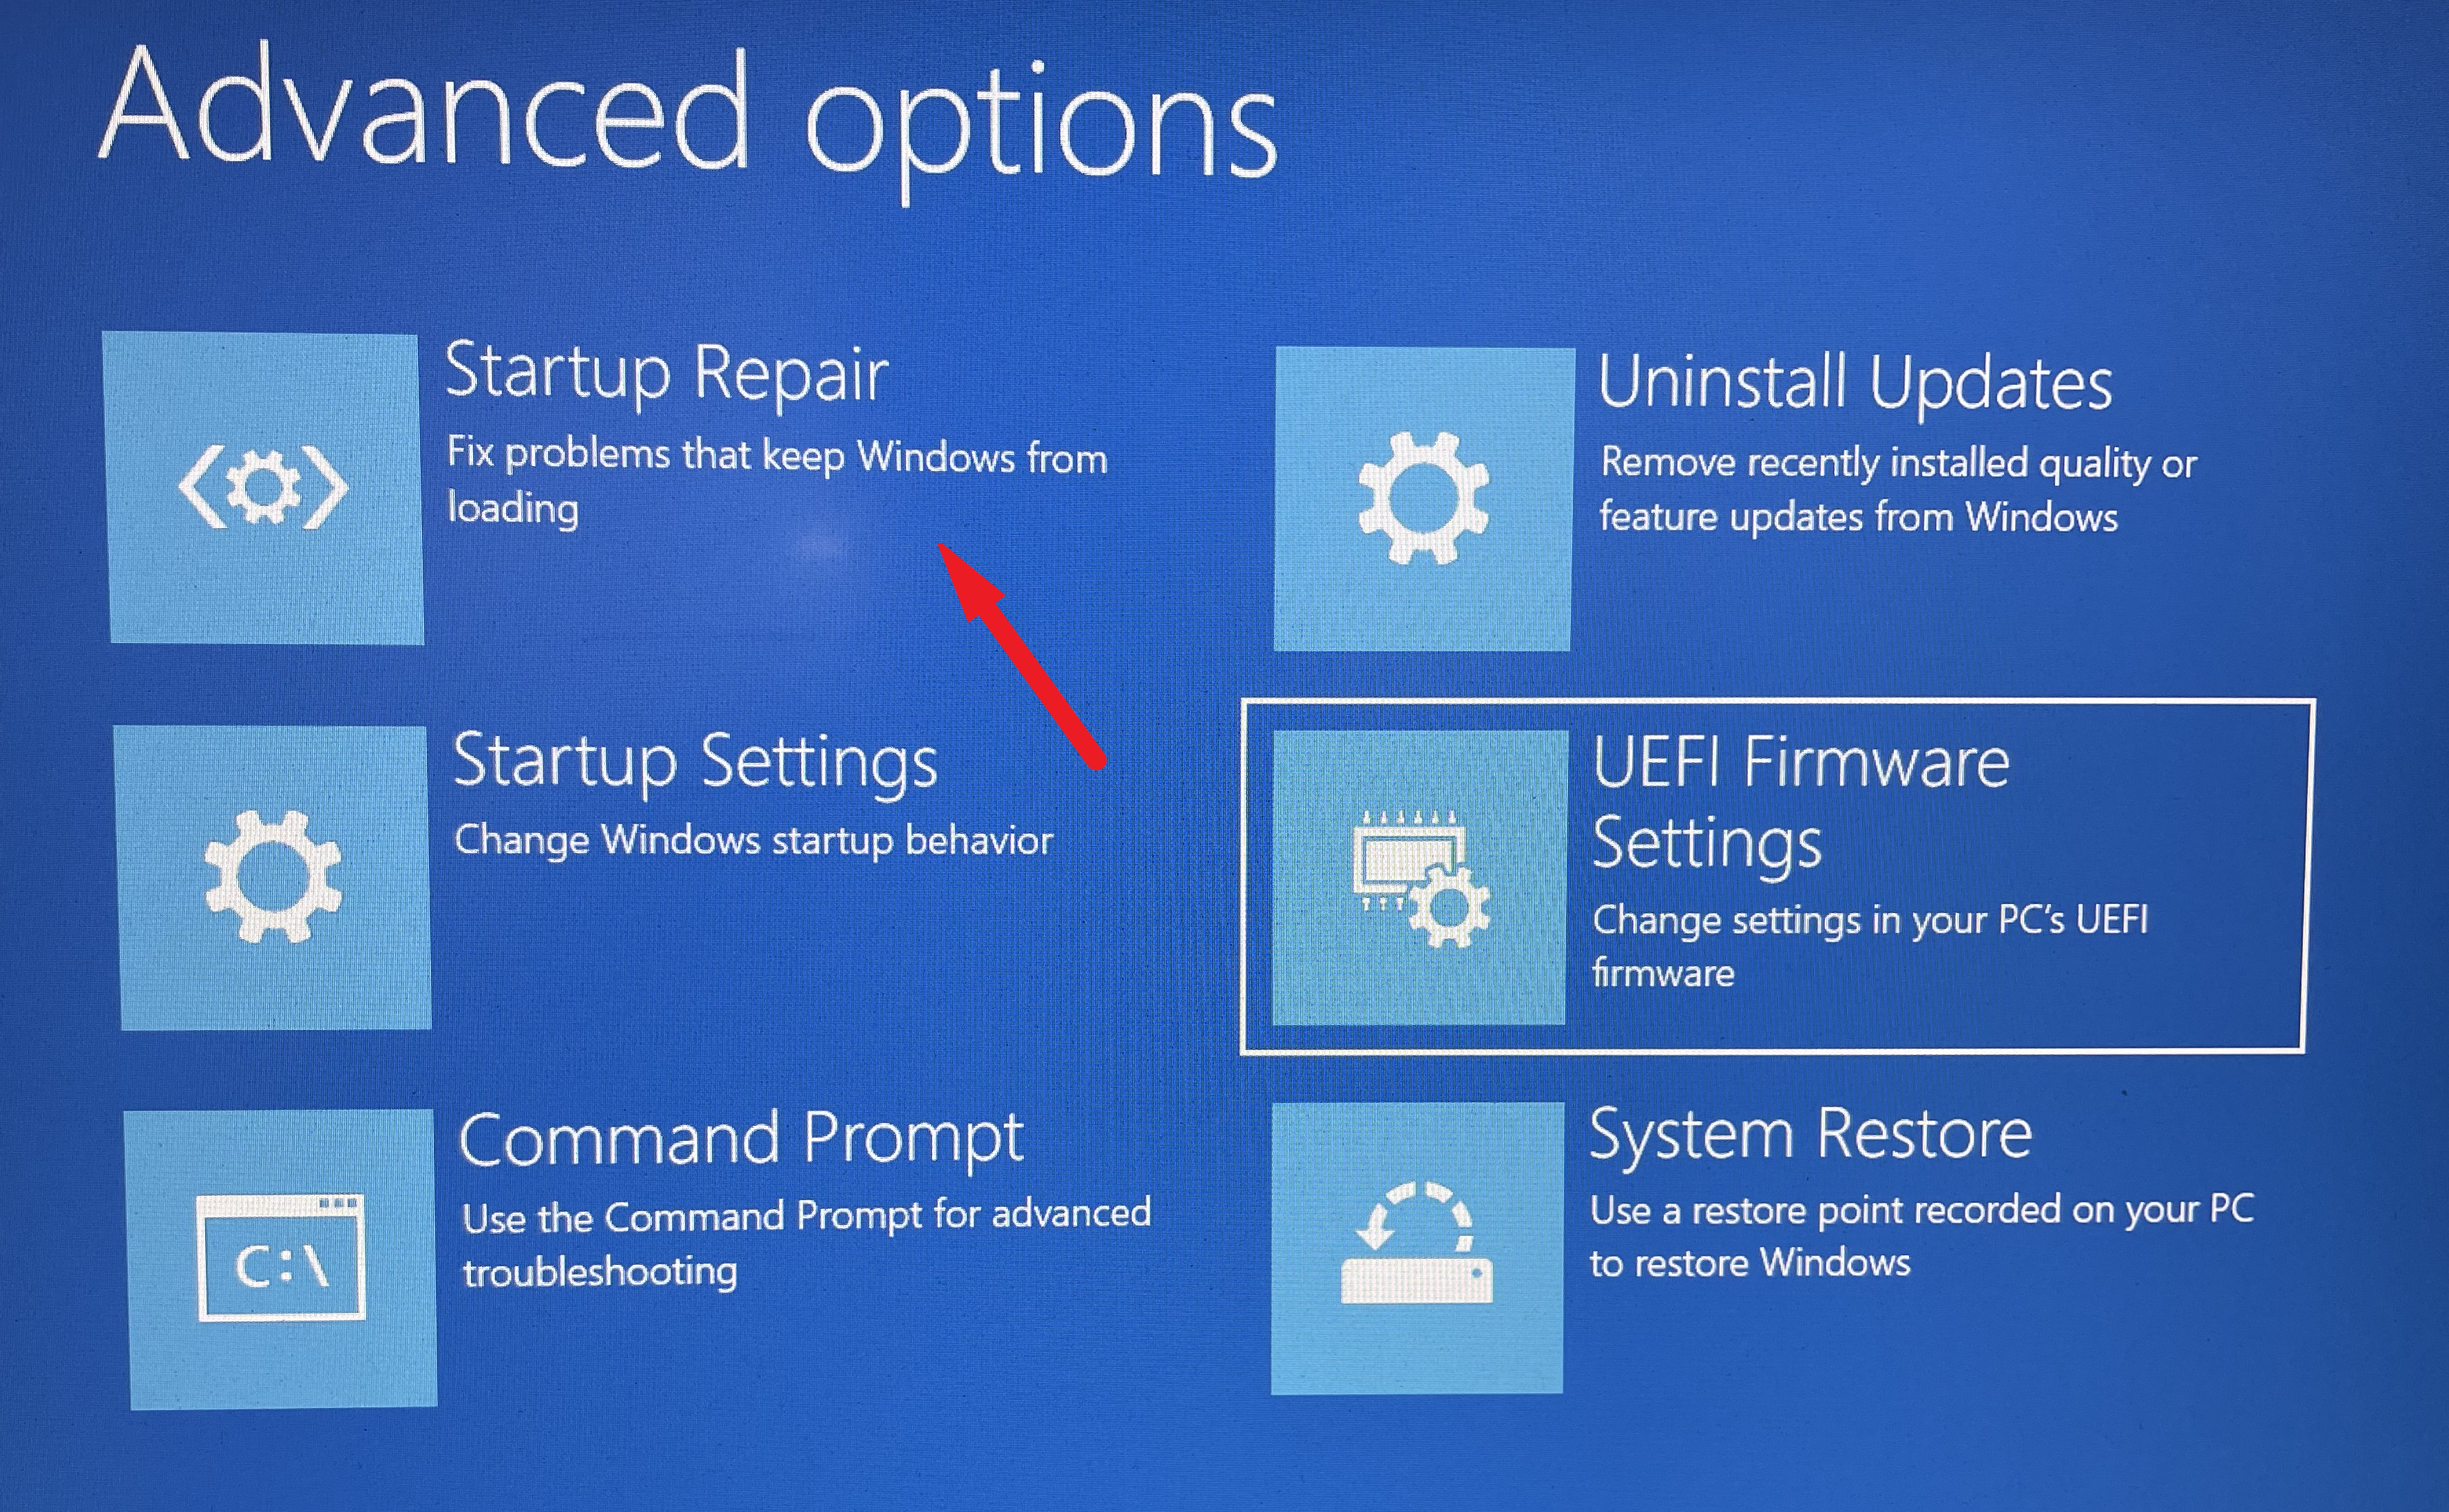
5 Select Startup Settings , then click Restart .
6 After restarting, press the appropriate key to enable Safe Mode (usually F4).
7 Once in Safe Mode, attempt to create a System Restore point. If successful, this indicates a third-party application may be causing the issue.
Enable System Restore on Your Windows 11 PC
If System Restore is not enabled, you need to turn it on before creating a restore point.
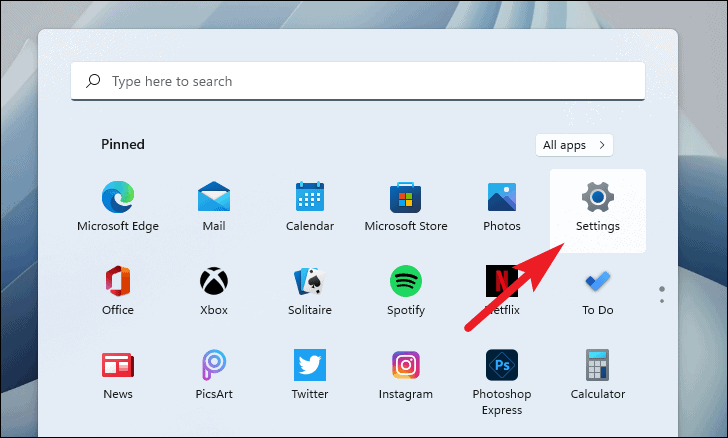
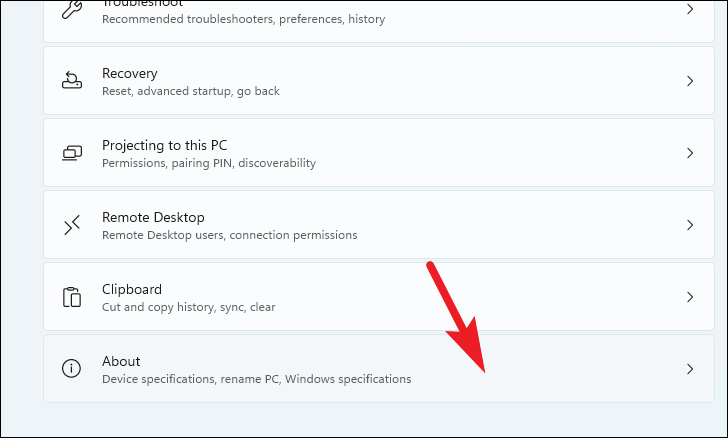
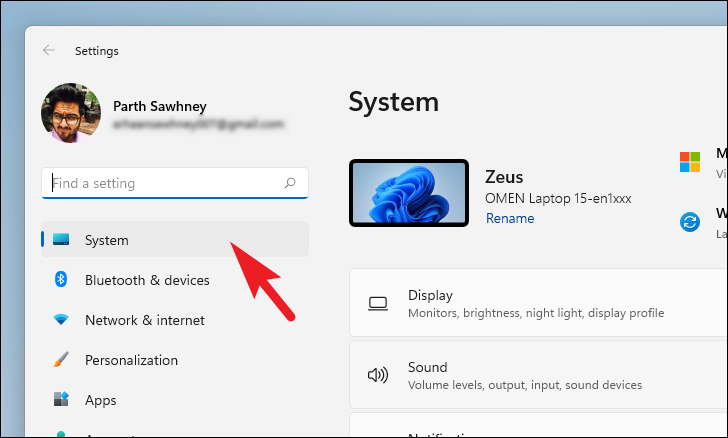
1 Open the Start Menu and click on Settings .
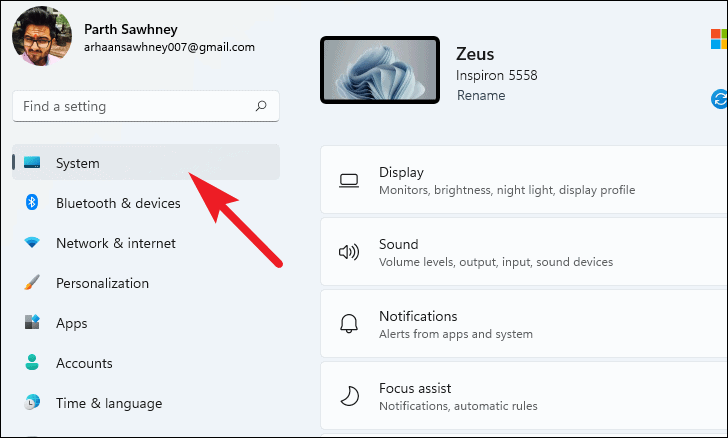
2 In the Settings window, select the System tab.
3 Scroll down and click on About .
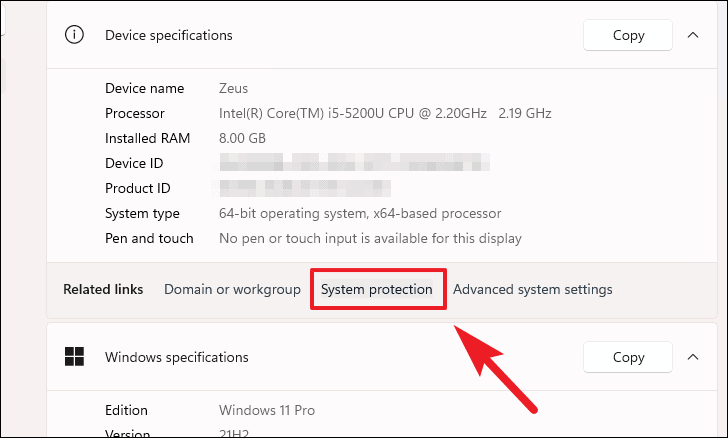
4 Under Related settings , click on System protection .
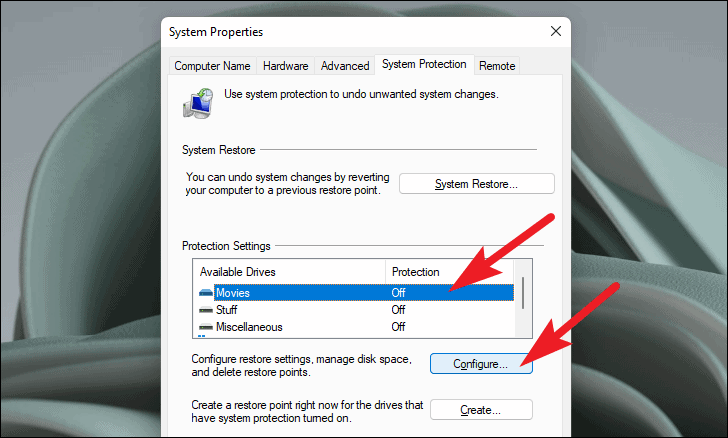
5 In the System Properties window, select your system drive and click on Configure .
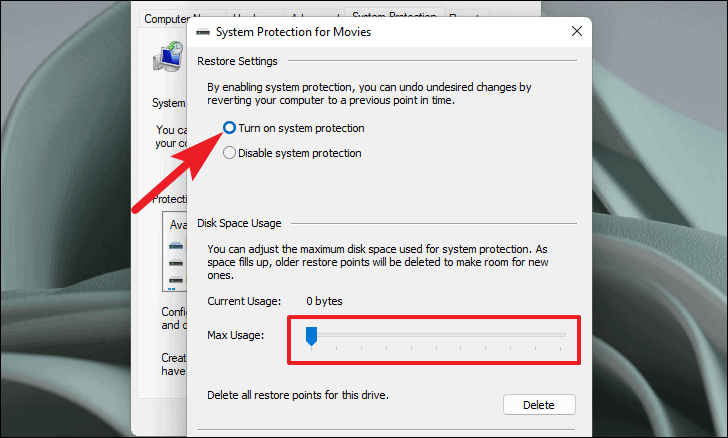
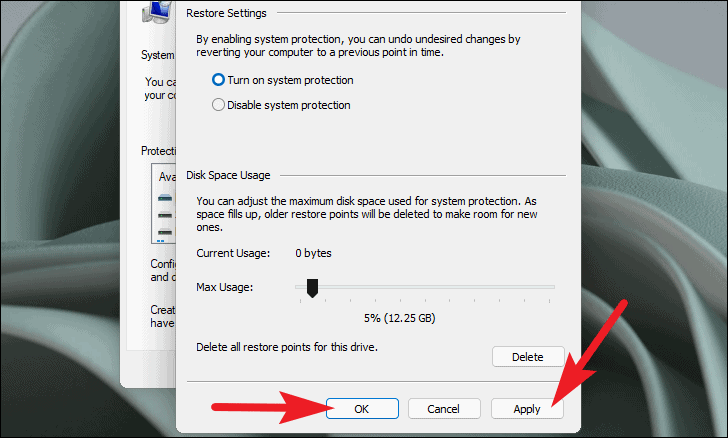
6 Choose Turn on system protection . Adjust the Disk Space Usage slider to allocate space for restore points.
7 Click Apply , then OK to save the changes.
8. Reset Your PC
If all else fails, resetting your PC may be necessary. This reinstalls Windows while keeping your personal files intact.
1 Open the Start Menu and select Settings .
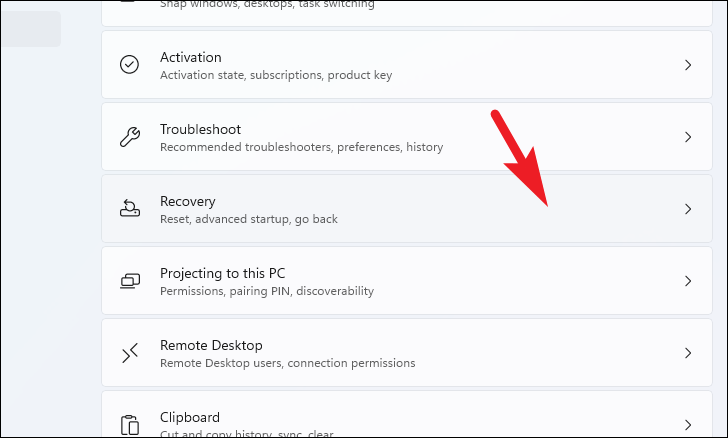
2 Ensure you’re in the System tab, then click on Recovery .
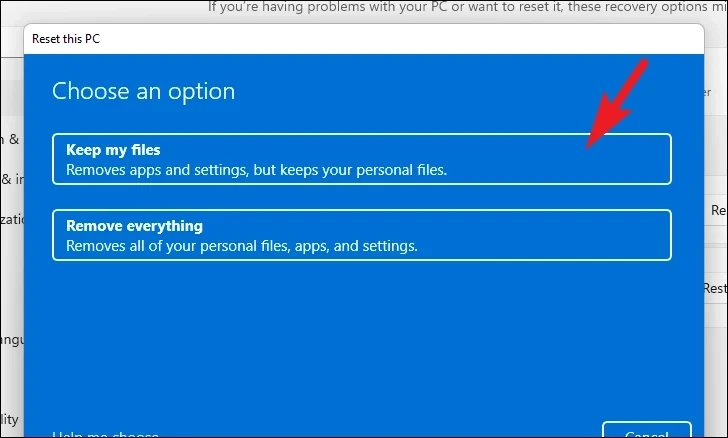
3 Under Recovery options , click on Reset PC next to Reset this PC .
4 Choose Keep my files to retain your personal data.
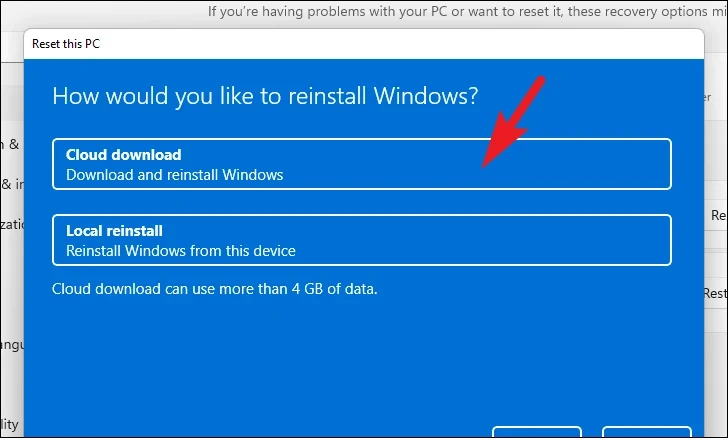
5 Select Cloud download to download a fresh copy of Windows. Note that this requires an internet connection and will use more than 4 GB of data.
Note: The Cloud download option will download a fresh copy of Windows from Microsoft servers.
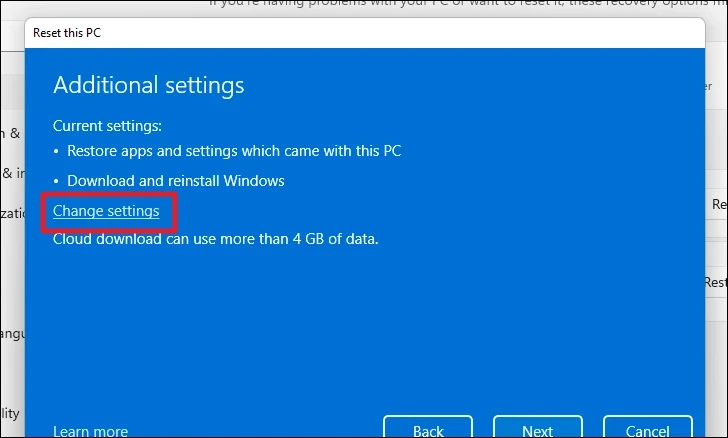
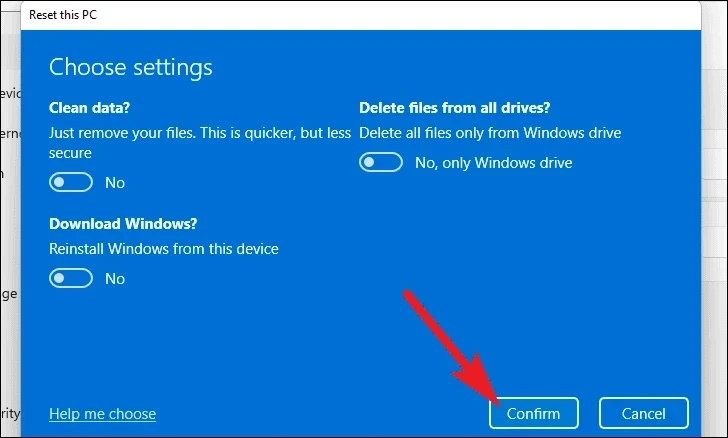
6 Review the settings. If you wish to change any, click on Change settings .
7 Adjust settings such as restoring preinstalled apps or switching between Cloud and local reinstall. Click Confirm when done.
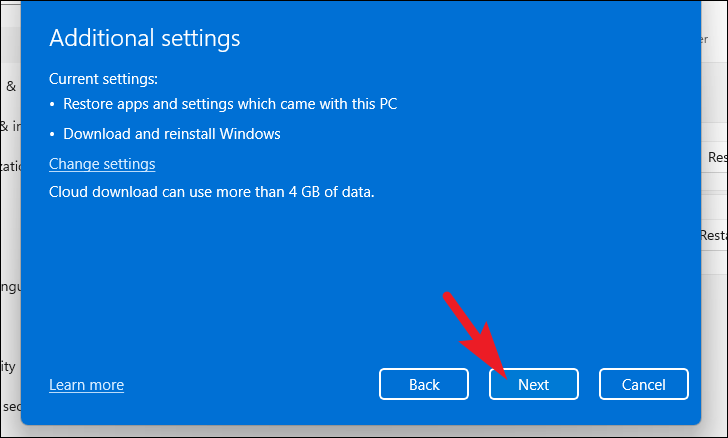
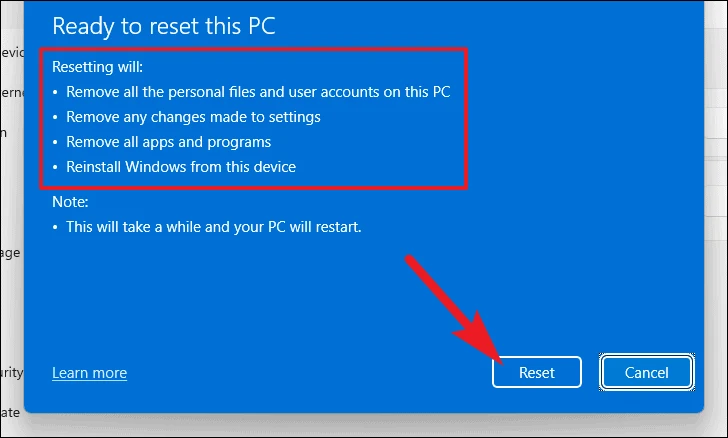
9 Read the summary of actions, then click Reset to begin the process.
By following these methods, you should be able to resolve the 0x80042306 error and create System Restore points once again. Keeping your system backed up ensures you can recover from unforeseen issues in the future.