Get rid of the WerFault.exe error on your PC with these fixes
Get rid of the WerFault.exe error on your PC with these fixes
by Parth Sawhney
The WerFault.exe error in Windows 11 can be a persistent issue, consuming significant system resources and affecting your computer’s performance. While WerFault.exe is a legitimate Windows process used for error reporting, problems arise when it malfunctions due to various reasons, such as corrupted system files or malware. In this guide, we’ll explore effective methods to fix the WerFault.exe error and get your system running smoothly again.
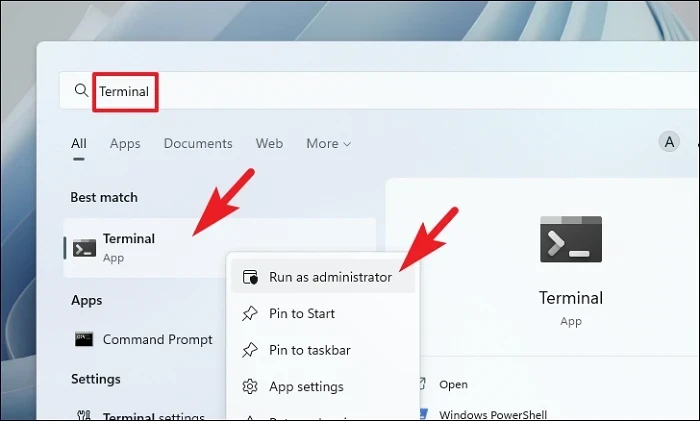
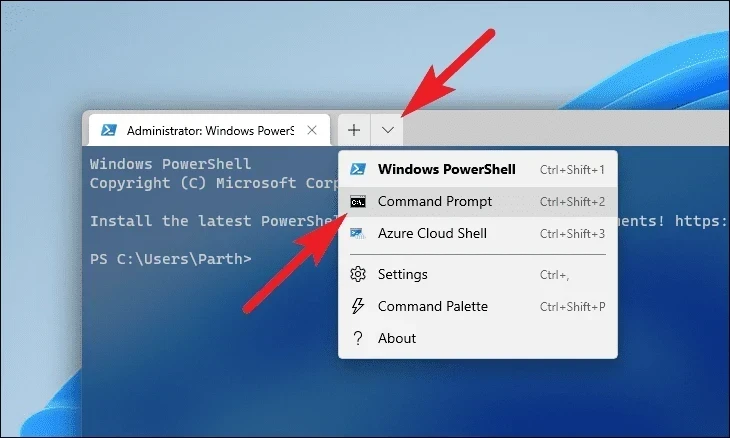
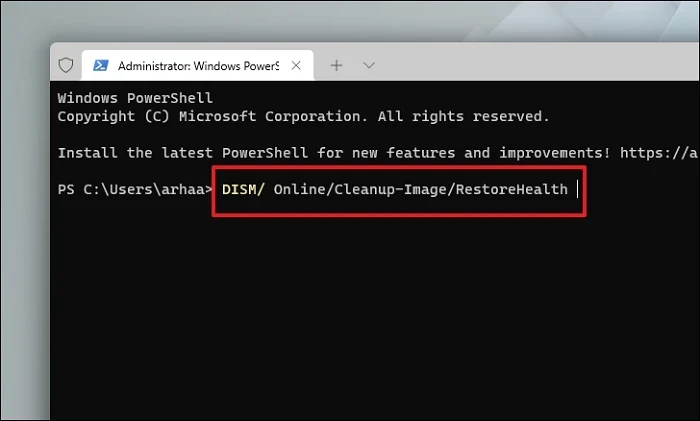
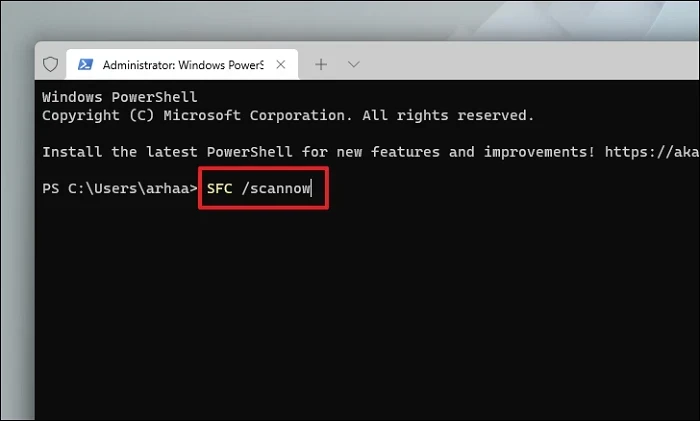
1. Run SFC and DISM
Running the System File Checker (SFC) and Deployment Image Servicing and Management (DISM) tools can repair corrupted system files that might be causing the WerFault.exe error. These built-in utilities are designed to scan and fix issues with your Windows system files.
After the scan is complete, restart your computer and check if the WerFault.exe error persists.
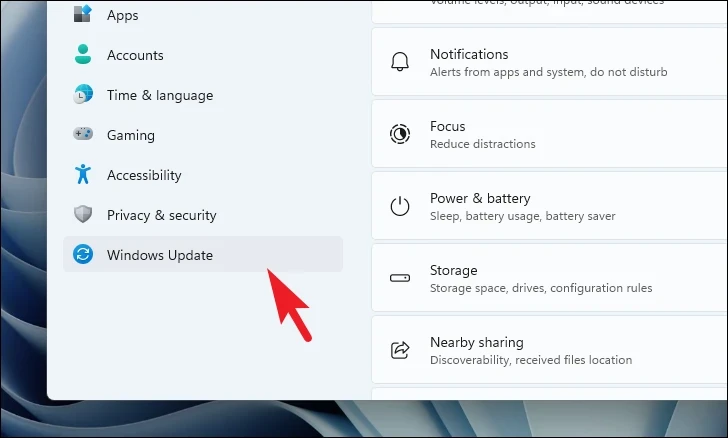
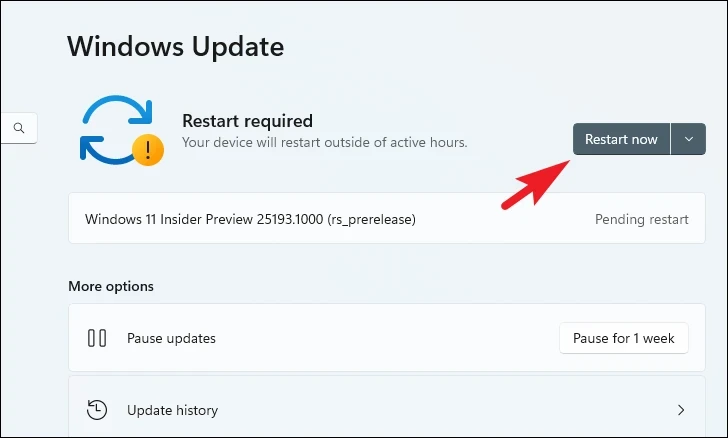
2. Update Windows
Keeping your Windows operating system up to date can resolve known issues and bugs, including problems with WerFault.exe. Updating ensures that you have the latest security patches and improvements from Microsoft.
Once the updates are installed, restart your computer to apply the changes.
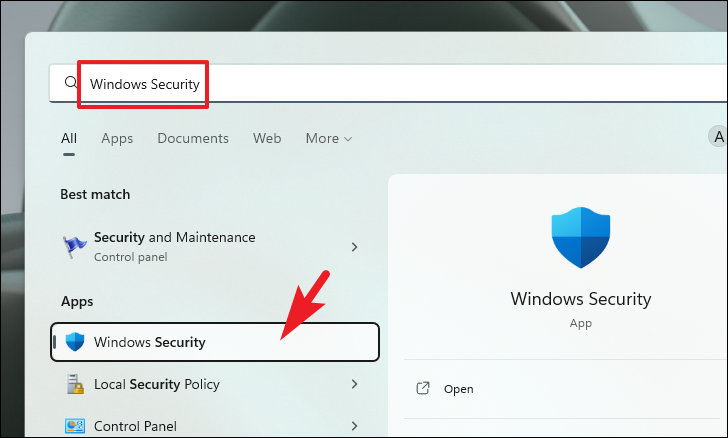
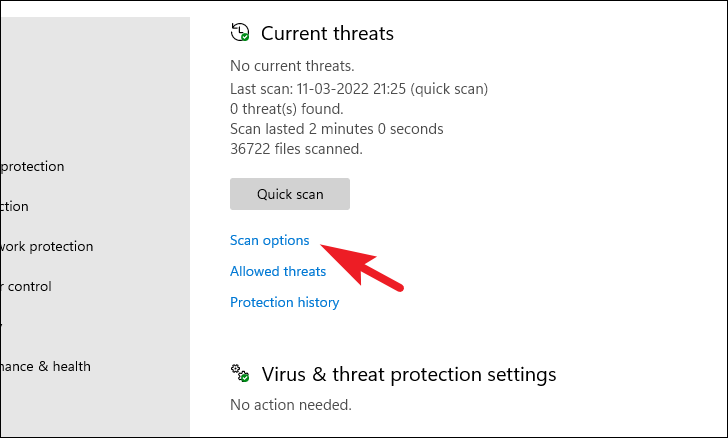
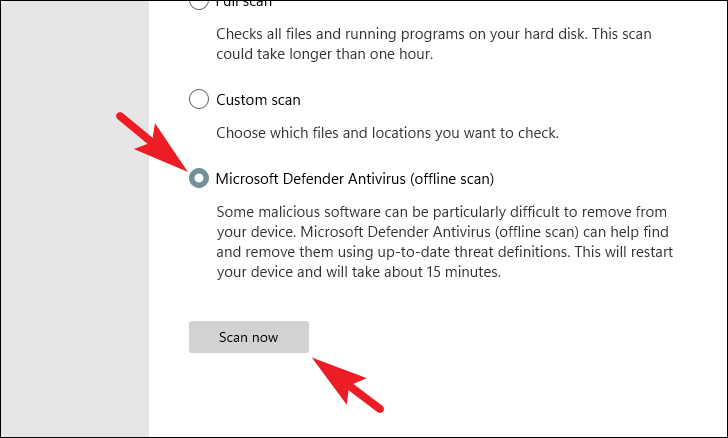
3. Run a System Scan
Malware or viruses disguised as WerFault.exe can cause high resource usage. Running a full system scan can detect and remove malicious software affecting your system.
Allow the scan to complete. If any threats are found, follow the prompts to remove them. Restart your computer afterward.
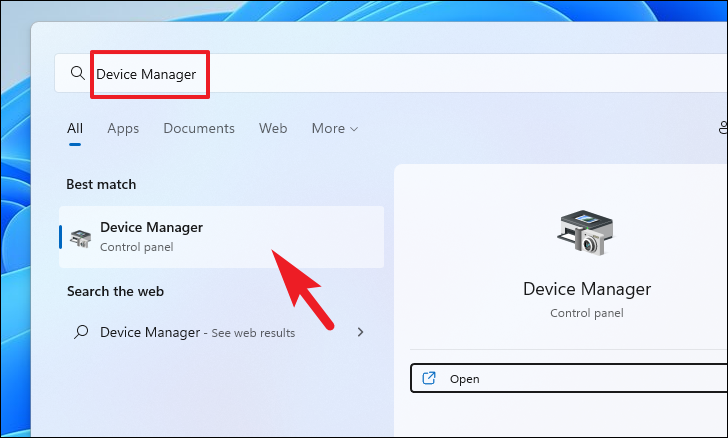
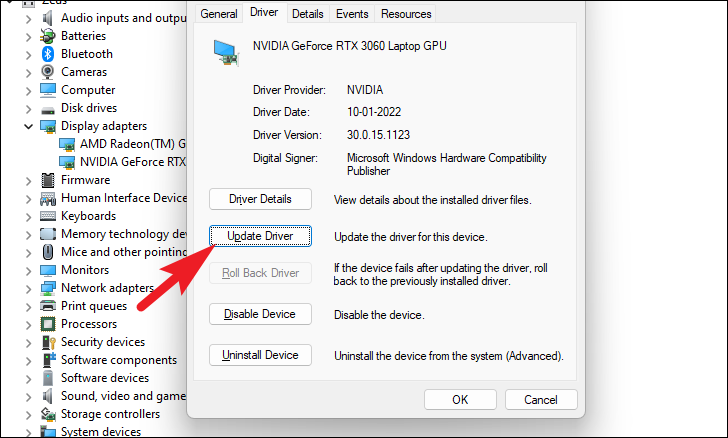
4. Update Drivers or Roll Back Drivers
Outdated or recently updated drivers can sometimes cause conflicts leading to the WerFault.exe error. Ensuring your drivers are up to date, or rolling back a problematic driver, can resolve the issue.
Open the Start Menu and type Device Manager. Click on the Device Manager app from the search results.
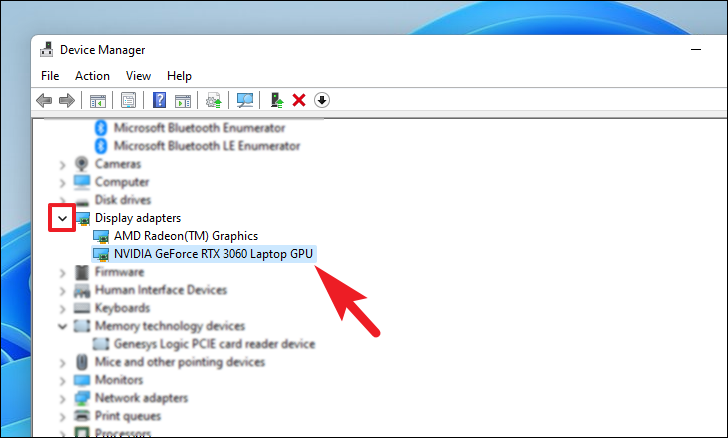
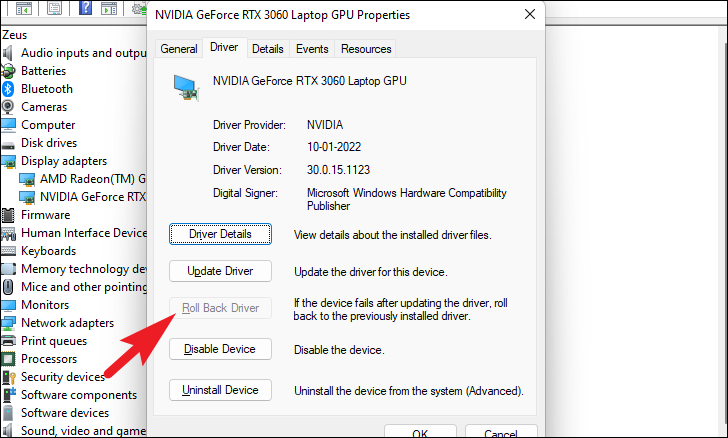
Step 2 (To Roll Back a Driver): Locate the device category for which the driver was recently updated. Double-click to expand it, then double-click on the specific device to open its properties.
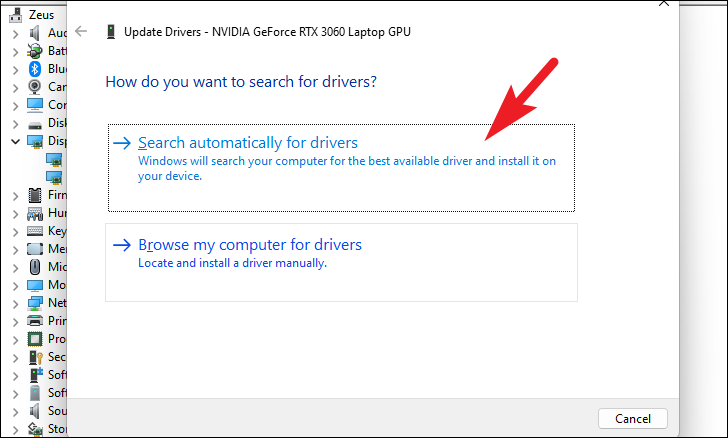
Choose Search automatically for drivers to let Windows find and install the latest driver. Alternatively, select Browse my computer for drivers if you have the driver file downloaded.
Note: Focus on updating or rolling back drivers for devices like NVMe storage, Wi-Fi adapters, Bluetooth, webcams, third-party devices, and graphics cards, as they are known to cause this issue.
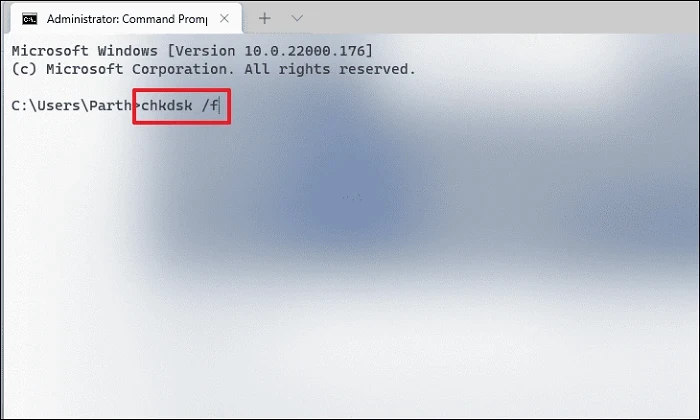
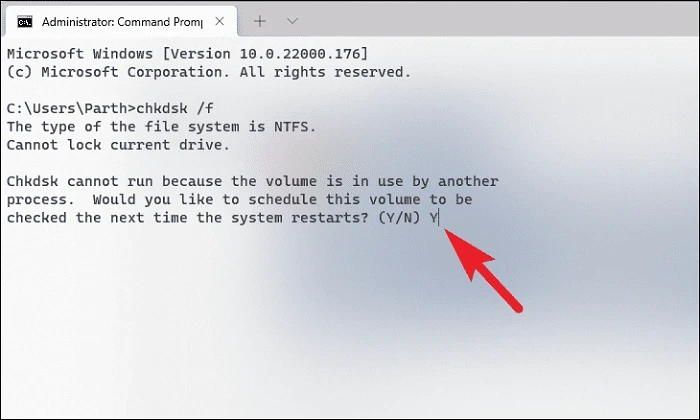
5. Run CHKDSK
The CHKDSK utility checks your hard drive for errors and can fix logical file system errors that might be causing the WerFault.exe issue.
Restart your computer to allow CHKDSK to run and fix any disk errors.
6. Restart Your Computer
Sometimes, a simple restart can resolve temporary glitches or conflicts causing the WerFault.exe error. Restarting clears the system memory and can fix issues arising from recent updates or software installations.
For Laptops: Press and hold the Power button to force a shutdown. Wait a few seconds, then press the Power button again to start the laptop.
For Desktops: Press the physical power button on the CPU unit to shut it down, or unplug it if necessary. Wait a moment, then power it back on.
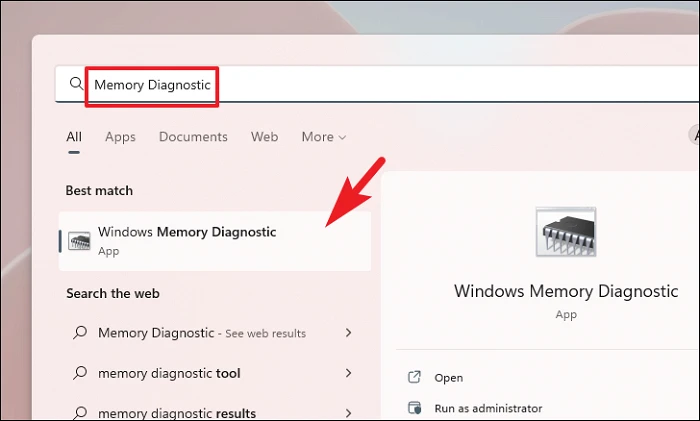
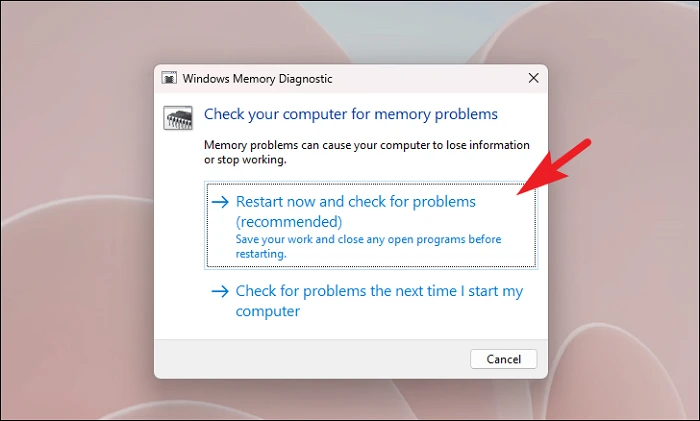
7. Run Windows Memory Diagnostics
Memory issues can cause system errors like WerFault.exe to occur. Running the Windows Memory Diagnostic tool can help identify and resolve problems with your RAM.
Choose Restart now and check for problems to begin the memory test immediately. Alternatively, select Check for problems the next time I start my computer if you wish to run the test later.
After the test completes, your computer will restart, and the results will be displayed upon logging in.
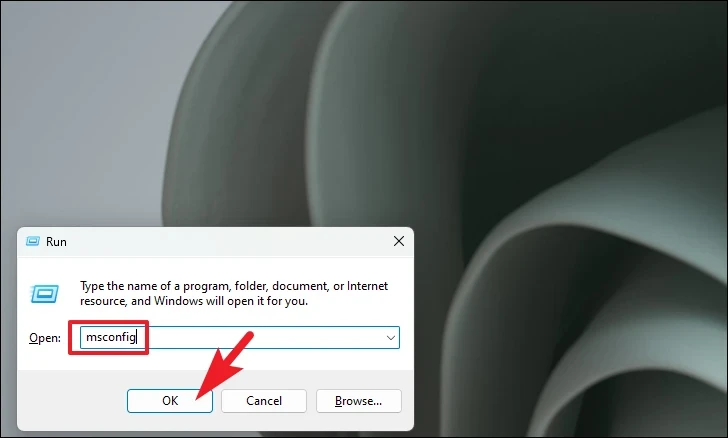
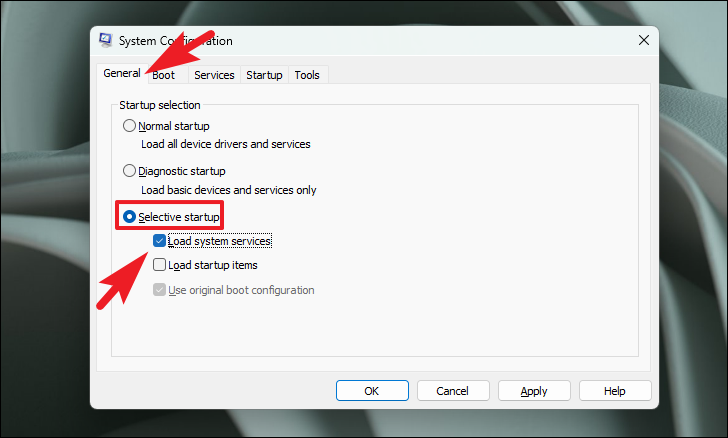
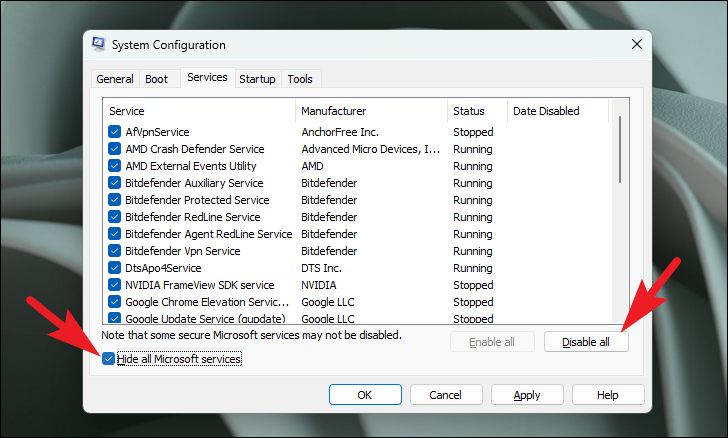
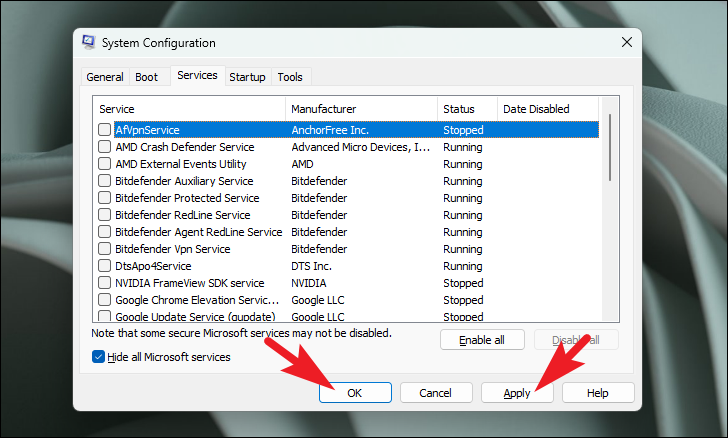
8. Perform a Clean Boot
Performing a clean boot starts Windows with a minimal set of drivers and startup programs, which can help identify if third-party applications are causing the WerFault.exe error.
In the System Configuration window, select the General tab. Choose Selective startup and uncheck Load startup items. Ensure that Load system services is checked.
Restart your computer. If the error no longer occurs, it indicates that a third-party service is causing the problem. You can enable services one by one to identify the culprit.
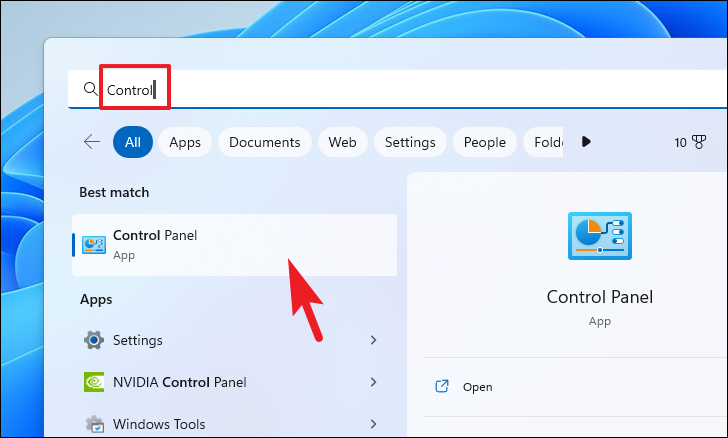
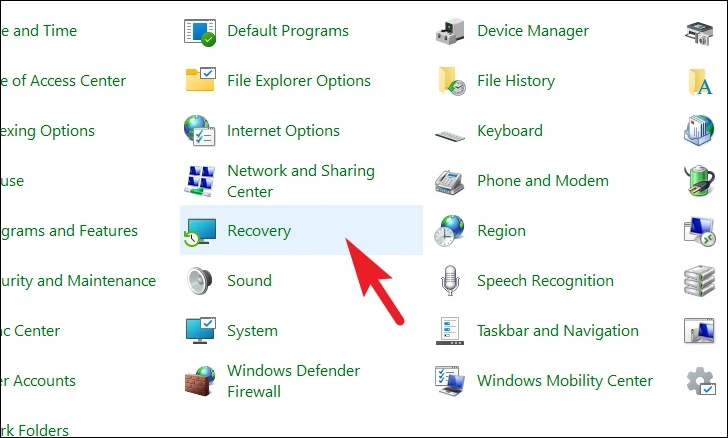
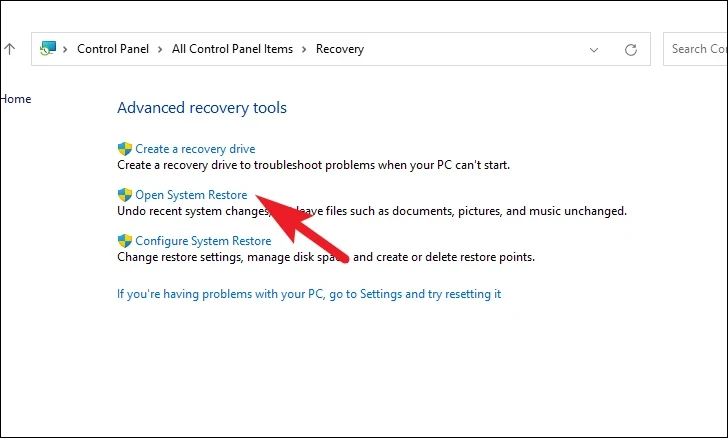
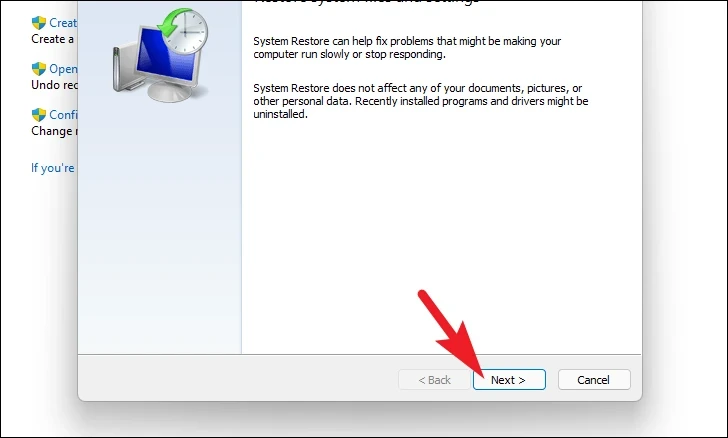
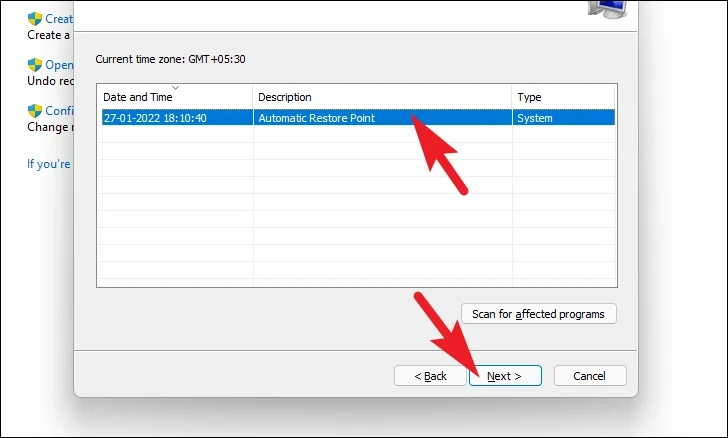
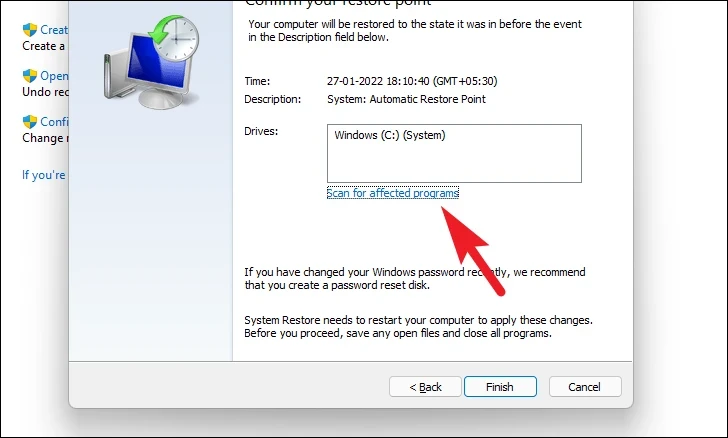
9. Roll Back to a System Restore Point
If the WerFault.exe error started occurring recently, rolling back your system to a previous state might resolve the issue. This method restores your system settings and files to an earlier point in time.
Your system will restart, and the restoration process will complete. Check if the WerFault.exe error is resolved.
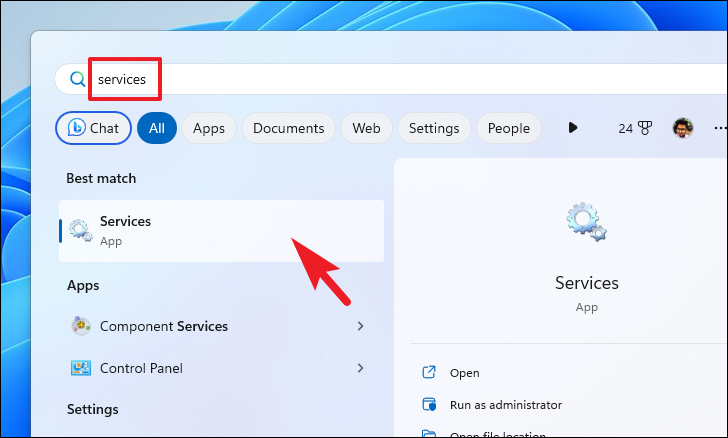
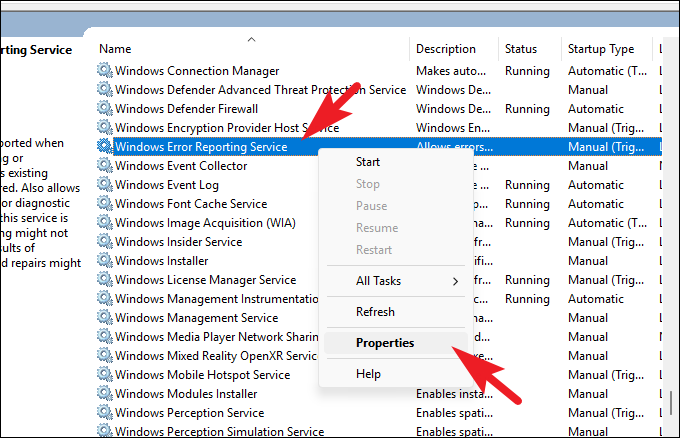
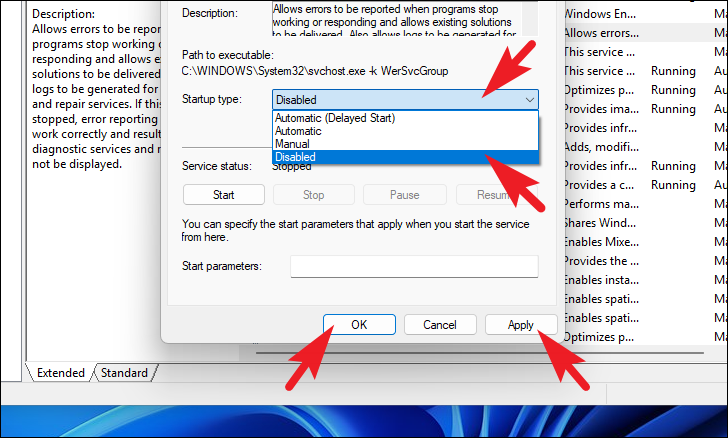
10. Disable WerFault.exe
If none of the previous methods have resolved the issue, disabling the Windows Error Reporting Service can stop the WerFault.exe error. Note that this will prevent error reports from being sent to Microsoft and should be used as a last resort.
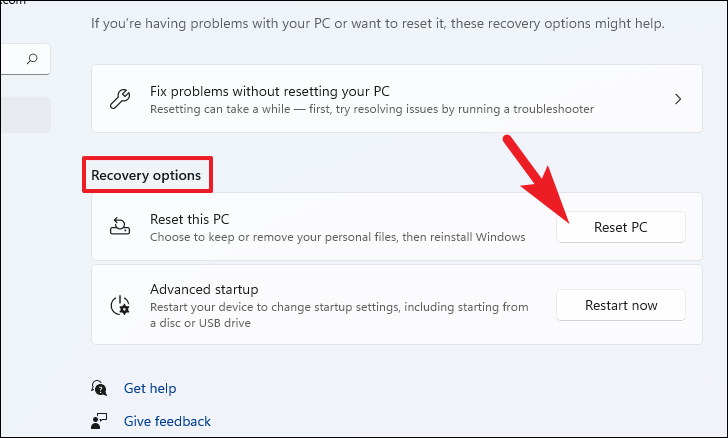
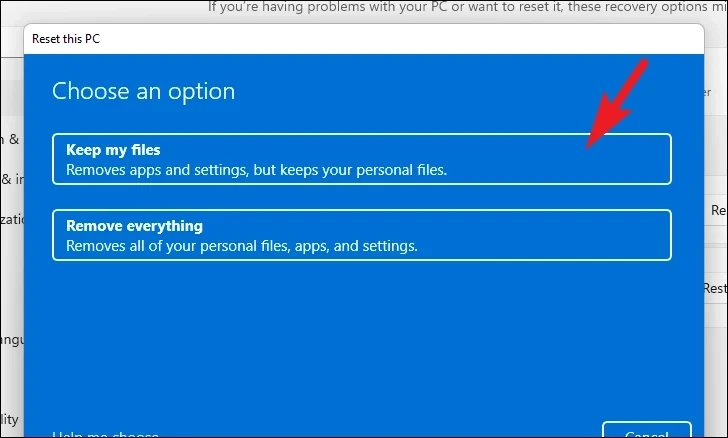
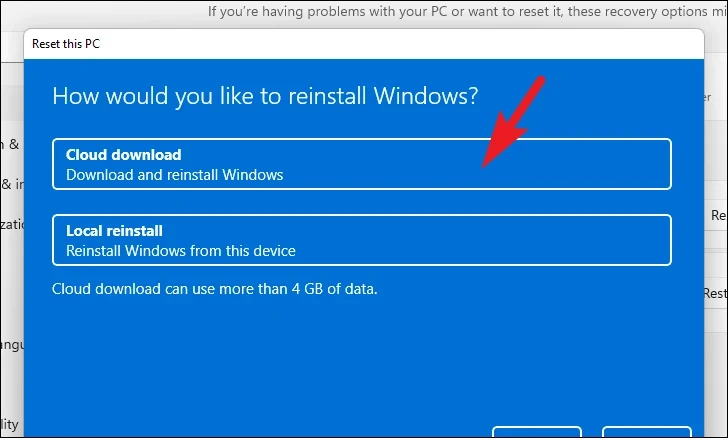
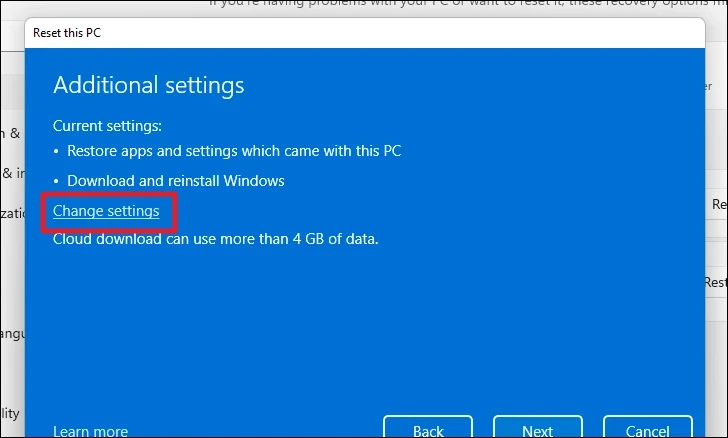
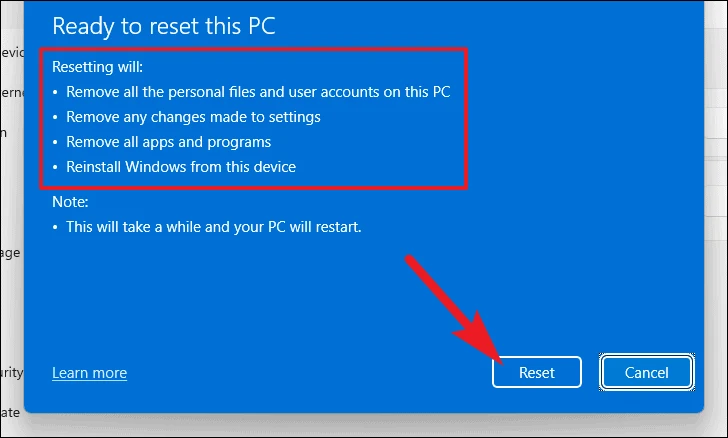
If all else fails, resetting your PC can resolve persistent issues by reinstalling Windows. This process lets you choose whether to keep your personal files while restoring system settings to their defaults.