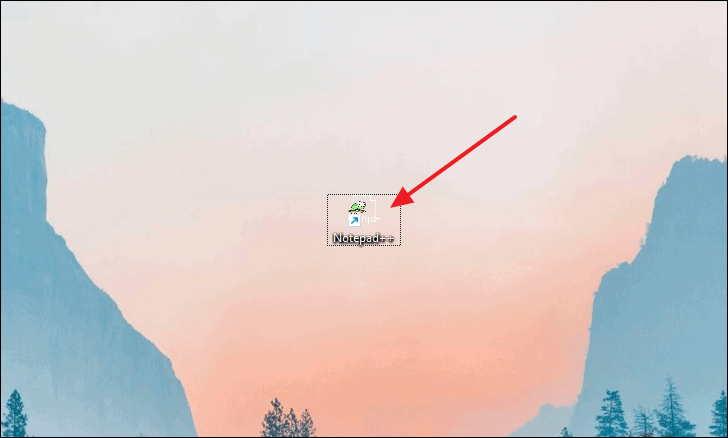
Encountering blank icons on your Windows 11 desktop can be quite inconvenient, especially when you're trying to navigate your applications quickly. This issue arises when Windows cannot properly display the icon files. Thankfully, there are several ways to fix this problem and restore your icons.
Delete the Icon Cache File
Windows stores all icons in a cache file. Deleting this file forces Windows to rebuild the cache, which can resolve the issue of blank icons.
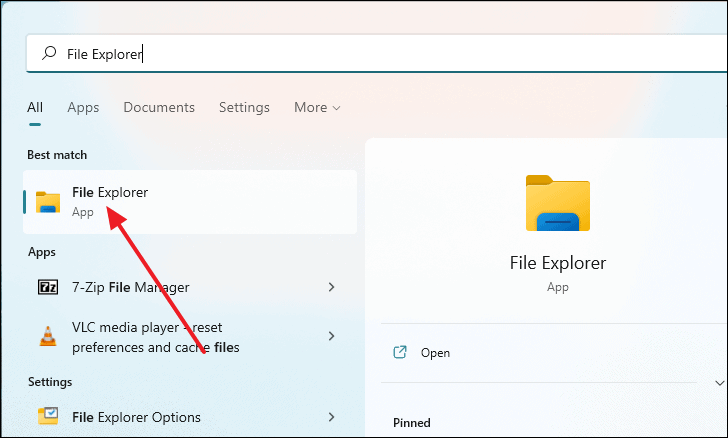
- Open File Explorer by pressing
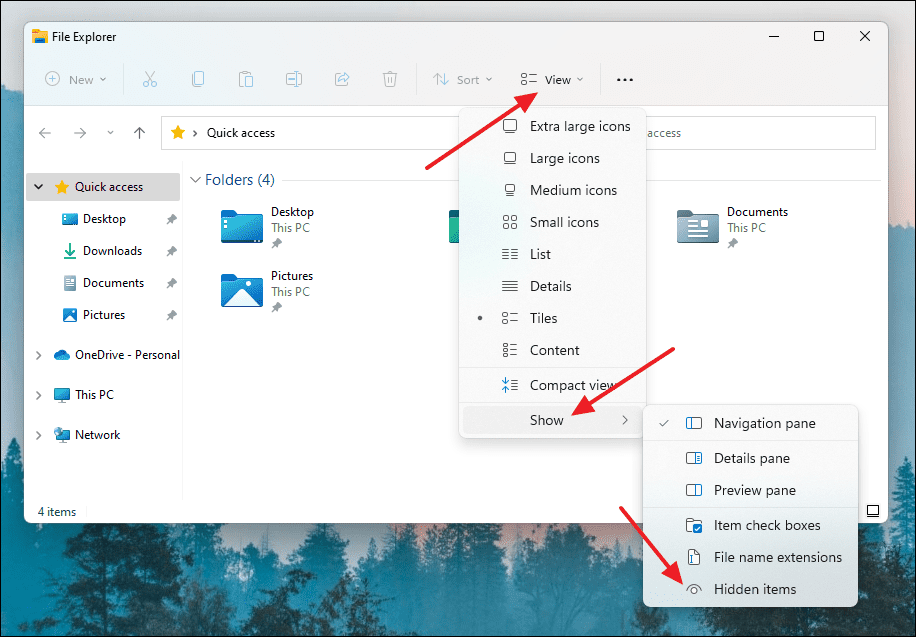
Windows + Eor searching for it in the Start menu. - Click on 'View' in the toolbar.
- Select 'Show' from the dropdown menu and then click on 'Hidden items' to display hidden files and folders.
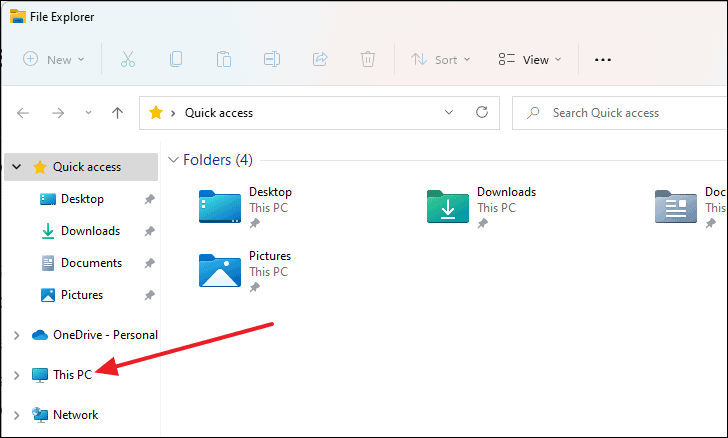
- Navigate to 'This PC' and open the 'C:' drive or the drive where Windows is installed.
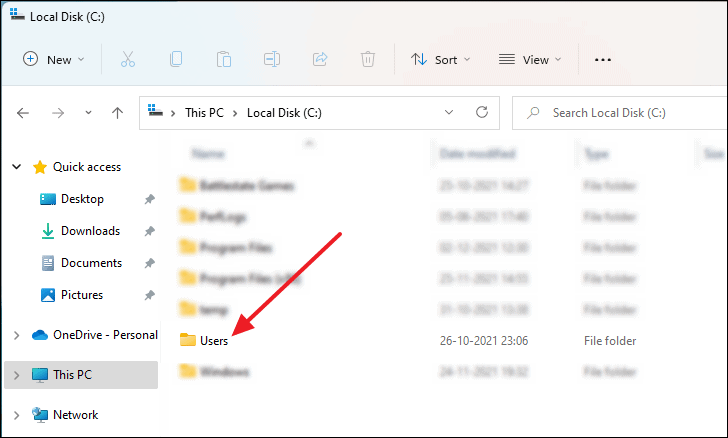
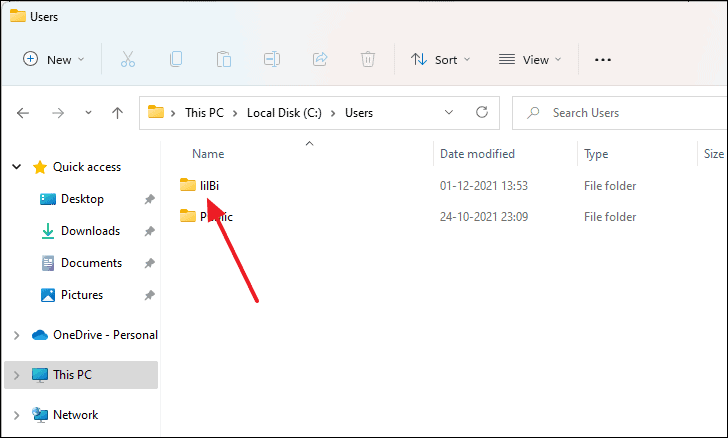
- Double-click on the 'Users' folder.
- Select your username folder.
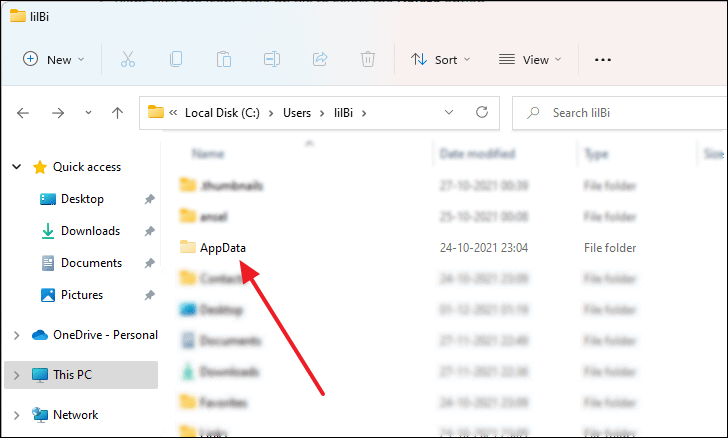
- Open the 'AppData' folder (it will appear faded since it's hidden).
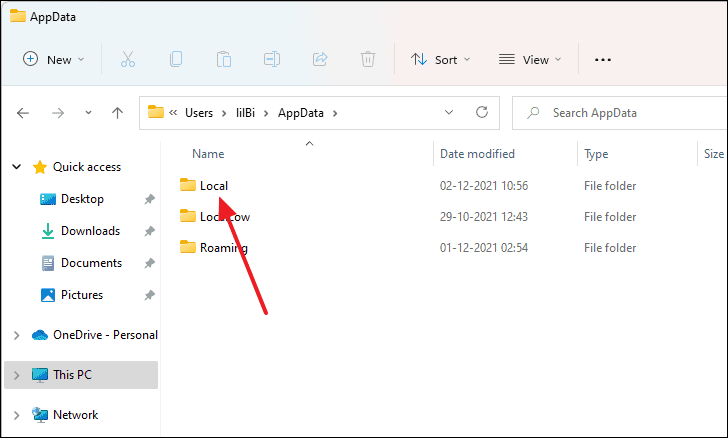
- Navigate to the 'Local' folder.
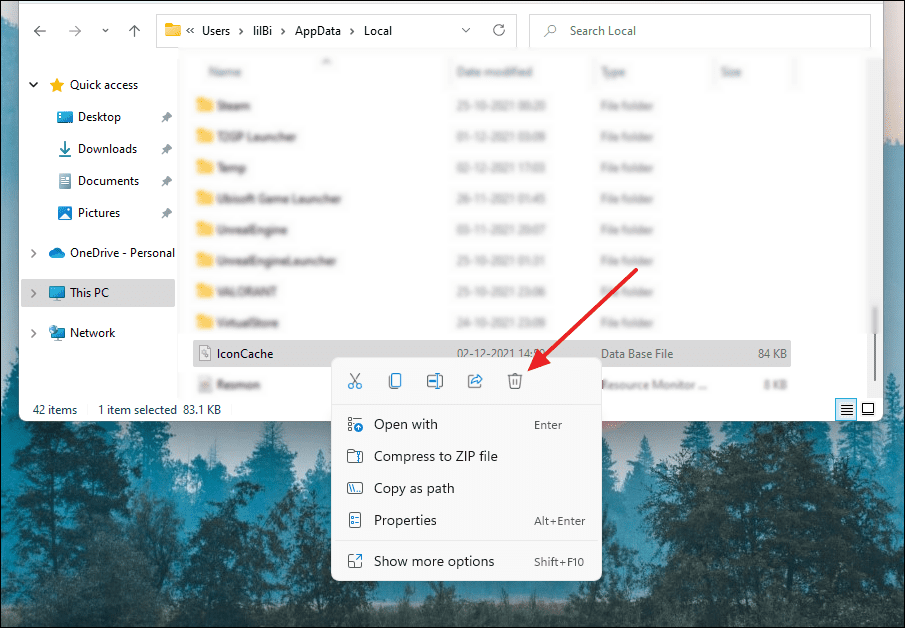
- Scroll down and locate the 'IconCache' file.
- Right-click on 'IconCache' and select 'Delete' or press
Delon your keyboard.
- Close File Explorer.
- Right-click on the 'Recycle Bin' icon on your desktop.
- Select 'Empty Recycle Bin' to permanently delete the file.
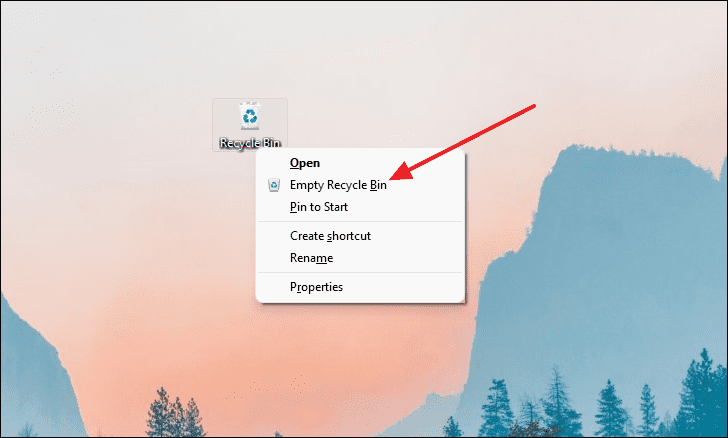
- Restart your computer to rebuild the icon cache. The blank icons should now be restored.
Reset Windows Explorer
Sometimes, the Windows Explorer process may encounter errors that cause icons to appear blank. Restarting this process can resolve the issue.
- Open the Task Manager by pressing
Ctrl + Shift + Escor searching for it in the Start menu.
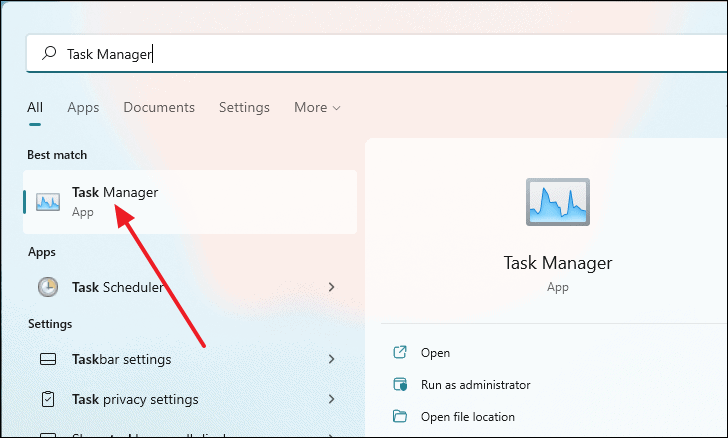
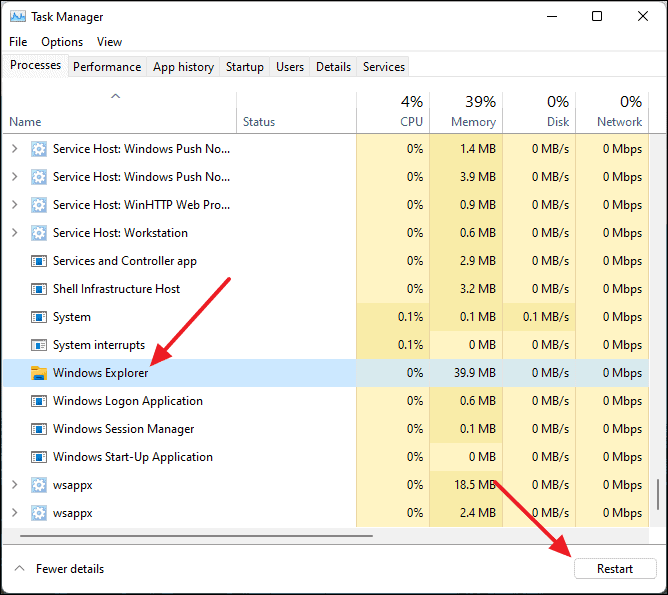
- In the Task Manager window, scroll down to find 'Windows Explorer' under the 'Processes' tab.
- Click on 'Windows Explorer' to select it.
- Click the 'Restart' button at the bottom-right corner of the window.
Perform a DISM Scan
The Deployment Image Servicing and Management (DISM) tool can repair Windows images, which may fix the blank icons issue.
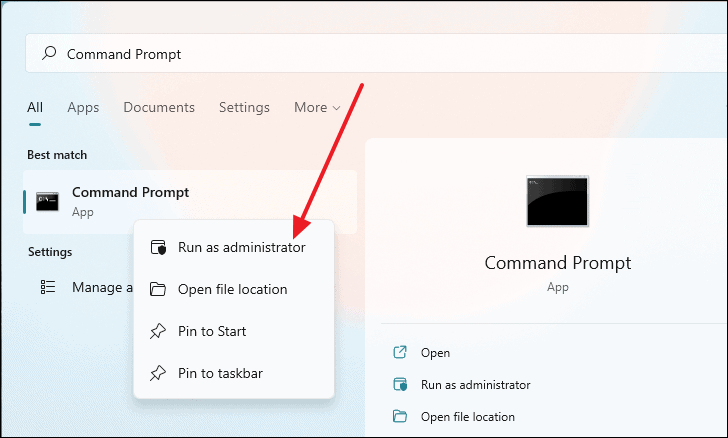
- Open Command Prompt as an administrator:
- Type 'Command Prompt' in the Windows search bar.
- Right-click on 'Command Prompt' in the search results.
- Select 'Run as administrator'.
- In the Command Prompt window, type the following command and press
Enter:
Dism /Online /Cleanup-Image /ScanHealth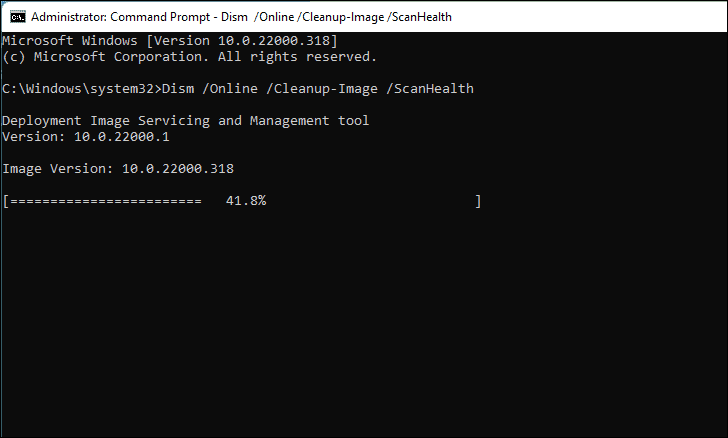
- After the scan completes, run the next command to repair any issues:
Dism /Online /Cleanup-Image /RestoreHealth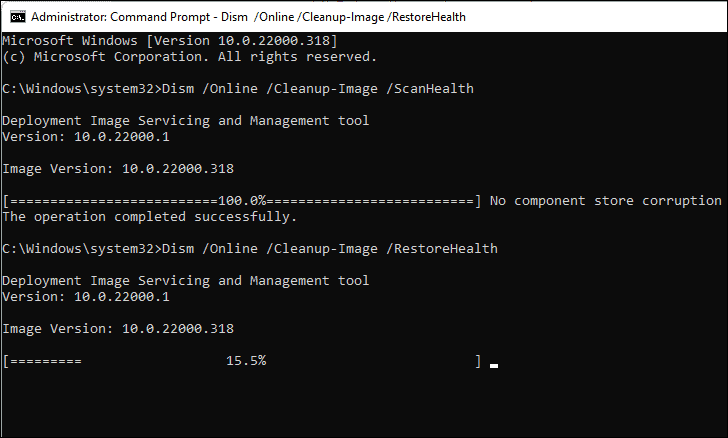
- Wait for the process to complete and then proceed to perform an SFC scan.
Perform an SFC Scan
The System File Checker (SFC) tool scans for and repairs corrupted system files, which may resolve the blank icons problem.
- Open Command Prompt as an administrator (if not already open).
- Type the following command and press
Enter:
sfc /scannow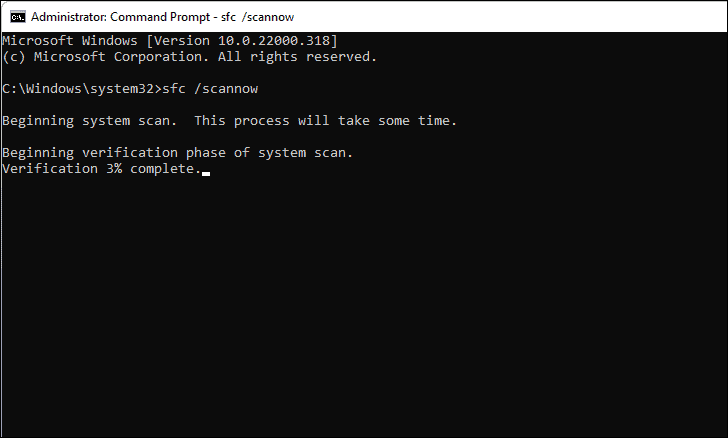
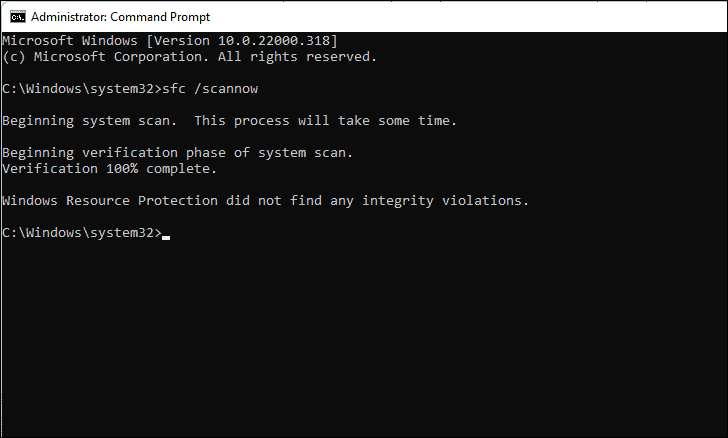
- Allow the scan to complete (it may take several minutes).
- Once finished, check if the blank icons issue is resolved.
Change the Blank Icon from the Properties Menu
If a specific icon is blank, you can manually change it from the application's properties.
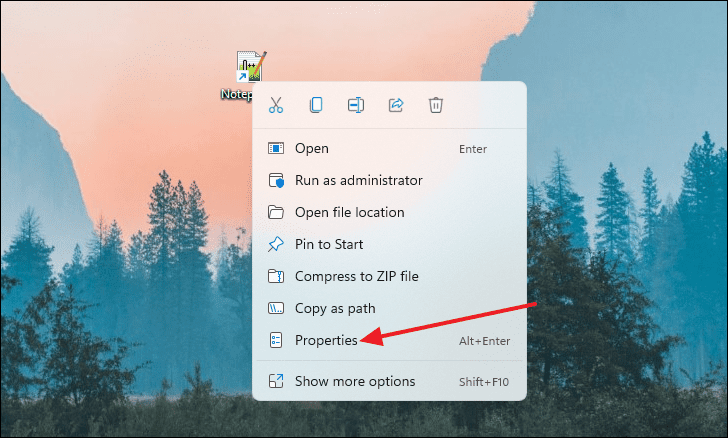
- Right-click on the blank icon on your desktop.
- Select 'Properties' from the context menu.
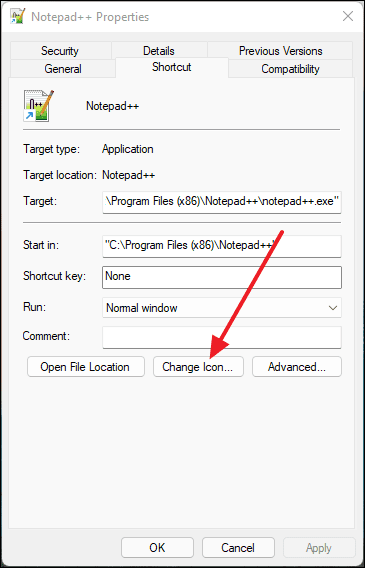
- In the Properties window, click on the 'Change Icon' button.
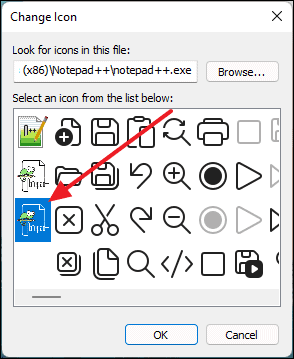
- Choose an icon from the list that you can easily recognize.
- Click 'OK' to confirm your selection.
- Back in the Properties window, click 'Apply' and then 'OK'.
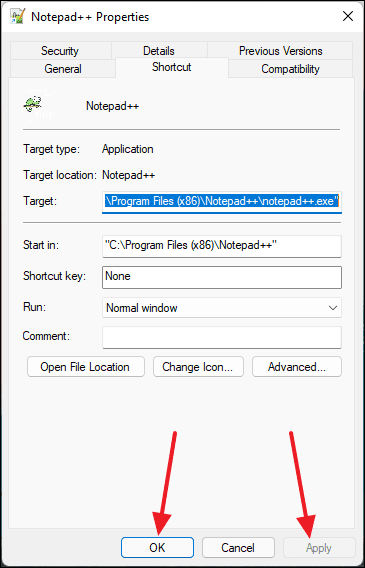
- The icon should now be updated on your desktop.
Make Sure the App is Updated
An outdated application may cause its icon to appear blank. Keeping your apps updated can prevent this issue.
Check if there are any available updates for the app:
- If the app was downloaded from the Microsoft Store:
- Open the Microsoft Store.
- Click on 'Library' in the lower-left corner.
- Click 'Get updates' and install any available updates.
- If the app was downloaded from a third-party website:
- Visit the developer's website.
- Download and install the latest version of the app.
Reinstall the Application
If updating doesn't fix the blank icon, reinstalling the app might help.
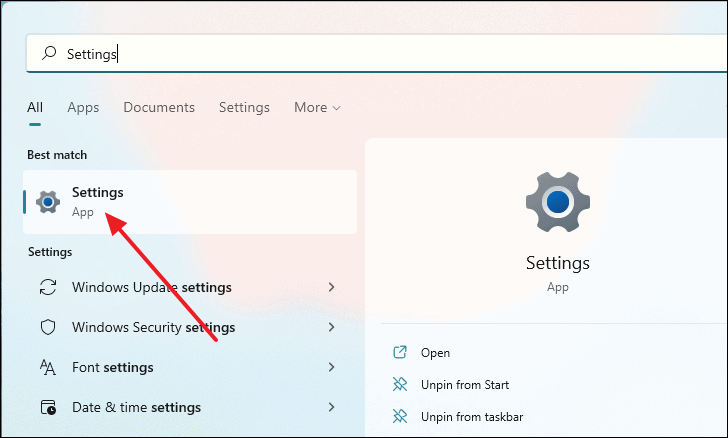
- Open 'Settings' by pressing
Windows + Ior searching for it in the Start menu.
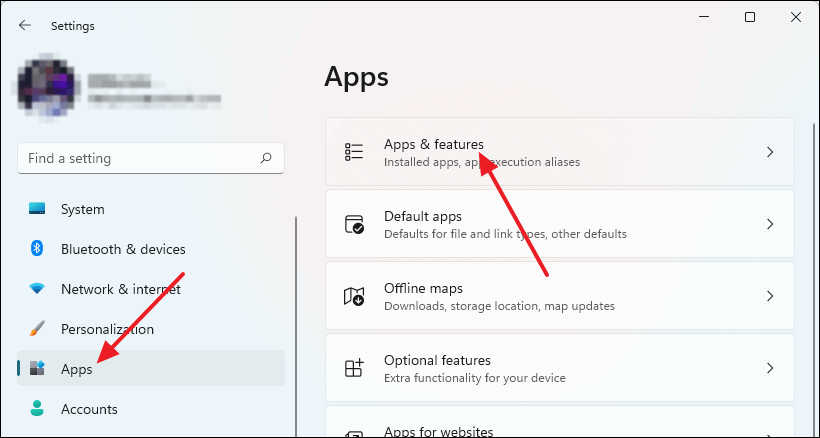
- Click on 'Apps' in the left sidebar.
- Select 'Apps & features' on the right.
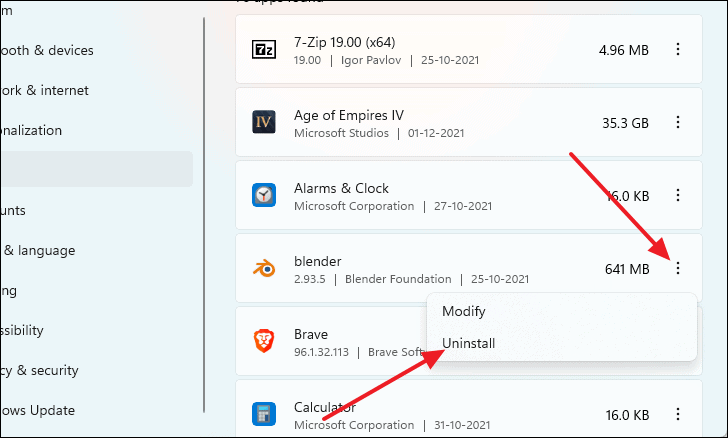
- Find the application with the blank icon in the list.
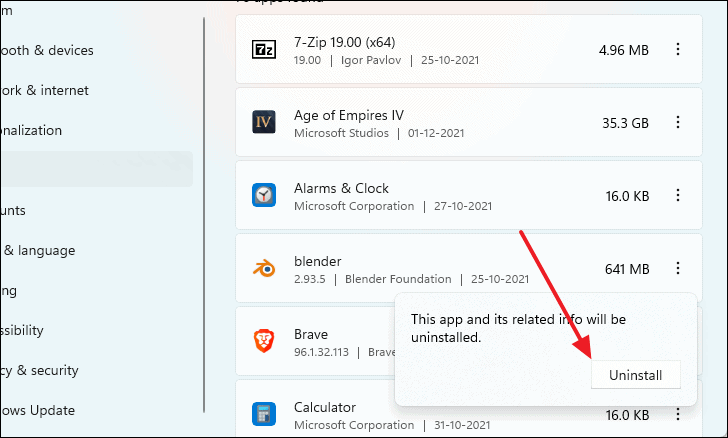
- Click the three vertical dots next to it and select 'Uninstall'.
- Confirm by clicking 'Uninstall' again.
- Once uninstalled, reinstall the app from the Microsoft Store or the developer's website.
You can also uninstall the app using Control Panel:
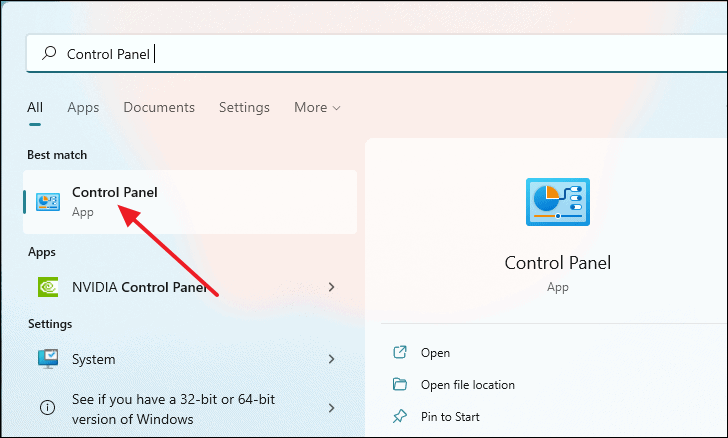
- Open 'Control Panel' by searching for it in the Start menu.
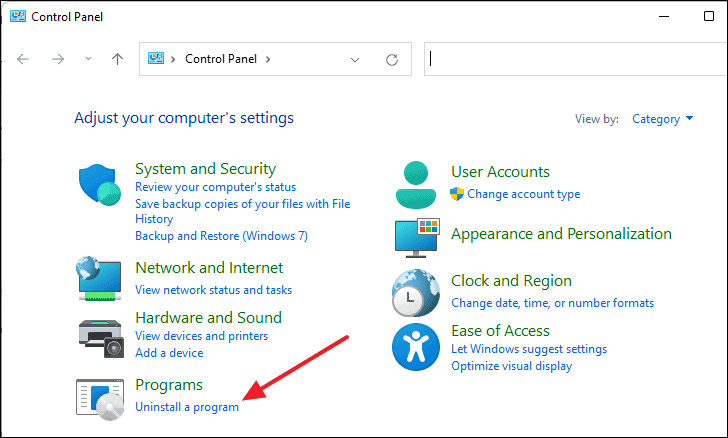
- Click on 'Uninstall a program' under the 'Programs' section.
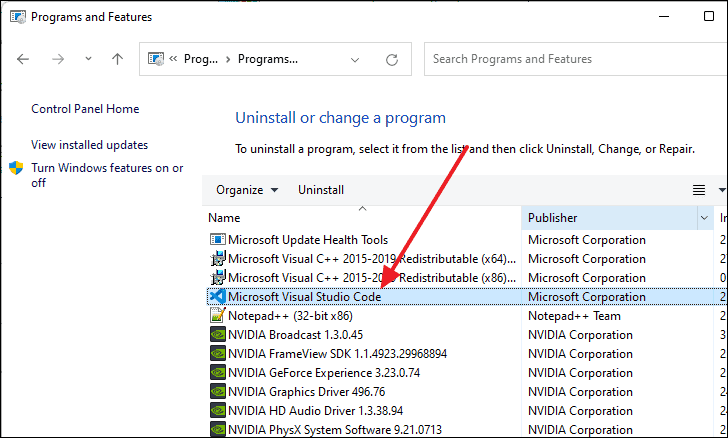
- Select the application from the list.
- Click 'Uninstall' at the top of the list and follow the prompts.
By following these methods, you should be able to fix any blank icons on your Windows 11 desktop and restore them to their normal state.




Member discussion