The latest Windows 11 updates (particularly builds KB5053598, KB5053606, and KB5053602) have unintentionally removed Microsoft’s Copilot app from users’ systems. After installing these updates, many users found Copilot unpinned from the taskbar and completely uninstalled from their devices. Microsoft has acknowledged the issue, attributing it to an update glitch, and has since released an emergency fix. However, if you’re still experiencing this problem, there are several straightforward methods to restore Copilot on your Windows 11 PC.
Method 1: Reinstall Copilot from Microsoft Store (Recommended)
The simplest and most effective way to restore Copilot is to reinstall it directly from the Microsoft Store.
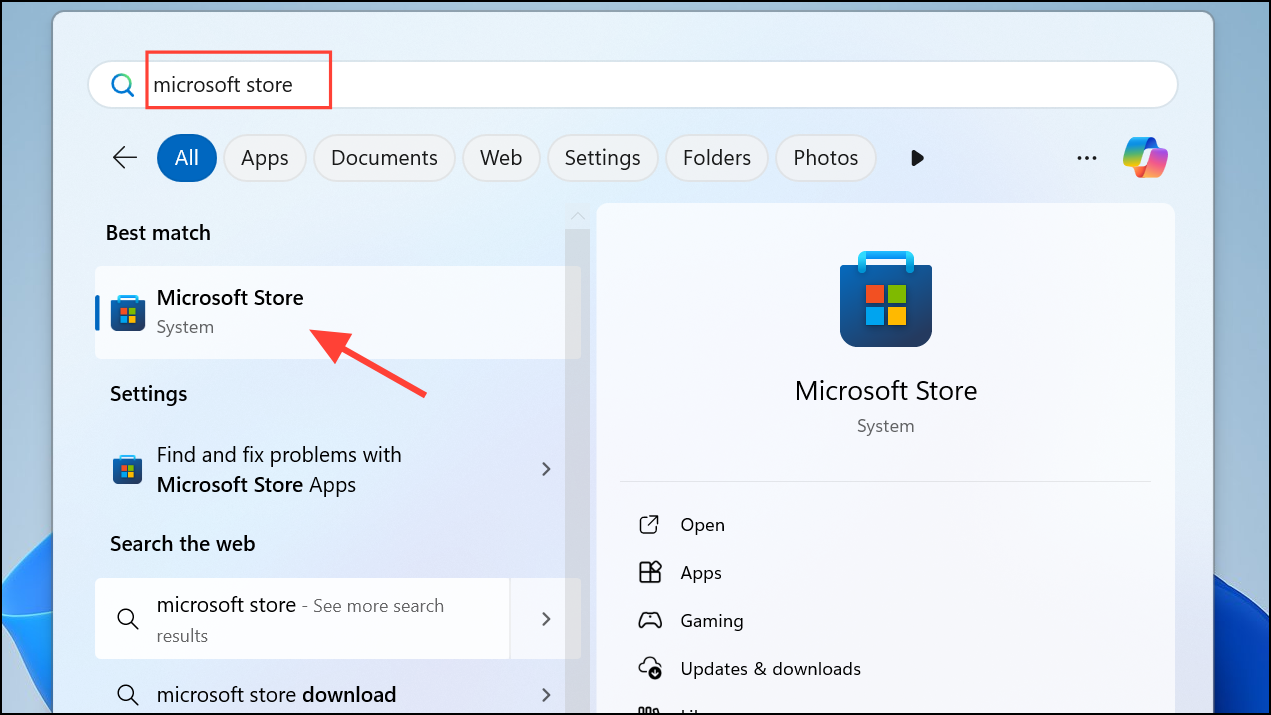
This method quickly restores Copilot and ensures it’s readily accessible from your taskbar.
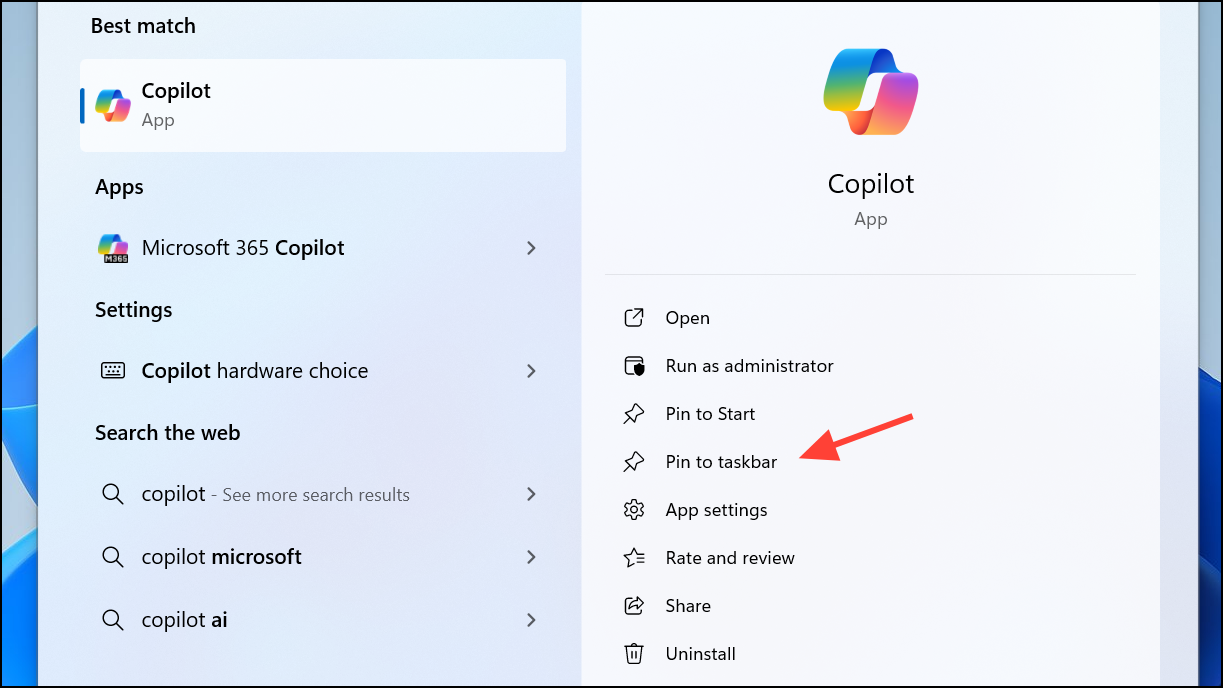
Method 2: Enable Copilot via Taskbar Settings
If Copilot is installed but not showing on the taskbar, you can enable it manually through Taskbar settings.

This action will immediately display the Copilot icon on your taskbar, allowing quick access.
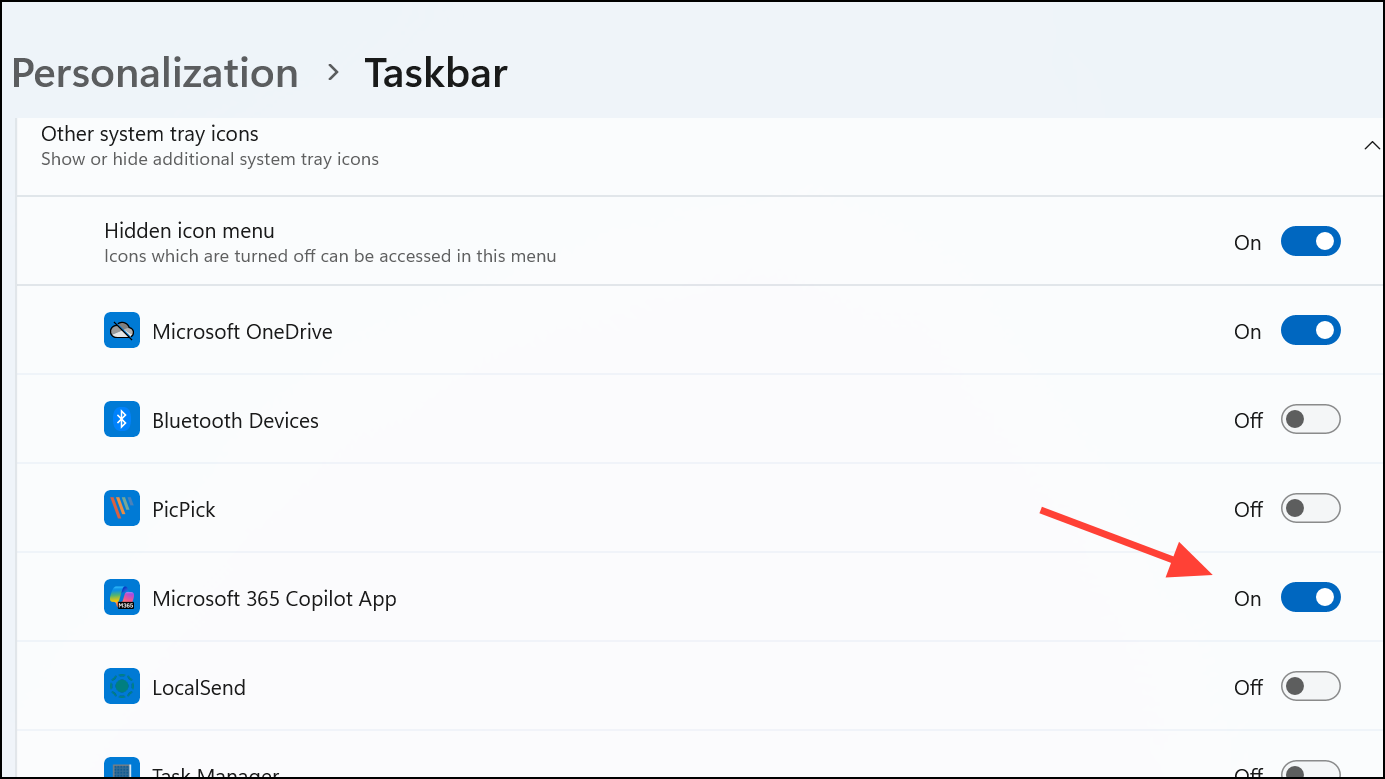
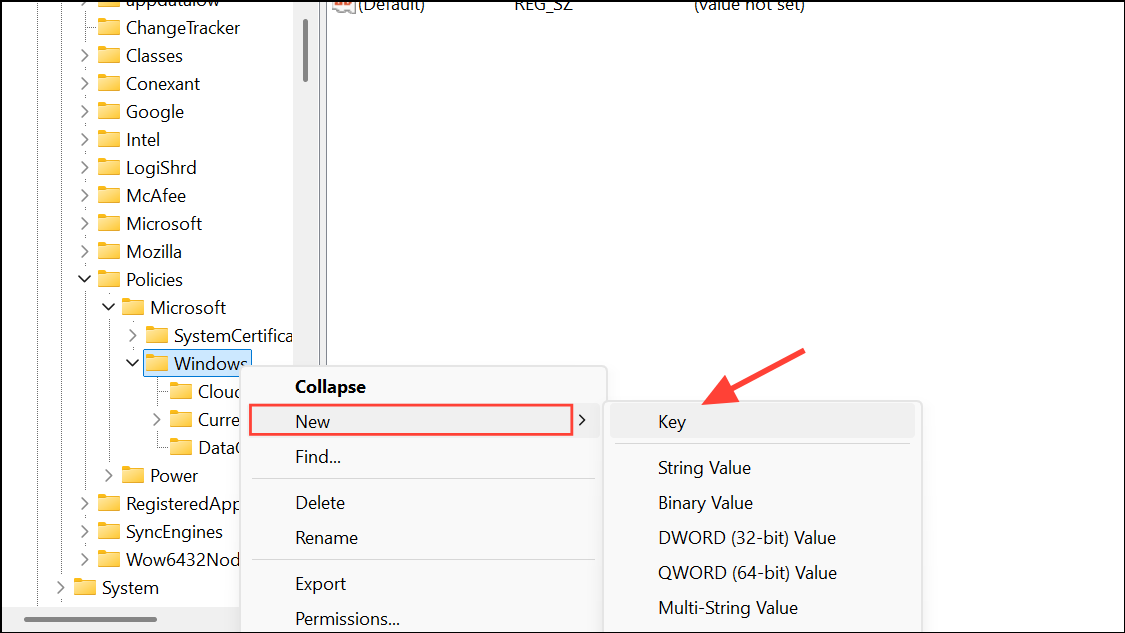
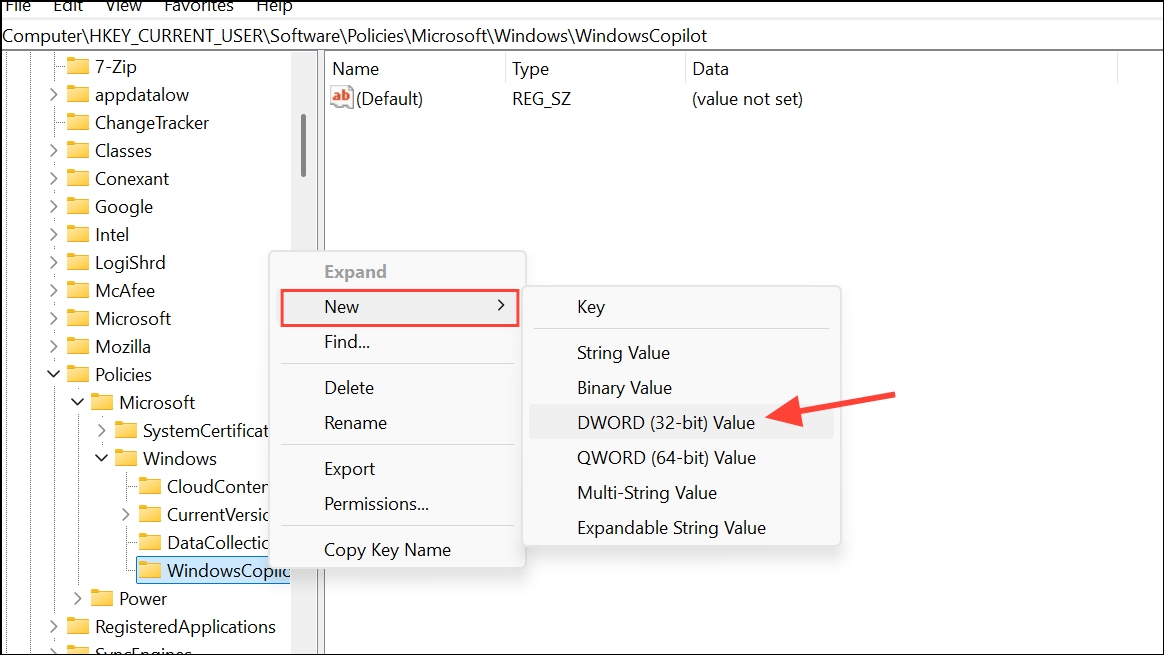
Method 3: Use Registry Editor to Re-enable Copilot
If the above methods don’t work, you can manually enable Copilot through the Windows Registry. Before proceeding, it’s crucial to back up your registry to avoid potential issues.
HKEY_CURRENT_USER\Software\Policies\Microsoft\Windows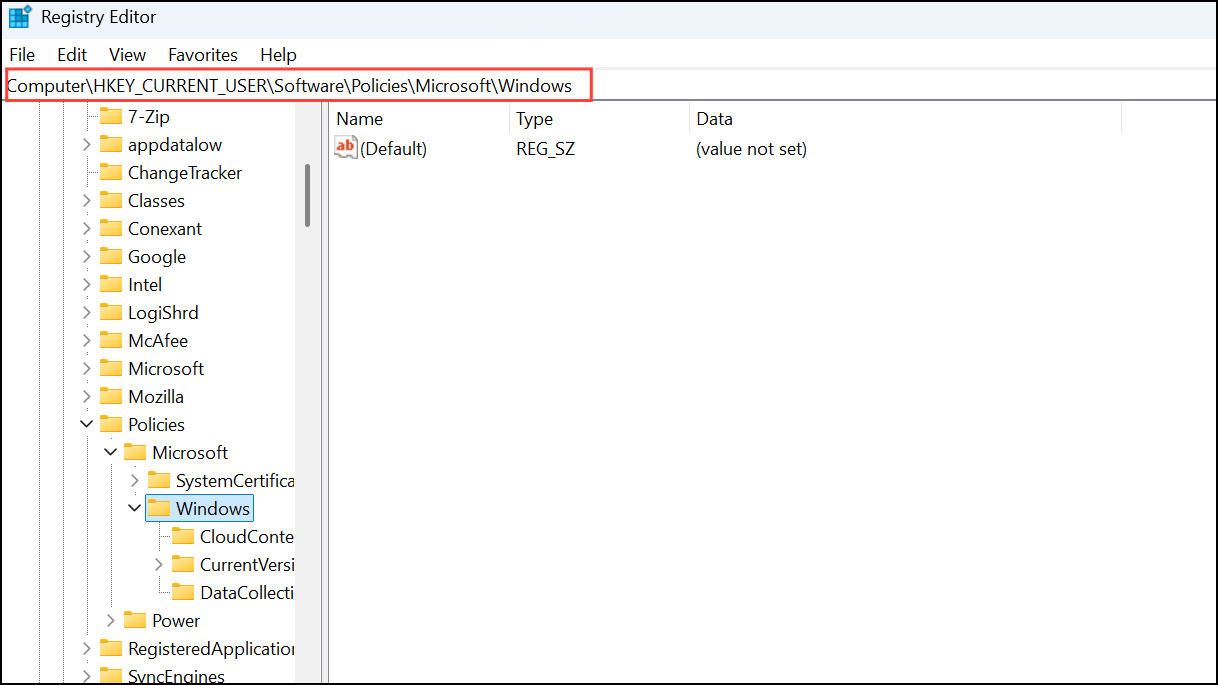
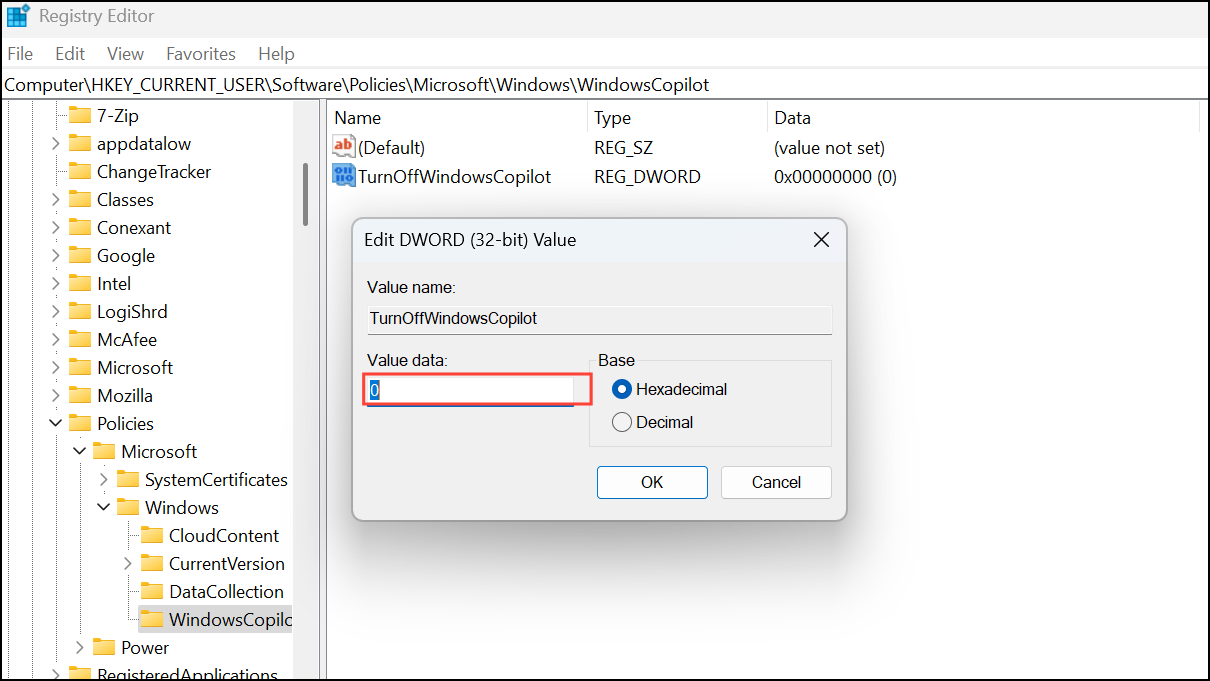
After rebooting, Copilot should be restored and available for use.
Method 4: Roll Back the Problematic Windows Update
If none of the above methods resolve your issue, consider rolling back the recent Windows update that caused Copilot to disappear.
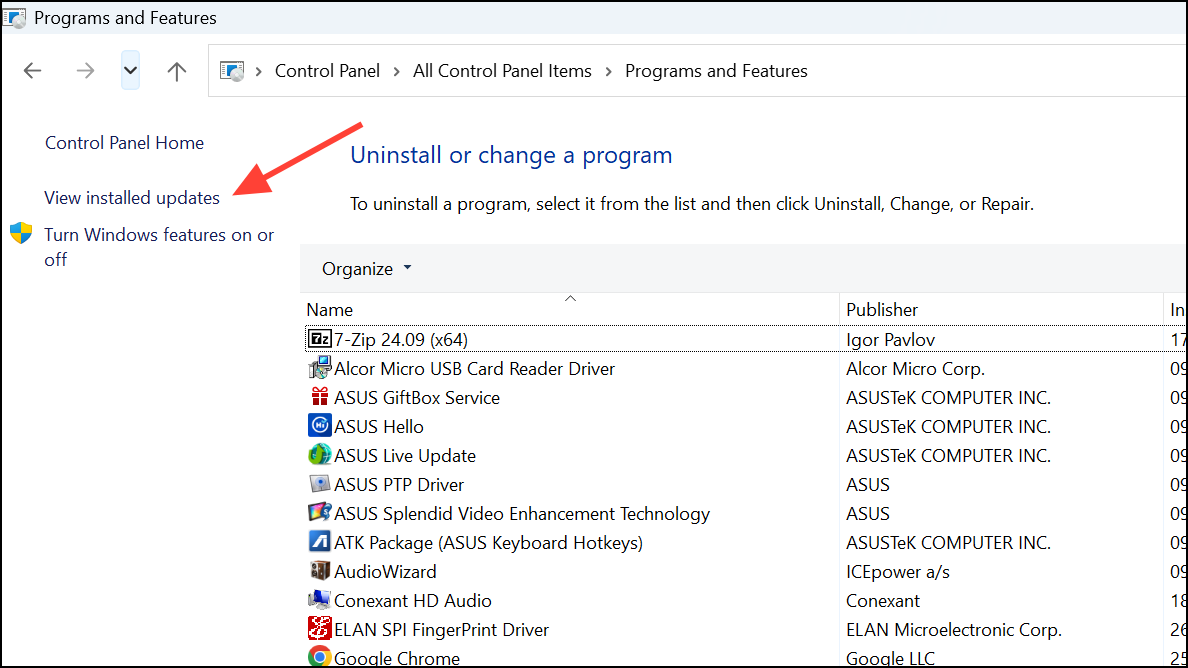
Restart your system after uninstalling the update. Copilot should now reappear as normal.
Microsoft has already released an emergency update addressing this Copilot issue. If you prefer, simply wait for the automatic fix to take effect on your device. However, the above solutions allow you to restore Copilot immediately and continue using it without interruption.