
The “Critical Process Died” error in Windows 11 can be an alarming experience for users. This error occurs when a crucial Windows process fails, causing system instability or crashes. While the causes can vary, there are several effective troubleshooting methods to resolve this issue.
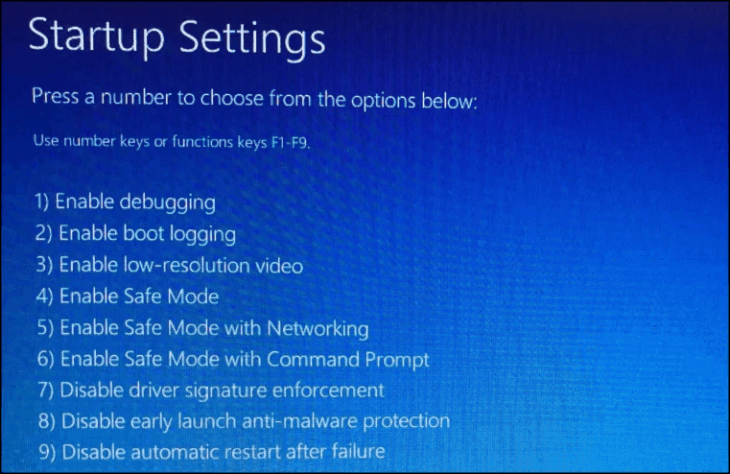
Boot Windows 11 into safe mode
If you’re unable to access Windows normally due to frequent crashes, booting into safe mode is an essential first step.
To enter safe mode:
- Force restart your PC 3 times during the boot process to trigger Automatic Repair mode
- Select “Troubleshoot” > “Advanced options” > “Startup Settings”
- Click “Restart”
- Press 4, 5, or 6 to select the desired safe mode option
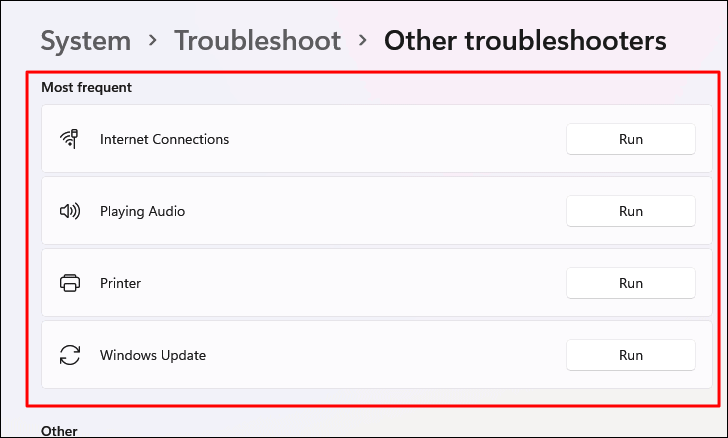
Run Windows troubleshooters
Windows 11 includes built-in troubleshooters that can automatically detect and fix common system issues.
To run troubleshooters:
- Open Settings > System > Troubleshoot
- Select “Other troubleshooters”
- Run relevant troubleshooters like “Windows Update”, “Hardware and Devices”, etc.
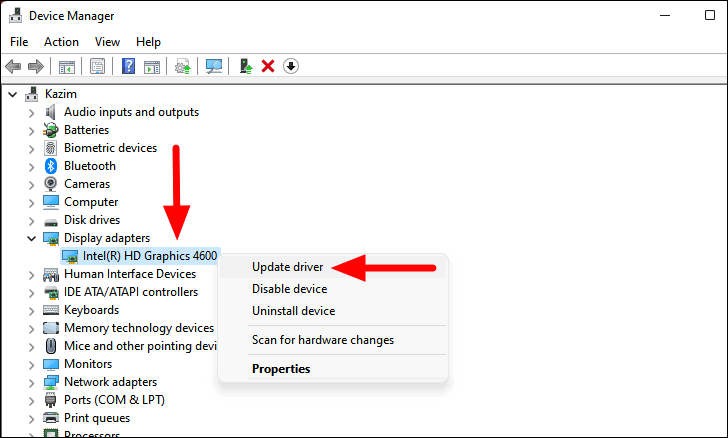
Update or reinstall drivers
Faulty or outdated drivers are a common cause of system errors.
To update drivers:
- Open Device Manager
- Right-click on a device and select “Update driver”
- Choose “Search automatically for drivers”
To reinstall drivers:
- In Device Manager, right-click the device and select “Uninstall device”
- Restart your PC to automatically reinstall the driver
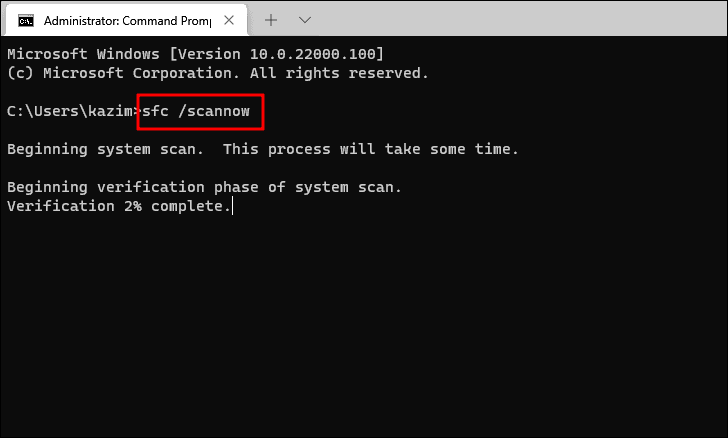
Run SFC and DISM scans
System File Checker (SFC) and Deployment Image Servicing and Management (DISM) tools can repair corrupted system files.
To run SFC:
- Open Command Prompt as administrator
- Type
sfc /scannowand press Enter
To run DISM:
- In Command Prompt, run these commands:
Dism /Online /Cleanup-Image /CheckHealth
Dism /Online /Cleanup-Image /ScanHealth
Dism /Online /Cleanup-Image /RestoreHealth
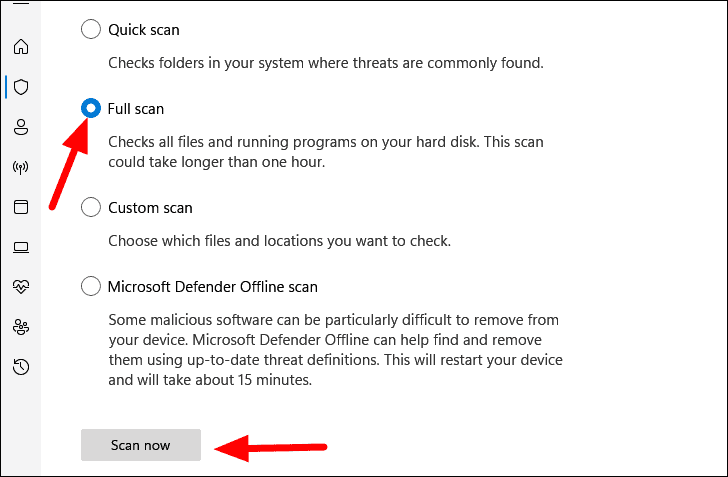
Perform a malware scan
Malware can cause system instability and errors. Use Windows Security or a third-party antivirus to perform a full system scan.
To run a full scan with Windows Security:
- Open Windows Security
- Go to Virus & threat protection
- Select Scan options > Full scan > Scan now
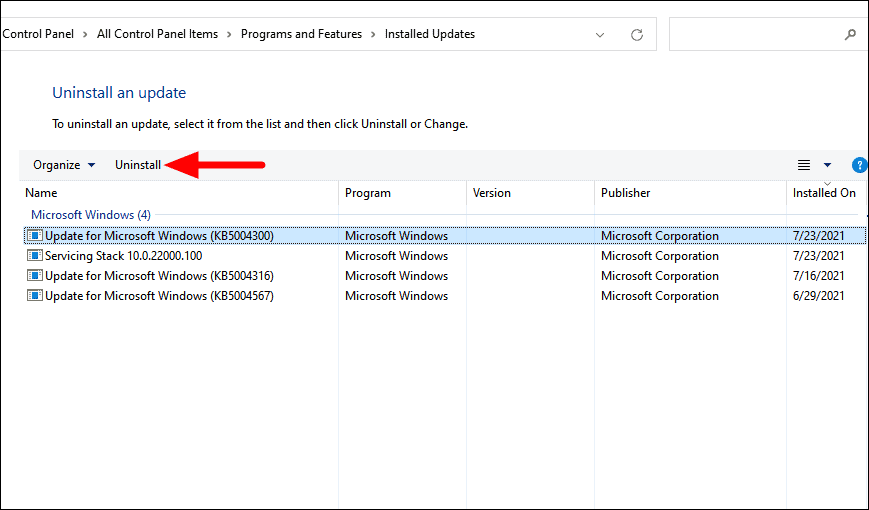
Uninstall recent updates or applications
If the error started occurring after a recent update or software installation, try removing it.
To uninstall Windows updates:
- Go to Settings > Windows Update > Update history
- Select “Uninstall updates”
- Find the recent update and click “Uninstall”
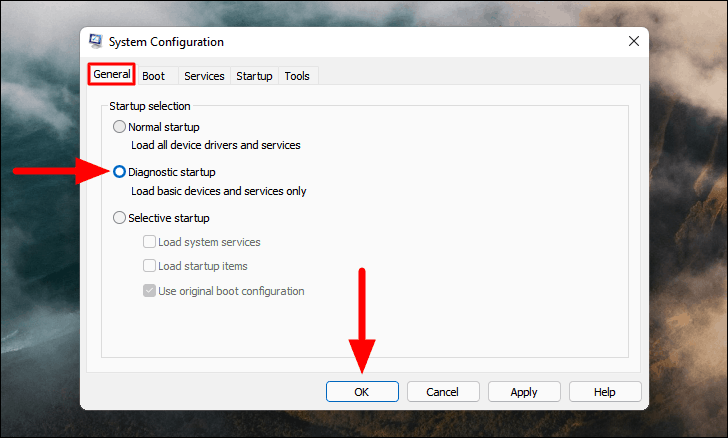
Perform a clean boot
A clean boot starts Windows with minimal drivers and startup programs, helping identify if a third-party application is causing the issue.
To perform a clean boot:
- Run
msconfig - In System Configuration, go to the General tab
- Select “Selective startup” and uncheck “Load startup items”
- Go to the Services tab, check “Hide all Microsoft services”, then click “Disable all”
- Restart your PC
Use System Restore
If all else fails, you can use System Restore to revert your system to a previous state when it was working correctly.
To use System Restore:
- Search for “Create a restore point” and open it
- Click “System Restore”
- Follow the wizard to choose a restore point and restore your system
Remember to create regular system restore points to have this option available when needed.
By following these methods, you should be able to resolve the “Critical Process Died” error in Windows 11. If you continue to experience issues, consider seeking assistance from Microsoft support or a professional technician. We encourage you to share your experiences or ask questions in the comments below.


