Google Chrome is widely recognized as one of the most popular web browsers, offering seamless integration with various Google services like Gmail, YouTube, and Google Drive. However, despite its widespread use and robust features, users may occasionally encounter issues where Chrome becomes unresponsive, freezes, or crashes altogether. This can manifest in error messages such as “Google Chrome has stopped working,” “Google Chrome is not responding,” or “Aw snap! Something went wrong while displaying a webpage.”
Causes of Chrome Not Responding Issues
There are several factors that can lead to Chrome not functioning properly on Windows 11. Understanding these can help in troubleshooting the problem effectively. Some common causes include:
- Overloading the browser with multiple tabs or windows.
- Faulty or excessive extensions installed.
- Insufficient system memory (RAM).
- Accumulation of temporary files like cache and cookies.
- Malware or viruses affecting browser performance.
- Incorrect proxy settings.
- Corrupted browser files or bugs in the software.
- Outdated Chrome or Windows versions.
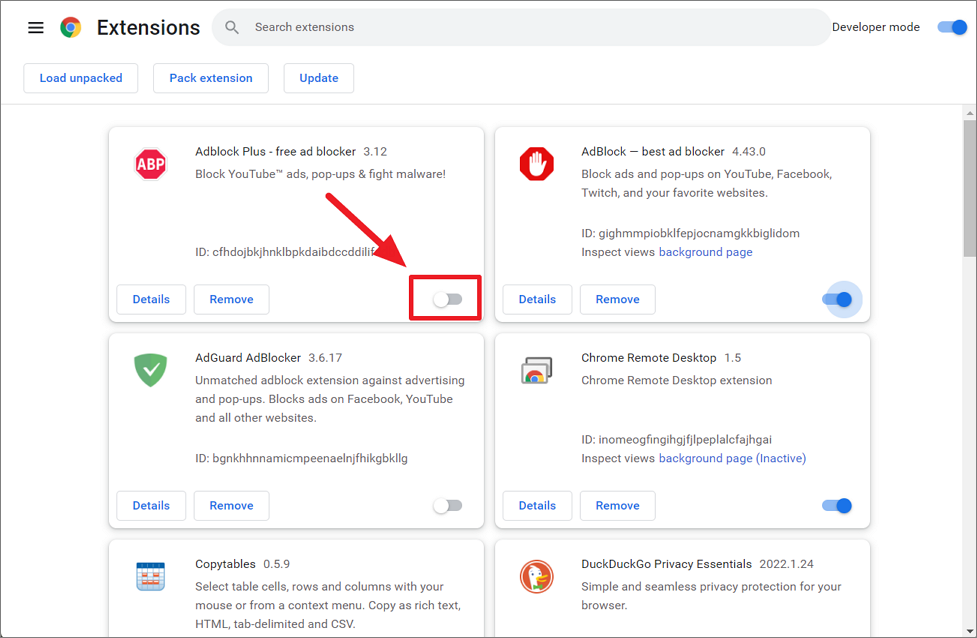
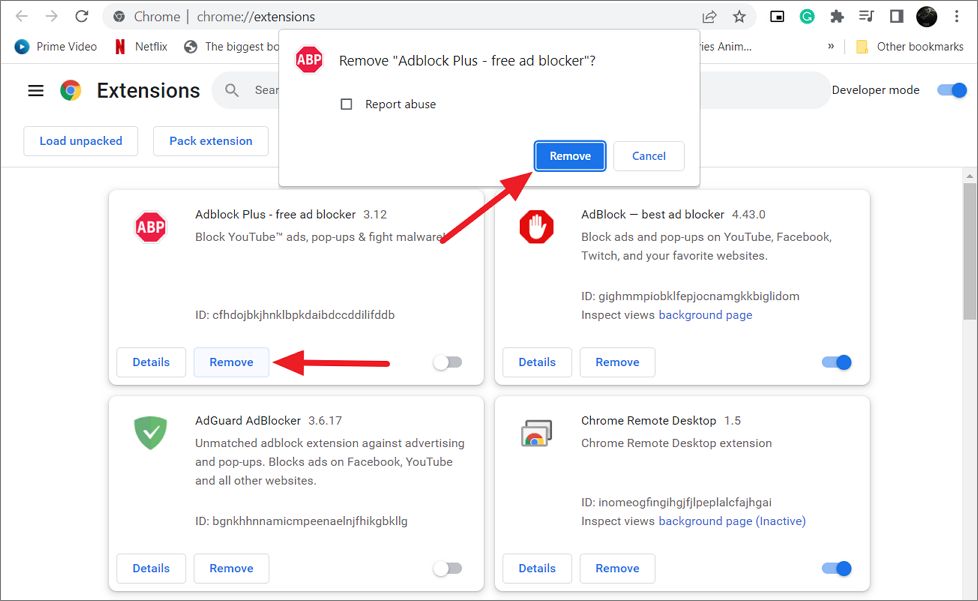
Disable or Remove Chrome Extensions and Apps
One of the primary reasons for Chrome becoming unresponsive is malfunctioning or malicious extensions. Extensions are third-party tools that enhance browser functionality, but they can sometimes interfere with Chrome’s performance. Disabling or removing unnecessary or problematic extensions can often resolve the issue.
Disabling Chrome Extensions
chrome://extensions/ in the address bar and press Enter.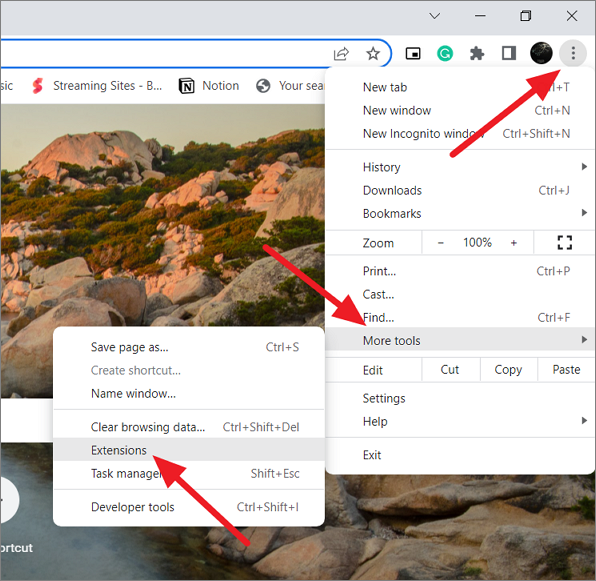
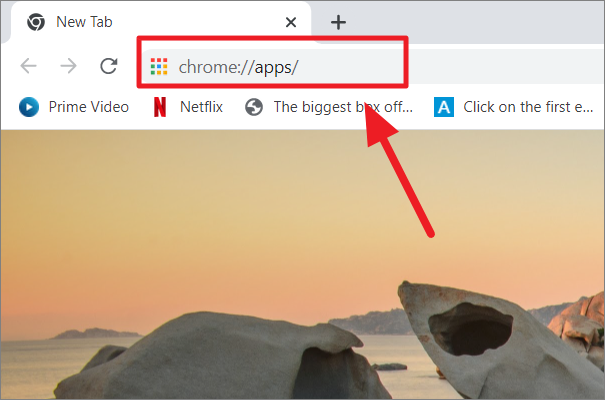
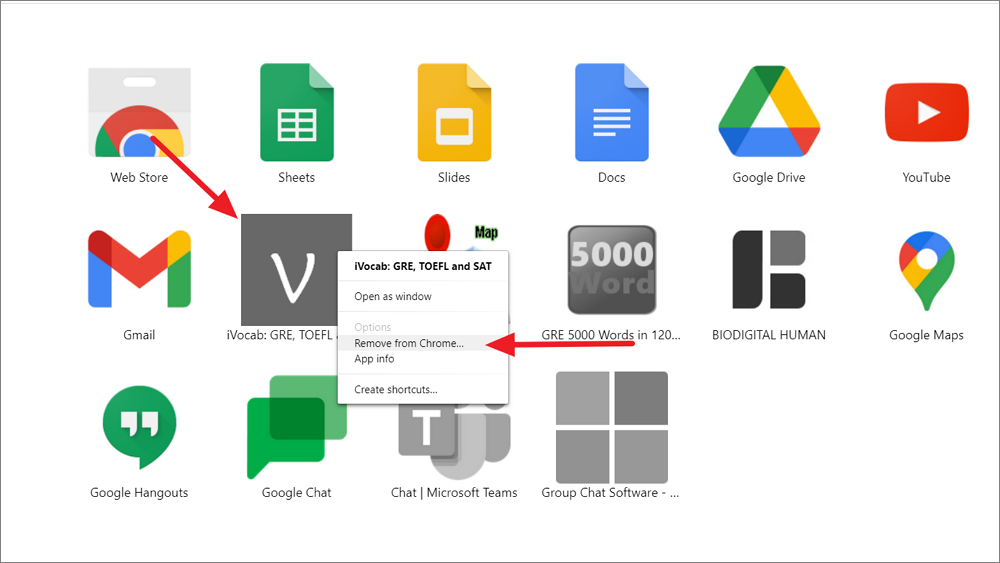
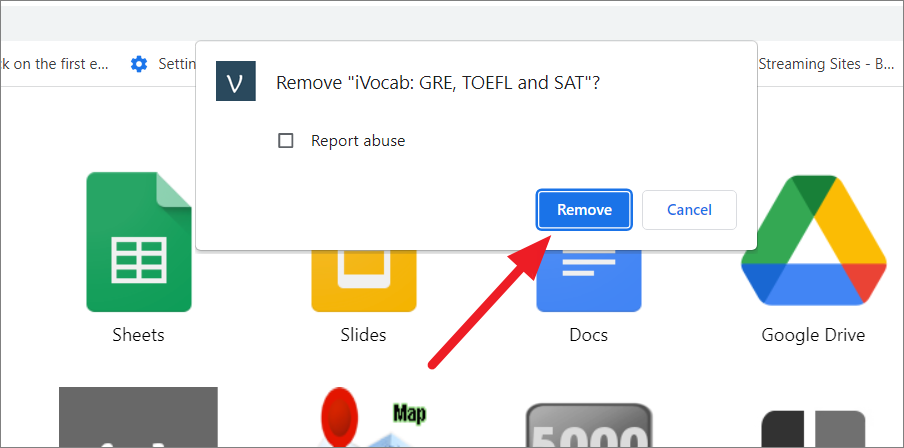
Removing Chrome Apps
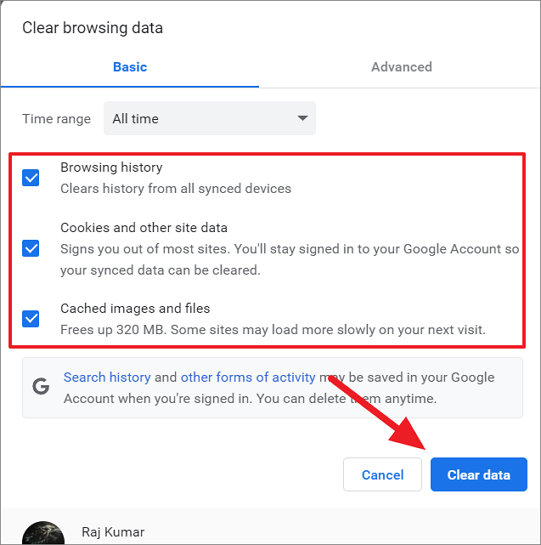
Clear Browsing Data, Cache, and Cookies
Over time, Chrome accumulates browsing data, cache, and cookies, which can slow down the browser and cause it to become unresponsive. Clearing this data can help improve performance.

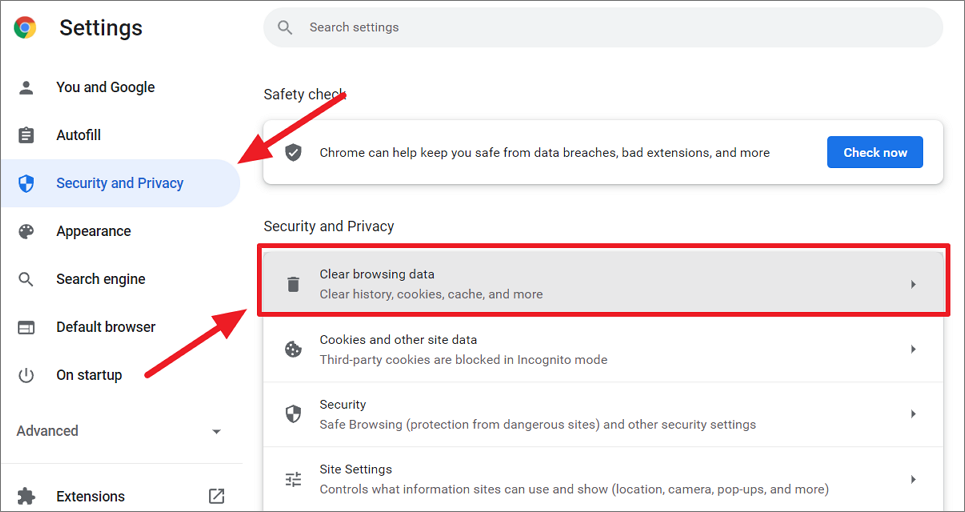
Alternatively, you can directly navigate to this page by typing chrome://settings/clearBrowserData in the address bar.
Update Google Chrome
Using an outdated version of Chrome can lead to performance issues and compatibility problems. Updating Chrome ensures you have the latest fixes and improvements.
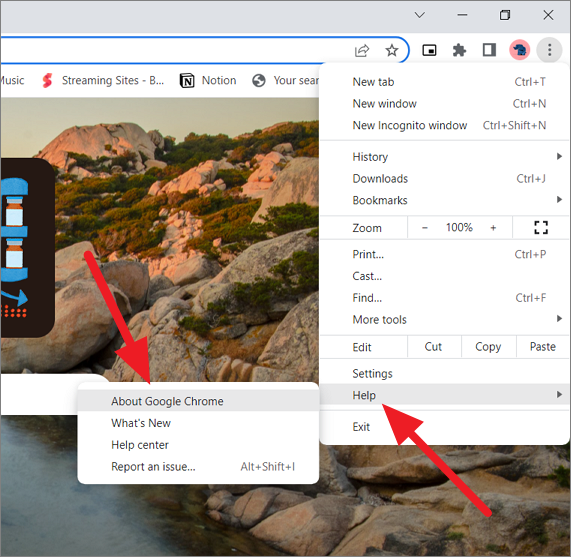
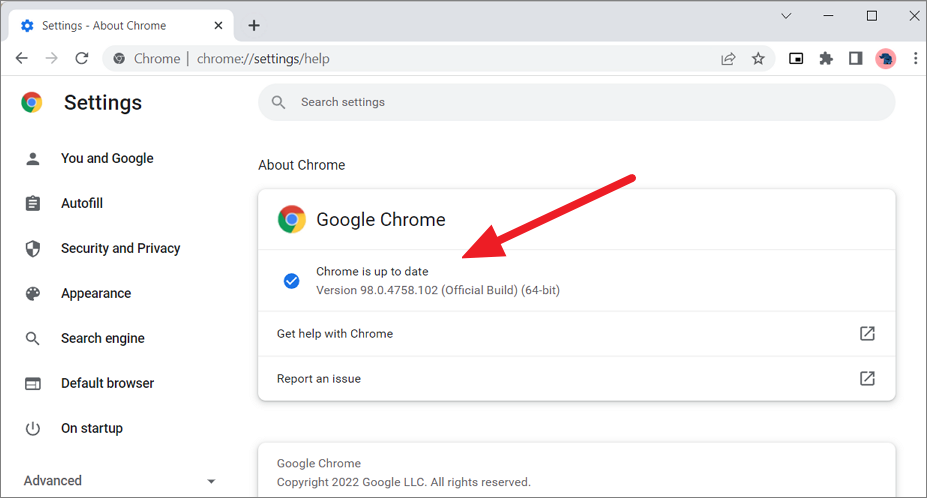
Ensuring Chrome is up to date can resolve many issues related to performance and security.
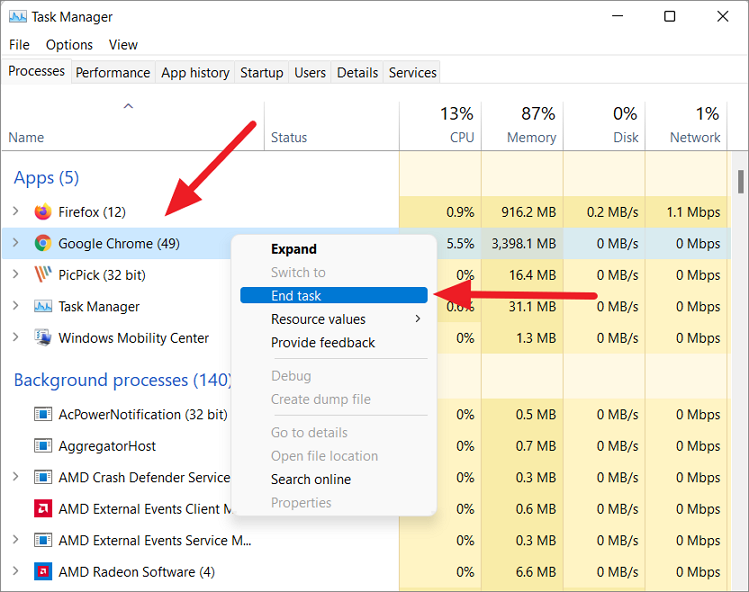
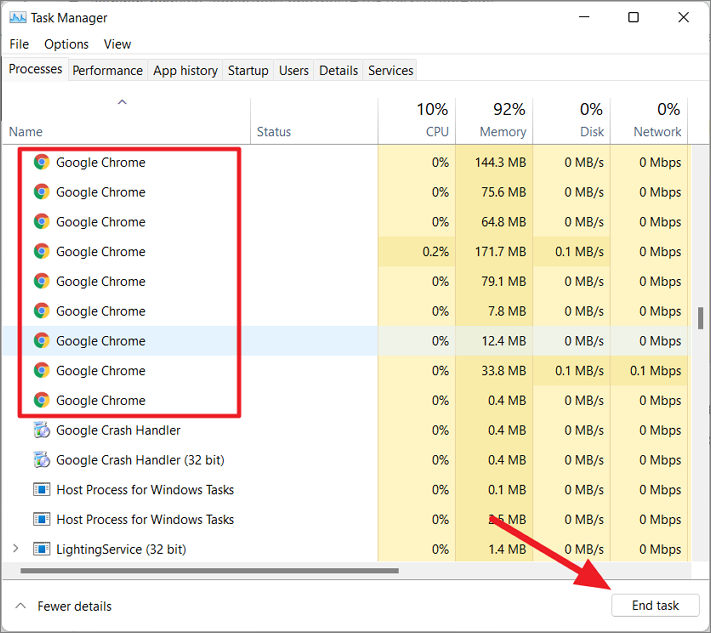
Kill All Chrome Processes and Relaunch the Browser
Sometimes, Chrome processes running in the background can cause the browser to become unresponsive, especially if they have crashed or are consuming excessive resources. Terminating these processes and restarting Chrome can help.
Ctrl + Shift + Esc to open the Task Manager. Alternatively, right-click on the Start menu and select Task Manager.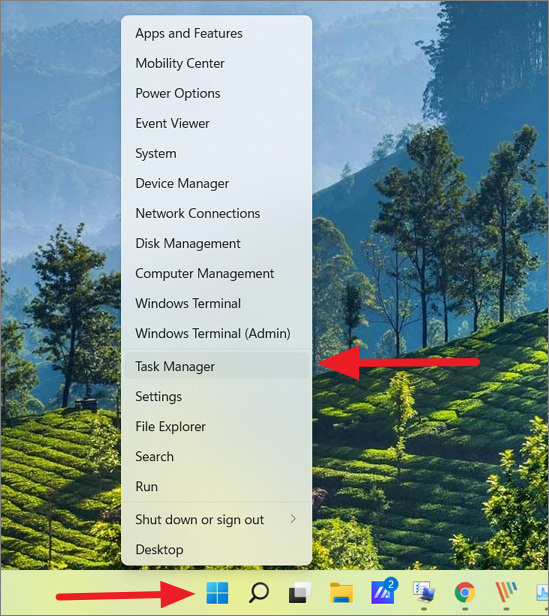
Restart Your Computer
A simple restart can resolve many software glitches by clearing the system memory and resetting processes. This can be especially helpful if Chrome’s issues are due to limited system resources or conflicts with other applications.
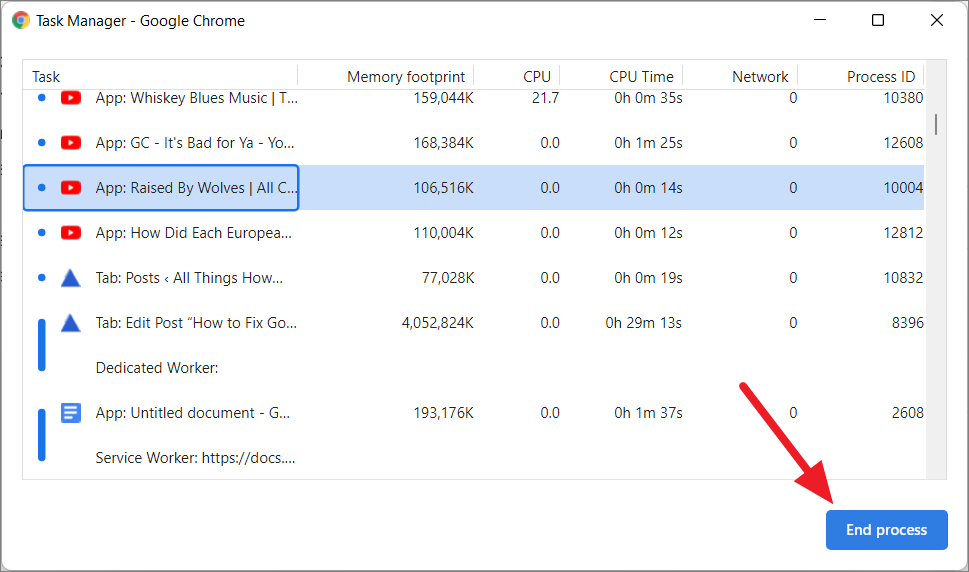
Use Chrome’s Task Manager to End Processes
Chrome has its own Task Manager that allows you to monitor and manage tabs, extensions, and processes. This can help identify any resource-intensive tasks that may be causing Chrome to freeze or crash.
Shift + Esc to open the Chrome Task Manager. You can also access it by clicking on the three vertical dots, selecting More Tools, and choosing Task Manager.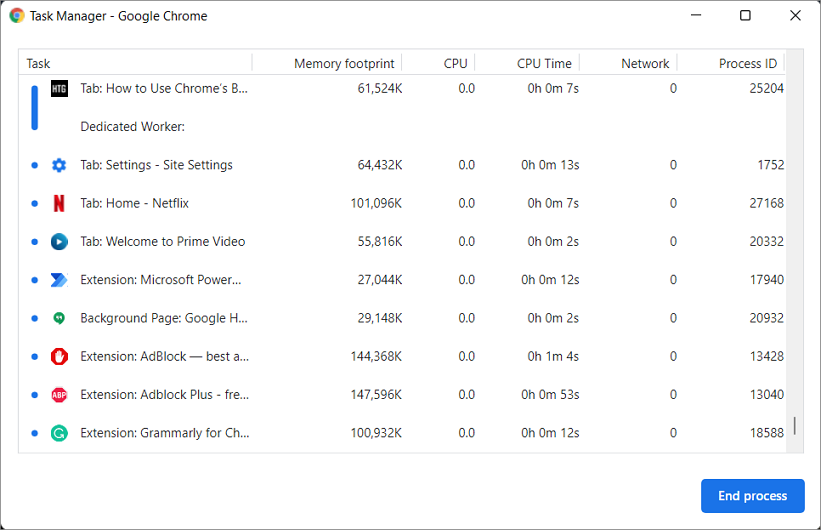
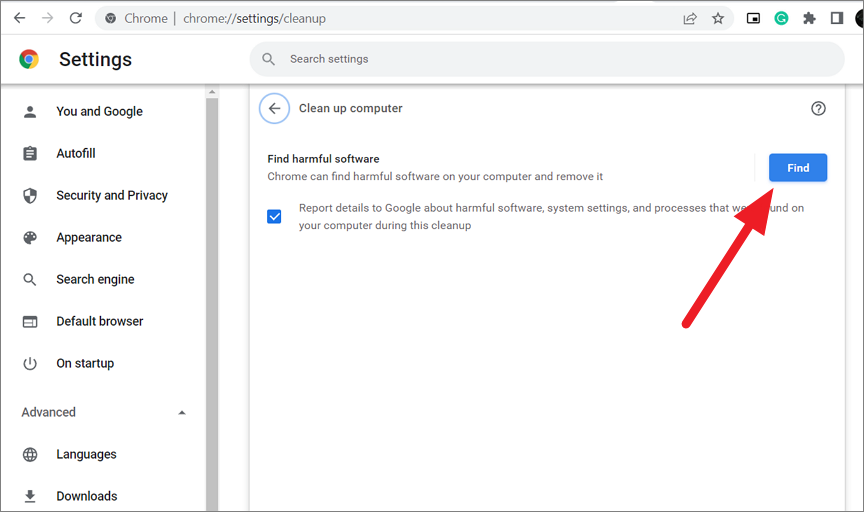
Clean Up Computer with Chrome’s Built-in Tool
Chrome provides a built-in tool that scans for harmful software that might interfere with the browser’s operation. Using this tool can help identify and remove malware affecting Chrome.
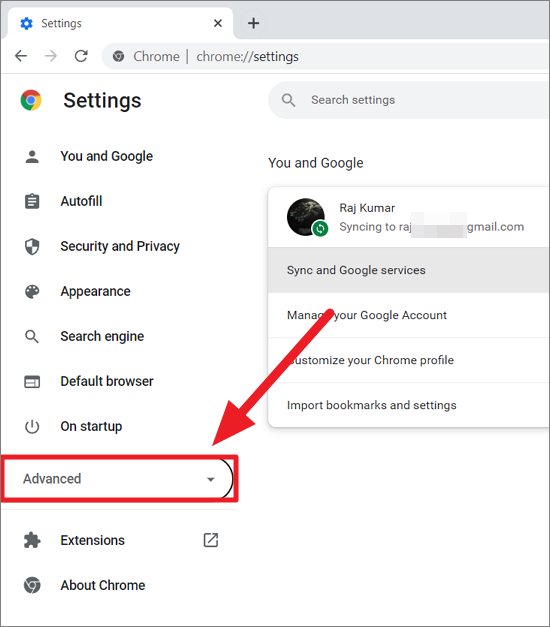
chrome://settings/cleanup or click on the three vertical dots, select Settings, click on Advanced on the left sidebar, choose Reset and clean up, and then select Clean up computer.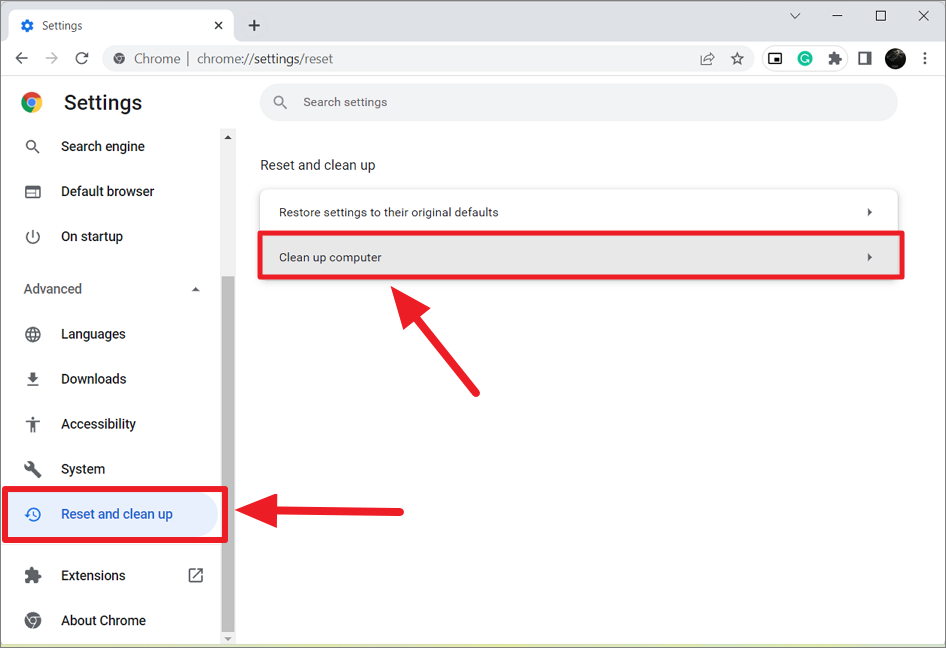
Disable Antivirus Software Temporarily
Sometimes, third-party antivirus programs can interfere with Chrome’s processes, mistaking them for potential threats. Temporarily disabling your antivirus software can help determine if it’s causing the issue.
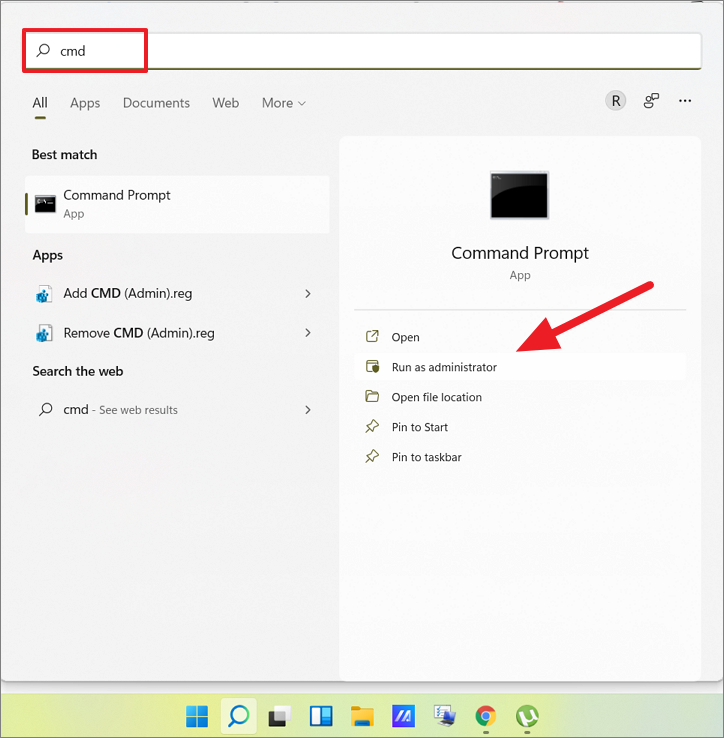
Run System File Checker (SFC) Scan
Corrupted or missing system files can cause applications like Chrome to malfunction. Running an SFC scan can detect and repair these files.
sfc /scannow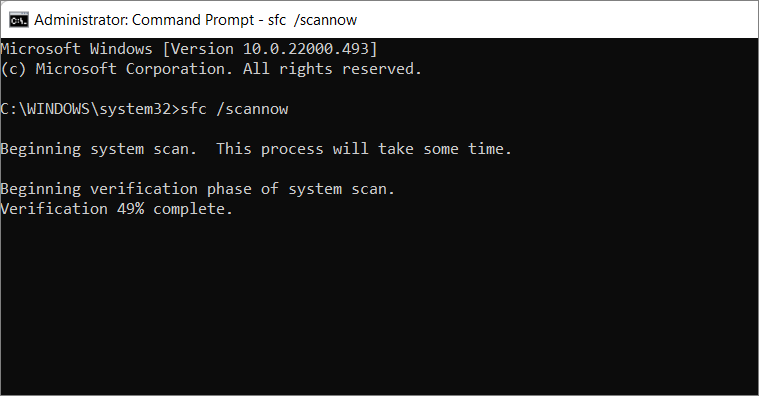
Run DISM Commands
The Deployment Image Servicing and Management (DISM) tool can fix deeper issues within the Windows system image, which might be affecting Chrome’s performance.
DISM.exe /Online /Cleanup-image /scanhealthDISM.exe /Online /Cleanup-image /Restorehealth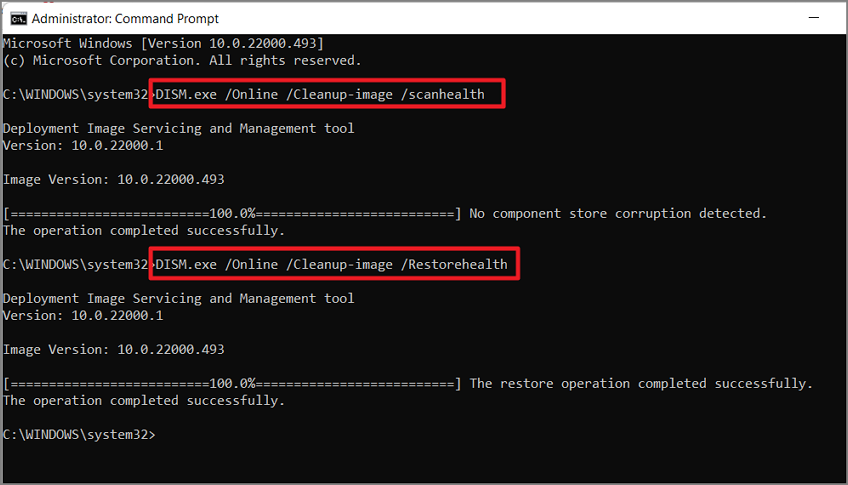
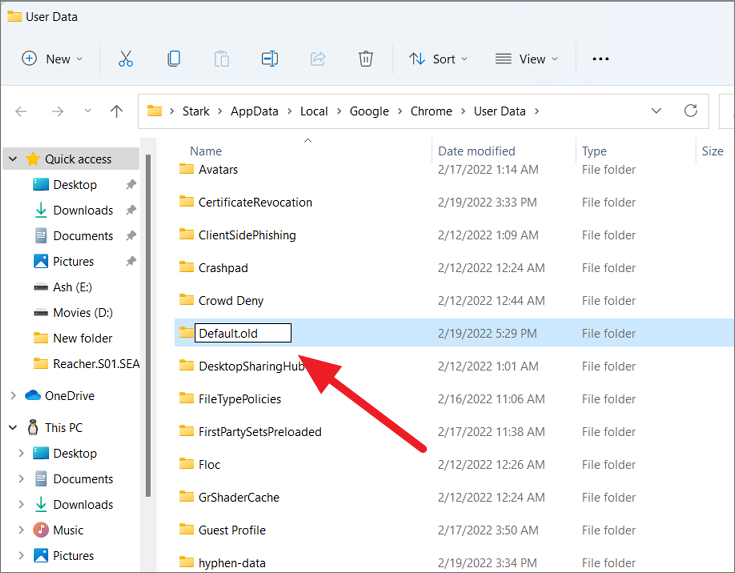
Delete the User Profile Folder
Corrupted user profiles can cause Chrome to behave unexpectedly. Deleting or renaming the default user profile folder can force Chrome to create a new profile, potentially resolving the issue.
Windows + R, type the following path, and press Enter:%USERPROFILE%\AppData\Local\Google\Chrome\User Data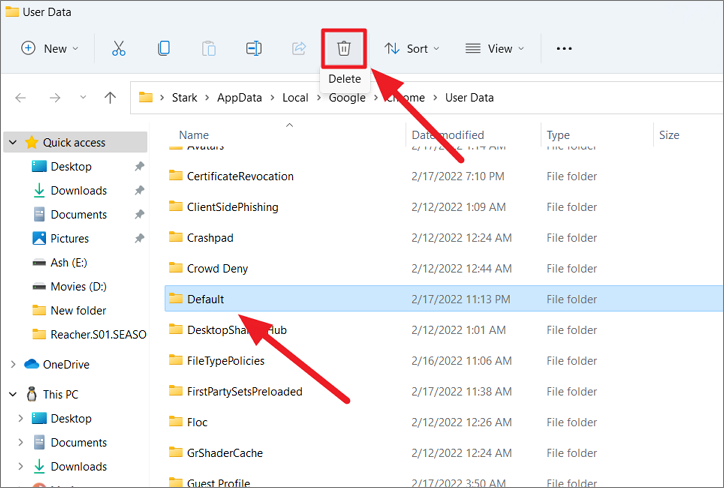
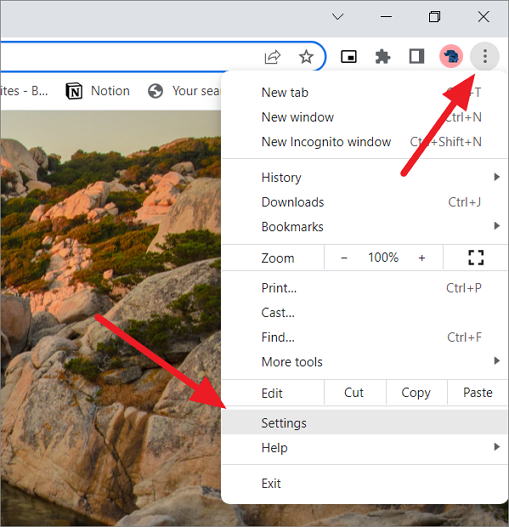
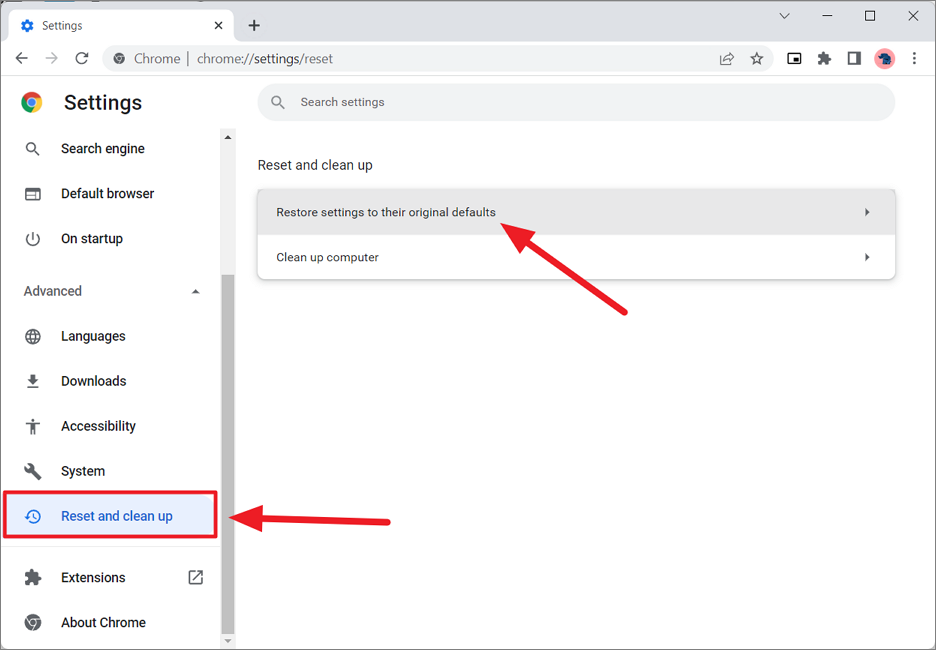
Reset Google Chrome to Default Settings
Resetting Chrome can resolve issues caused by incorrect settings or configurations. This action will restore Chrome to its original state, but your bookmarks, history, and saved passwords will remain intact if synced with your Google account.

Allow Chrome Through Windows Defender Firewall
Windows Defender Firewall may sometimes block Chrome, preventing it from accessing the internet or functioning correctly. Allowing Chrome through the firewall can resolve connectivity issues.
Windows Firewall, and select Windows Defender Firewall from the search results.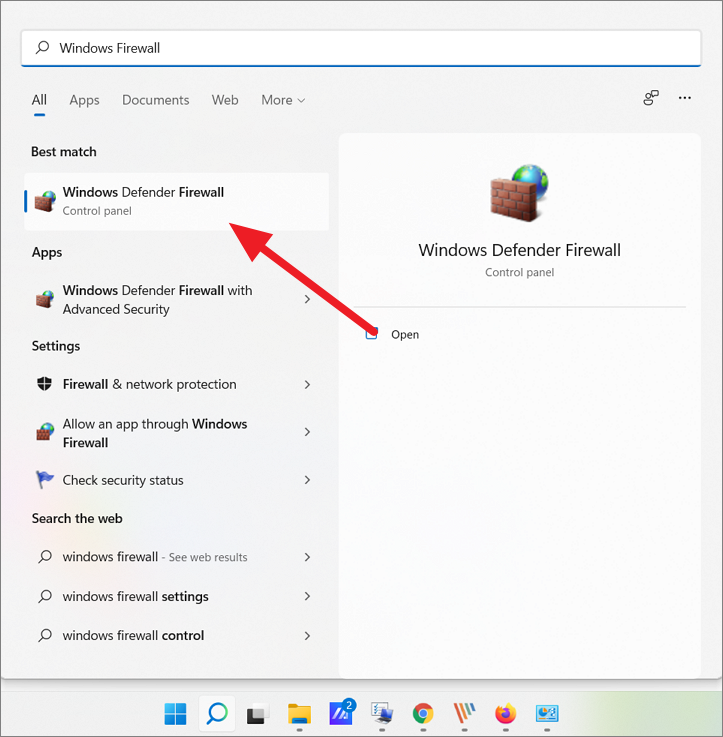
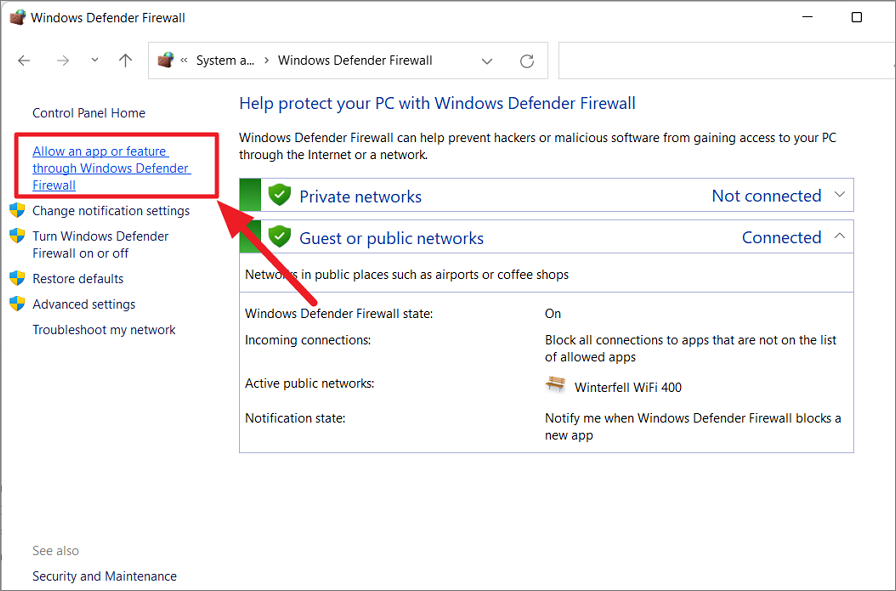
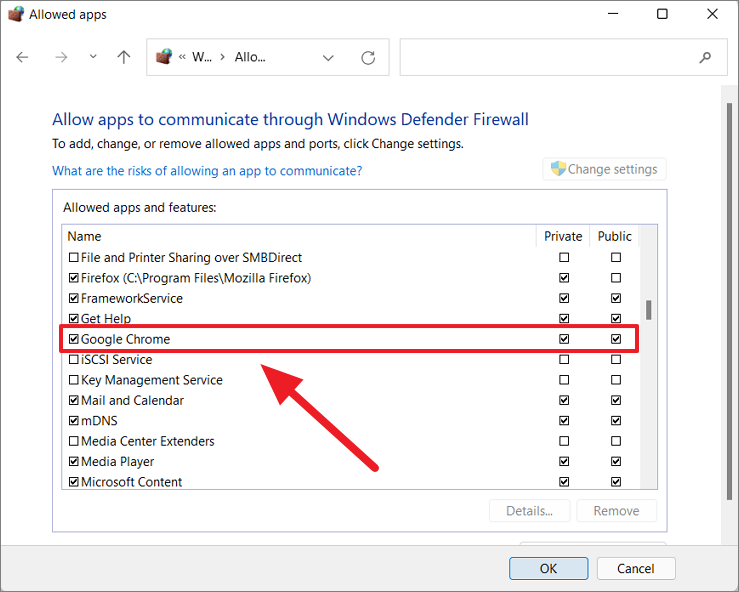
C:\Program Files\Google\Chrome\Application\chrome.exe), select it, and add it to the list.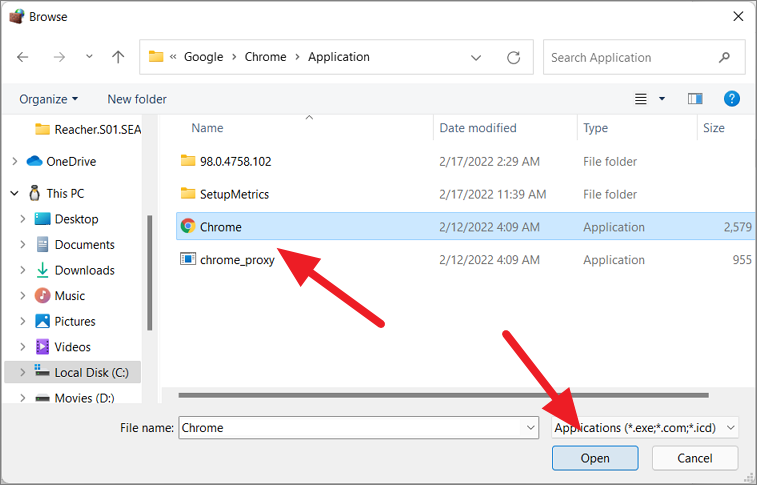
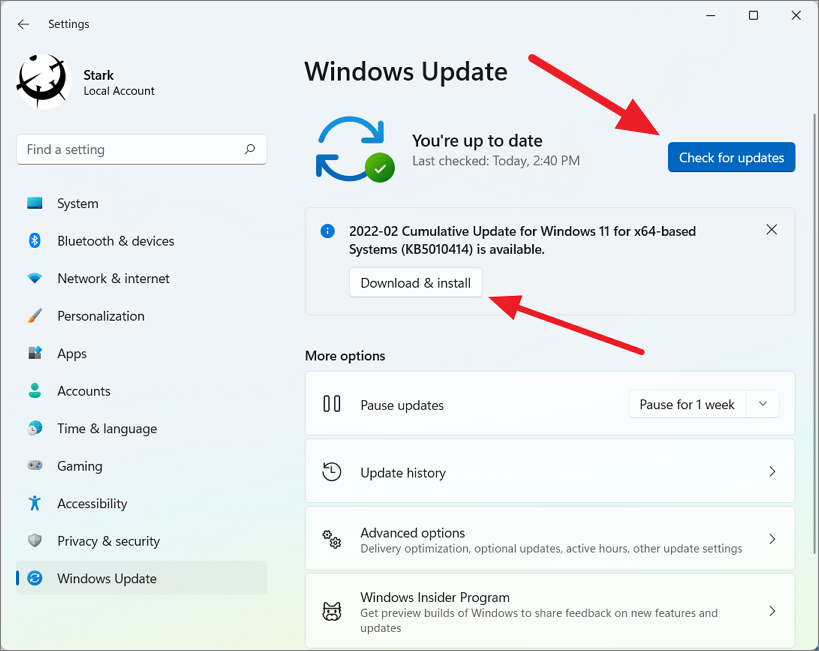
Update Windows 11
Running the latest version of Windows 11 can ensure better compatibility and performance with applications like Chrome. Updating Windows can fix underlying system issues that might be affecting Chrome.
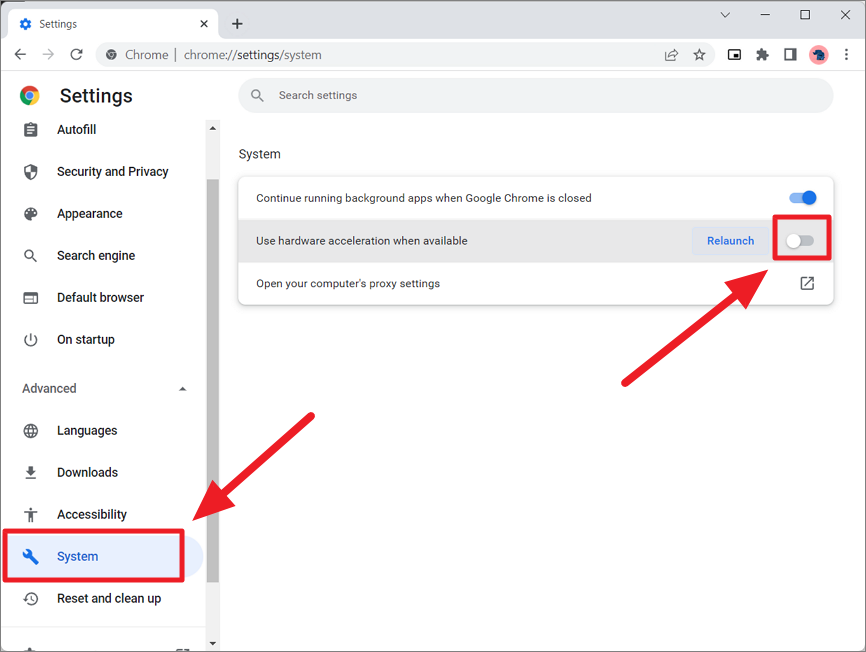
Disable Hardware Acceleration in Chrome
Hardware acceleration allows Chrome to use your computer’s GPU to render web pages faster. However, this feature can sometimes cause compatibility issues leading to browser crashes or freezes.
Uninstall and Reinstall Google Chrome
If none of the above methods work, reinstalling Chrome may resolve deeper issues related to corrupted installation files.

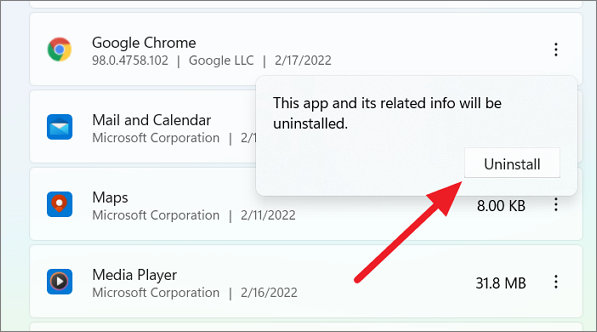
Windows + R, type %LOCALAPPDATA%\Google\Chrome\User Data, and delete the User Data folder.Experiencing Chrome not responding issues can be frustrating, but by following these methods, you can troubleshoot and resolve most common problems. Regular maintenance, such as keeping Chrome and Windows updated, can prevent many of these issues from occurring in the first place.


