
The "How to Get Help in Windows" pop-up window repeatedly appearing in Windows 11 disrupts workflow by opening unexpectedly, often without any user interaction. This issue typically happens due to accidental activation of the F1 key, malware infection, or a system glitch. Resolving it involves checking hardware, disabling specific keys, adjusting system settings, or removing possible malware infections. Follow the detailed methods below to stop this pop-up permanently.
Check and Fix Keyboard Issues
Step 1: Inspect your keyboard. A stuck or malfunctioning F1 key often triggers the "Get Help" pop-up. Carefully examine the key for any visible debris or damage. Use compressed air to clean around the key, ensuring it moves freely without sticking.
Step 2: Test your system with another keyboard. Connect a different keyboard to your computer temporarily. If the pop-up stops appearing, your original keyboard is likely defective and requires replacement or repair.
Disable the F1 Key Using AutoHotkey
If your keyboard is fine, you can disable the F1 key to prevent accidental triggers. AutoHotkey is a lightweight scripting tool that lets you disable or remap keys easily.
Step 1: Download and install AutoHotkey from its official site. Follow the installation prompts to complete the setup.
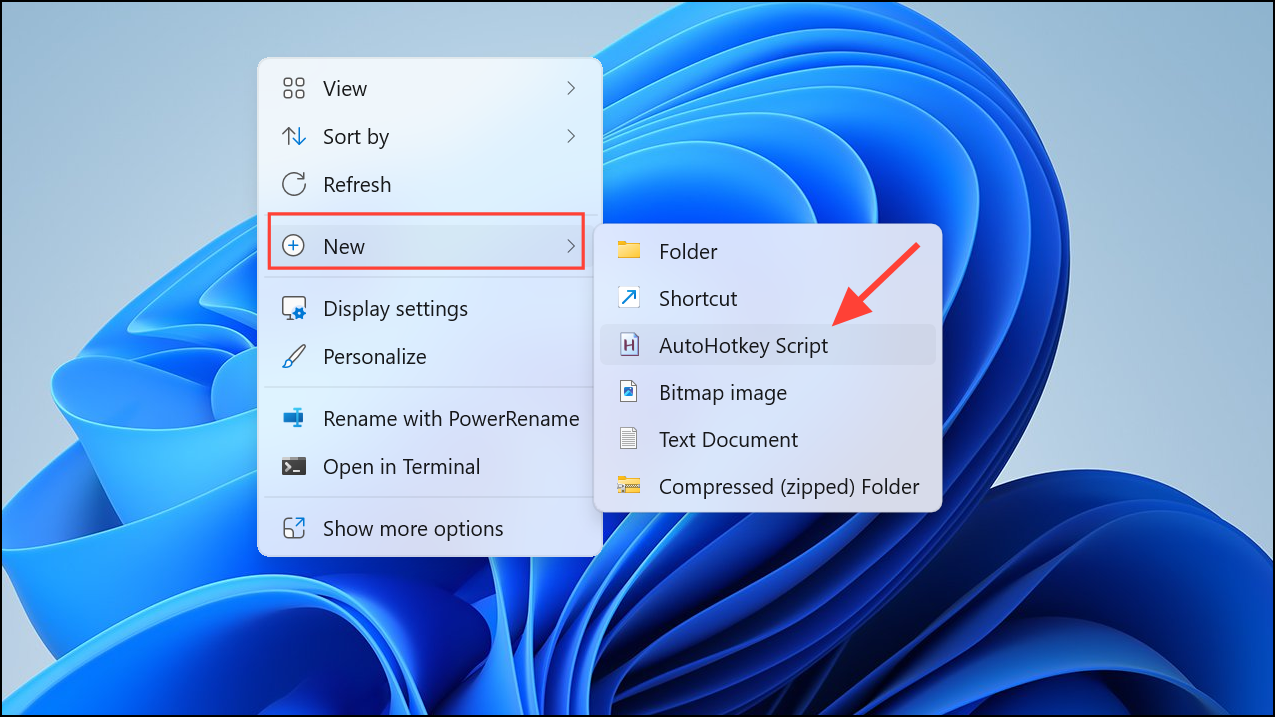
Step 2: After installation, right-click on your desktop, select "New," and then "AutoHotkey Script."
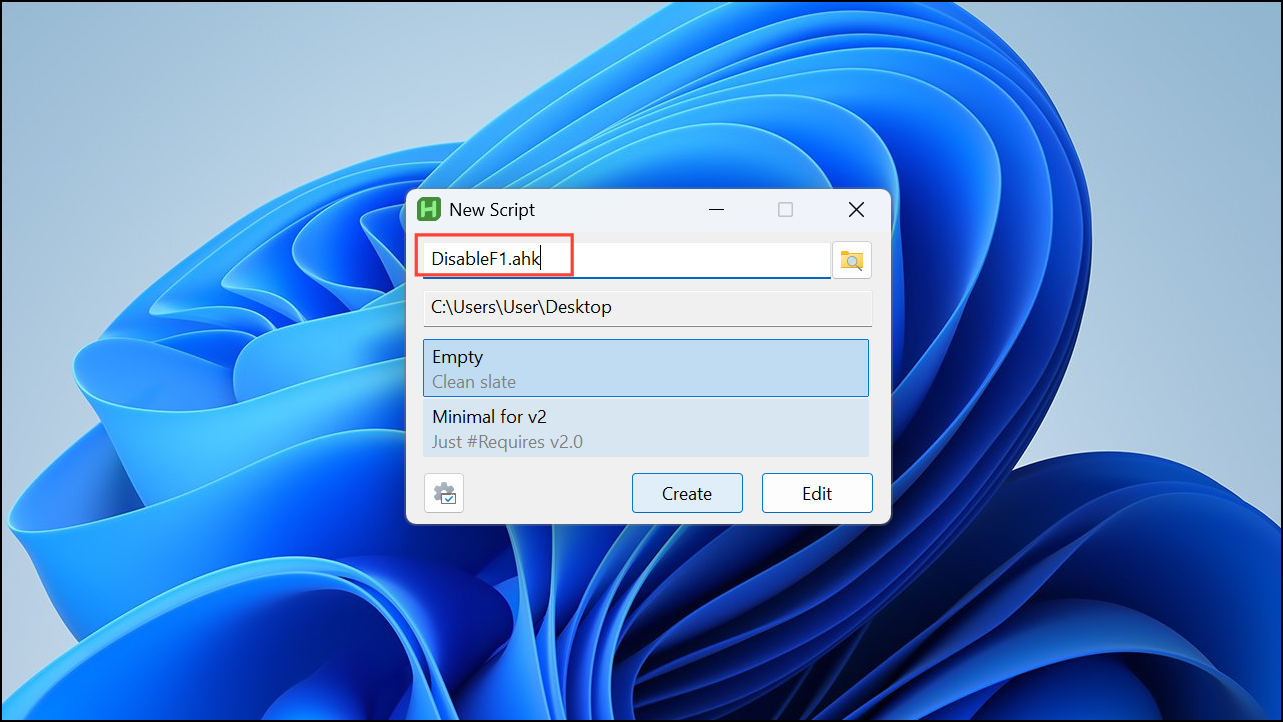
Step 3: Name it clearly, such as "DisableF1.ahk".
Step 4: Right-click your new script file, select "Edit script," and paste the following line to completely disable the F1 key:
f1::Return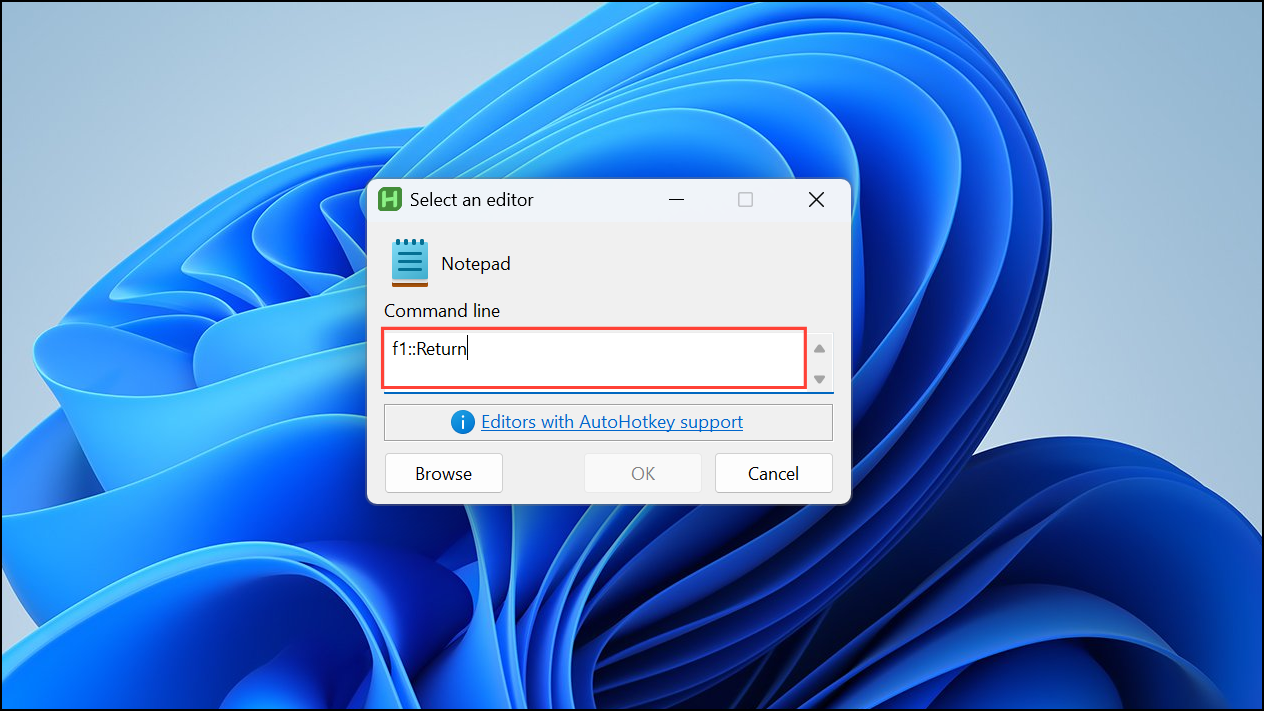
Step 5: Save the file, close the editor, and double-click the script to run it. The F1 key is now disabled.
Step 6: To ensure this runs automatically at startup, move the script to the Startup folder. Use Win + R to open the "Run" dialog, type shell:startup and press Enter. Then copy the script to the folder that opens).

Rename the "HelpPane.exe" File
Renaming the Windows help executable file prevents the pop-up from appearing, as Windows will no longer find the file when triggered.
Step 1: Open File Explorer and navigate to C:\Windows. Locate the file named HelpPane.exe.
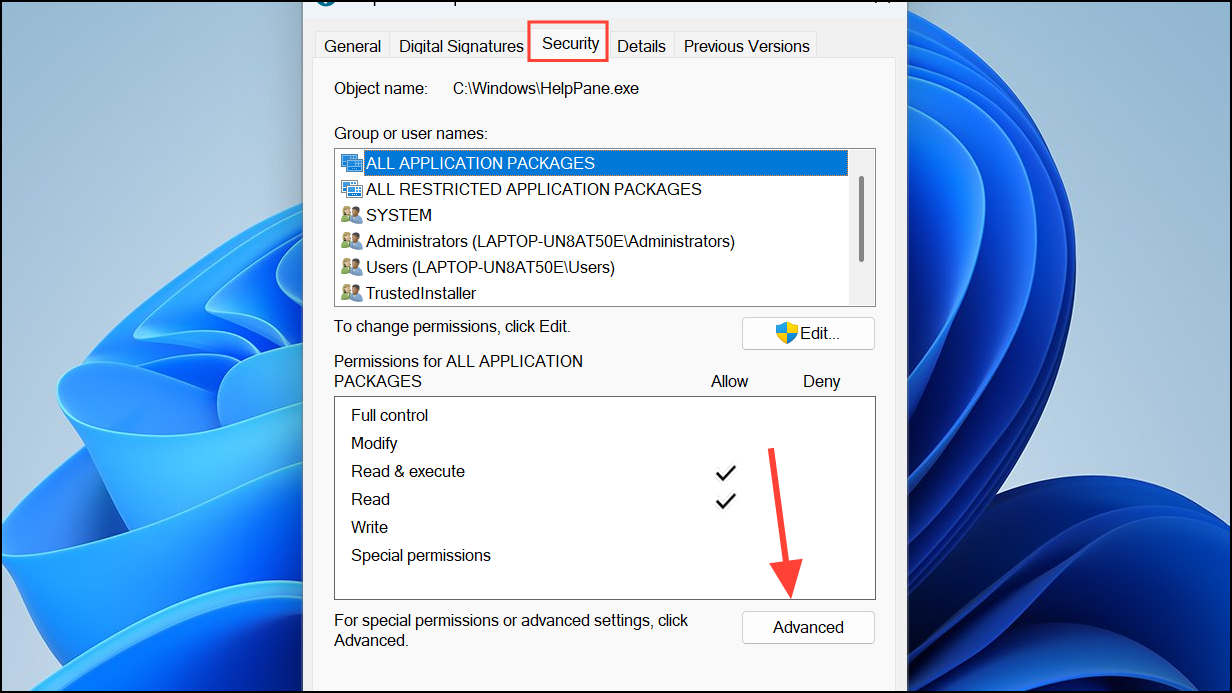
Step 2: Right-click HelpPane.exe and select "Properties."
Step 3: Click the "Security" tab, then "Advanced."
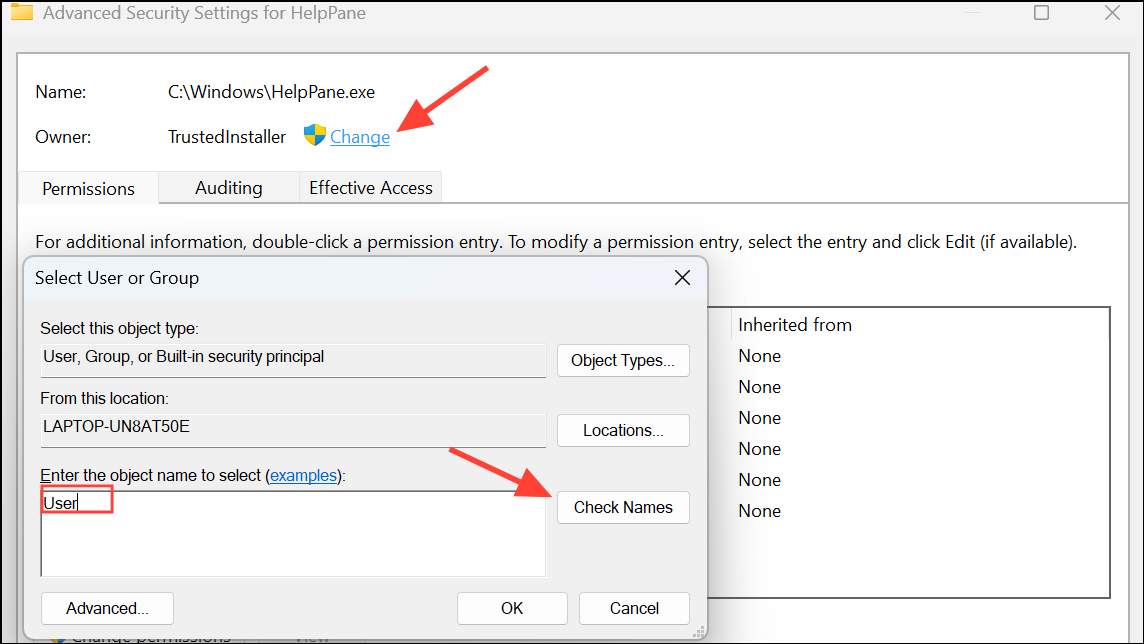
Step 4: Change ownership to your user account by clicking "Change" next to the owner's name. Enter your username, click "Check Names," then "OK."
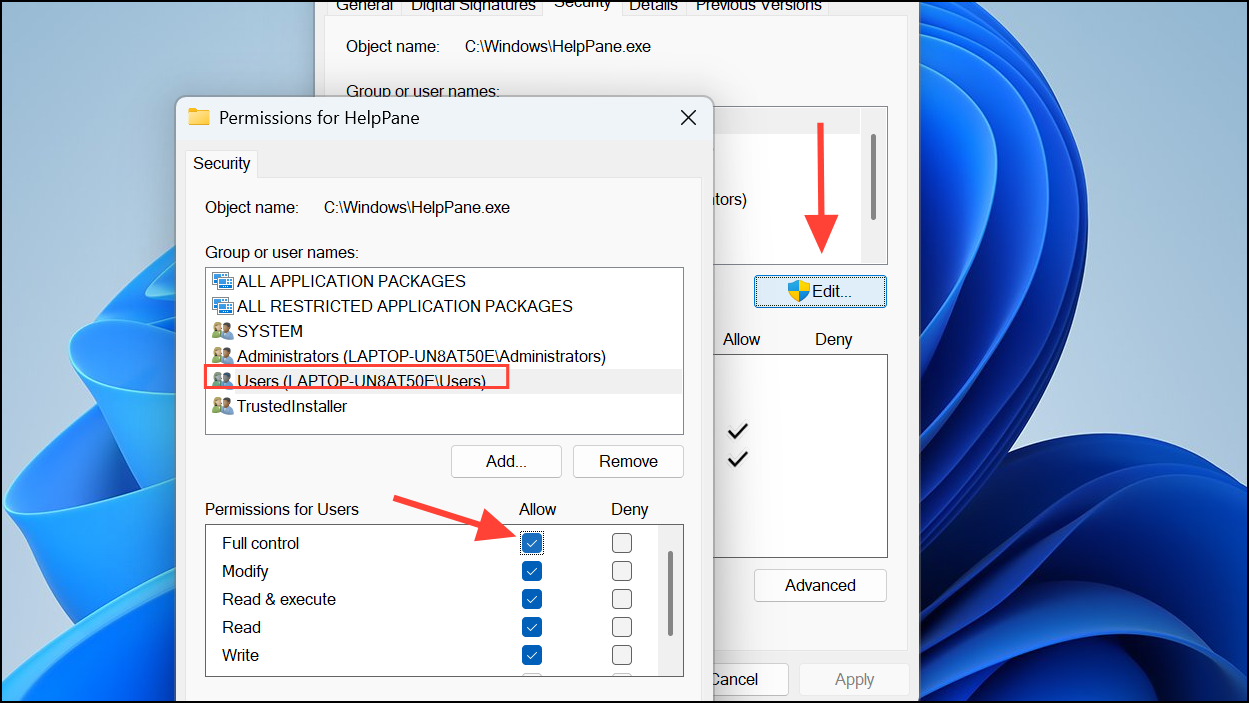
Step 5: After taking ownership, return to the security tab, click "Edit," select your username, and grant yourself "Full Control." Click "Apply" and "OK."
Step 6: Rename the file to HelpPane.old.exe. This prevents Windows from launching the help window.
Use a Script to Permanently Disable HelpPane.exe
This method involves creating a simple command script to block Windows from launching the help process.
Step 1: Open Notepad and paste the following commands:
@echo off
taskkill /f /im HelpPane.exe
takeown /f %WinDir%\HelpPane.exe
icacls %WinDir%\HelpPane.exe /deny Everyone:(X)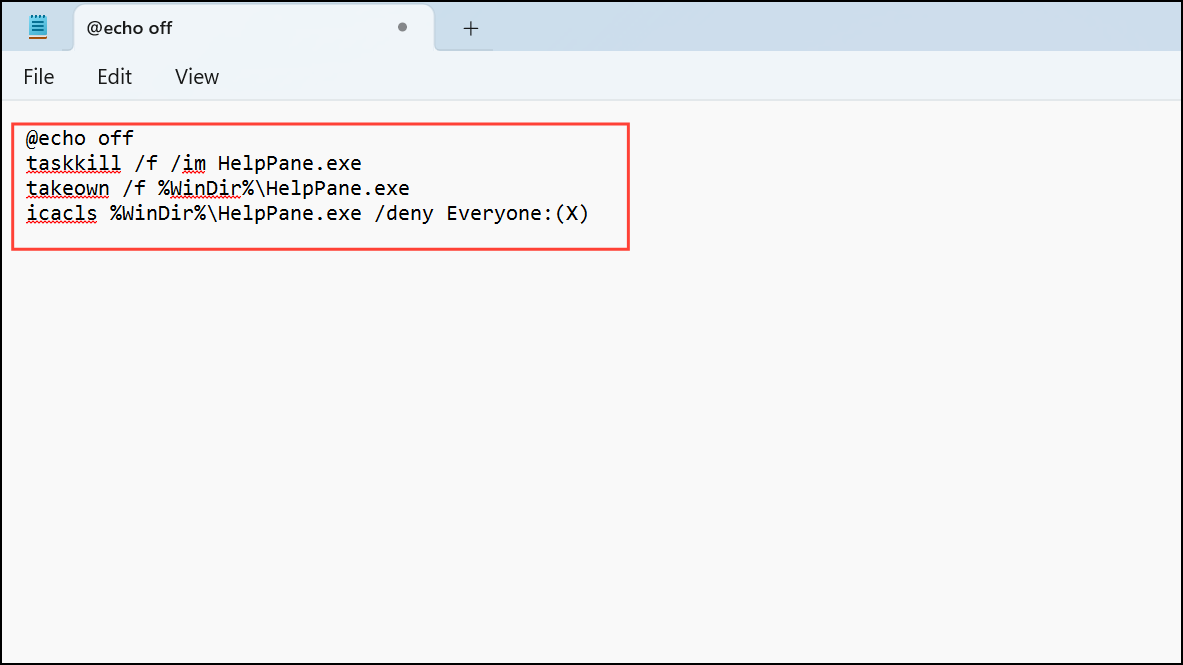
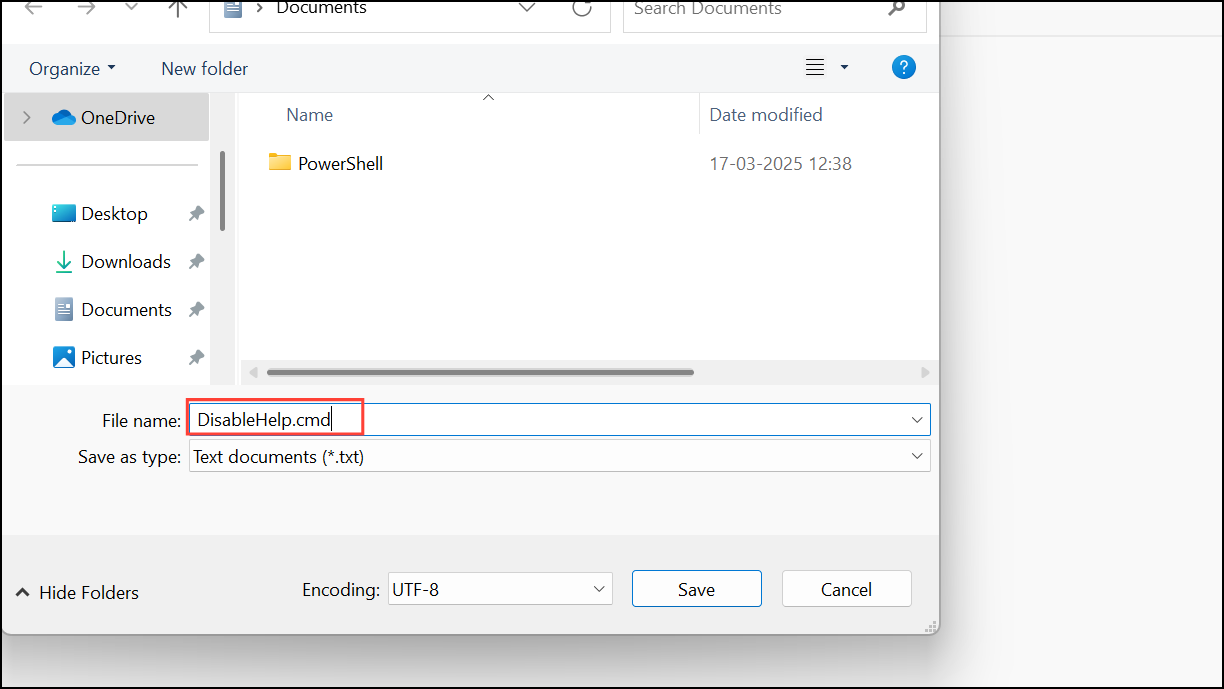
Step 2: Click "File" > "Save As" and name the file DisableHelp.cmd. Choose "All files" from the file type dropdown, then click "Save."
Step 3: Right-click the saved DisableHelp.cmd file and select "Run as administrator." This script immediately terminates and blocks the help pop-up process.
Run a Malware Scan
Malware infections can cause unexpected pop-ups and erratic system behavior. Run a thorough malware scan to detect and remove any threats.
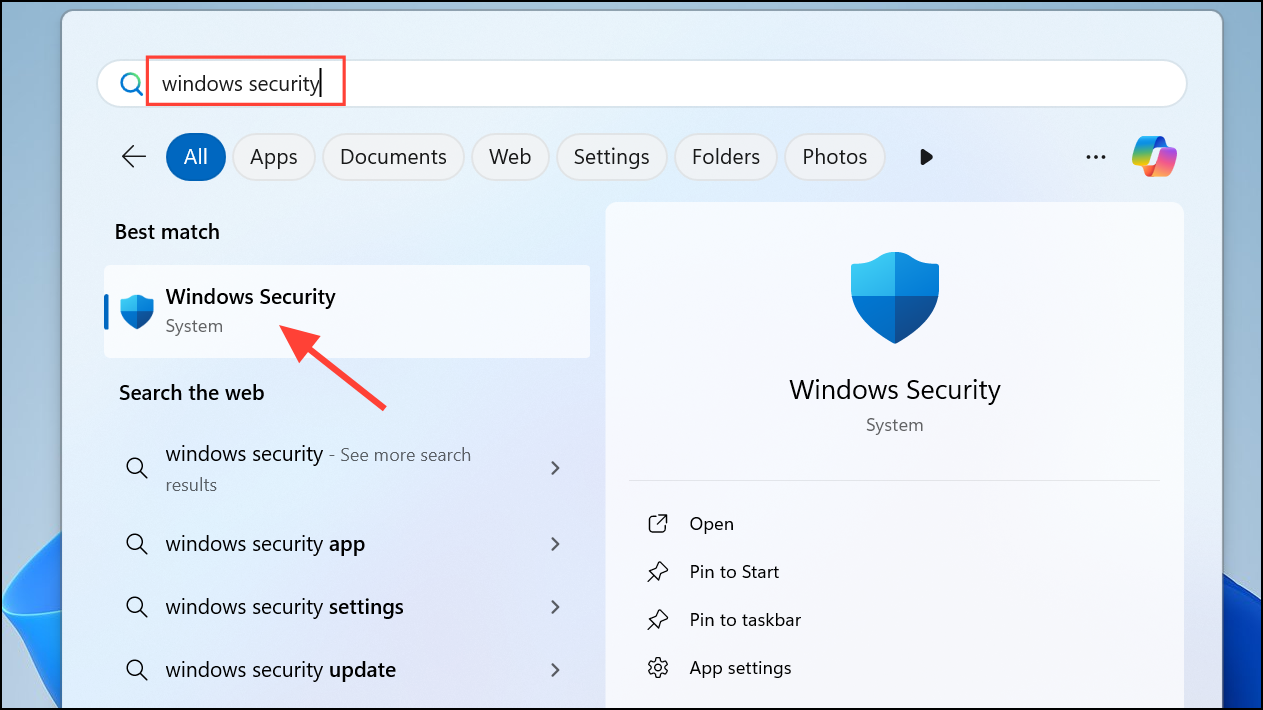
Step 1: Open "Windows Security" by typing it into the Windows search bar and pressing Enter.
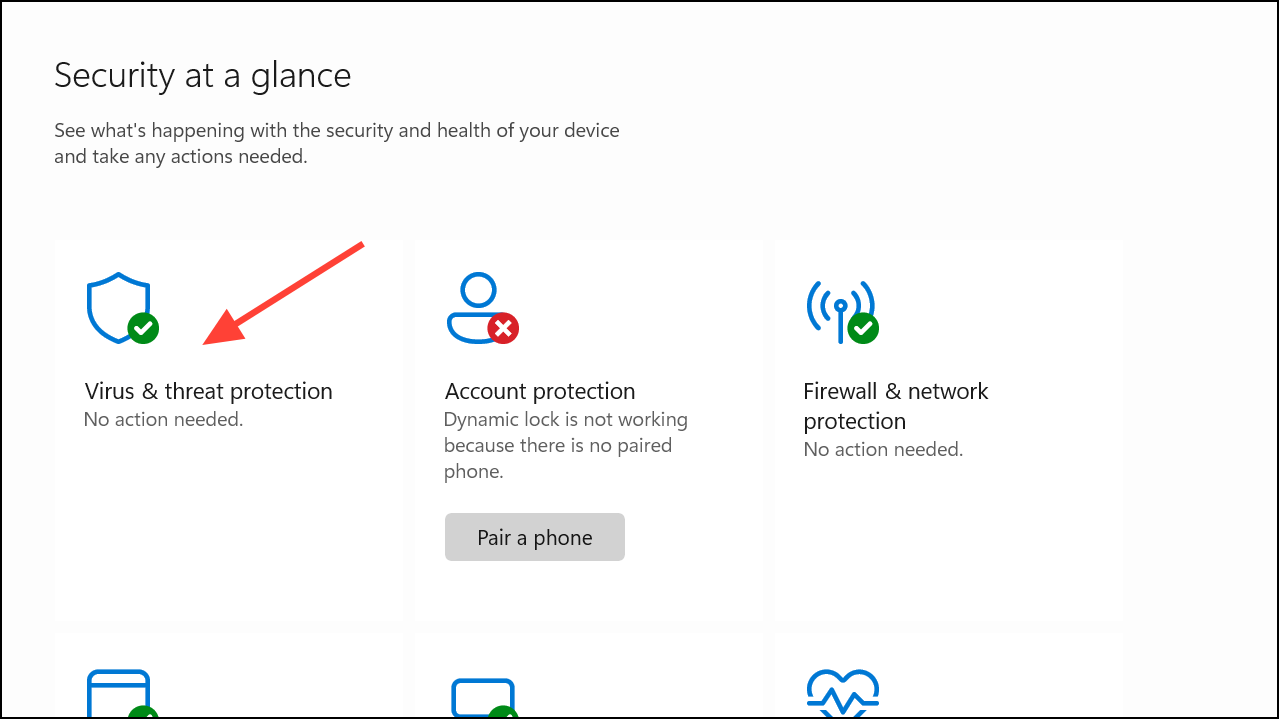
Step 2: Navigate to "Virus & threat protection."
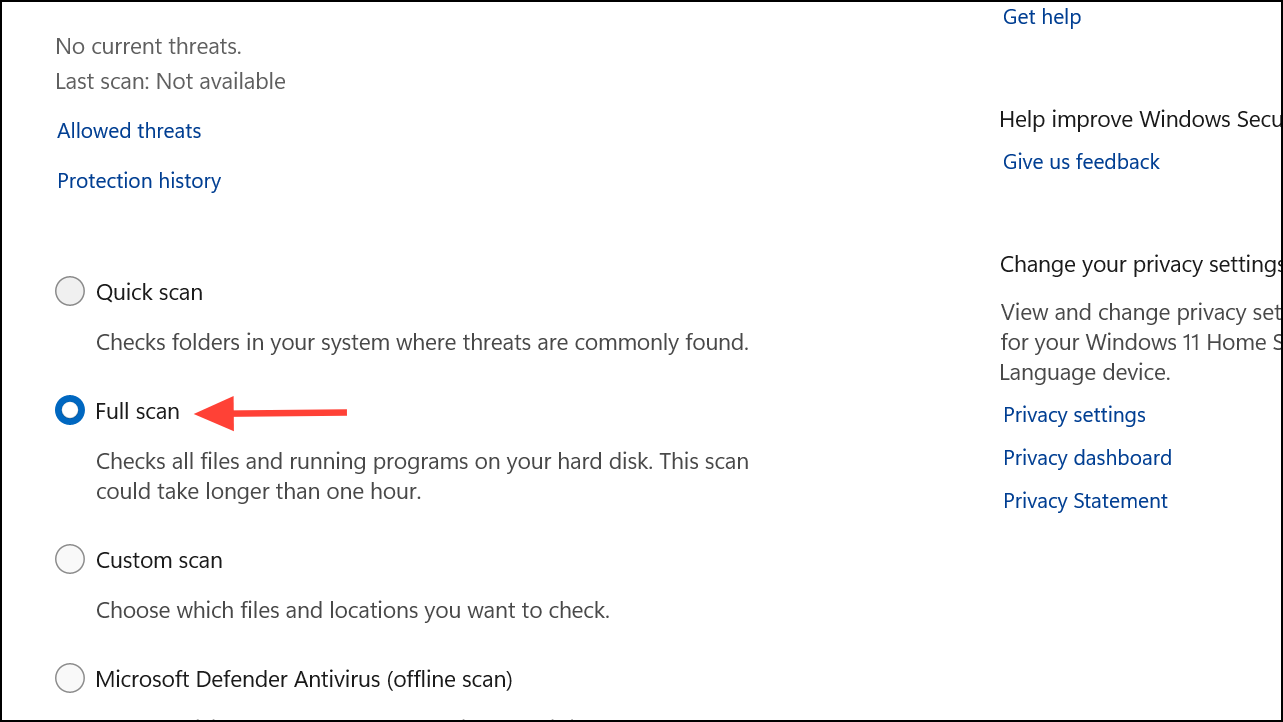
Step 3: Select "Scan options," choose "Full scan," and click "Scan now." Wait for the scan to complete, and follow any recommended actions to remove detected threats.
If you prefer third-party antivirus software, ensure it's updated and perform a complete system scan.
Perform a System Update
Windows updates often include patches for known glitches and bugs that trigger unwanted pop-ups.
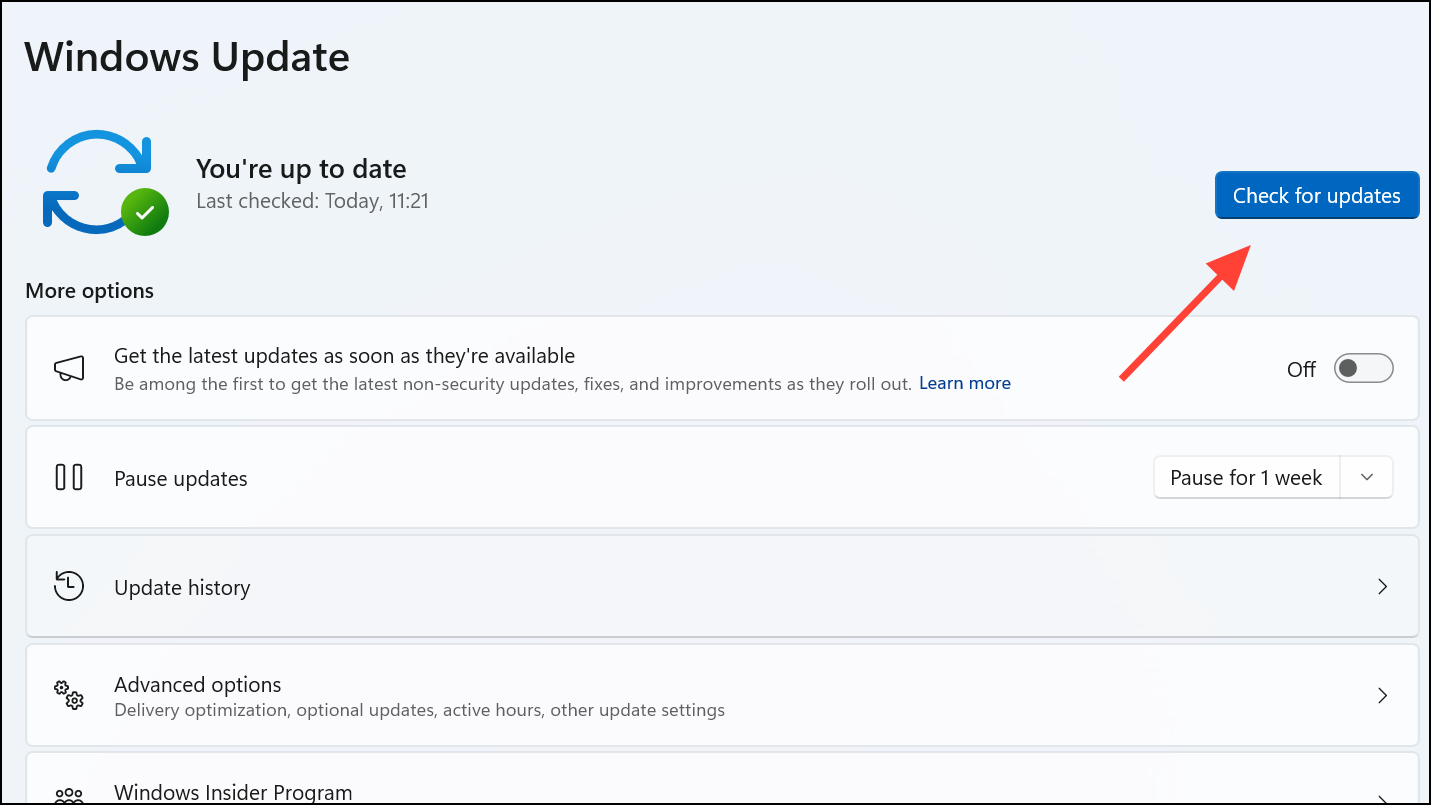
Step 1: Press Win + I to open "Settings," then navigate to "Windows Update."
Step 2: Click "Check for updates," install any available updates, and restart your computer if prompted.
Reset Windows 11 (Last Resort)
If none of the above methods resolve the issue, resetting Windows 11 can eliminate persistent system glitches.
Step 1: Back up all important data to an external drive or cloud storage.
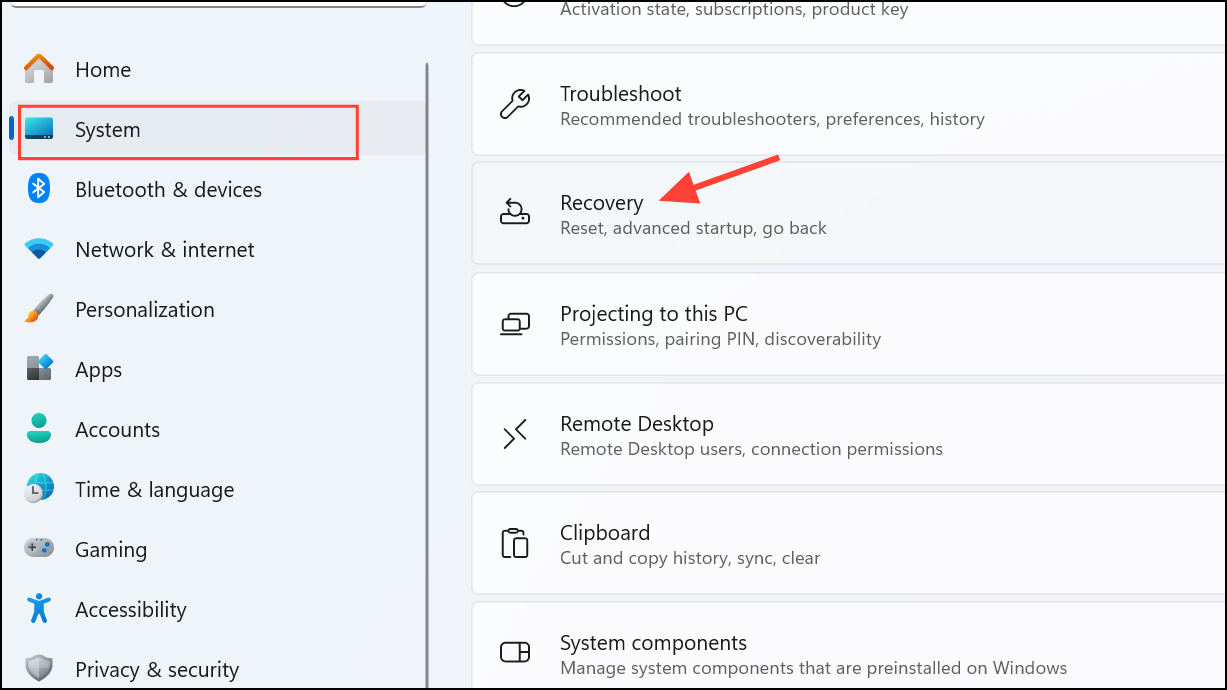
Step 2: Open "Settings," navigate to "System" > "Recovery."
Step 3: Click the "Reset PC" button under "Recovery options."
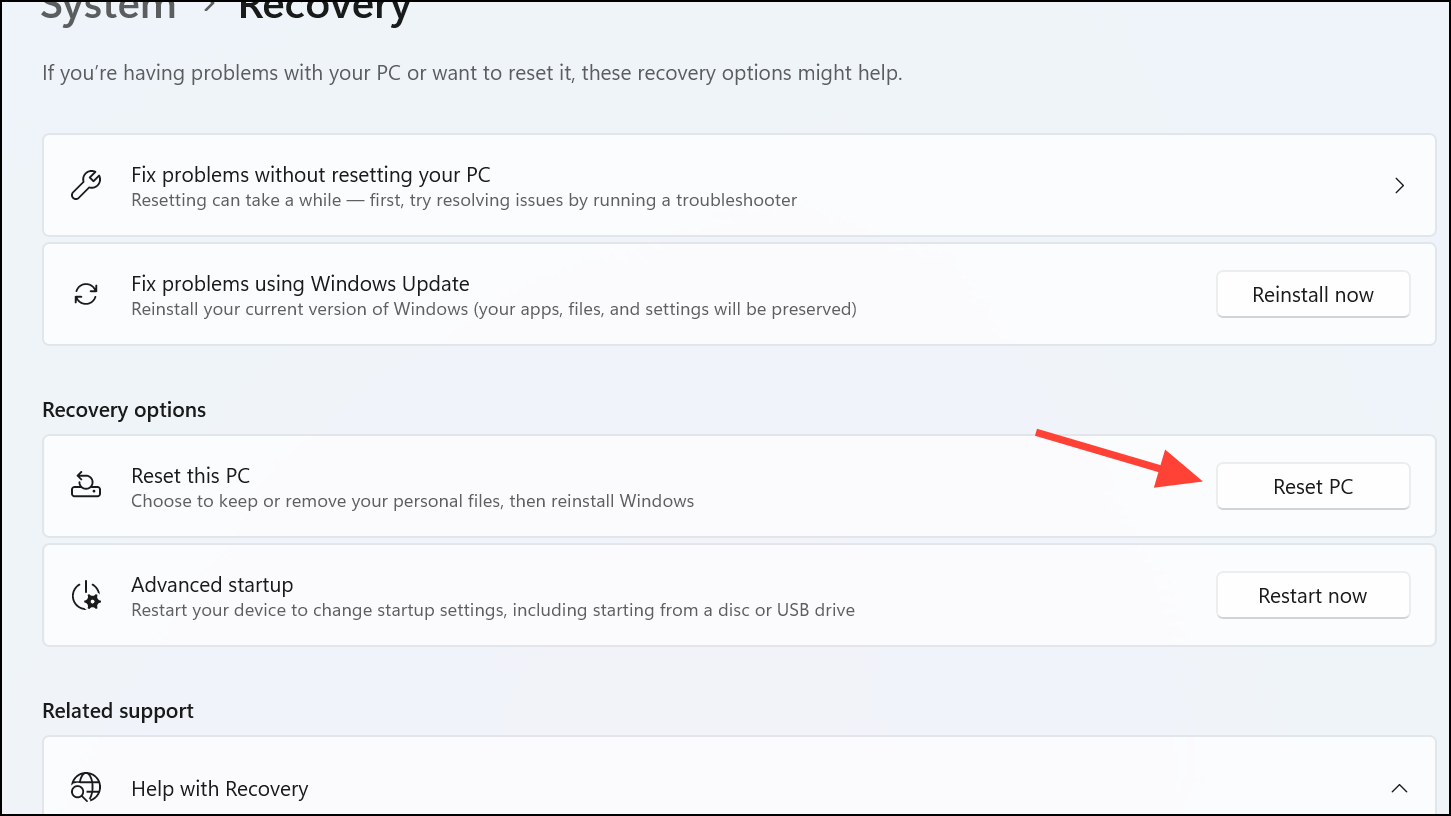
Step 4: Choose "Keep my files" to retain personal data or "Remove everything" for a complete reset, then follow the on-screen instructions to complete the process.
With these detailed methods, you should be able to stop the "How to Get Help in Windows" pop-up permanently and return to a distraction-free computing experience.