
Typing delays, sluggish slide changes, and slow animations in PowerPoint disrupt the flow of any presentation. When PowerPoint performance drops—especially during live presentations—slides may stutter, media playback can freeze, and even simple edits become frustratingly slow. Several factors trigger these slowdowns, ranging from printer driver issues to overloaded animations, large media files, and background system processes. Addressing these root causes directly results in a noticeably faster, more reliable PowerPoint experience.
Set a Default Printer Driver to Resolve PowerPoint Lag
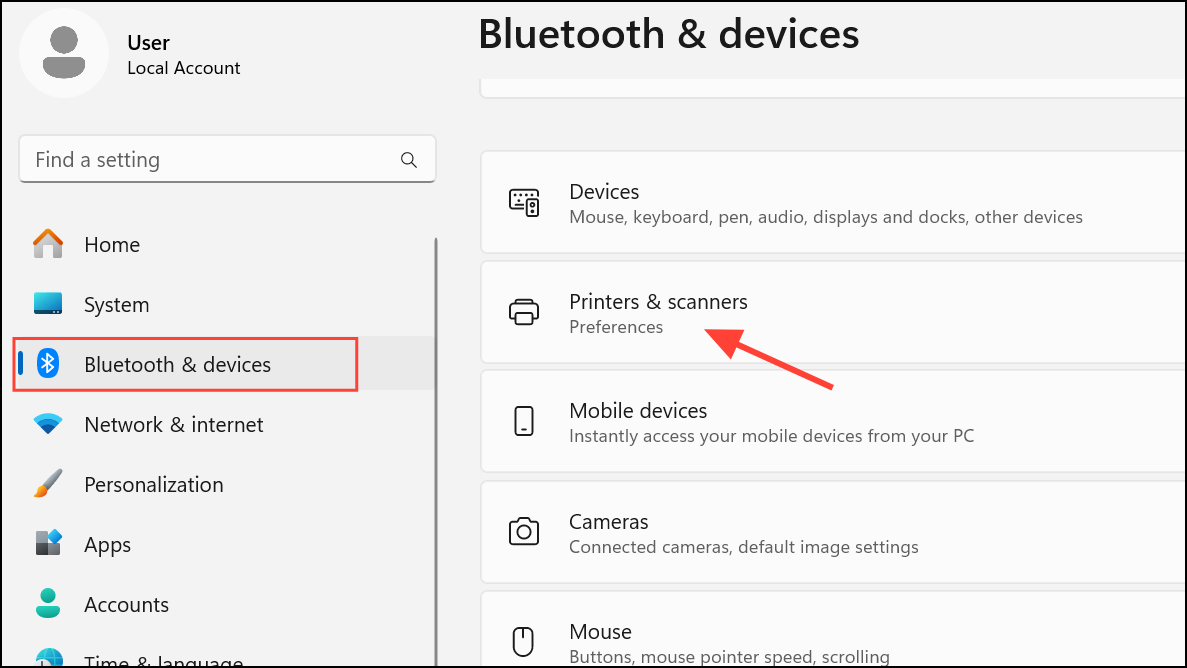
Step 1: Open Windows Settings by pressing Windows key + I on your keyboard. In the Settings window, select Bluetooth and Devices, then choose Printers & scanners from the right pane.
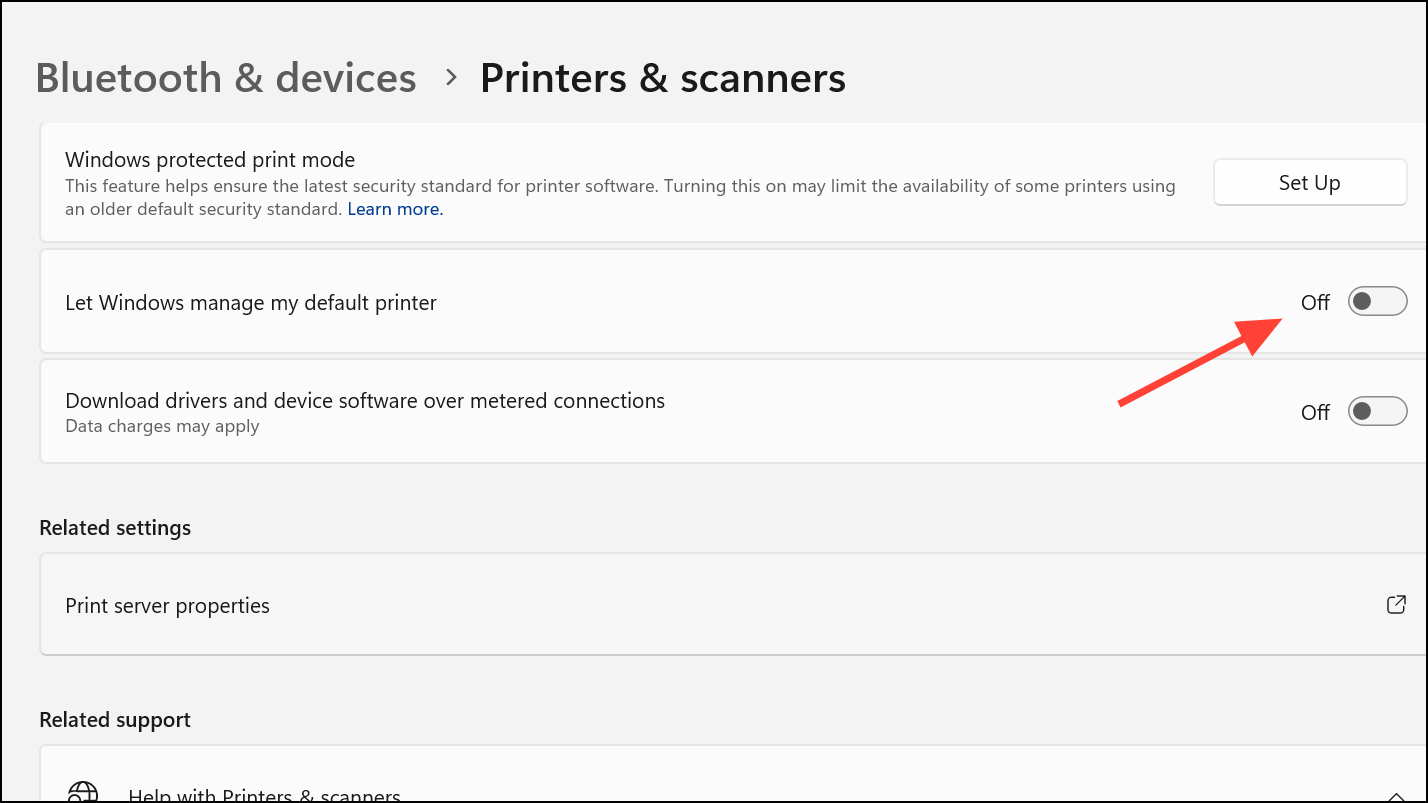
Step 2: Scroll down and locate the option labeled Let Windows to manage my default printer. Toggle off this option. This prevents Windows from automatically switching your default printer, which can cause PowerPoint to lag when it queries printer settings for slide rendering.
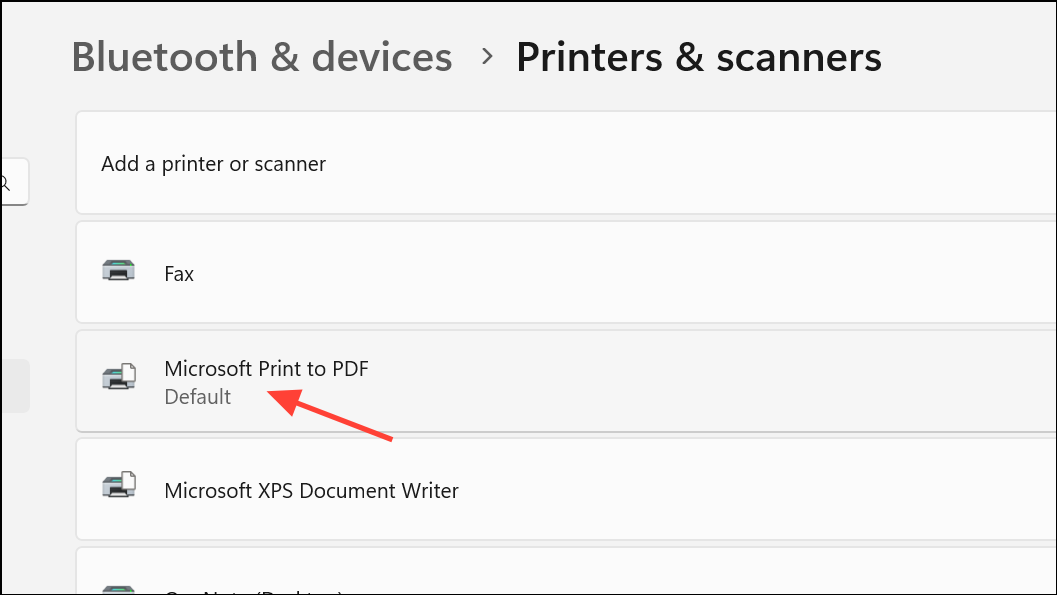
Step 3: Click on your actual printer in the list (turn it on and add it if it’s not visible), then select Set as default. If you don’t have a physical printer, you can install a generic printer driver such as Microsoft Print to PDF and set it as default.
Step 4: Restart your computer using the Restart option from the Start menu. This ensures the new default printer setting is fully applied.
After restarting, open PowerPoint and check if lag issues are resolved. This method directly addresses a common but often overlooked cause of slow performance, especially in Windows 11.
Reduce Animations, Transitions, and Media Complexity
Step 1: Open your PowerPoint file and review slides with heavy animations or transitions. Limit the number of transitions and avoid using multiple transition types. Use only essential animations, and avoid by-letter or by-word effects on text, as these are resource-intensive.
Step 2: Replace complex animations (such as fade, rotate, or scale) with simpler ones or remove them entirely. Large gradients, transparent objects, and heavy media files (like 4K videos or high-resolution images) also slow down performance. Replace these with solid color fills or compressed images when possible.
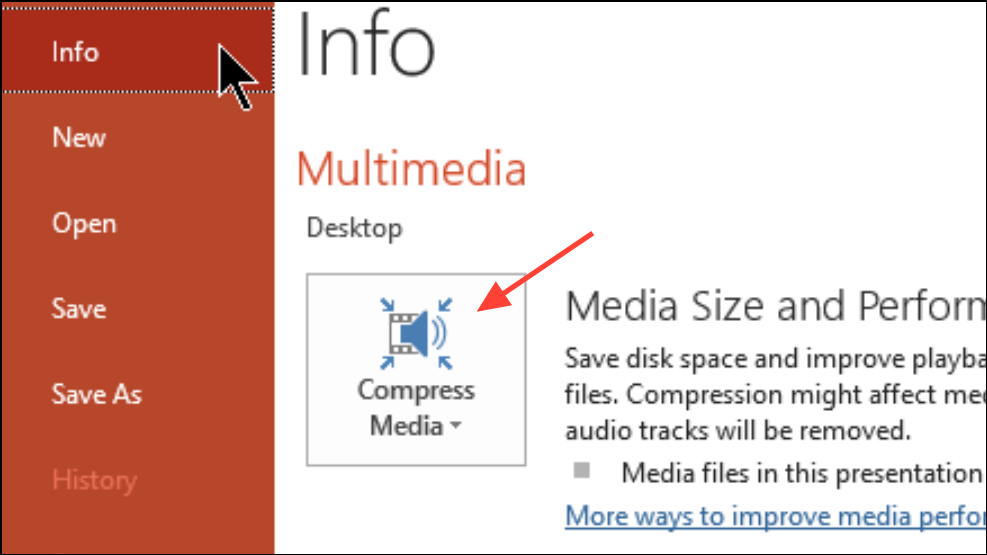
Step 3: To compress media, go to File > Info > Compress Media and select the desired compression level. This reduces file size and speeds up playback during presentations.
Streamlining your presentation’s visual effects and media content leads to faster slide changes and smoother animations, especially during live presentations or when editing large files.
Clean Temporary Files and Cache
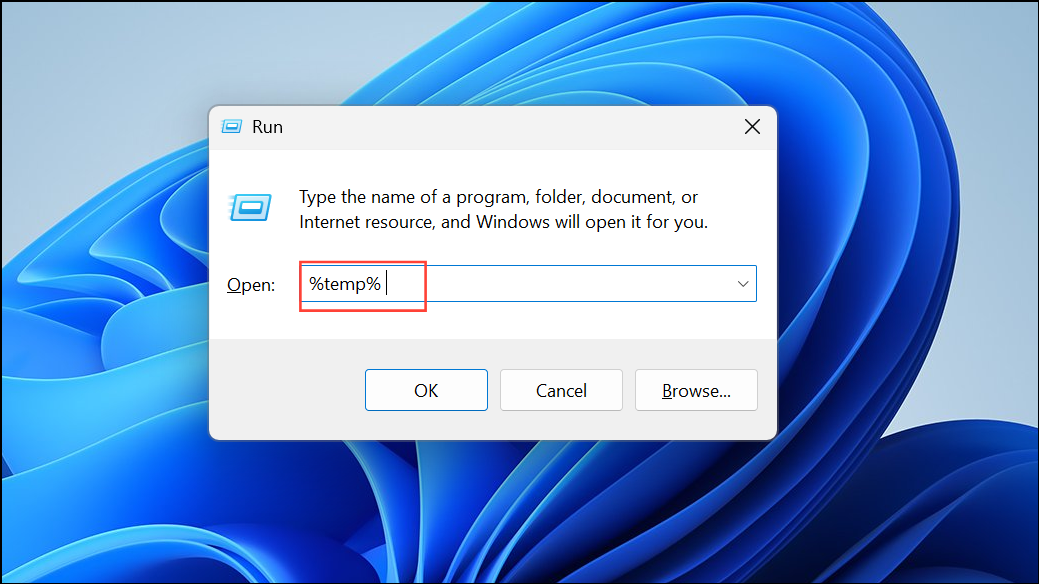
Step 1: Close PowerPoint and all other applications. Open the Run dialog by pressing Windows key + R. Type %temp% and press Enter to open the TEMP folder.
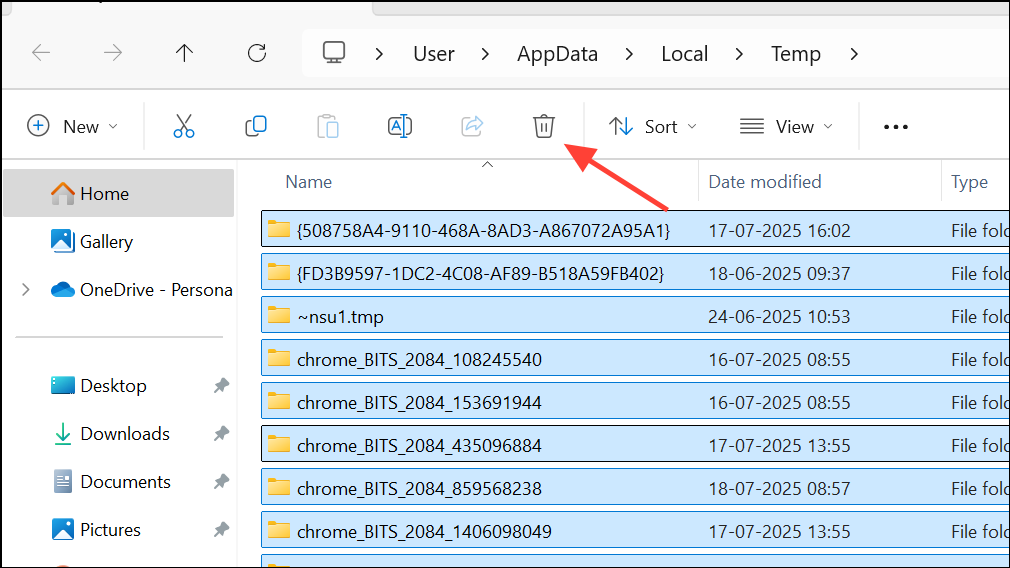
Step 2: Select all files in the TEMP folder (press Ctrl + A), then press Delete on your keyboard. If prompted, skip any files in use. Deleting these temporary files removes old cache and leftover data that can bog down PowerPoint and other programs.
Clearing temporary files boosts PowerPoint’s responsiveness, especially if you frequently work with large or complex presentations.
Adjust PowerPoint and System Performance Settings
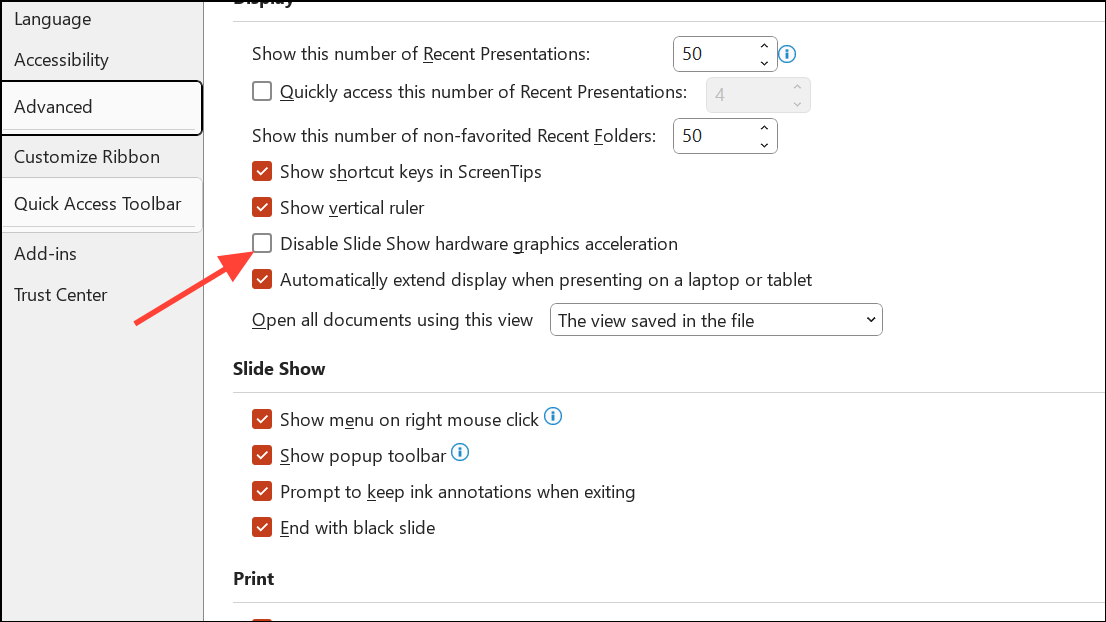
Step 1: In PowerPoint, go to File > Options > Advanced.

Step 2: Scroll to the Display section. Ensure that Disable hardware graphics acceleration is unchecked. Hardware acceleration offloads graphics processing from your CPU to your GPU, speeding up animations and transitions.
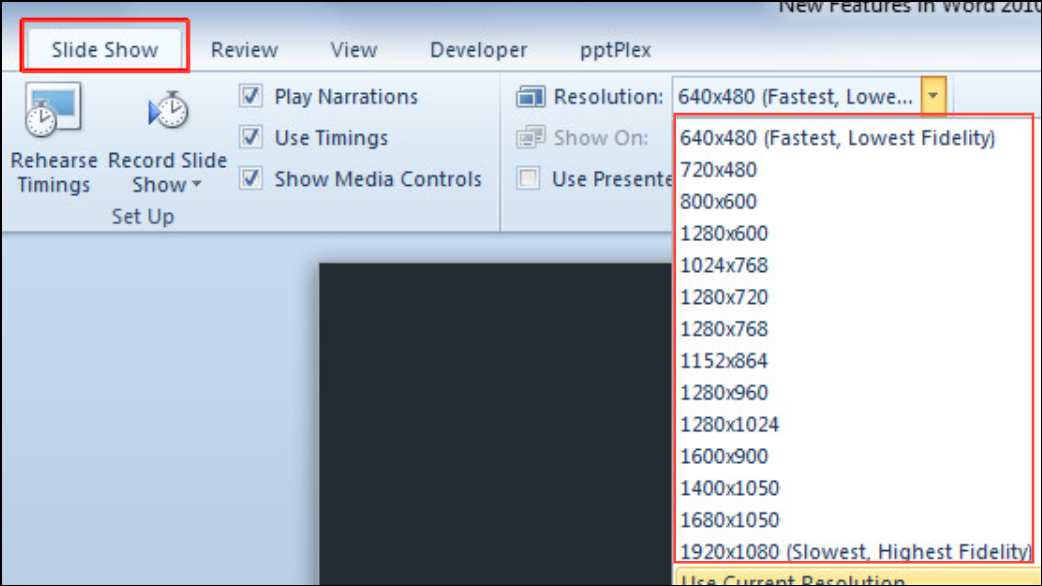
Step 3: For presentations with lag during slide shows, open the Slide Show tab, find the Monitors group, and adjust the Resolution dropdown. Select a lower resolution, such as 640x480, to speed up rendering. If slide images shift or display incorrectly, revert to Use Current Resolution.
These settings directly improve PowerPoint’s ability to handle complex graphics and large presentations, making slide transitions and media playback smoother.
Close Background Programs and Free Up System Resources
Step 1: Before starting a presentation, close unnecessary programs, browser tabs, and background processes. This frees up memory and CPU resources for PowerPoint.
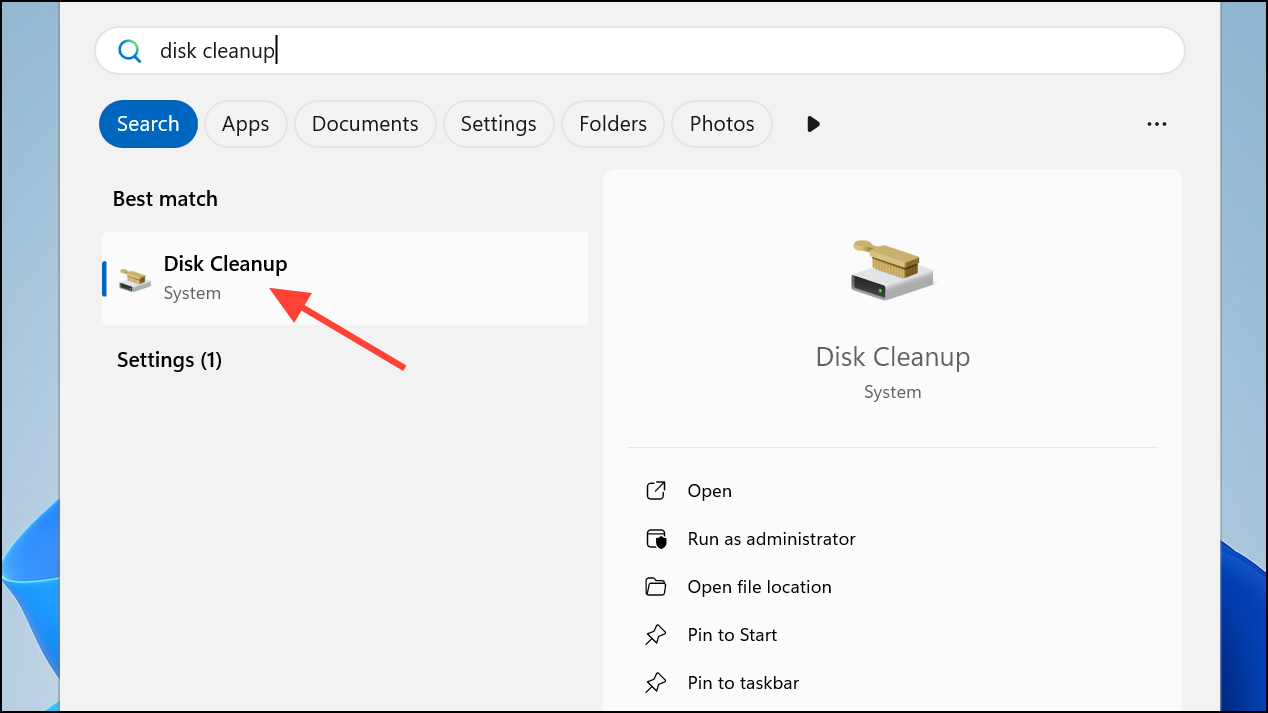
Step 2: Run Disk Cleanup by searching for it in the Start menu and selecting your system drive. Remove temporary files, system cache, and other unneeded data to increase available disk space.
Having more free memory and disk space allows PowerPoint to load and display slides more quickly, especially when working with large files or presenting online.
Additional Troubleshooting for macOS Users
Step 1: If PowerPoint lags on Mac, check your internet connection, especially if you see messages like "Contacting the server for information." Save files locally instead of on cloud services to avoid sync delays.
Step 2: Clear PowerPoint’s cache by quitting the app, opening Finder, pressing Command + Shift + G, and entering ~/Library/Containers. Move the Microsoft PowerPoint folder to the Trash, then reopen PowerPoint.
Step 3: If issues continue, uninstall PowerPoint from Finder > Applications, then reinstall the latest version from the official Microsoft download link.
These steps resolve lag caused by corrupted cache or installation issues on macOS, restoring normal performance.
Optimizing printer settings, minimizing complex animations, cleaning temporary files, and adjusting system resources all make PowerPoint presentations run faster and more reliably. Regular maintenance and these targeted fixes keep your slides responsive and your presentations stress-free.