
Typing in Microsoft Word and seeing only uppercase letters, even though Caps Lock is off, disrupts document creation and slows down workflow. This issue can result from formatting settings, keyboard shortcuts, accessibility features, or style configurations within Word. Addressing the root cause quickly restores normal typing and prevents frustration.
Check and Remove All Caps Formatting in Word
Formatting options in Word can force text to display in all uppercase, regardless of Caps Lock status. This setting is often triggered by accidentally using keyboard shortcuts or by applying styles that enforce uppercase letters.
Step 1: Select the affected text in your Word document. If the entire document is affected, press Ctrl + A to select all content.
Step 2: Right-click the selected text and choose "Font" from the context menu.

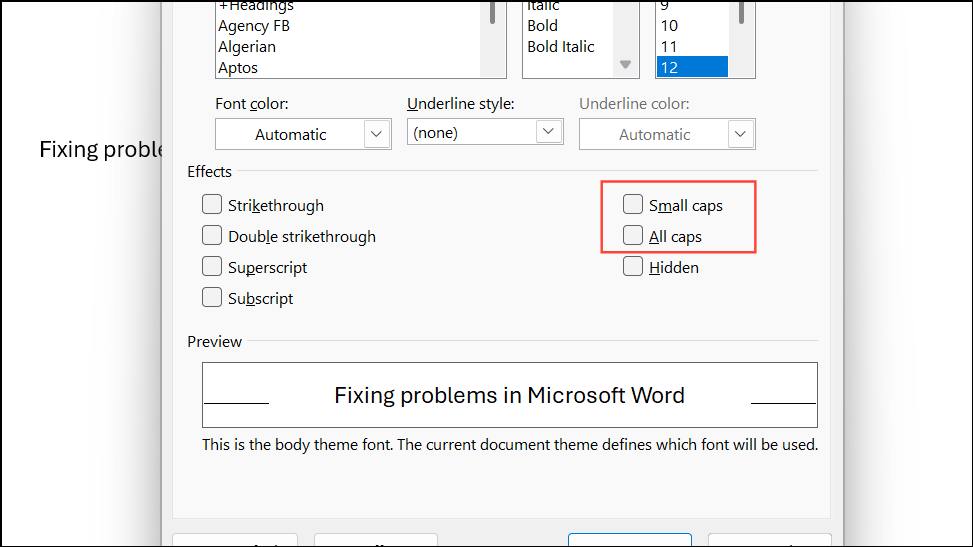
Step 3: In the Font dialog box, look for the “Effects” section and check if “All Caps” or “Small Caps” is selected. If either box is checked, uncheck it and click "OK" to apply the changes. This action immediately restores normal casing to your text.
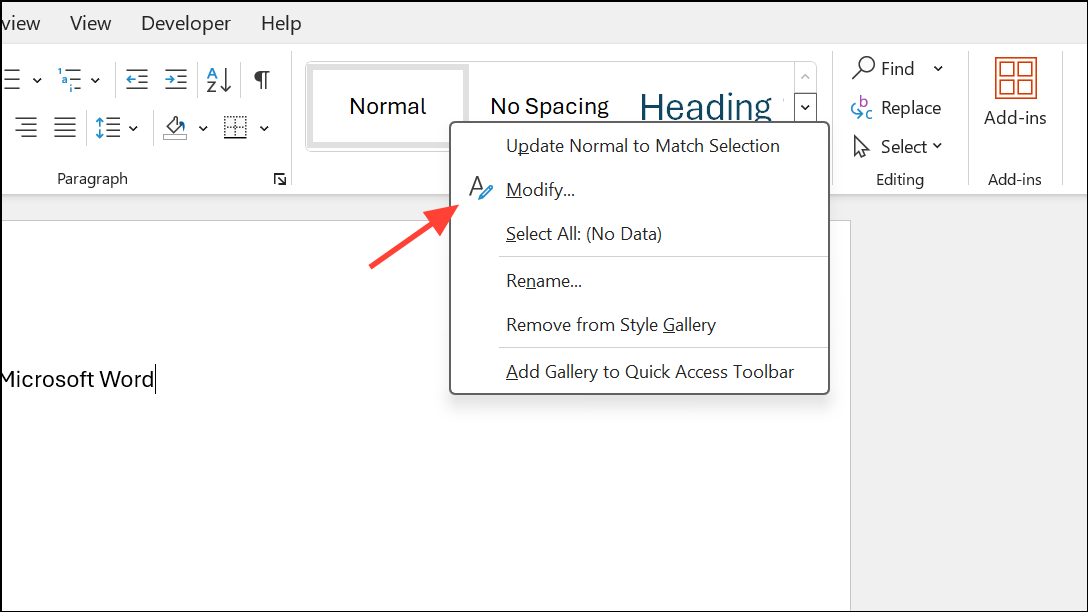
Step 4: If the issue persists, check the applied style. Click on the “Styles” pane in the Home tab, locate the style in use (such as “Normal” or a custom style), right-click it, and choose “Modify.”
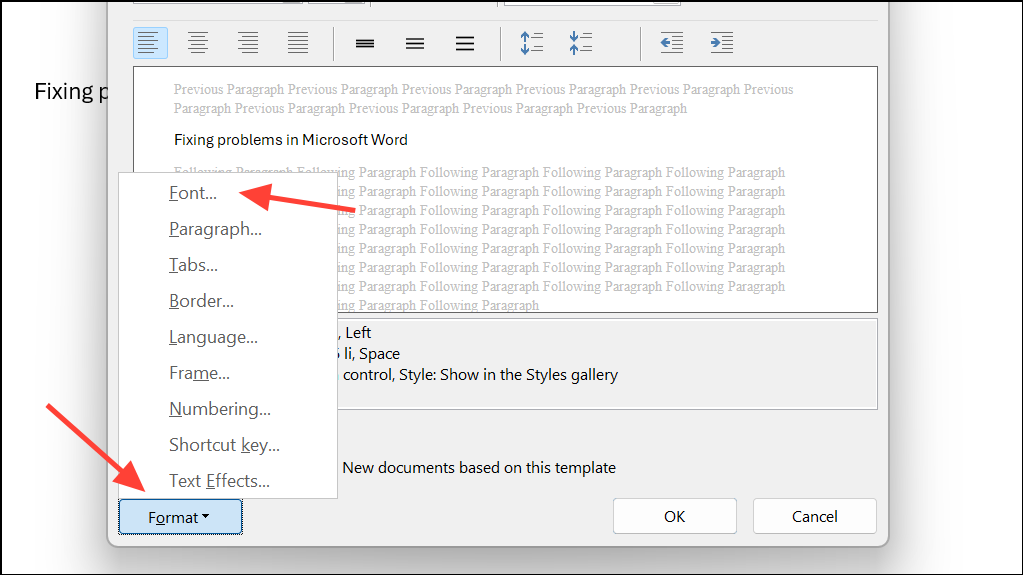
Step 5: Click the “Format” button, select “Font,” and ensure “All Caps” and “Small Caps” are unchecked. Click “OK” to confirm.
Use Keyboard Shortcuts to Toggle Case
Word supports keyboard shortcuts that change text case formatting. Accidentally pressing these shortcuts can lock text in all caps mode, even if Caps Lock is off.
Step 1: Select the text that appears in all caps.
Step 2: Press Ctrl + Shift + A to toggle All Caps formatting. This shortcut applies or removes the All Caps effect for the selected text.
Step 3: If the text remains uppercase, try Shift + F3. This shortcut cycles through uppercase, lowercase, and sentence case for the selected text. Press it repeatedly until the desired case appears.
These shortcuts quickly resolve formatting issues caused by accidental keystrokes.
Reset Keyboard Configuration and Accessibility Settings
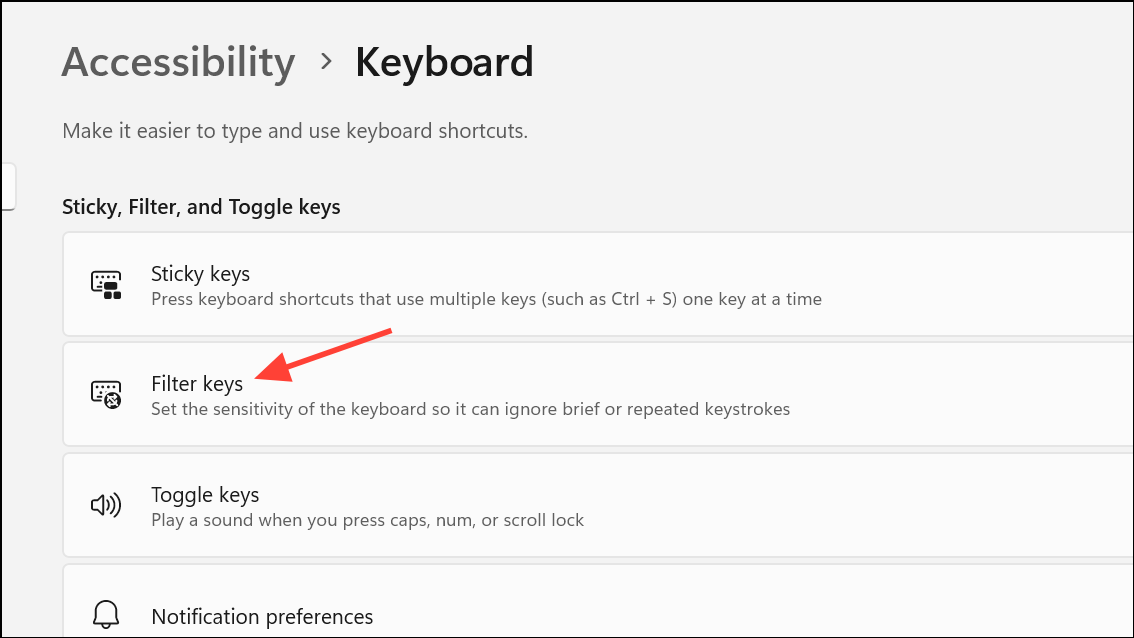
Sticky Keys or Filter Keys—Windows accessibility features—can alter keyboard behavior, causing letters to appear in uppercase even when Caps Lock is off. These settings may be enabled by holding down the Shift key for several seconds or through accidental activation.
Step 1: Press both Shift keys simultaneously. This action cancels certain accessibility changes and can immediately restore standard typing behavior.
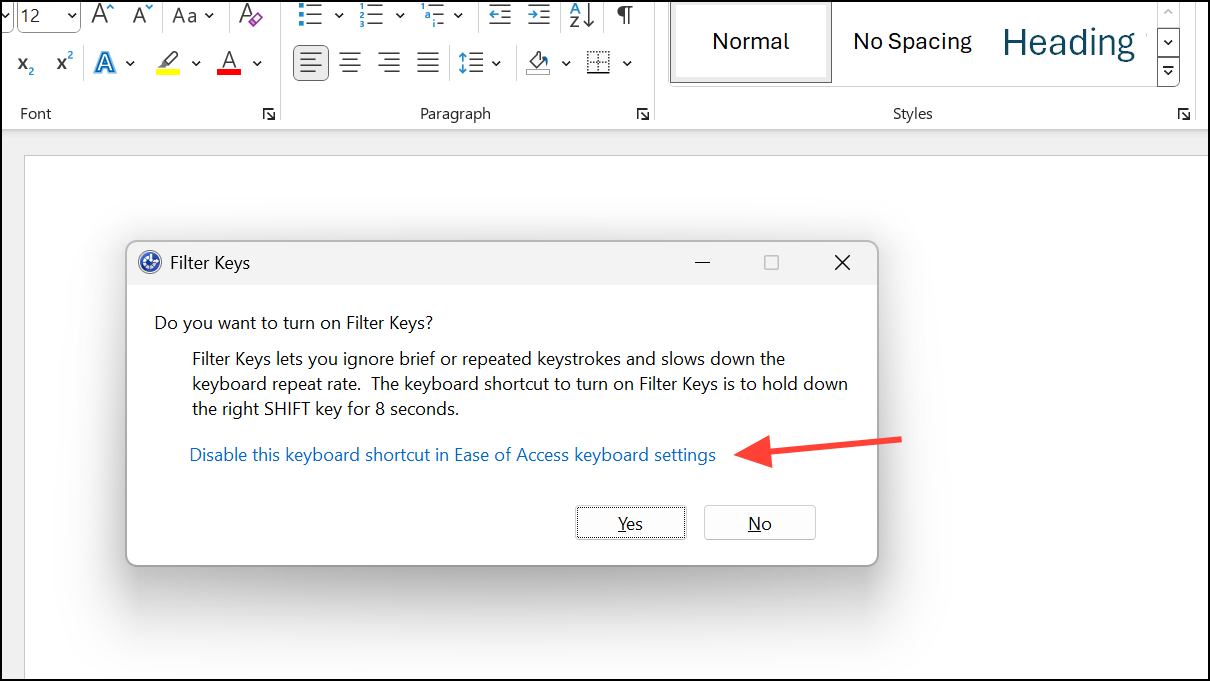
Step 2: Hold the right Shift key for 8 seconds to open the Filter Keys popup window. If the popup appears, click "Settings."
Step 3: Navigate to the Keyboard tab, then click "Filter Keys," followed by "Settings."
Step 4: Under Keyboard Shortcut, uncheck “Keyboard Shortcut for Filter Keys” to prevent accidental activation in the future. Click “OK,” then “Apply,” and finally “OK” again. Repeat pressing both Shift keys to ensure changes take effect.
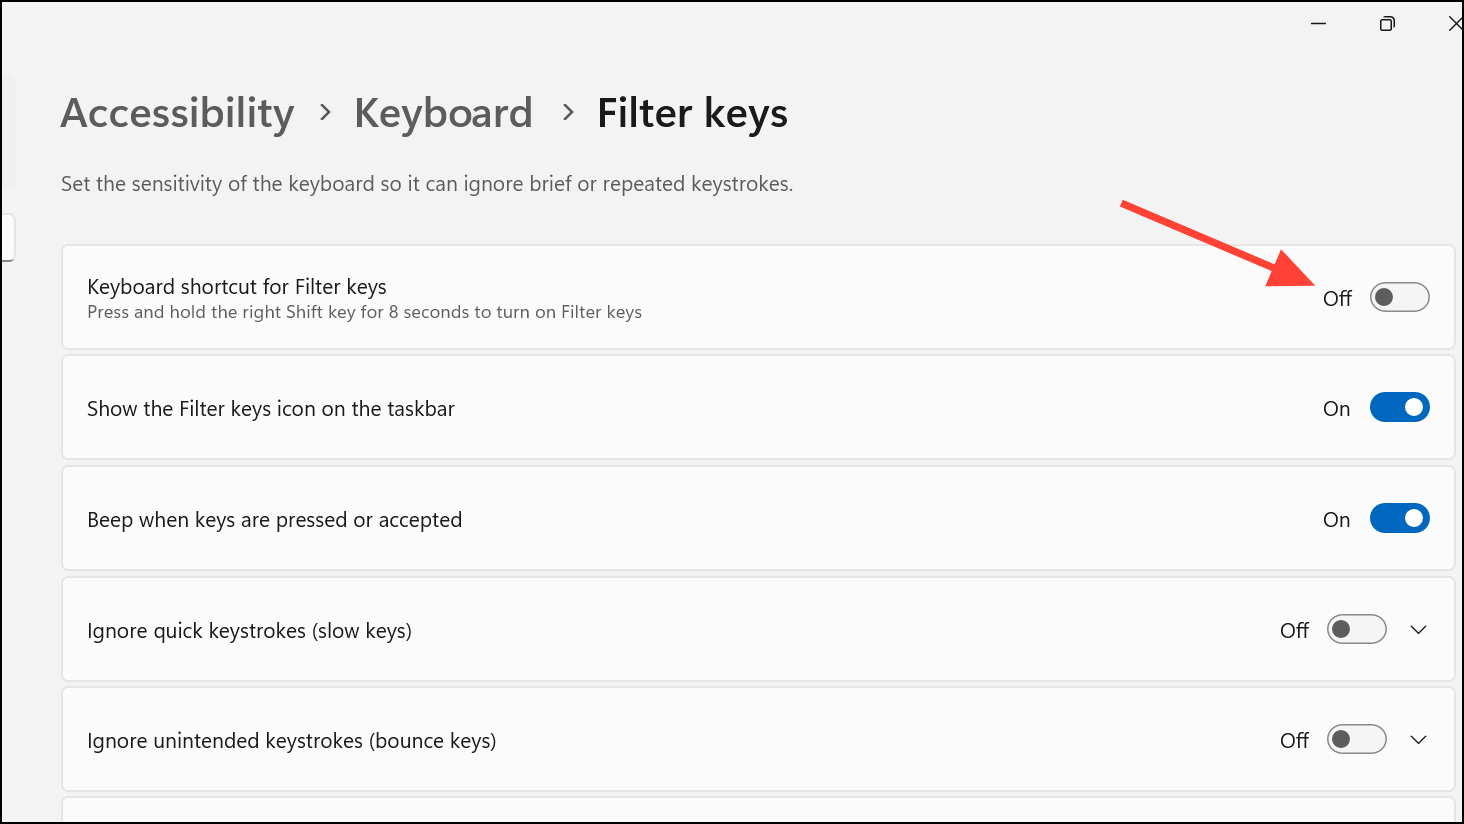
Disabling these shortcuts prevents unexpected keyboard behavior from recurring.
Clear Formatting and Reset Styles
Documents copied from other sources or using inherited formatting may have styles that enforce all caps. Clearing formatting resets text to the default style and removes unwanted effects.
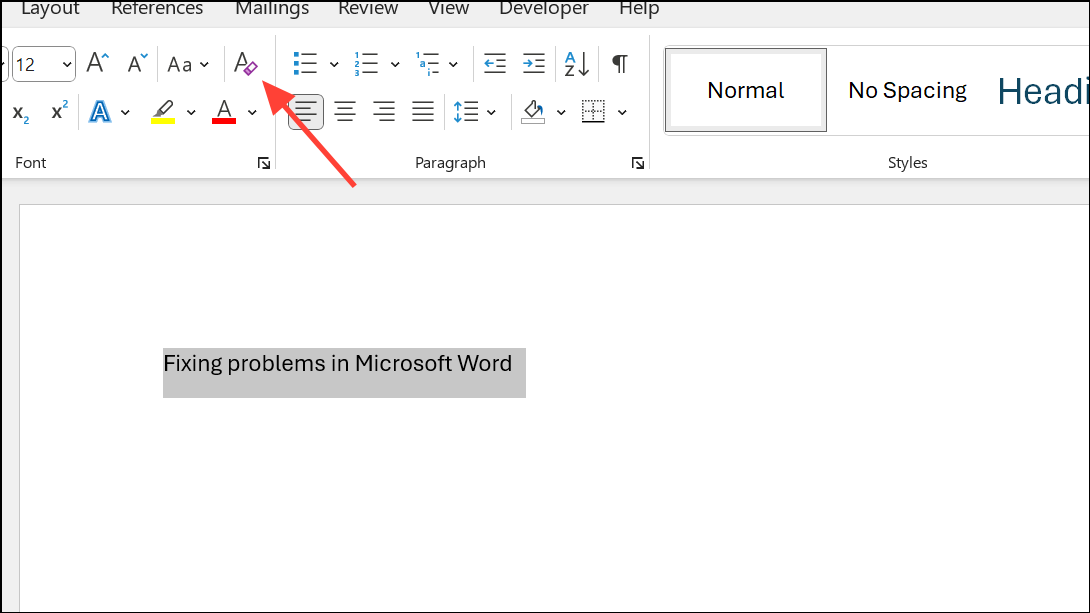
Step 1: Select the problematic text or the entire document.
Step 2: Click the “Clear All Formatting” button in the Home tab (it looks like an eraser on an A). This action removes direct formatting, including forced uppercase.
Step 3: After clearing formatting, apply the “Normal” style from the Styles group to reset the paragraph’s style. If the style name shows a suffix like “+AllCaps,” open the Styles pane, right-click the style, and choose “Delete” to remove the custom style. Reapply the standard style as needed.
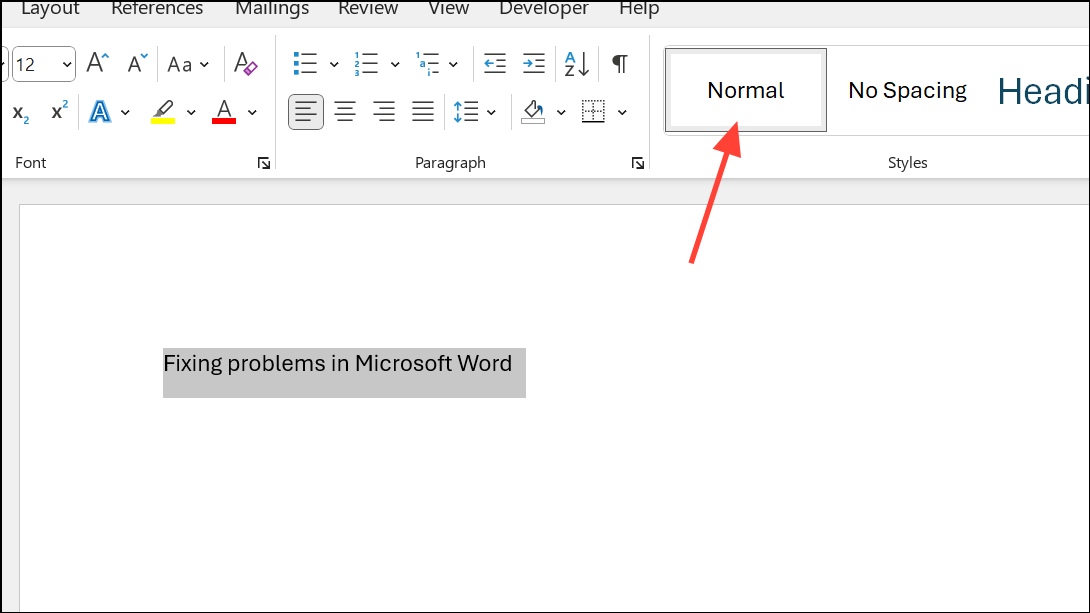
This process strips away persistent formatting and restores standard text appearance.
Adjust System Keyboard Settings
Windows keyboard settings can influence how Caps Lock and Shift interact. If toggling Caps Lock does not restore lowercase typing, review these settings.
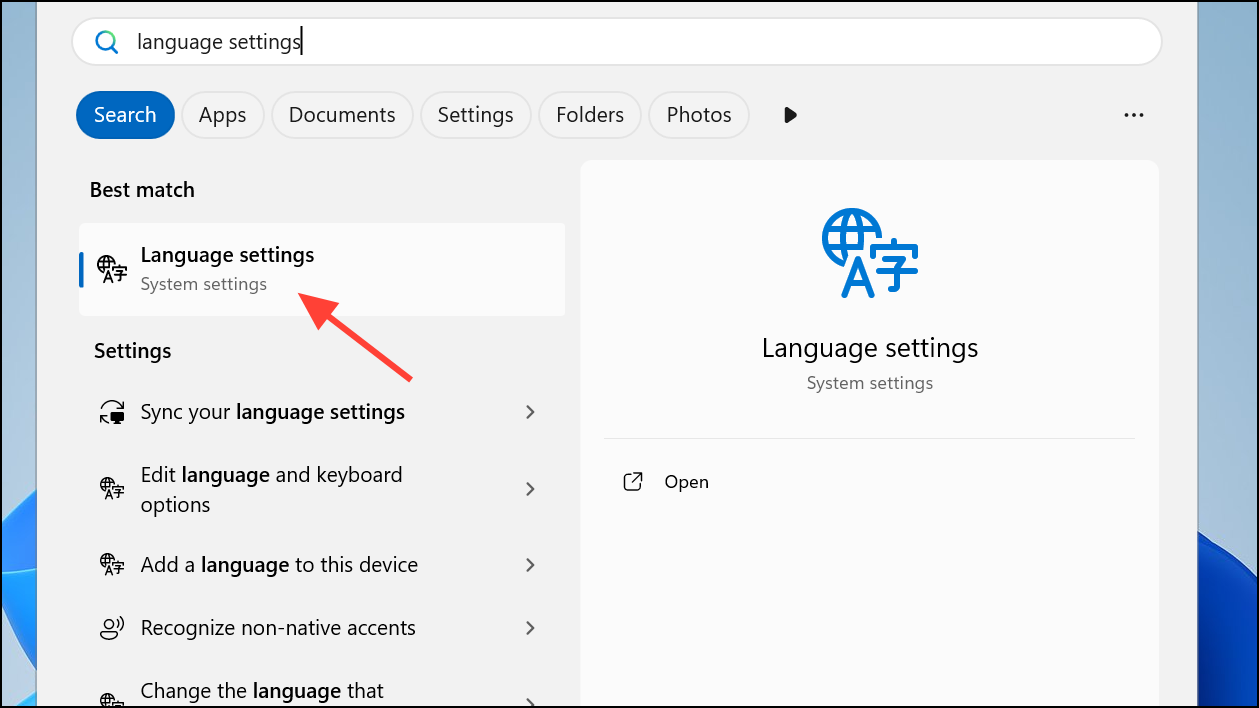
Step 1: Open the Start menu, type “language settings,” and select the result.
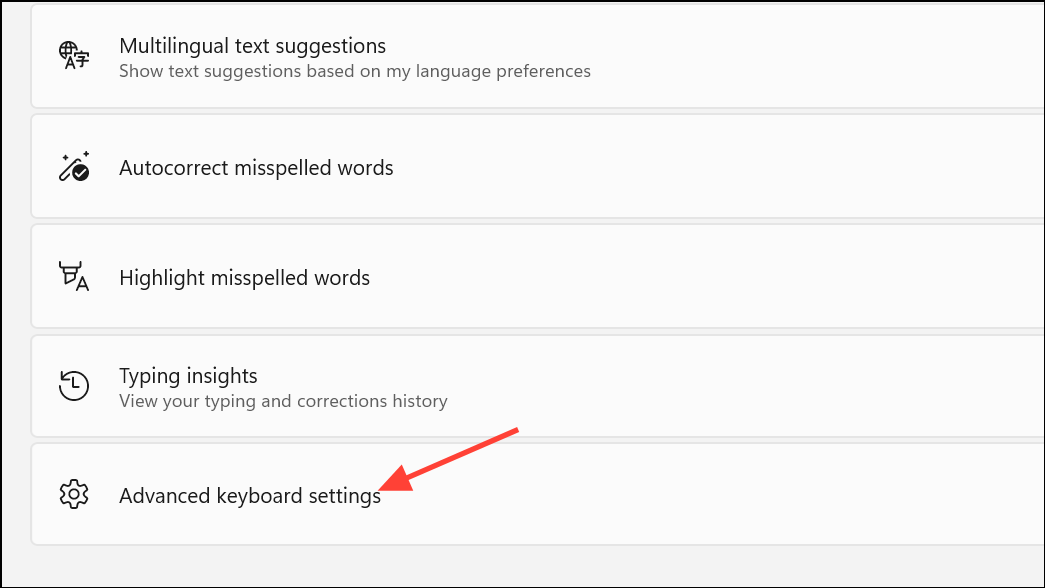
Step 2: Scroll down to “Typing,” then click “Advanced keyboard settings.”
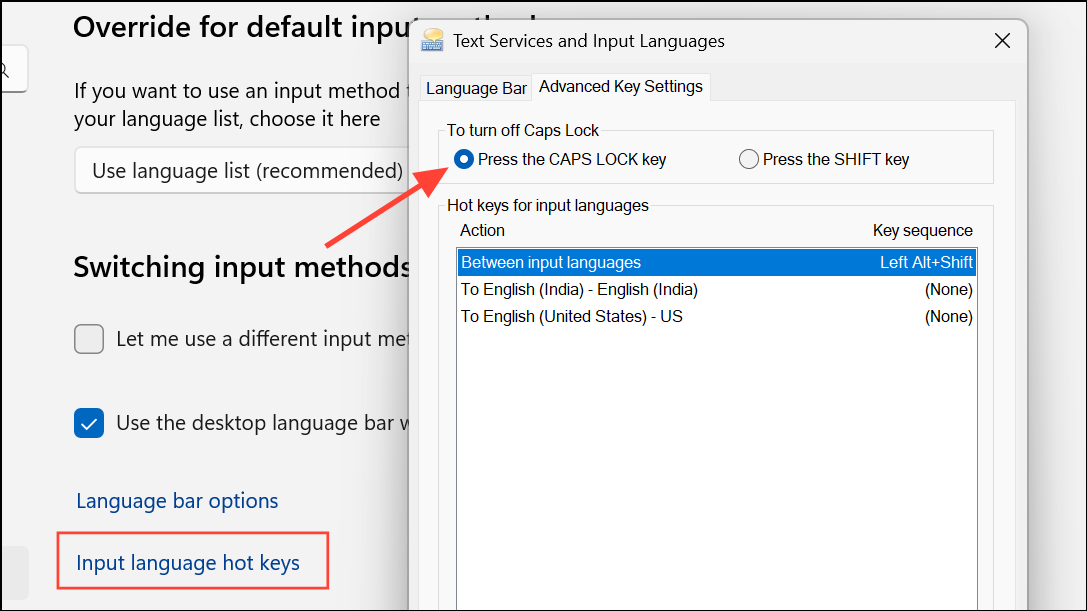
Step 3: Click “Input language hotkeys,” then in the new window, select “Advanced Key Settings.” Make sure “Press the CAPS LOCK key” is set for turning off Caps Lock, not “Press the SHIFT key.” Click "OK" to confirm.
Ensuring the correct setting here prevents confusion between Shift and Caps Lock functionality.
Repair or Restart Microsoft Word and Windows
Occasionally, restarting Word or Windows temporarily resolves the issue, especially if the problem is software-related or isolated to a single session. If the issue recurs, repairing your Office installation may help.
Step 1: Save your work and restart your computer. This simple step can reset temporary glitches affecting keyboard input.
Step 2: If restarting does not resolve the issue, repair your Office programs. Go to Control Panel > Programs > Programs and Features.
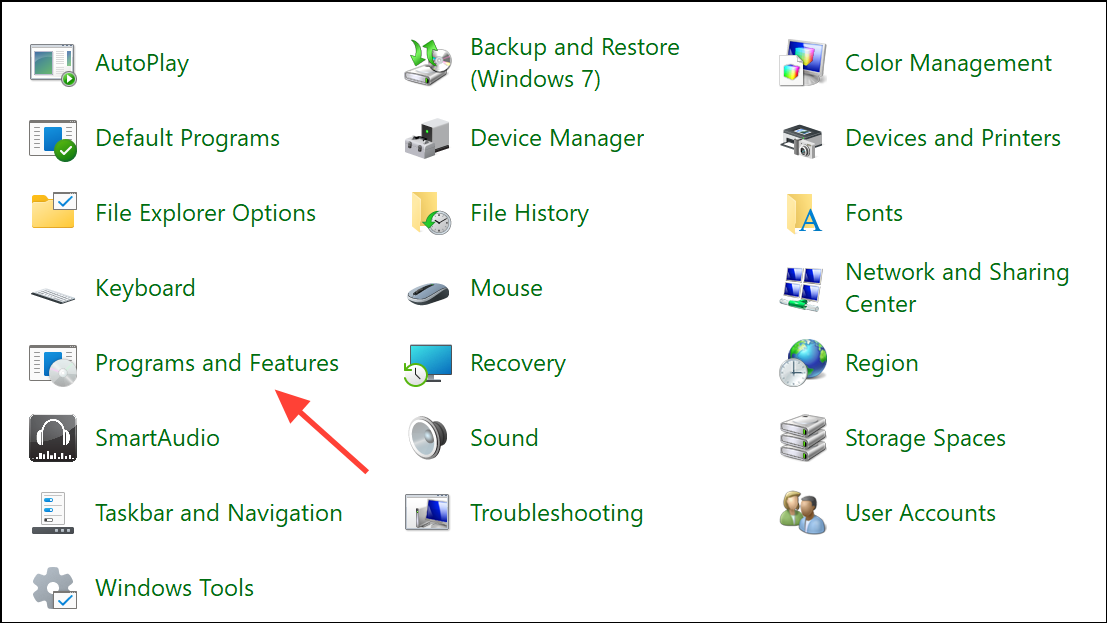
Step 3: Select Microsoft Office, then click “Change” and choose “Repair.” Follow the on-screen prompts to complete the repair process.

Repairing Office can fix underlying software issues that cause persistent formatting or keyboard problems.
Resolving the all caps issue in Word involves checking formatting, keyboard shortcuts, accessibility settings, and system preferences. Applying these steps restores normal typing and streamlines your document editing experience.