How to Fix Network Connection Issues in Windows 11
The ultimate guide to fixing any and all network connection issues on your Windows 11 computer with perfectly outlined steps.
The ultimate guide to fixing any and all network connection issues on your Windows 11 computer with perfectly outlined steps.
by Parth Sawhney
In the modern era, having a stable internet connection on your Windows 11 computer is essential for work, communication, and entertainment. Facing network connectivity issues can be incredibly frustrating. Fortunately, there are several solutions you can try to resolve these problems.
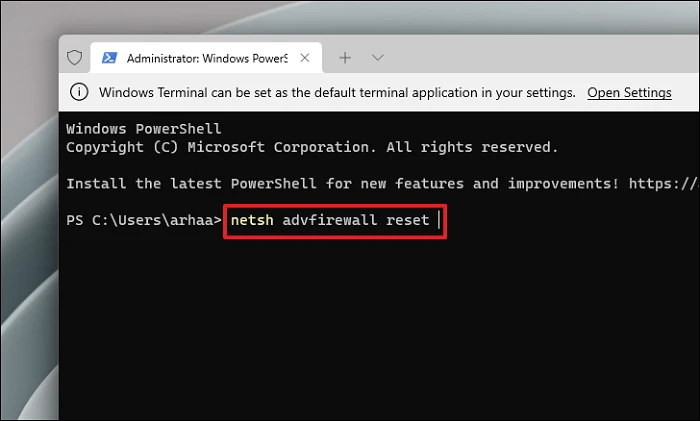
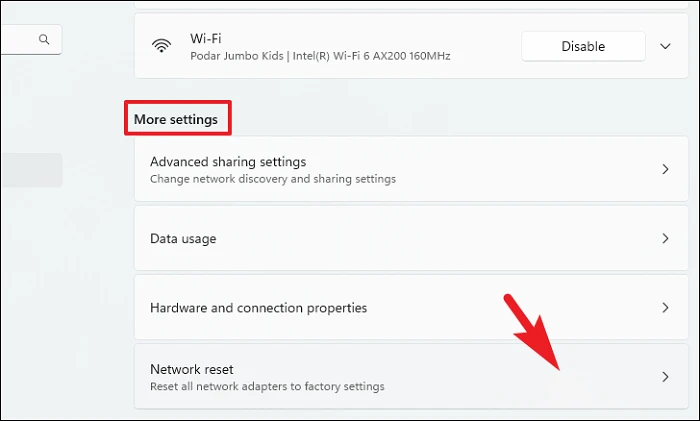
Reset Network Components
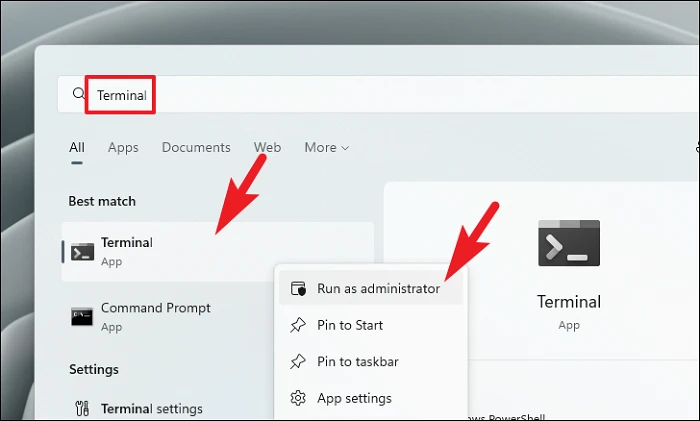
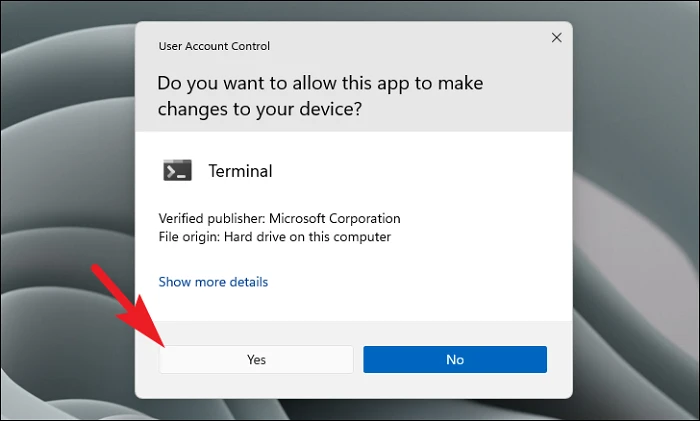
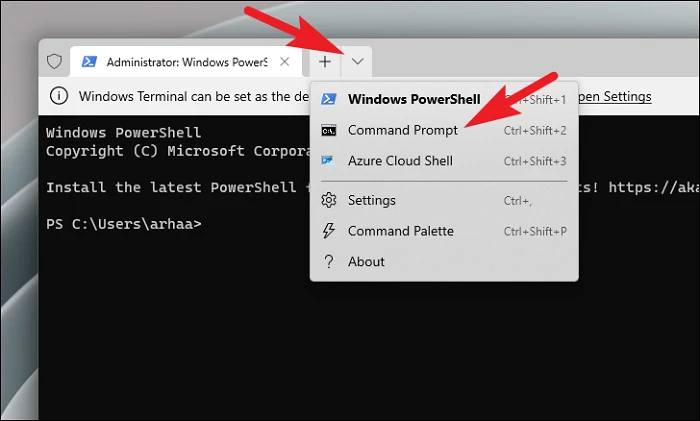
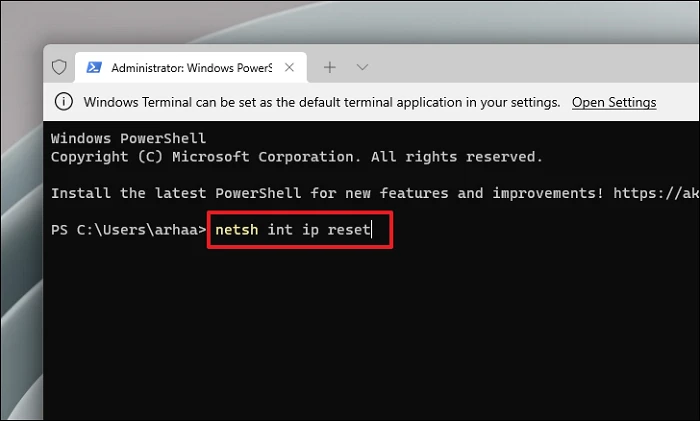
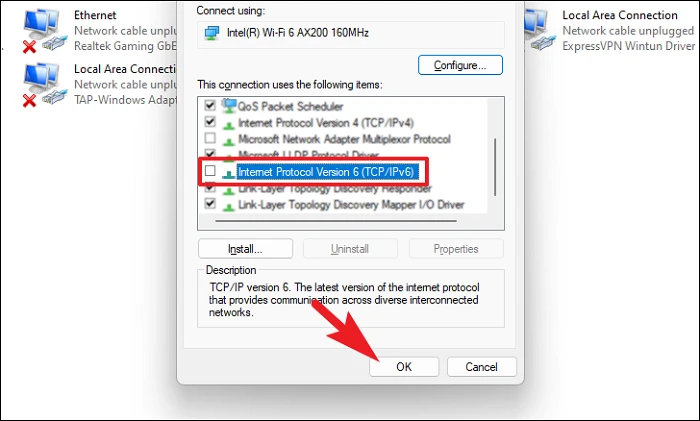
One effective way to tackle network connection issues is by resetting your network components. This action resets configurations like firewall settings, TCP/IP settings, and flushes DNS, which can eliminate any improper settings causing the problem.
Run the following commands one by one, pressing Enter after each, to reset the firewall settings, reset the Winsock catalog, flush the DNS, release and renew your IP configuration:
After executing all the commands, restart your computer and check if the network connection issue is resolved.
Restart Your Router
Sometimes, the issue might not be with your computer but with your router. Restarting your router can help resolve temporary glitches or connectivity problems on the network side.
Locate the power button on your router, usually found at the back near the LAN ports. Press the button to turn off the router. If you cannot find the button, you can unplug the router from the power source.
Once the router has restarted, try connecting to the internet again on your computer.
Note: If the Internet LED on your router is off or showing a different color, your Internet Service Provider (ISP) might be experiencing an outage. Consider contacting your ISP to confirm.
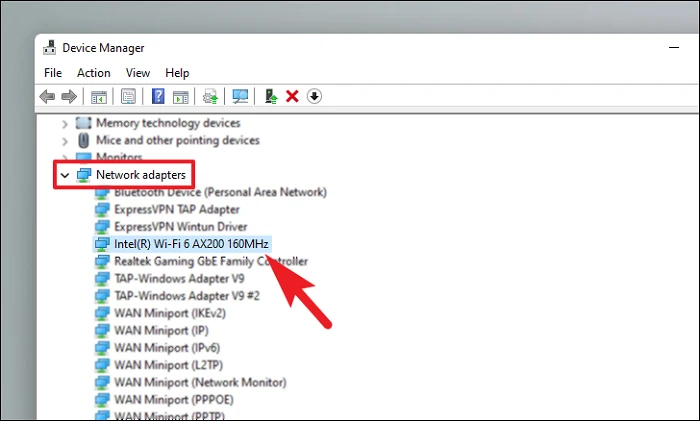
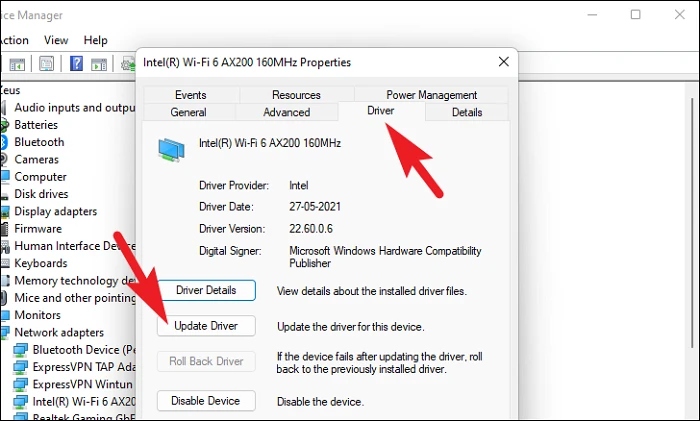
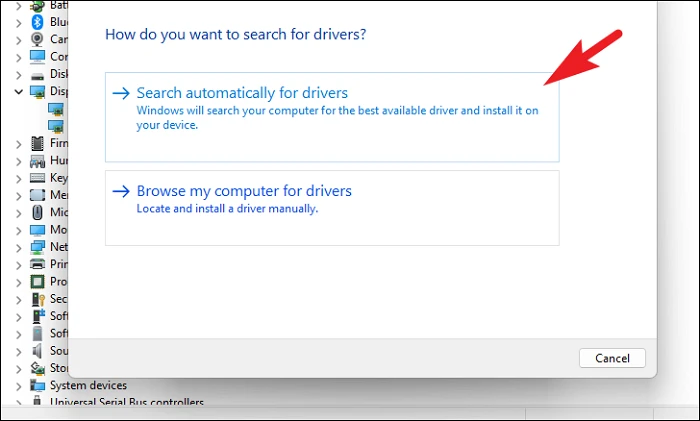
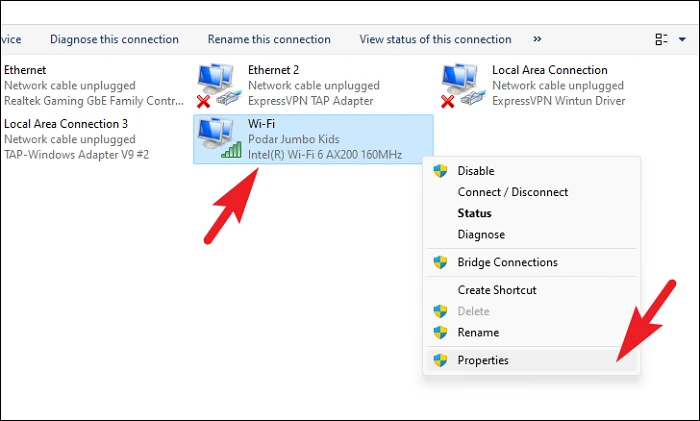
Reinstall Network Adapters
If resetting network components didn’t work, reinstalling all network adapters can help. This process removes and reinstalls your network hardware drivers, which can fix any underlying issues.
After installing updates, restart your computer and check your network connection.
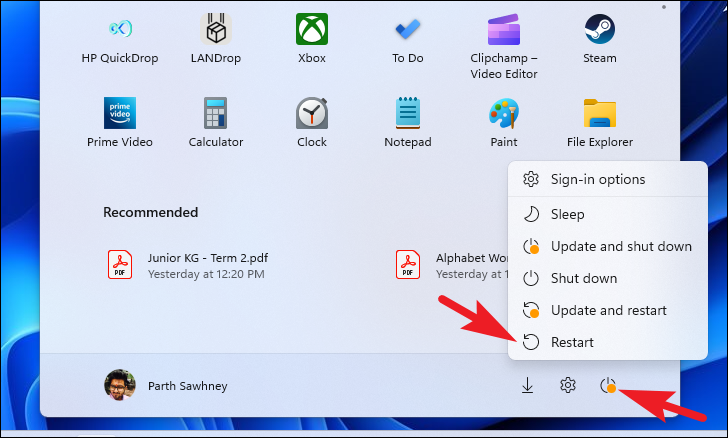
Restart Your Computer
It might sound simple, but restarting your computer can resolve many temporary glitches and conflicts that might be affecting your network connectivity.
Check if your network connection has been restored.
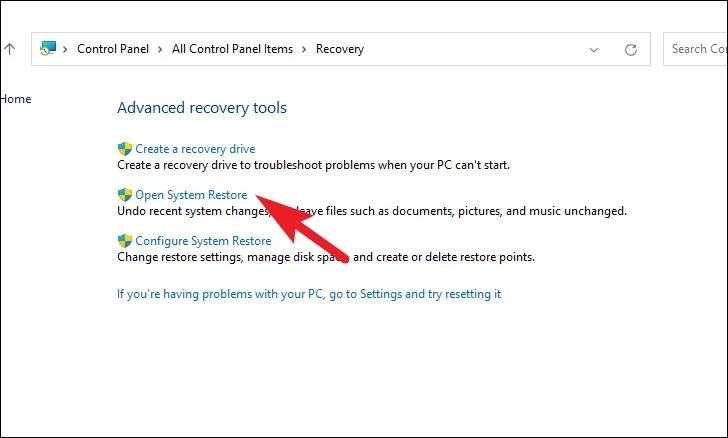
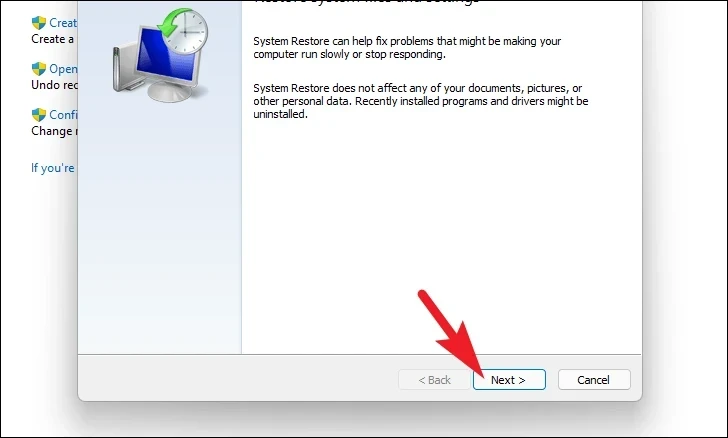
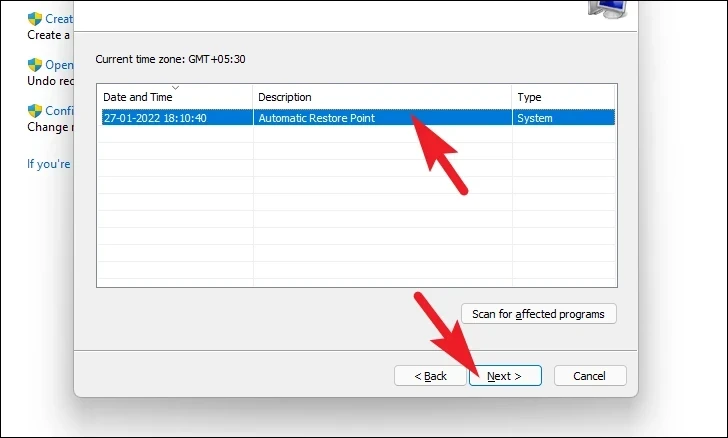
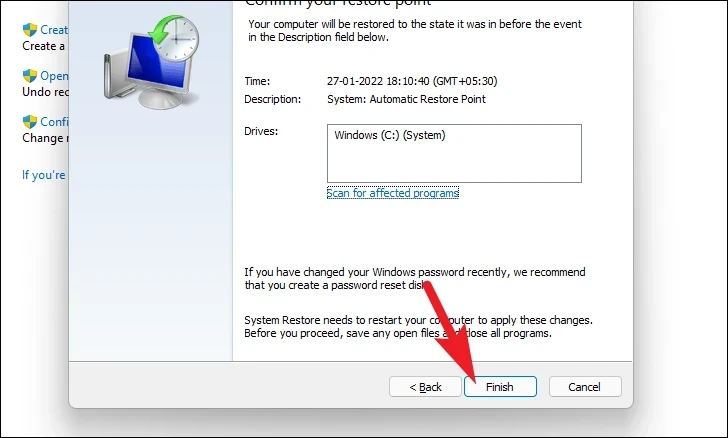
Roll Back to a System Restore Point
If all else fails, you can try rolling back your system to a previous restore point before the network issues began. This can undo recent changes that might be causing the problem.