How to Fix “No Internet, Secured” WiFi Error in Windows 11
6 ways to fix No Internet issue on WiFi on your Windows 11 PC.
6 ways to fix No Internet issue on WiFi on your Windows 11 PC.
by Parth Sawhney
Experiencing the ‘No Internet, Secured’ error in Windows 11 can be perplexing. This message appears when your device connects to a WiFi network but cannot access the internet. Various factors, such as network misconfigurations or outdated drivers, can cause this issue. Thankfully, several solutions can help you restore your internet connection.
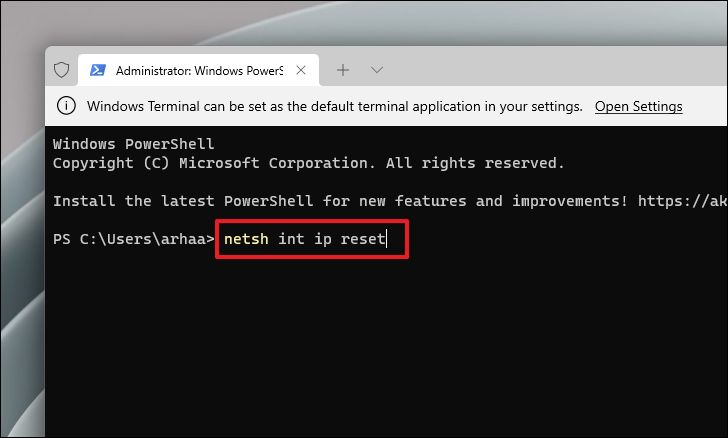
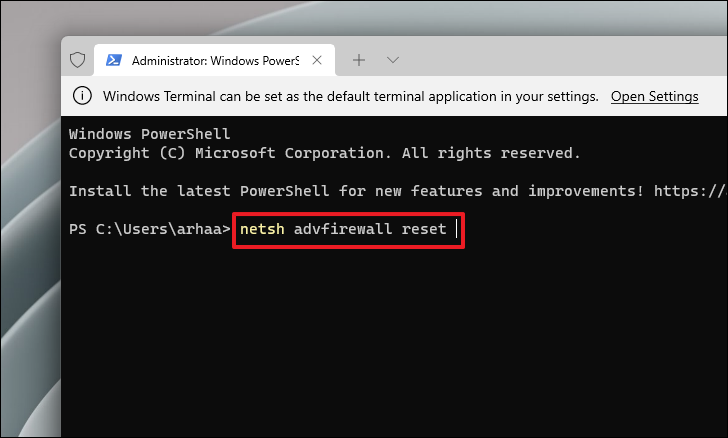
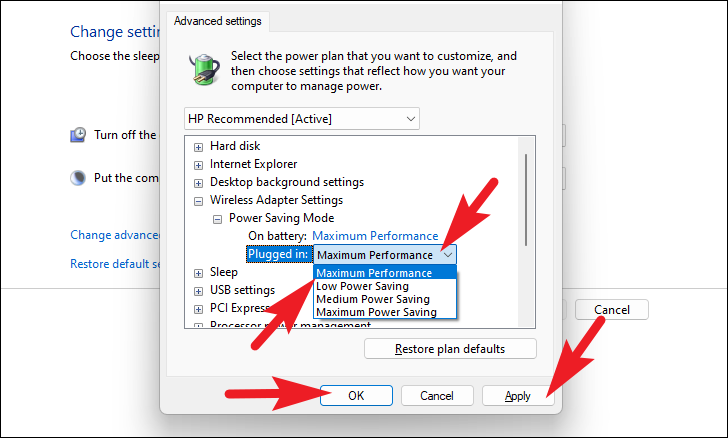
Method 1: Reset TCP/IP, Firewall Settings, and More Using the Command Prompt
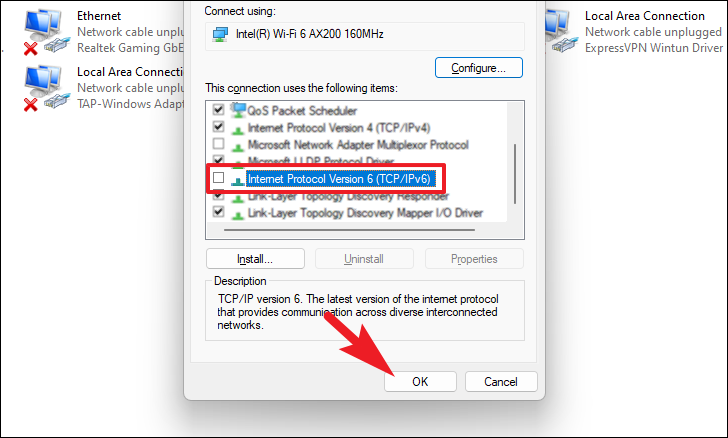
Resetting network components like TCP/IP settings, DNS configurations, and firewall settings can resolve connectivity issues.
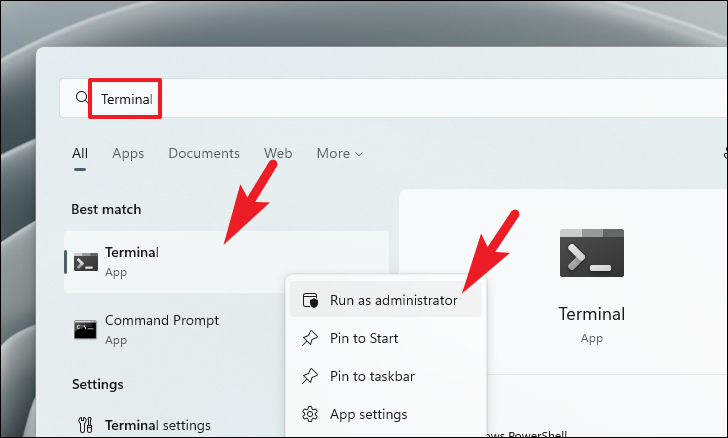
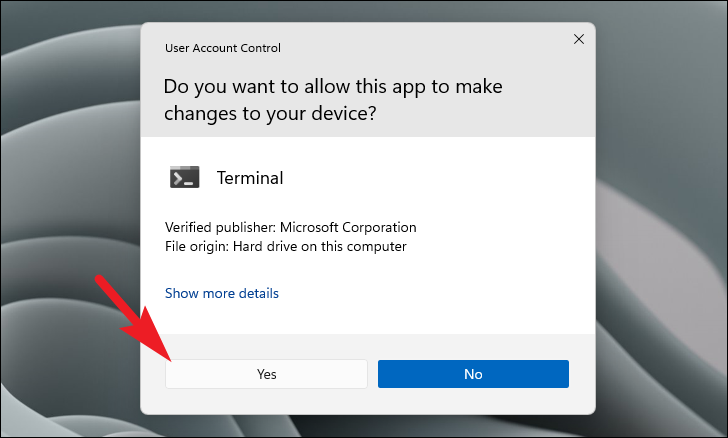
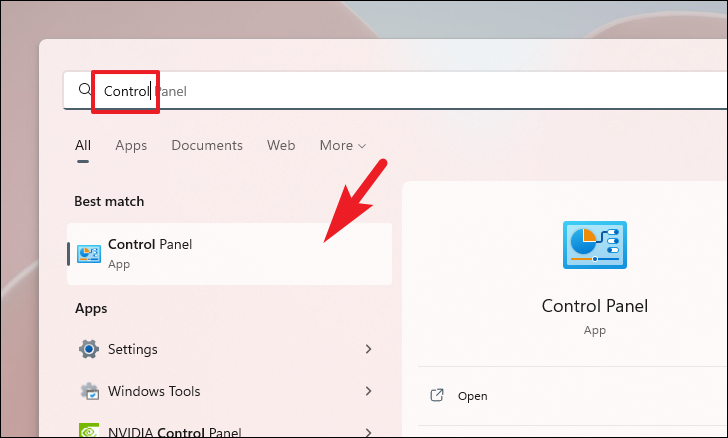
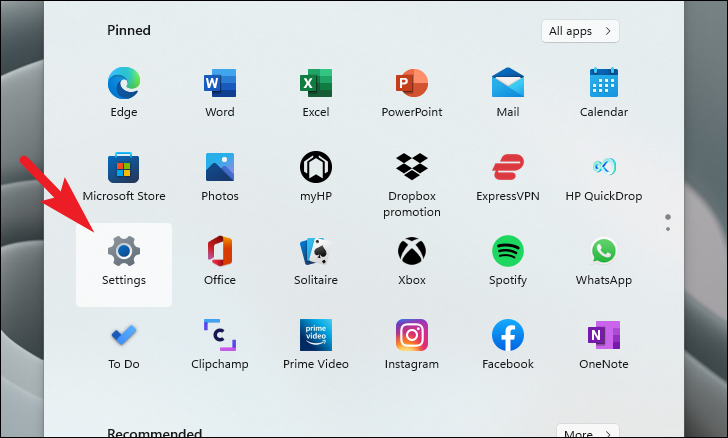
Open the Start Menu and type Terminal in the search bar. Right-click on the ‘Terminal’ app and select ‘Run as administrator’. This action will prompt a User Account Control (UAC) window.
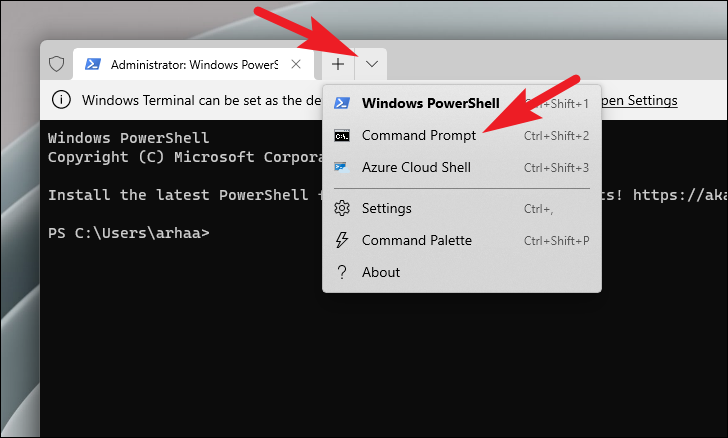
In the Terminal window, click the downward arrow (chevron) on the tab bar and select ‘Command Prompt’ to open a new Command Prompt tab. Alternatively, press Ctrl+Shift+2 on your keyboard.
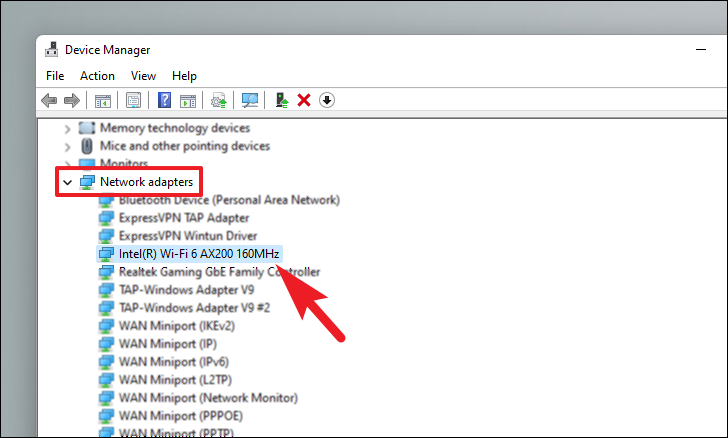
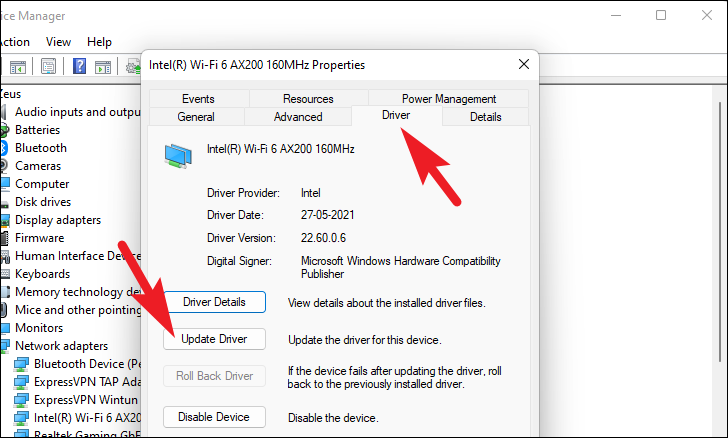
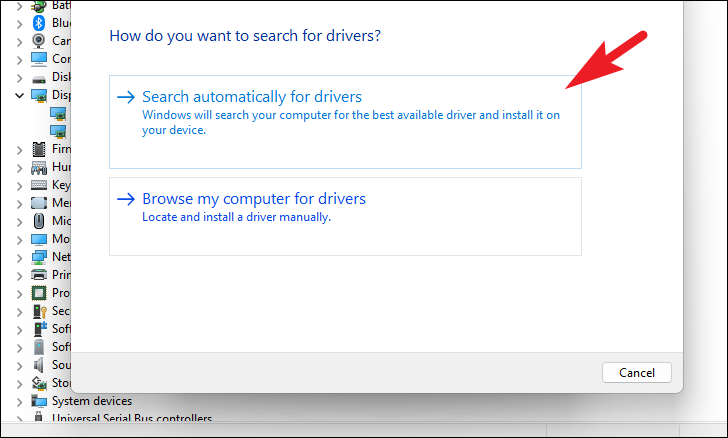
If Windows doesn’t find an update, you can download the latest driver from the manufacturer’s website. If you have the driver file, select ‘Browse my computer for drivers’ and navigate to it.
After updating, restart your computer and see if the error persists.
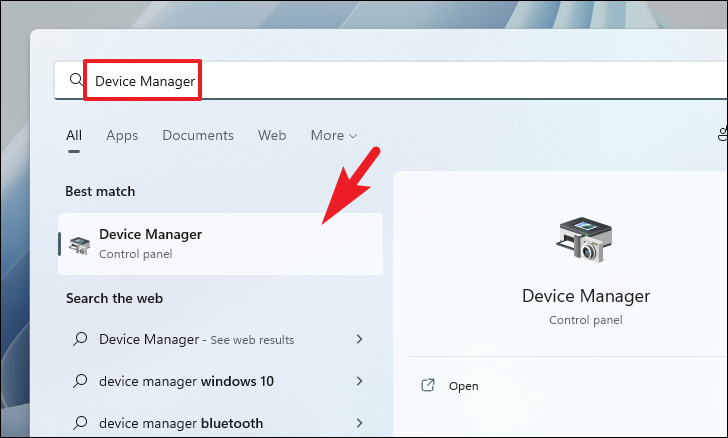
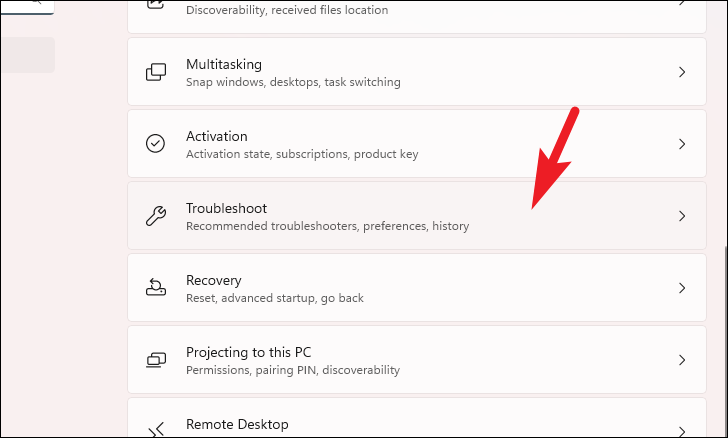
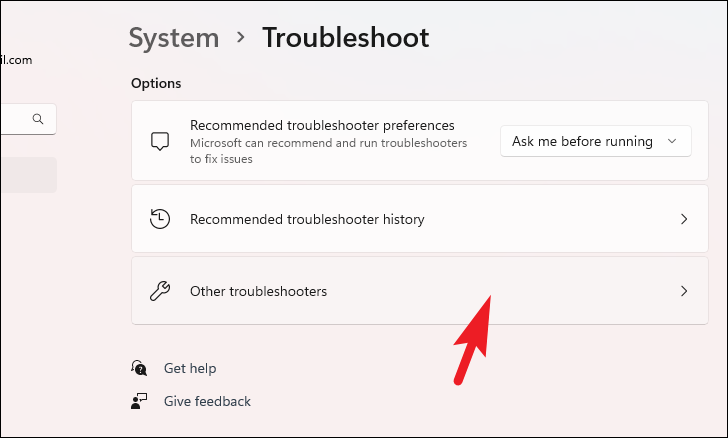
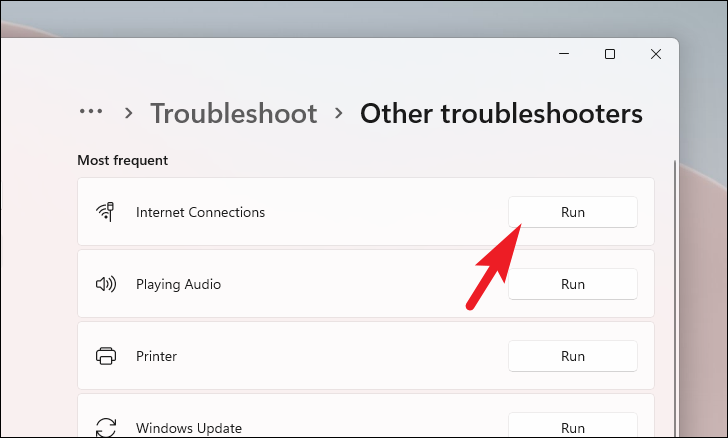
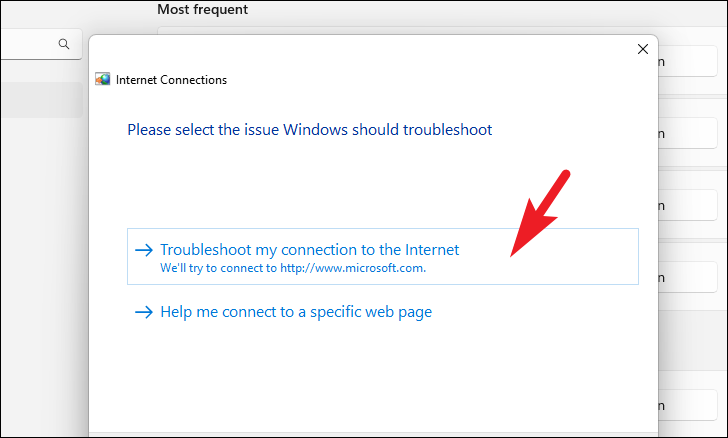
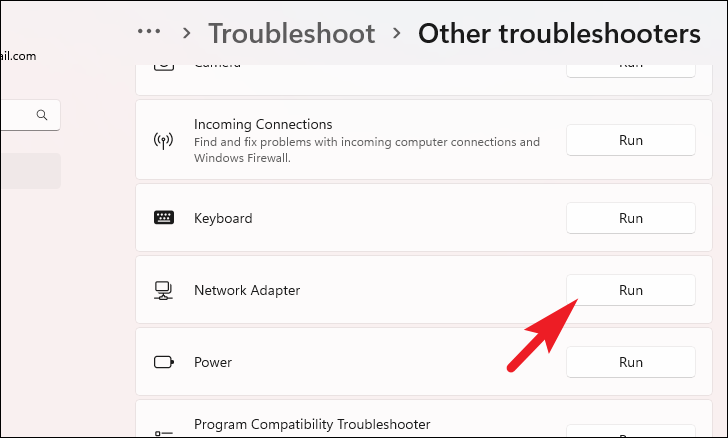
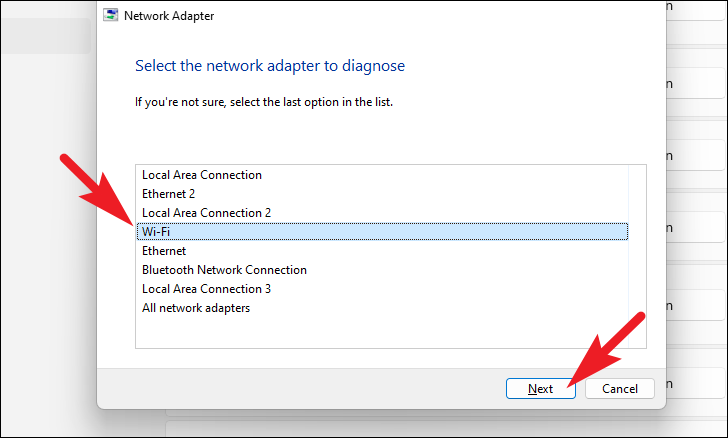
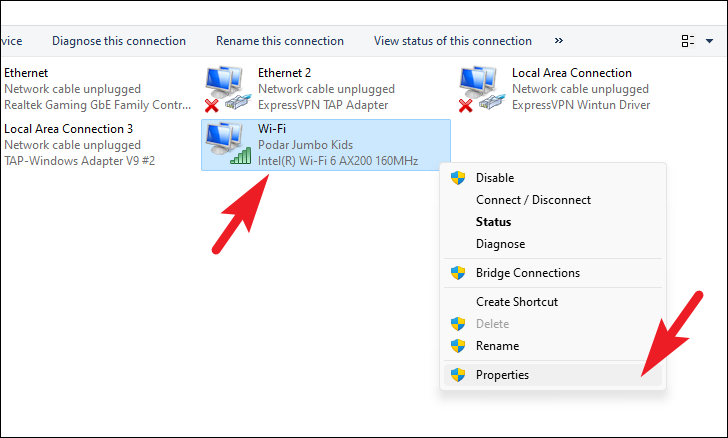
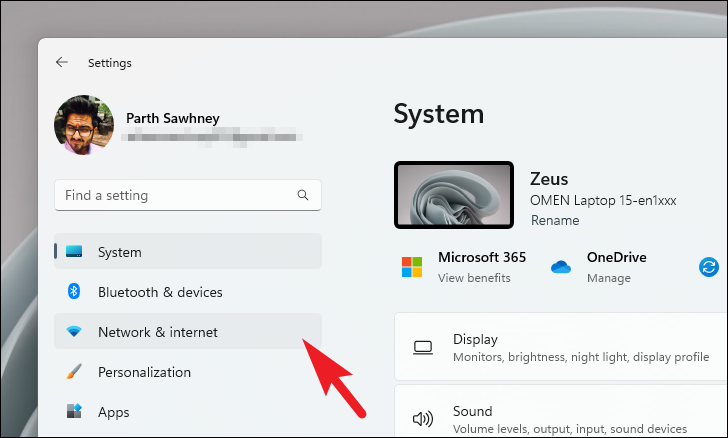
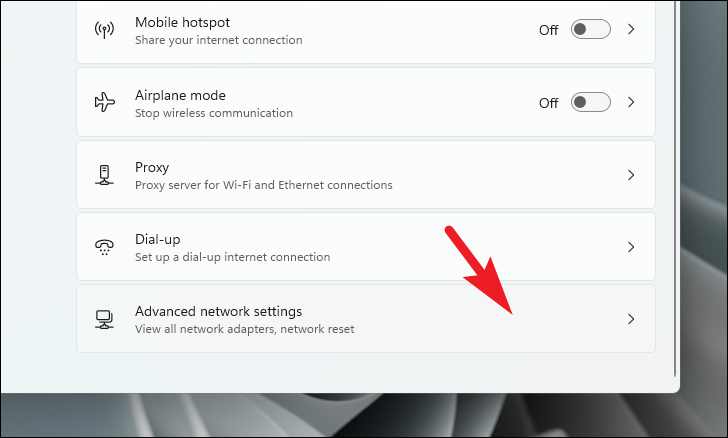
Method 3: Run Internet Connections and Network Adapter Troubleshooter
Windows 11 has built-in troubleshooters that can automatically detect and fix network issues.
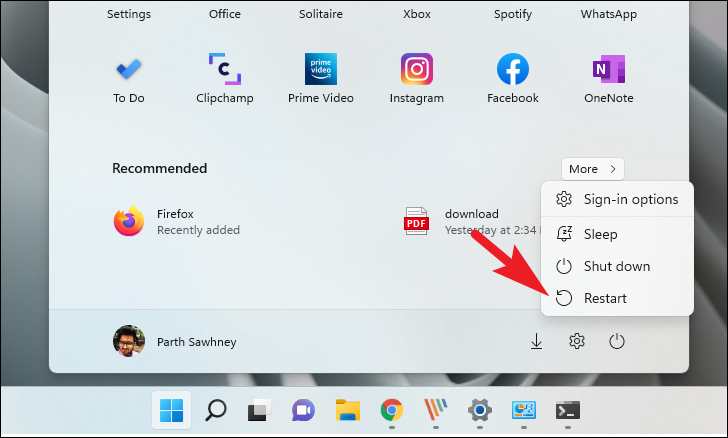
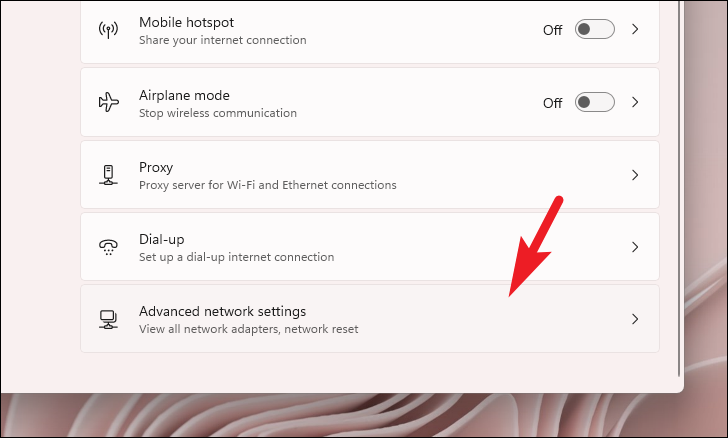
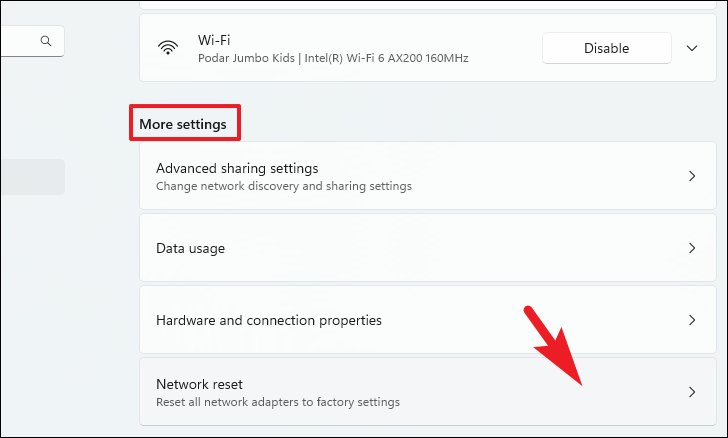
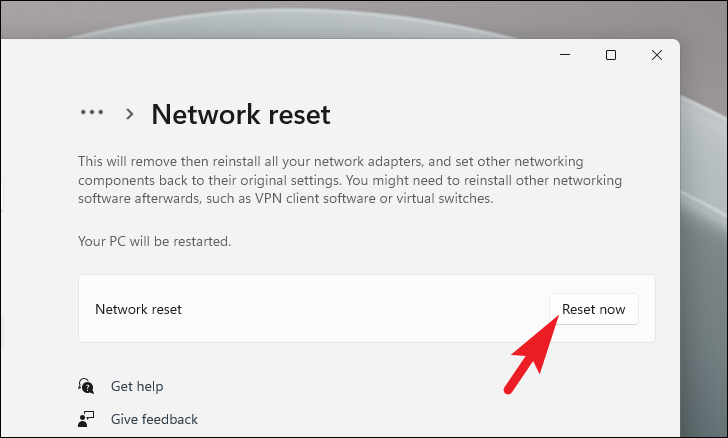
Click ‘Reset now’ to start the process. Your PC will restart automatically.
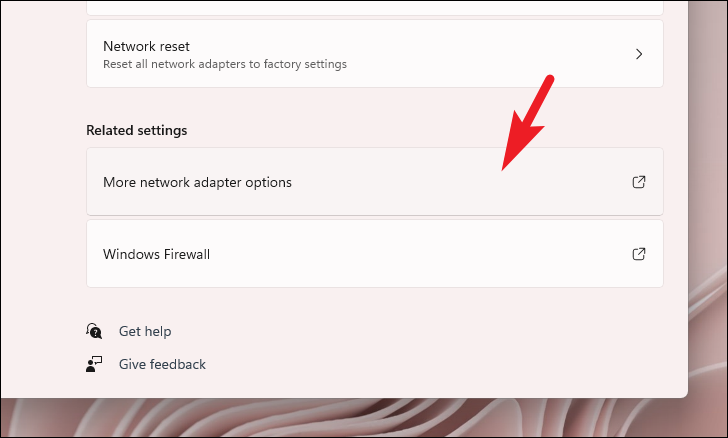
Note: This action will uninstall and reinstall all your network adapters. It will also remove any VPN software or virtual switches installed on your system.
After restarting, reconnect to your WiFi network using your password.
By following these methods, you should be able to fix the ‘No Internet, Secured’ error in Windows 11 and regain access to the internet.