
Experiencing sluggish LAN speeds on Windows 11 can be incredibly frustrating, whether you’re streaming videos, gaming, or downloading files. Fortunately, several methods can help you troubleshoot and improve your LAN speed.
1. Change Speed and Duplex Settings
Incorrect Speed and Duplex settings can significantly limit your LAN speed. For instance, if your network supports 100 Mbps but the settings are configured to 10 Mbps, you’ll only achieve 10 Mbps speeds. Ensuring these settings match your network’s capabilities is essential.
To adjust the Speed and Duplex settings in Windows 11:
- Open the
Settingsapp by typingSettingsin the Windows search bar and selecting it.

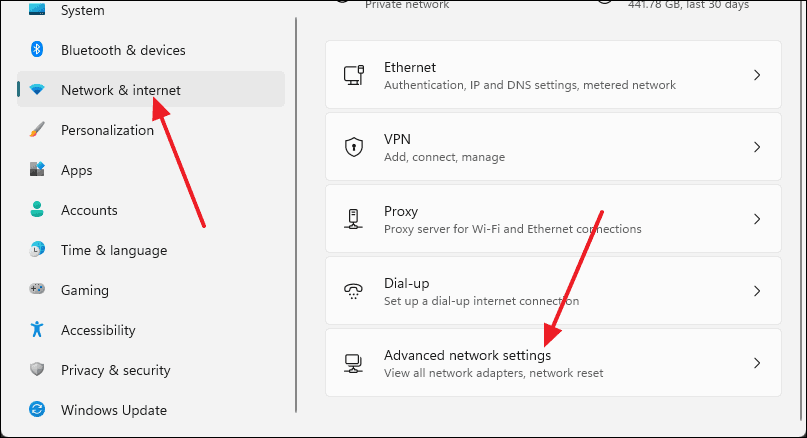
- In the Settings window, select Network & internet from the left pane, then click on Advanced network settings on the right.
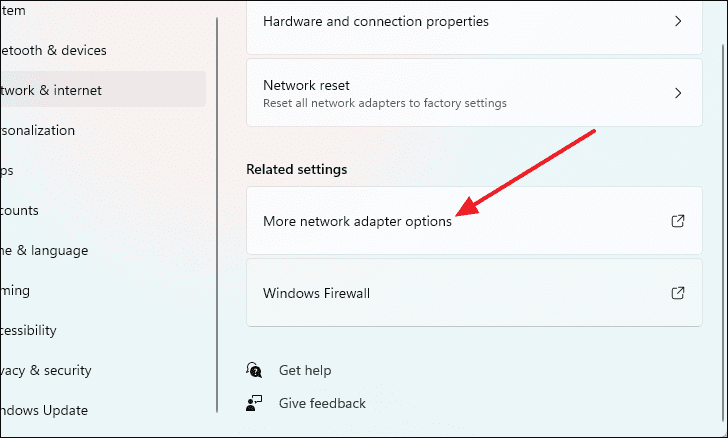
- Click on More network adapter options.
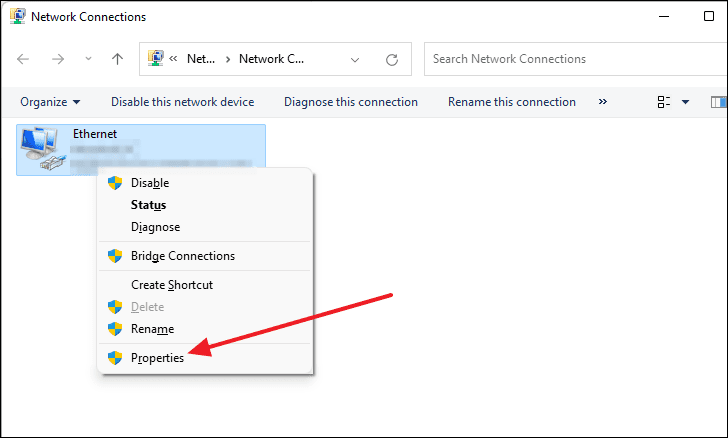
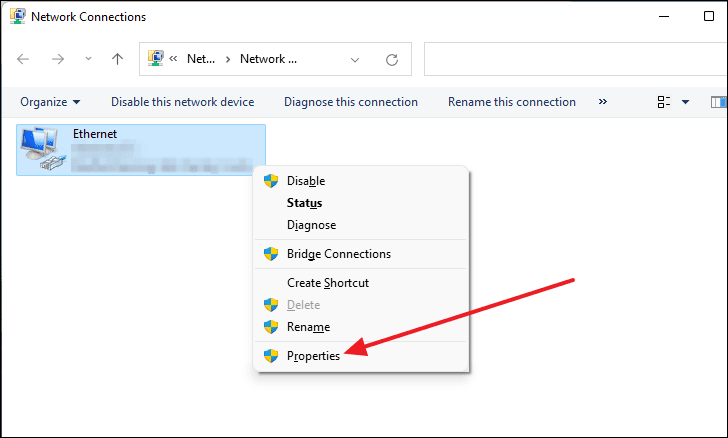
- In the Network Connections window, right-click on your Ethernet adapter and select Properties.
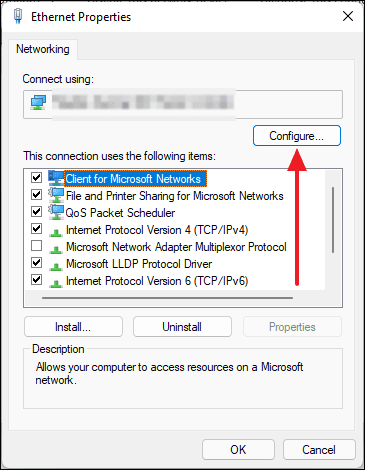
- Click on the Configure button under the adapter’s name.
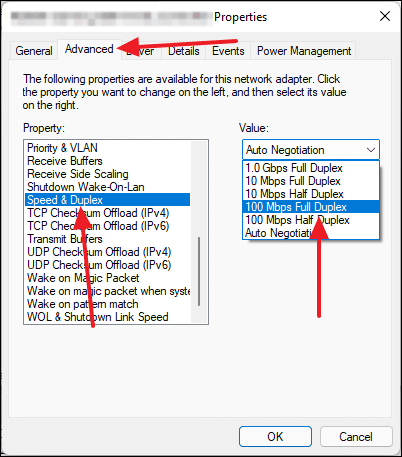
- In the Properties window, go to the Advanced tab.
- Select Speed & Duplex from the Property list.
- From the Value dropdown menu, choose 100 Mbps Full Duplex if your network speed is up to 100 Mbps. If your network supports higher speeds, select 1.0 Gbps Full Duplex.
- Click OK to save the changes.
2. Manually Update Network Driver Using Device Manager
Outdated network drivers can cause slow LAN speeds. Updating your network driver may resolve the issue. Here’s how to do it:
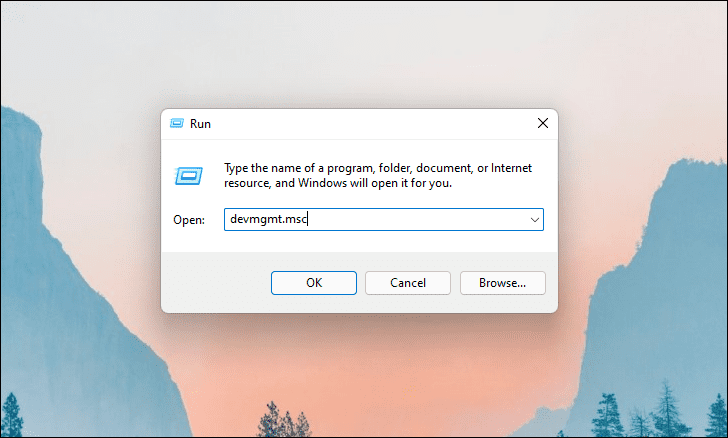
- Press
Windows+Rto open the Run dialog. - Type
devmgmt.mscand pressEnterto open Device Manager.
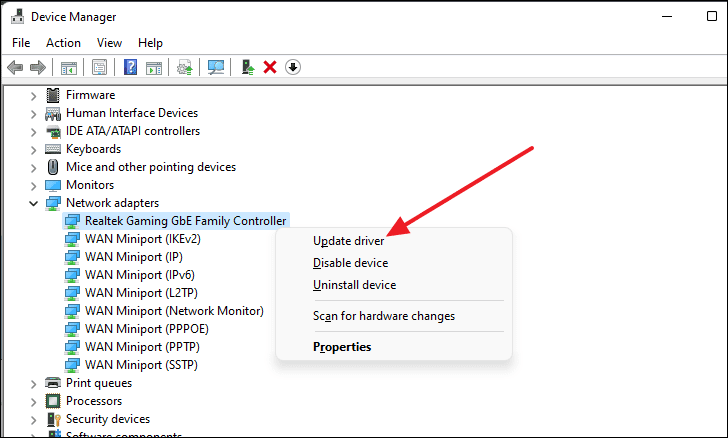
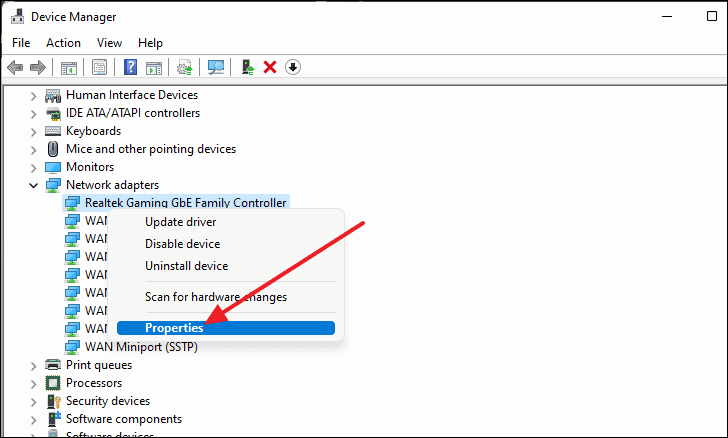
- In Device Manager, expand the Network adapters section.
- Right-click on your network adapter and select Update driver.
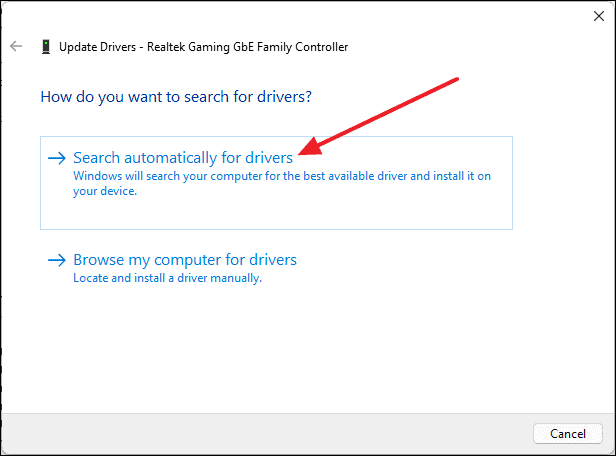
- Choose Search automatically for drivers. Windows will search for the latest driver and install it if available.
3. Disable Large Send Offload (LSO)
The Large Send Offload feature can sometimes cause network issues. Disabling LSO might improve your LAN speed:
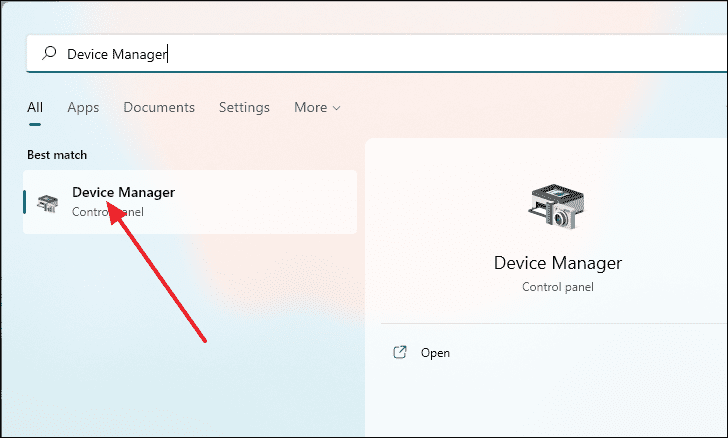
- Open
Device Managerby searching for it in the Windows search bar.
- Expand Network adapters, then right-click on your network adapter and select Properties.
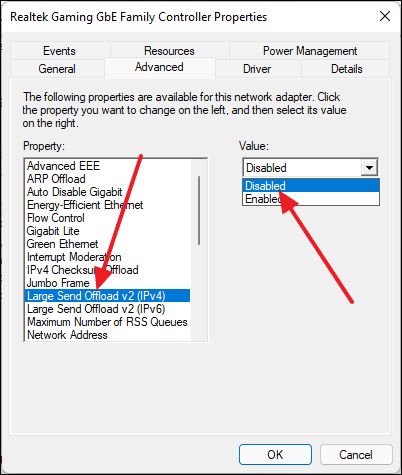
- Go to the Advanced tab.
- Select Large Send Offload v2 (IPv4) from the Property list.
- Set the Value to Disabled.
- Click OK to apply the changes.
4. Turn Off IPv6 from Network Adapter Properties
Disabling IPv6 can sometimes resolve network speed issues:
- Open the
Settingsapp by pressingWindows+I. - Select Network & internet from the left pane, then click on Advanced network settings.
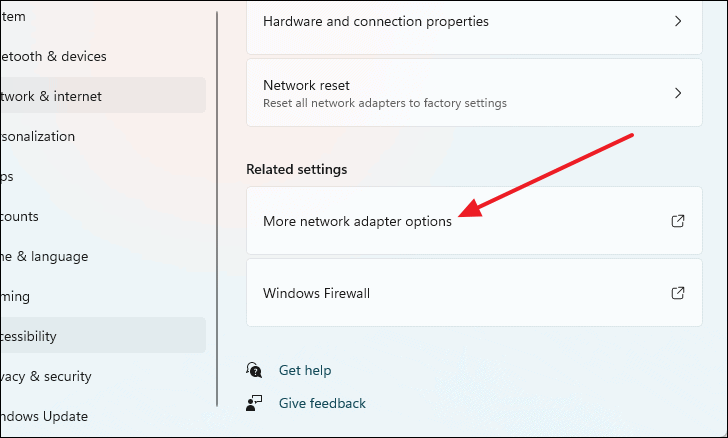
- Click on More network adapter options.
- Right-click on your network adapter and select Properties.
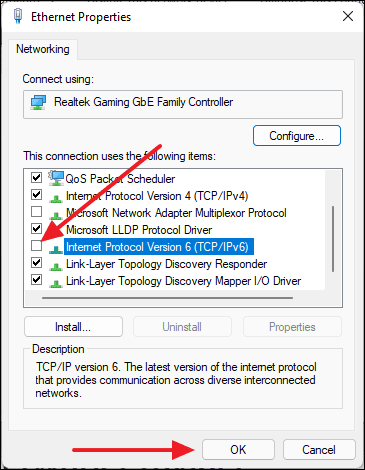
- Uncheck the box next to Internet Protocol Version 6 (TCP/IPv6).
- Click OK to save the changes.
5. Use a Different DNS
Switching to a different DNS provider like Google Public DNS can improve your network speed:
- Open the
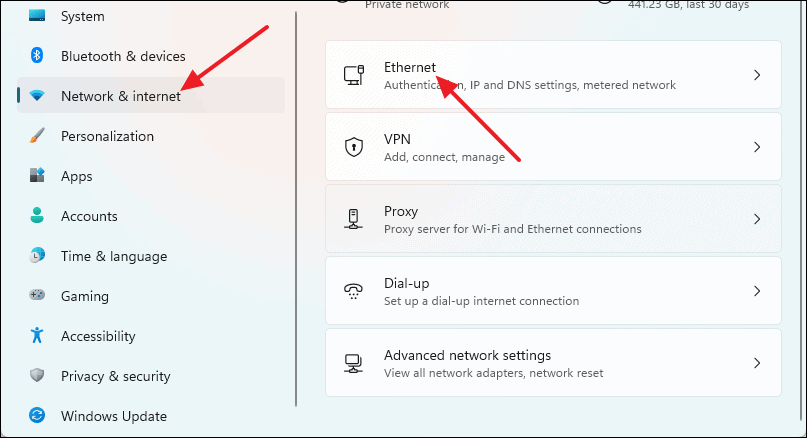
Settingsapp. - Select Network & internet from the left pane, then click on Ethernet.
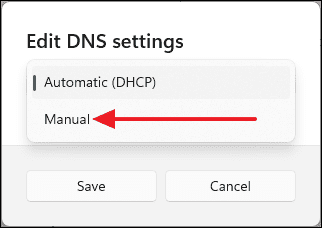
- Click the Edit button next to DNS server assignment.
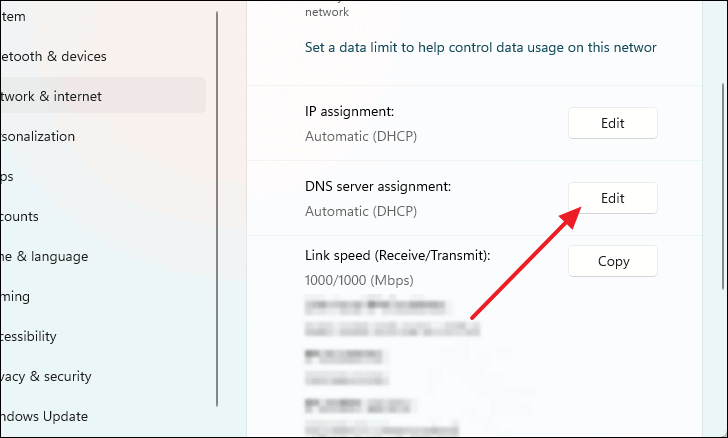
- Select Manual from the dropdown menu.
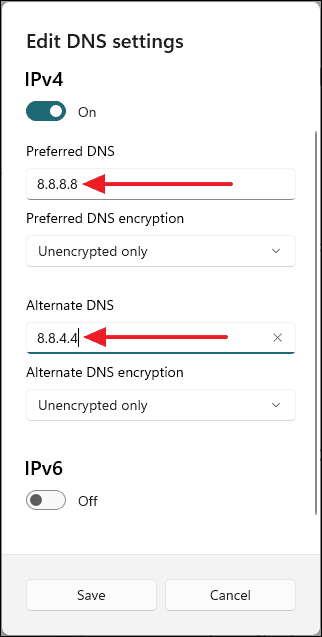
- Toggle IPv4 to On.
- Enter
8.8.8.8in Preferred DNS and8.8.4.4in Alternate DNS.
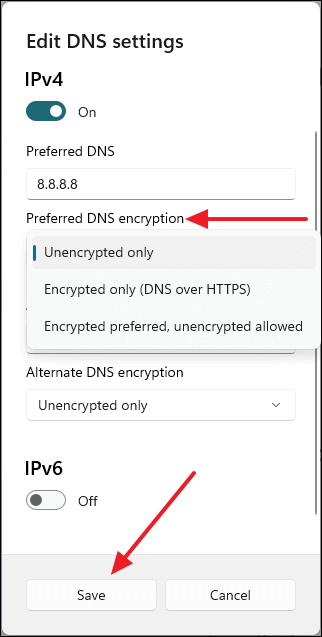
- Optionally, set Preferred DNS encryption to Encrypted only.
- Click Save to apply the settings.
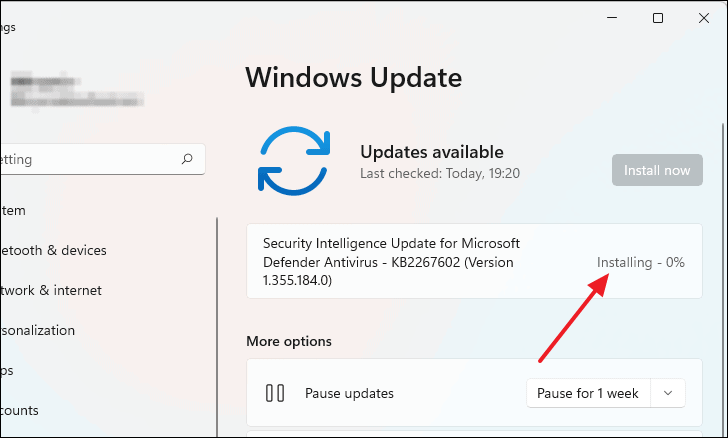
6. Check for Pending Windows Updates
Ensuring your system is up to date can resolve network issues:
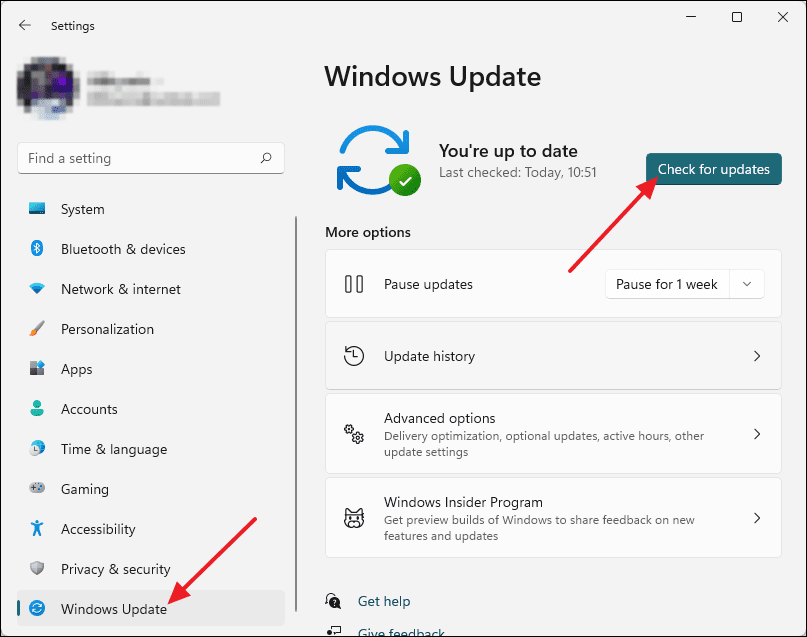
- Open the
Settingsapp. - Click on Windows Update from the left pane.
- Click on Check for updates.
- If updates are available, Windows will download and install them automatically.
- Restart your computer to complete the installation.
7. Disable Windows Update Service
Disabling the Windows Update service can free up bandwidth:
- Type
Servicesin the Windows search bar and open the Services app.
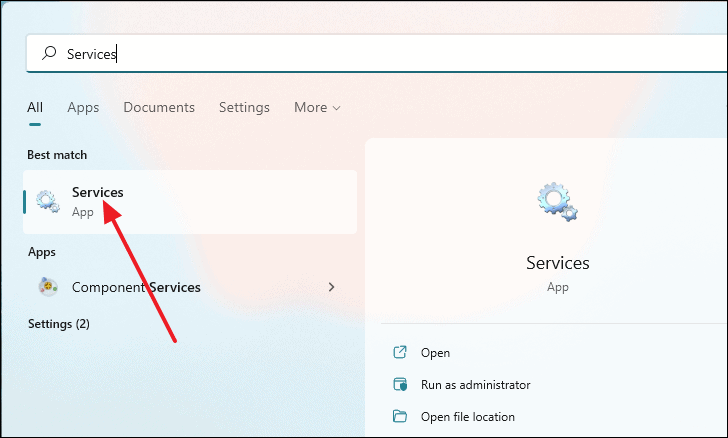
- Locate and double-click on Windows Update.
- Click Stop under Service status.
- Set Startup type to Disabled.
- Click OK to save changes.

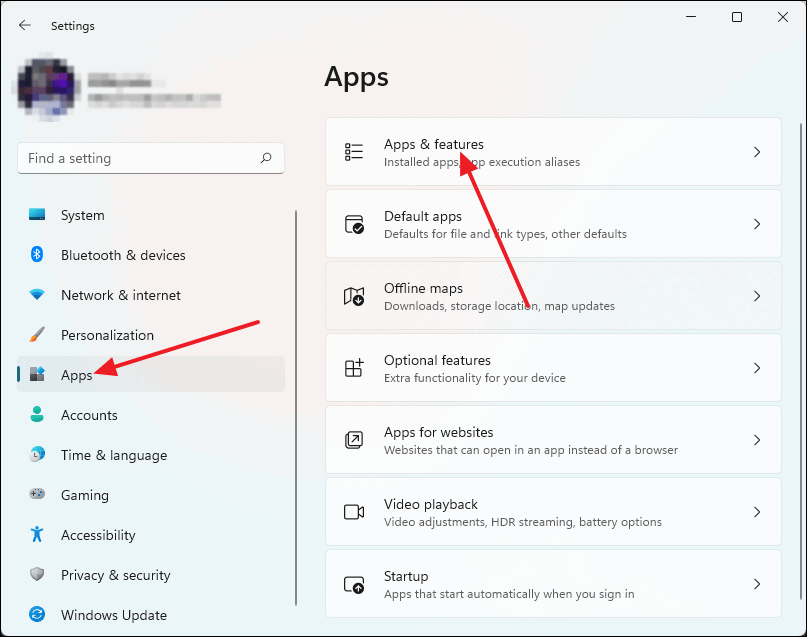
8. Uninstall VPN Client
VPN clients can slow down your connection. Uninstalling them can help:
- Open the
Settingsapp. - Select Apps from the left pane, then click on Apps & features.
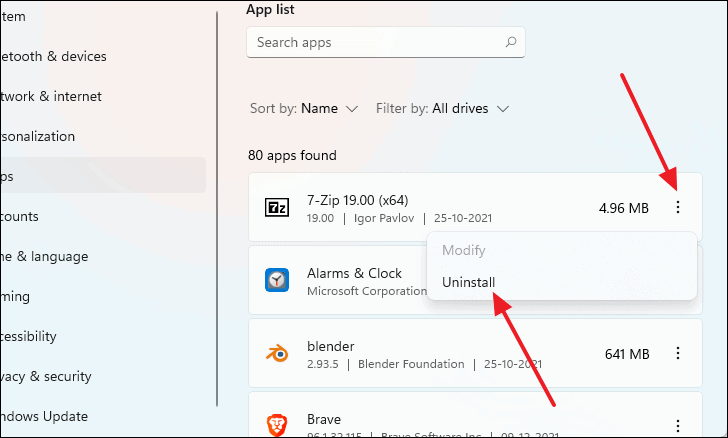
- Find your VPN client in the list.
- Click the three dots next to it and select Uninstall.
- Confirm by clicking Uninstall again.
Alternatively, you can uninstall it via Control Panel:
- Open Control Panel by searching for it.
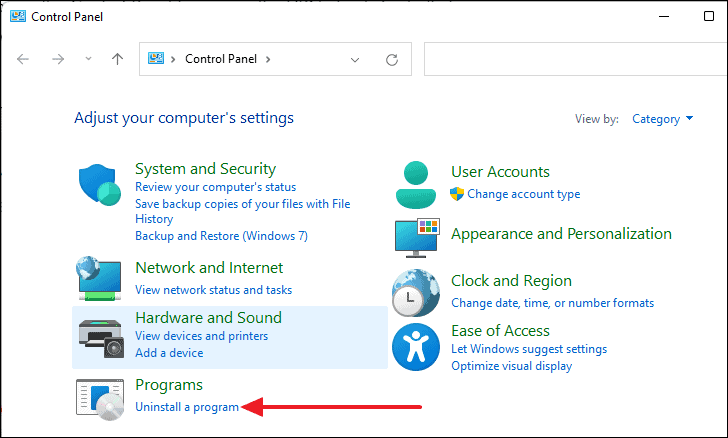
- Click on Uninstall a program under Programs.
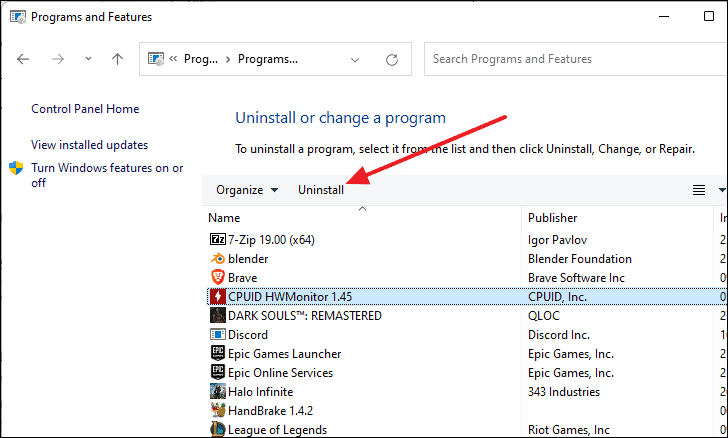
- Select your VPN client and click Uninstall on the toolbar.
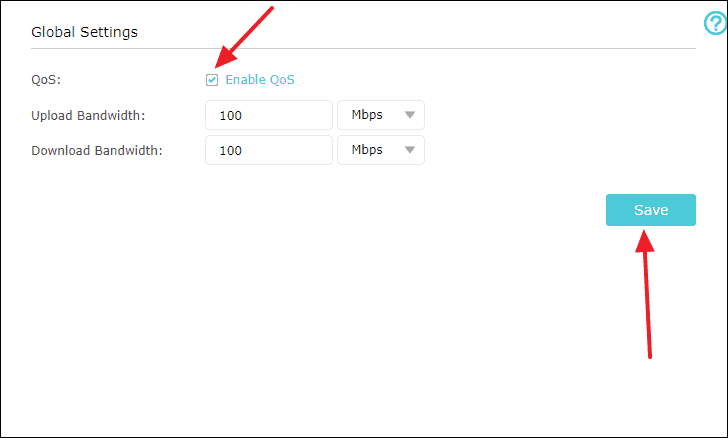
9. Turn On Quality of Service (QoS) on Your Router
Enabling QoS can prioritize network traffic and improve performance. Steps may vary by router model:
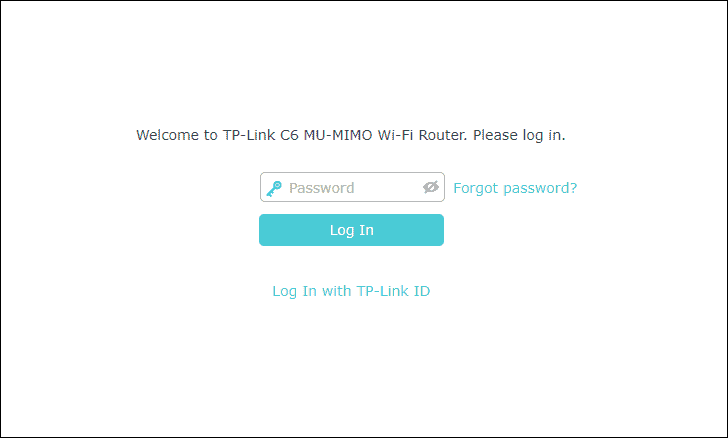
- Open a web browser and enter 192.168.0.1 in the address bar to access your router’s settings.
- Log in with your router credentials.
- Locate and select the QoS settings.

- Check the Enable QoS option.
- Set your Upload Bandwidth and Download Bandwidth according to your internet plan.
- Click Save to apply the changes.
10. Contact Your Network Provider
If none of the above methods resolve your slow LAN speed, the issue might be with your internet service provider. Contact them to report the problem and seek assistance.
By following these methods, you can troubleshoot and improve your LAN speed on Windows 11.


