
Dynamic Lock is a Windows feature that automatically locks your computer when you move away, using a paired Bluetooth device like your smartphone. However, many users encounter issues with this feature, especially those who use the Phone Link app. Let’s explore how to resolve the “Dynamic Lock Not Working” problem in Windows 11, starting with the most effective solution.
Resolving conflict with Phone Link app
There’s a known compatibility issue between Dynamic Lock and the Phone Link app (formerly Your Phone) in Windows 11. To address this:
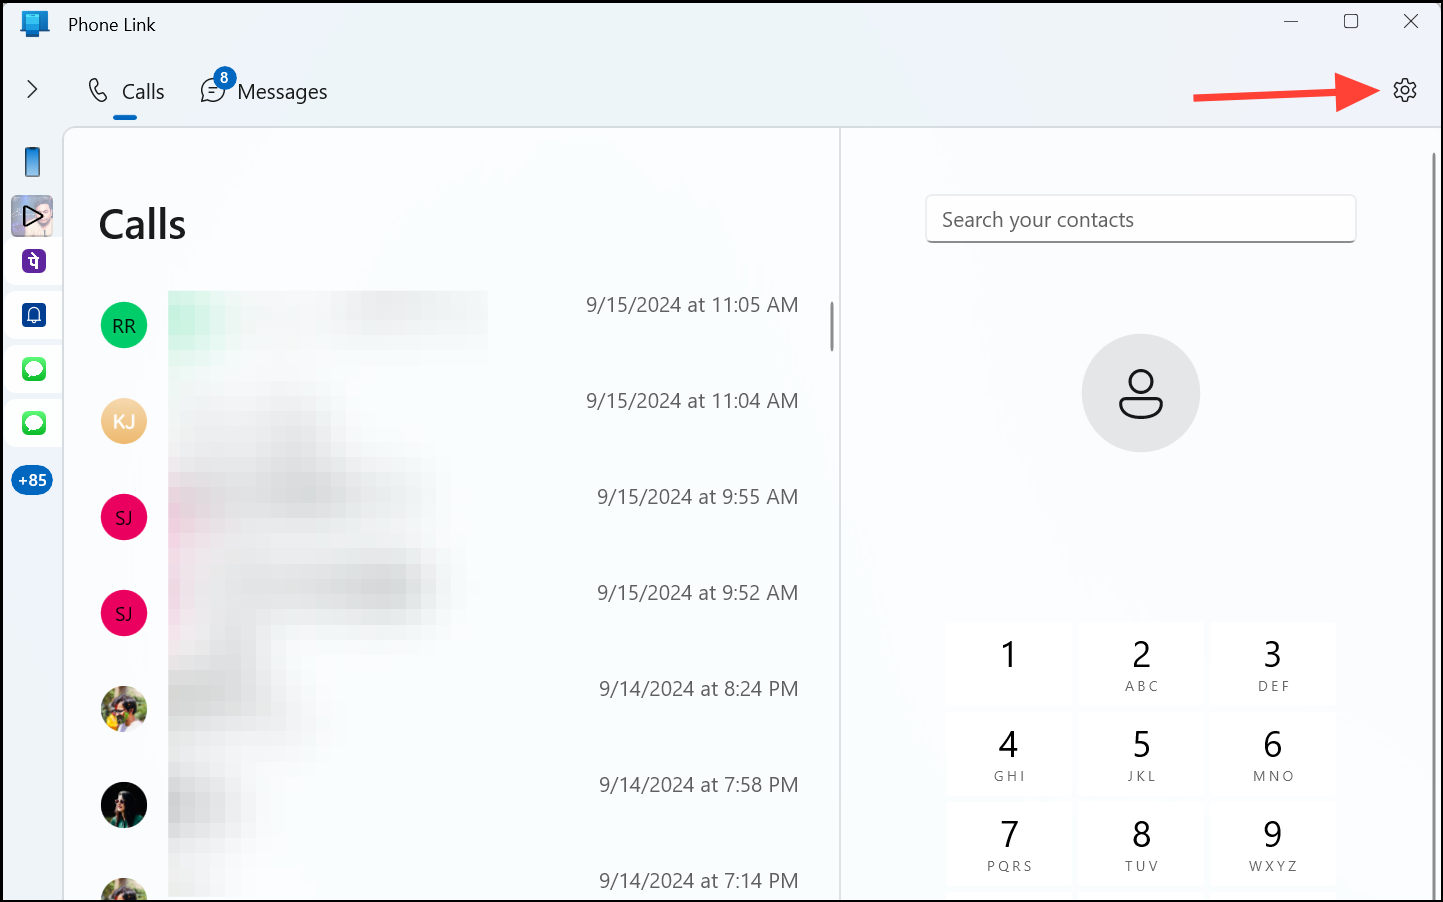
- Open the Phone Link app on your Windows 11 PC.
- Navigate to the app’s Settings.
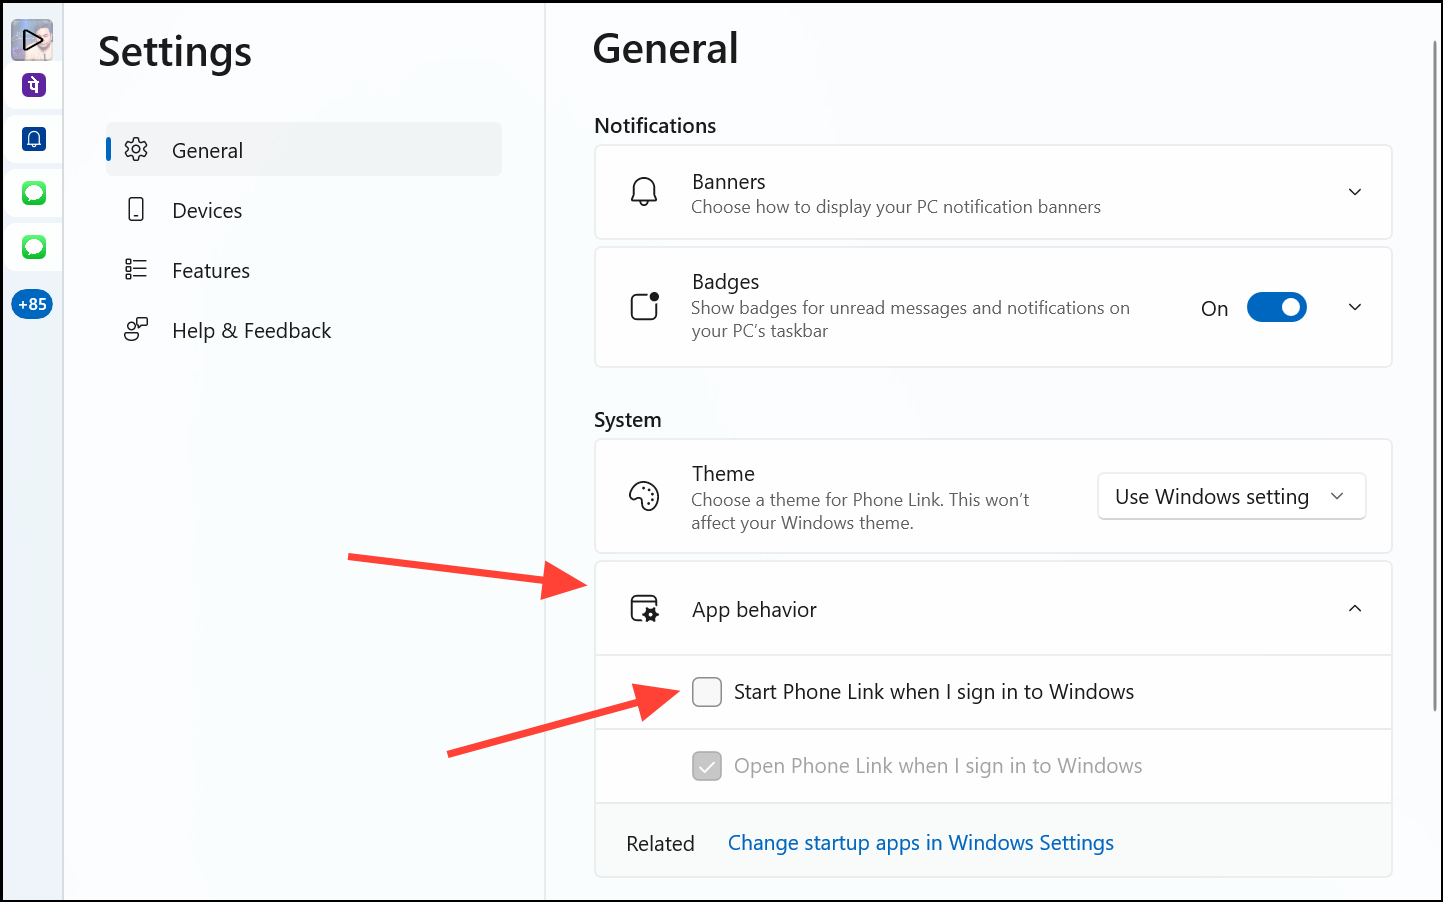
- Under ‘General’ settings, expand the ‘App behaviour’ options and disable the option ‘Start phone link when I sign in’.
- Restart your computer.
- Check if Dynamic Lock now functions correctly.
If this doesn’t solve the problem, you may need to choose between using Dynamic Lock or Phone Link until Microsoft addresses this bug. Remember to report this issue through the Feedback Hub (Windows key + F) to bring it to Microsoft’s attention.
Ensure Dynamic Lock is enabled
Verify that Dynamic Lock is actually turned on:
- Open the Start Menu and click on ‘Settings’.
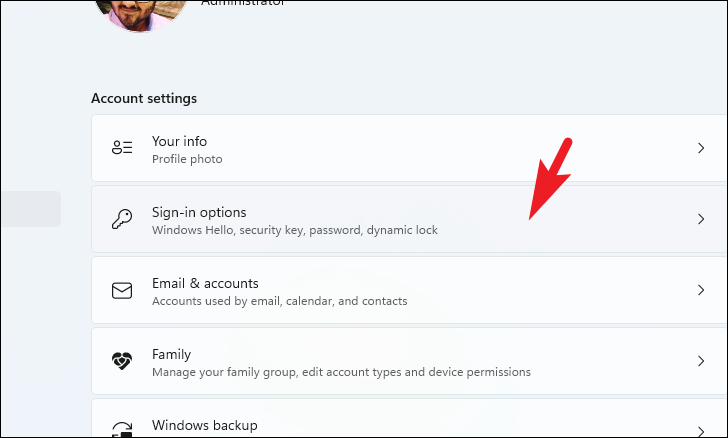
- Select ‘Accounts’ from the left sidebar.

- Click on ‘Sign-in options’.
- Find the ‘Dynamic Lock’ tile and ensure the checkbox for ‘Allow Windows to automatically lock your device when you’re away’ is ticked.
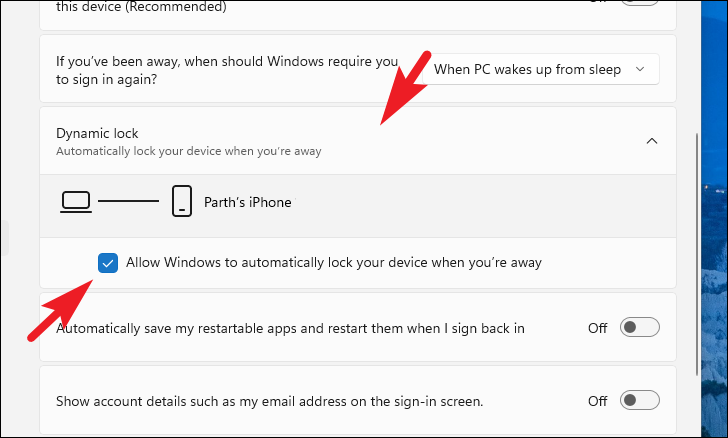
Note: Ensure your phone is connected via Bluetooth to your computer before enabling Dynamic Lock.
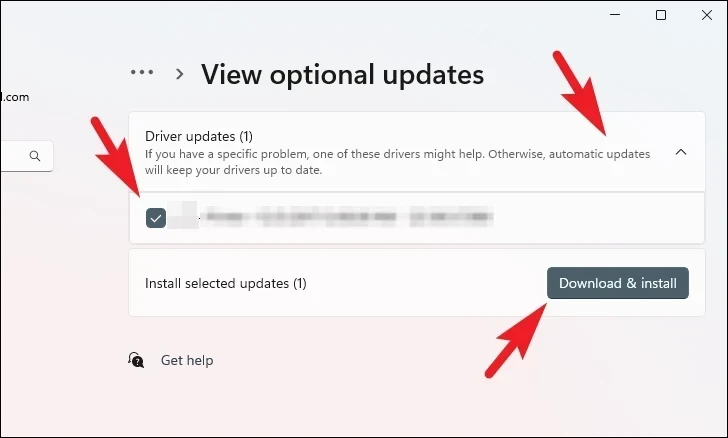
Update or reinstall Bluetooth driver
Since Dynamic Lock relies on Bluetooth, an outdated or corrupted driver can cause issues. Here’s how to update it:
Using Settings app
- Open ‘Settings’ from the Start Menu.
- Click on ‘Windows Update’ in the left sidebar.
- Select ‘Advanced Options’.
- Click on ‘Optional Updates’.
- Look for any updates with ‘Bluetooth’ in the name, check the box, and click ‘Download & Install’.
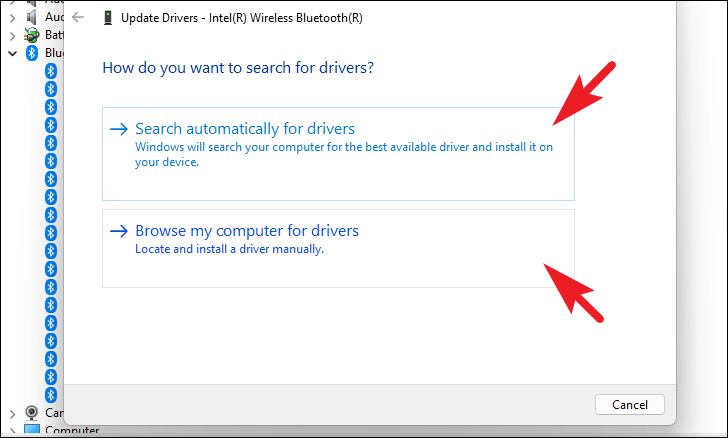
Using Device Manager
- Open Device Manager by searching for it in the Start Menu.
- Expand the ‘Bluetooth’ section.
- Right-click on ‘Intel Wireless Bluetooth’ and select ‘Update driver’.
- Choose ‘Search automatically for drivers’ or ‘Browse my computer for drivers’ if you have a driver package.
Force update the driver
-
In Device Manager, right-click on the Bluetooth component and select ‘Uninstall device’.
-
Check ‘Attempt to remove the driver for this device’ and click ‘Uninstall’.
-
Restart your device.
-
After restarting, download the update from the ‘Optional Updates’ section as described earlier.
Repair system files
Corrupted system files can cause various issues. Here’s how to repair them:
- Open Terminal as administrator by searching for it in the Start Menu, right-clicking, and selecting ‘Run as administrator’.
- Run the following command to execute DISM:
DISM /Online/Cleanup-Image/RestoreHealth
- After it completes, run the System File Checker with this command:
SFC /scannow
- Restart your PC once the process is complete.
Modify Registry settings
- Open Registry Editor by searching for it in the Start Menu.
- Navigate to:
Computer\HKEY_CURRENT_USER\Software\Microsoft\Windows NT\CurrentVersion\Winlogon
- Double-click on the ‘EnableGoodbye’ DWORD file. If it doesn’t exist, create it by right-clicking, selecting ‘New’ > ‘DWORD (32-bit) Value’, and naming it ‘EnableGoodbye’.
- Set the ‘Value data’ to ‘1’ and click ‘OK’.
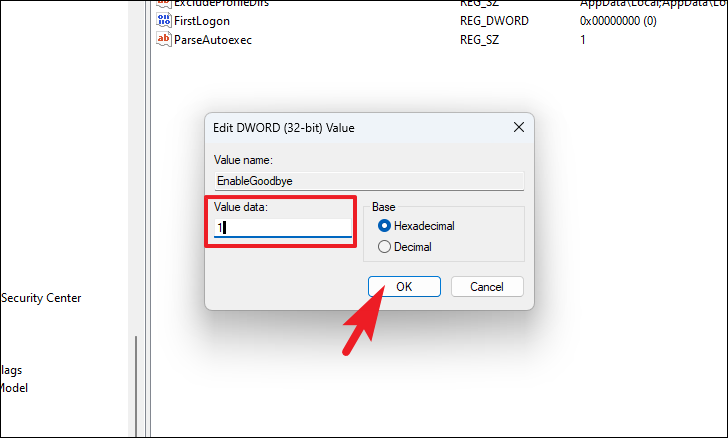
- Restart your PC.
Use Group Policy Editor (Pro versions only)
- Open Group Policy Editor by searching for ‘Edit Group Policy’ in the Start Menu.
- Navigate to: Administrative Templates > Windows Components > Windows Hello for Business.
- Double-click on ‘Dynamic lock factors’.
- Select ‘Enabled’ and click ‘Apply’ then ‘OK’.
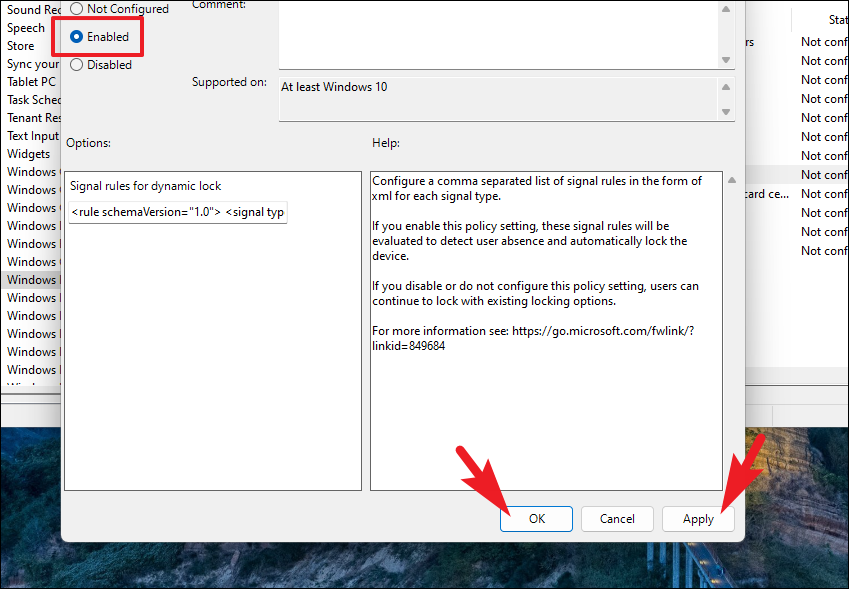
- Restart your PC.
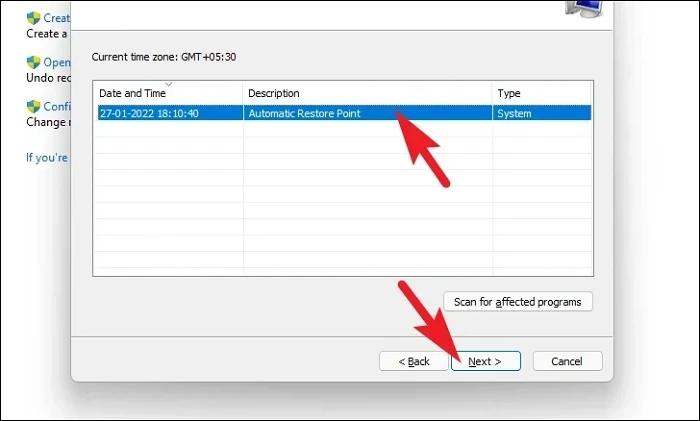
Restore system to a previous point
If you have a system restore point from before the issue started:
- Open Control Panel and click on ‘Recovery’.
- Select ‘Open System Restore’.
- Choose a restore point from before the issue occurred.
- Follow the prompts to complete the system restore process.
By following these methods, you should be able to resolve the Dynamic Lock not working issue on your Windows 11 computer. Remember to check for Windows updates regularly, as Microsoft may release a fix for the Phone Link conflict in a future update.


