Attempting to install Windows 11 but encountering the error message “This PC can’t run Windows 11” can be frustrating. This issue often arises due to certain security settings being disabled or your system not meeting the minimum requirements. Fortunately, there are several solutions to address this problem and successfully install Windows 11 on your PC.
In this guide, we’ll walk you through the most effective methods to fix the “This PC can’t run Windows 11” error, ensuring your system is ready for the upgrade.
Different Types of “This PC Can’t Run Windows 11” Errors
When the error message appears, it usually specifies the reason why your PC can’t run Windows 11. Common reasons include:
- TPM 2.0 is a requirement for running Windows 11.
- The system disk needs to be 64 GB or larger.
- The processor isn’t supported by Windows 11.
- The PC must support Secure Boot.
- Your PC does not meet the minimum hardware requirements for Windows 11.
Understanding the specific reason helps in choosing the appropriate solution.
System Requirements for Windows 11
Windows 11 has specific hardware requirements that your PC must meet:
- Processor: 1 GHz or faster with at least 2 cores on a compatible 64-bit processor or SoC.
- Memory: 4 GB RAM minimum.
- Storage: 64 GB or larger storage device.
- System Firmware: UEFI, Secure Boot capable.
- TPM: Trusted Platform Module (TPM) version 2.0.
- Graphics Card: DirectX 12 compatible graphics / WDDM 2.x.
- Display: High definition (720p) display that is greater than 9” diagonally, 8 bits per color channel.
An internet connection and a Microsoft account are also required for Windows 11 Home setup.
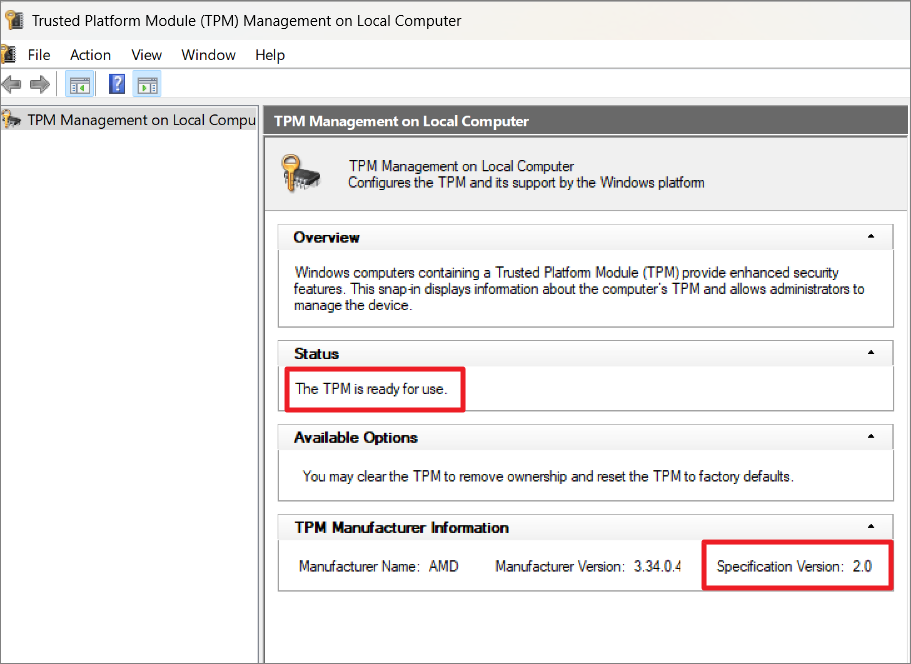
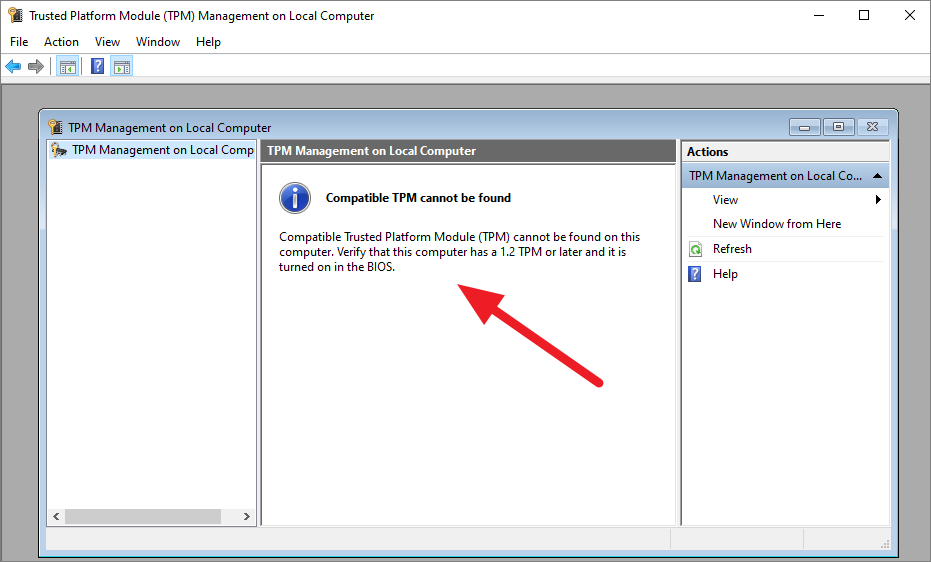
1. Enable TPM 2.0 in BIOS
One of the primary reasons for the error is the absence or disabling of TPM 2.0. The Trusted Platform Module (TPM) is a security feature that Windows 11 requires. Here’s how to check and enable TPM 2.0:
Windows+R to open the Run dialog box. Type tpm.msc and press Enter to open the TPM Management window.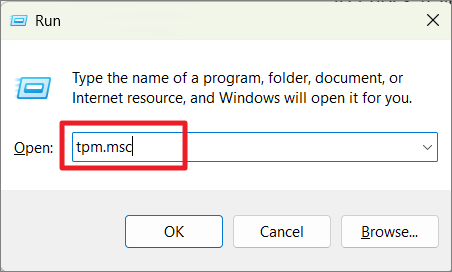
If you receive a message stating “Compatible TPM cannot be found,” it means TPM is either disabled or not present.
DEL, F2, or F10).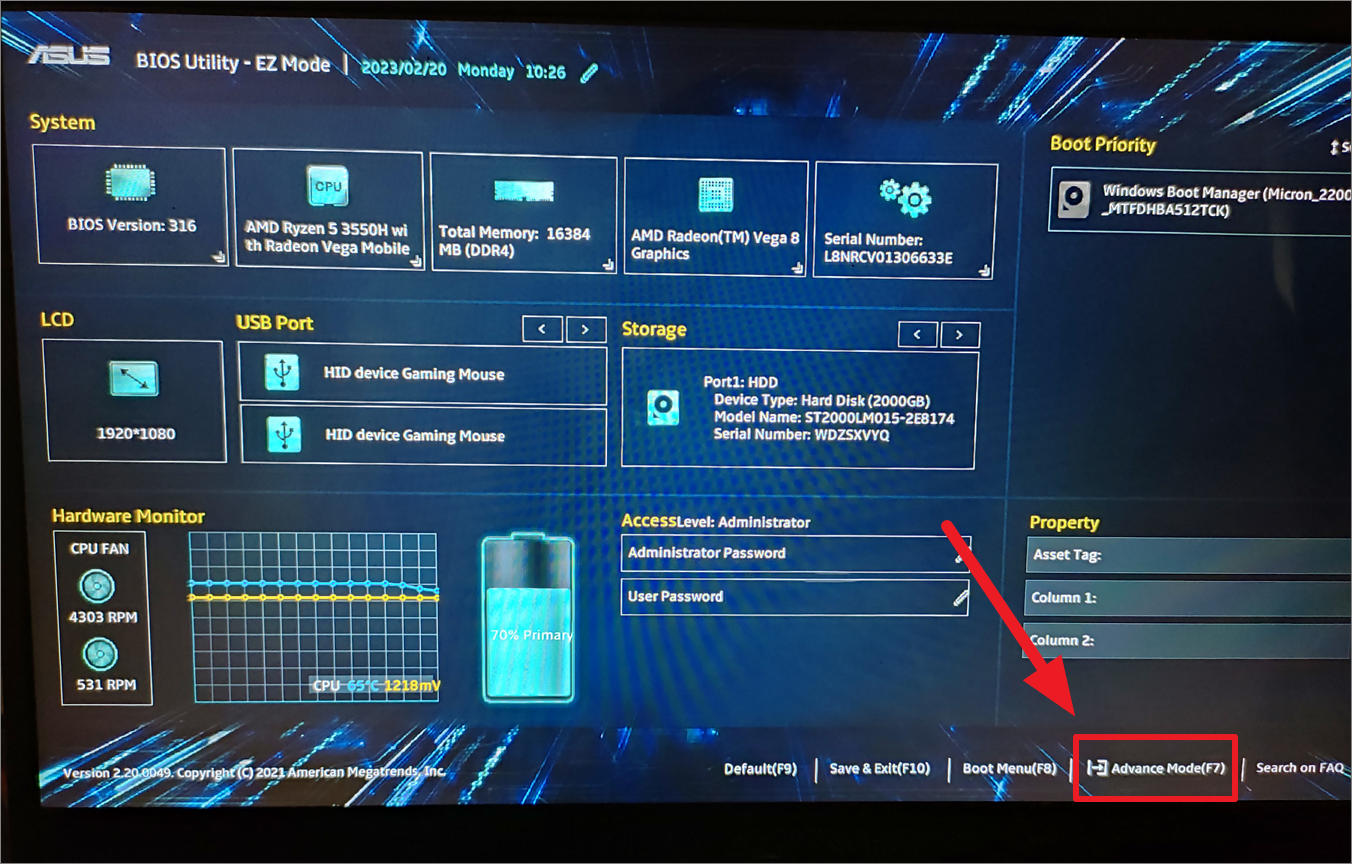
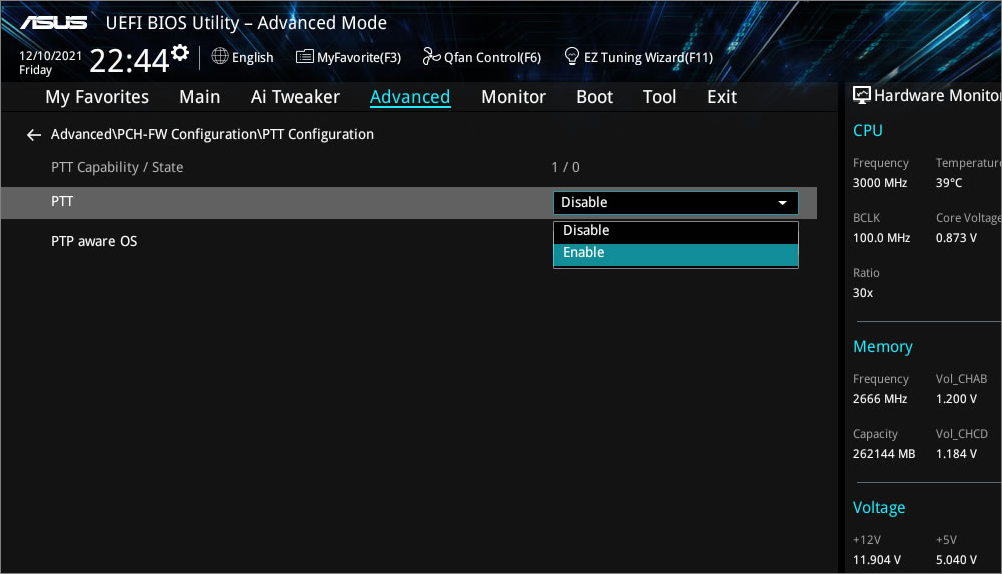
After enabling TPM, try installing Windows 11 again to see if the issue is resolved.
2. Enable Secure Boot in BIOS
Secure Boot is another critical requirement for Windows 11. It ensures your PC boots using only software trusted by the manufacturer.
Windows+R, typing msinfo32, and pressing Enter. In the System Information window, look for Secure Boot State.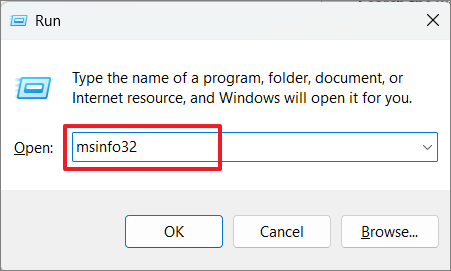
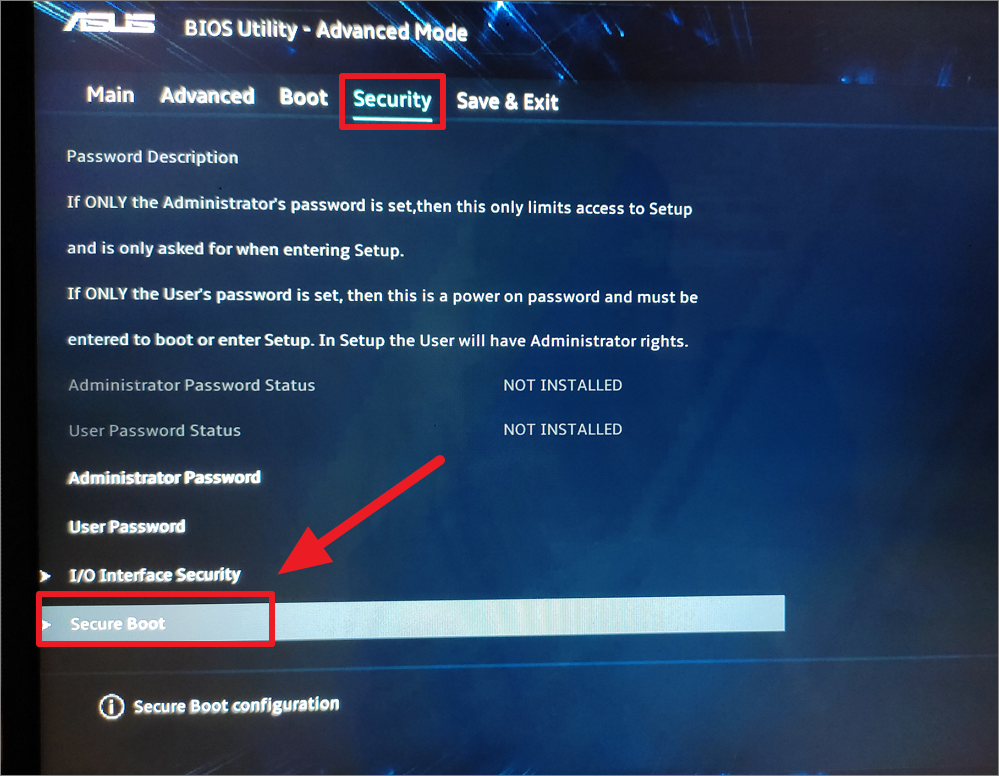
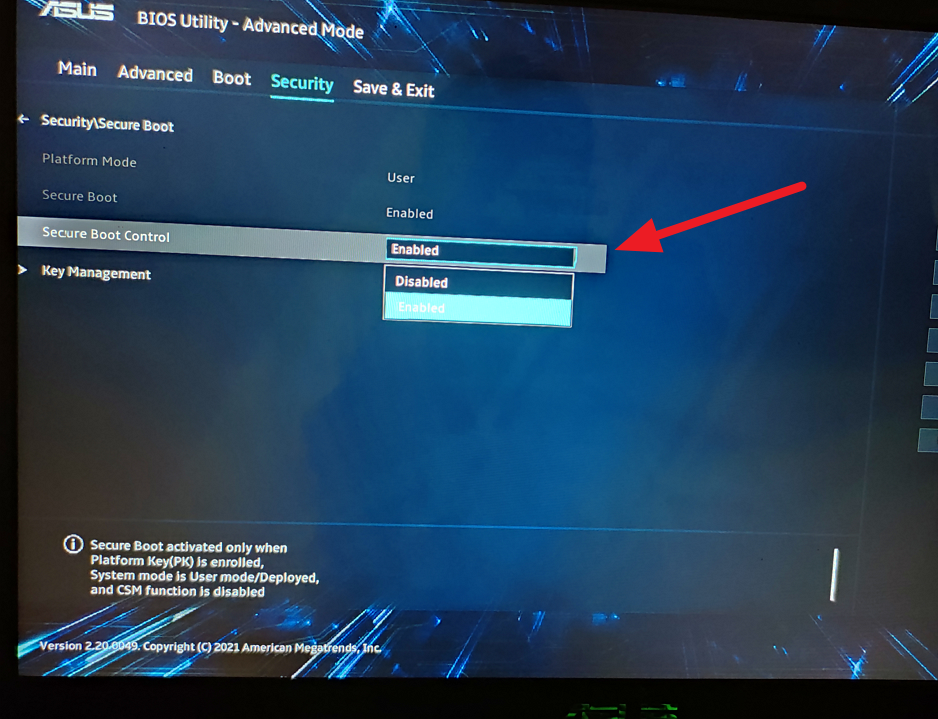
With Secure Boot enabled, attempt the Windows 11 installation again.
3. Check if Your Processor Is Supported
Windows 11 supports only certain processors. Ensure your CPU is compatible:
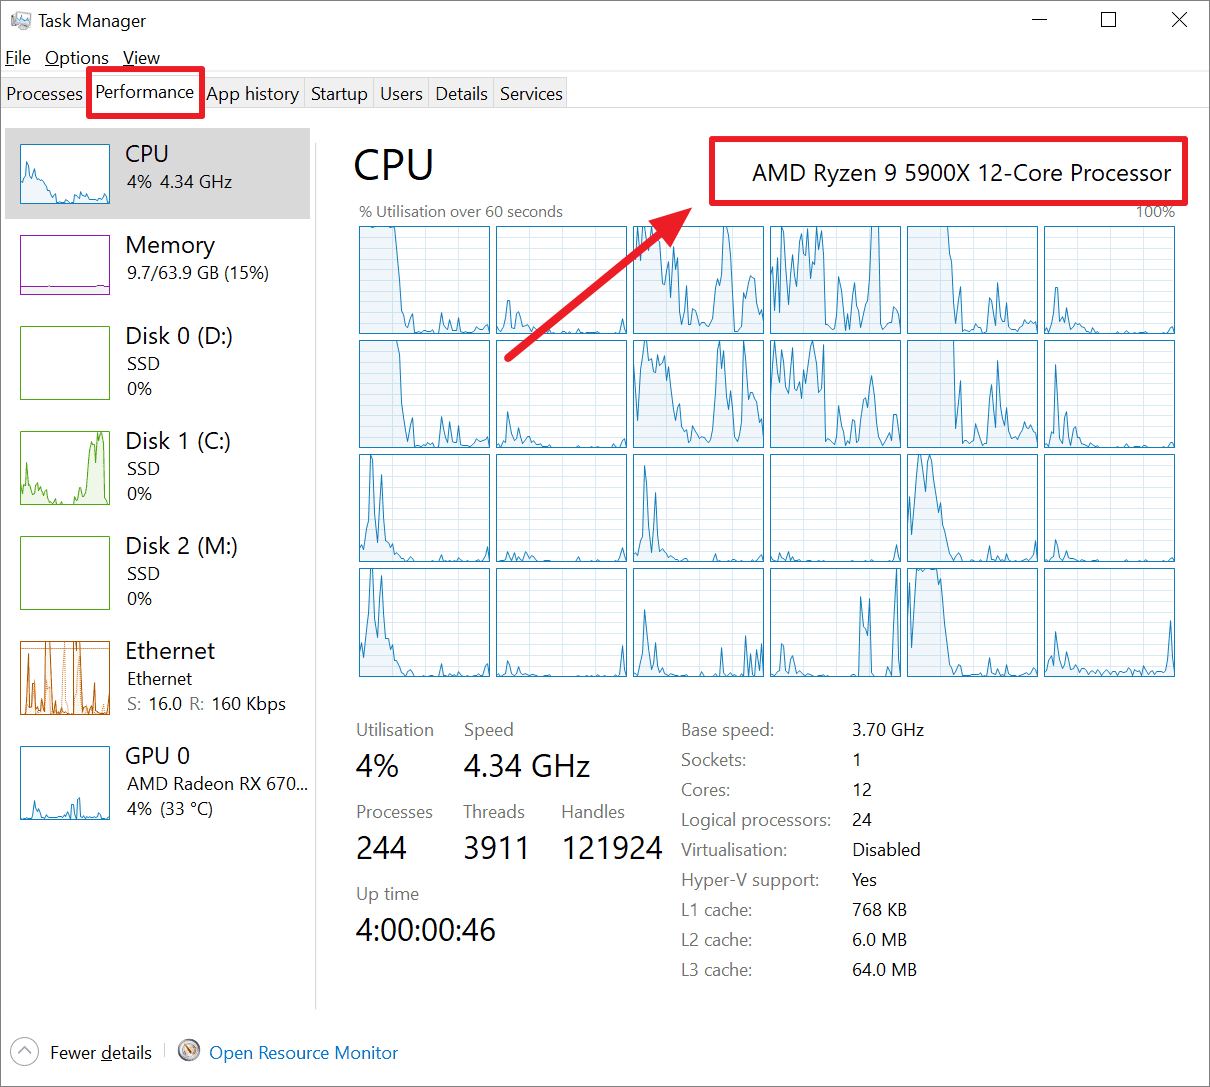
Compare your processor with the list of supported CPUs provided by Microsoft:
If your processor isn’t supported, you may need to upgrade your CPU or consider bypassing the requirements (see Method 5).
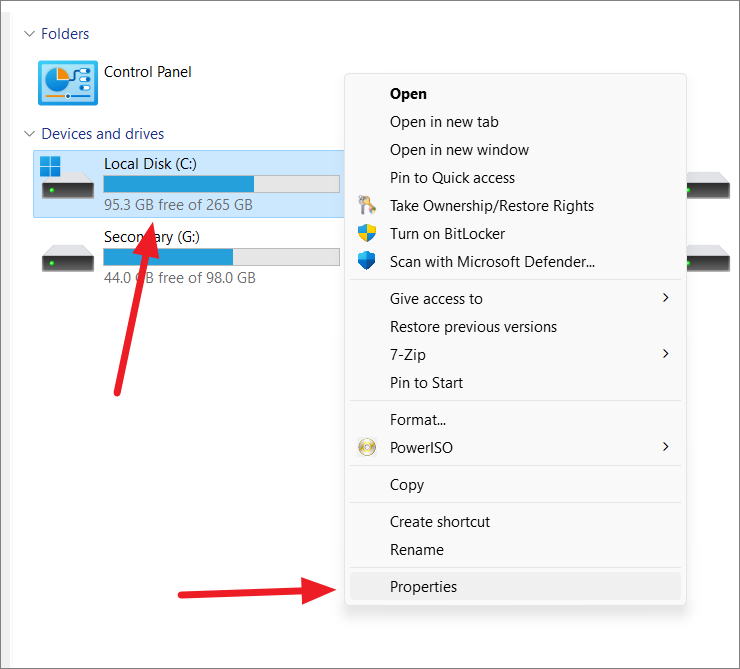
4. Ensure Sufficient Storage Space
Windows 11 requires at least 64 GB of storage space. Here’s how to check and free up space if needed:
Extending the Partition
If you have unallocated space or another partition with free space, you can extend your system partition:

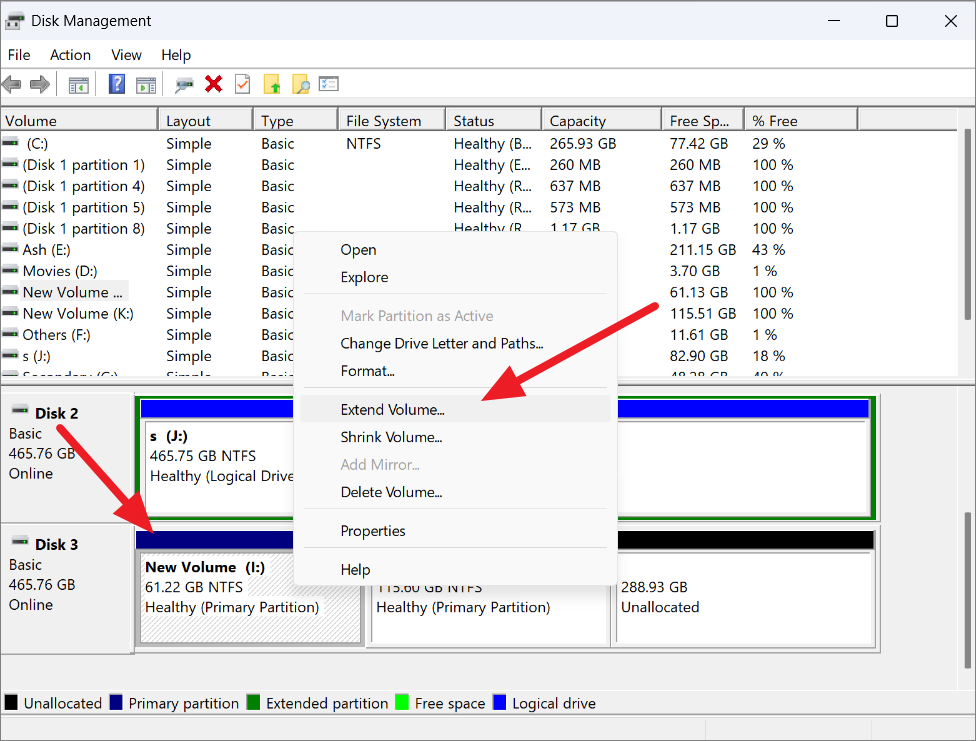
If you cannot extend due to lack of unallocated space, consider shrinking another partition to create unallocated space.
5. Bypass Windows 11 Requirements
If your PC doesn’t meet the requirements for TPM 2.0, Secure Boot, or processor, you can bypass these checks. Note that installing Windows 11 on unsupported hardware may lead to instability or lack of updates from Microsoft.
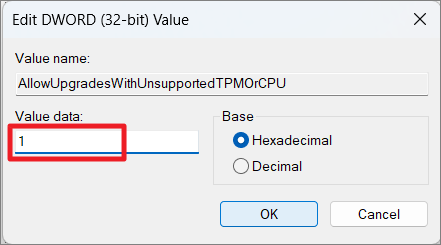
5.1. Bypass TPM 2.0 and CPU Requirements via Registry Editor
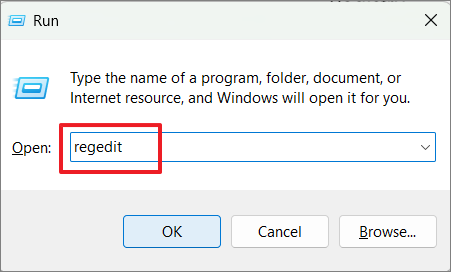
HKEY_LOCAL_MACHINE\SYSTEM\Setup\MoSetup. If the MoSetup key doesn’t exist, create it by right-clicking on Setup, selecting New > Key, and naming it MoSetup.AllowUpgradesWithUnsupportedTPMOrCPU.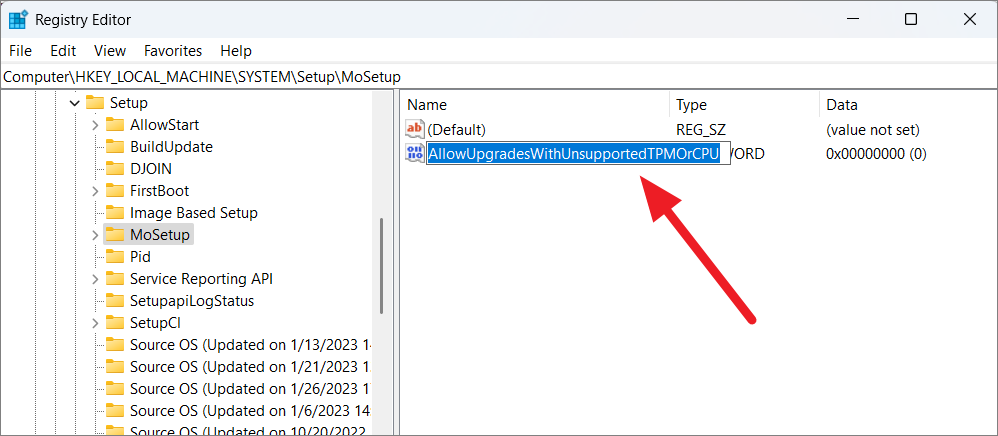
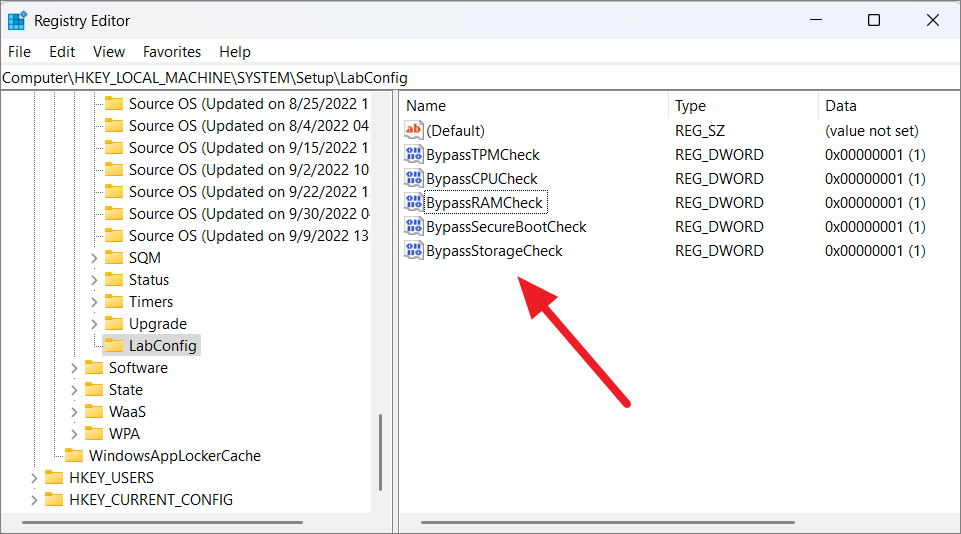
5.2. Bypass All Requirements via Registry Editor
You can bypass TPM, Secure Boot, RAM, and storage requirements:
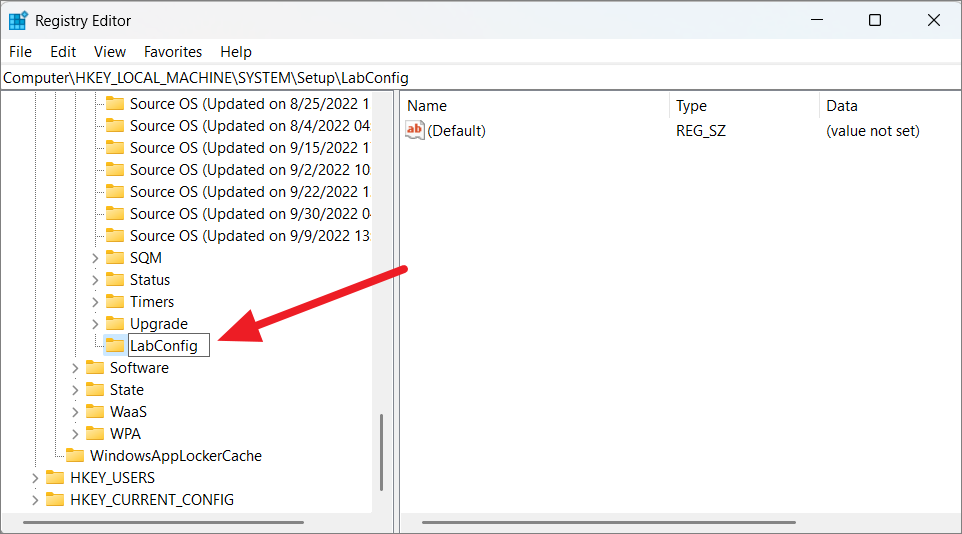
BypassTPMCheckBypassSecureBootCheckBypassRAMCheckBypassStorageCheckBypassCPUCheck
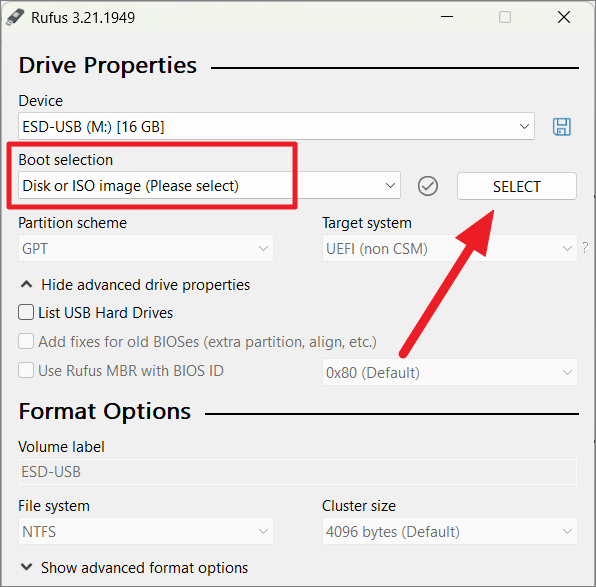
5.3. Create a Bootable USB Without Requirements Check Using Rufus
Using Rufus, you can create a Windows 11 installation media that bypasses the TPM and Secure Boot checks:
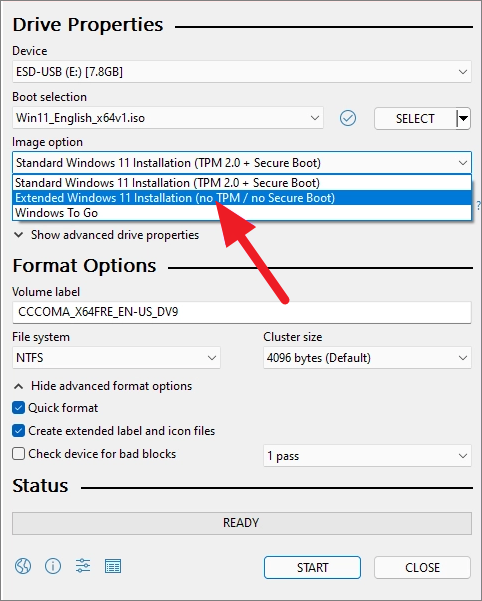
You can now use this USB drive to install Windows 11 without meeting the TPM and Secure Boot requirements.
By following these methods, you should be able to resolve the “This PC can’t run Windows 11” error and proceed with the installation. Always ensure your data is backed up before making significant system changes.


