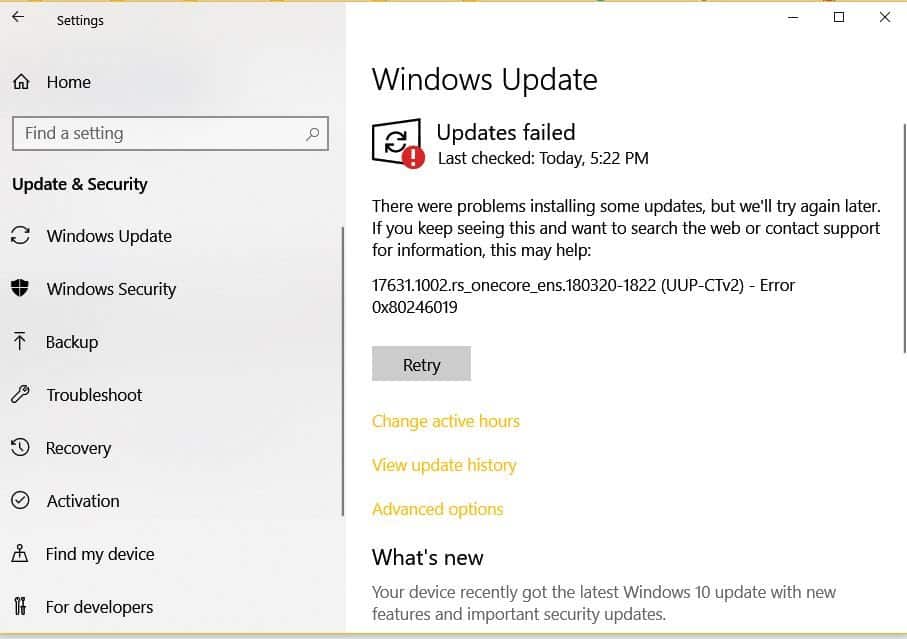
Encountering error codes 0x80240034 and 0x80246019 while updating Windows 10 can be frustrating. These errors often occur when trying to install specific updates, such as build 17631.1002.rs_onecore_ens.180320-1822 (UUP-CTv2). A reliable way to resolve these issues is by clearing the Windows Update cache. Follow the detailed steps below to clear the cache and get your system updating properly again.
Open Command Prompt as an administrator. Click on the Start button, type
cmd in the search bar, right-click on Command Prompt, and select Run as Administrator.In the Command Prompt window, type
net stop wuauserv and press Enter. This command stops the Windows Update service.Ensure that hidden files and folders are not visible. Click on the Start button, type
File Explorer Options, and select it from the search results. In the View tab, under “Hidden files and folders,” choose “Don’t show hidden files, folders, or drives”.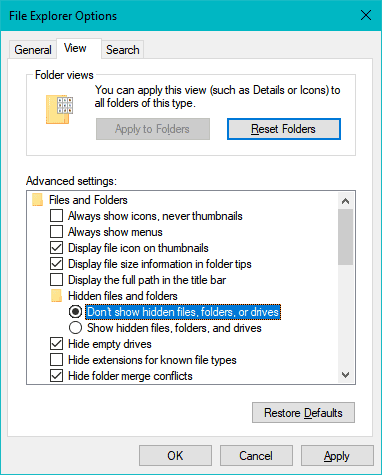
In the Command Prompt window, type
net start wuauserv and press Enter. This command restarts the Windows Update service.After completing these steps, try updating your computer again. The updates should proceed without encountering error codes 0x80240034 or 0x80246019.


