Although many things were chaotic in Elon Musk’s takeover of Twitter, one thing everyone remembers vividly is the supposed “democratization” of the blue mark. It was one of the original sins that started driving people away from the platform in hordes.
And millions of those users ended up on Mastodon. And despite the fact that most people find Mastodon initially confusing, it has seen unprecedented growth in its user base in the past couple of months, the likes of which it did not see in the past many years since its inception in 2016.
Now, since most people are coming over from Twitter on the micro-blogging platform, they expect features akin to the former on Mastodon. And one such feature is “verification”.
What’s the Big Deal About Verification Anyway?
If you’ve somehow eluded the blue ticks on Twitter (and all the recent debacle around them), here’s a quick recap. Blue ticks were originally meant to prevent the impersonation of public figures. Back when Twitter had no blue ticks, it was extremely easy for anyone to impersonate influential figures or celebrities, especially when they had no Twitter accounts. It also helped prevent misinformation by holding people accountable.
The blue check could be used to verify official government accounts, organizations, celebrities, and even content creators and influencers. But that’s the previous verification policy of Twitter, also known as the legacy verification policy.
Now, Twitter hands out the blue checkmark at just $8 a month, subverting the whole idea.
But the initial idea was, nonetheless, a good one. And users coming over to Mastodon naturally wonder if the platform offers something similar. Most social media platforms, like Instagram, and Facebook, offer a verification checkmark after all. Even Tumblr offers a sarcastic verification checkmark, in fact, two, for $7.99.
How does Verification Works on Mastodon?
This brings us back to the original question, “How do you get verified on Mastodon?” The straightforward answer is that you don’t, not in the sense that you’ve come to expect from other social media platforms.
Mastodon does not, or cannot, offer verification because of its inherent structure. As we know, Mastodon is a decentralized, federated network that’s made up of thousands of independent servers. There is no central authority that runs the platform – the very fact that makes Mastodon appealing to most.
But this very lack of a central authority makes it difficult for Mastodon to verify users, in the traditional sense.
“You’re mistaken. I’ve seen people with verified accounts on Mastodon!” Hold your horses if you’re thinking something like this. We are not mistaken, you’ve just been fooled. Anyone can “verify” their account with a checkmark on Mastodon; it’s not proof of authenticity. It’s just a harmless emoji that anyone who knows how to use emojis can add to their username.
Don’t look so appalled. Mastodon isn’t the only platform where people pull stunts like this. You’ll find plenty of profiles with checkmark emojis on other platforms. The only difference is that on other platforms, it’s easy to differentiate between real and fake checkmarks since the former exists. On Mastodon, no matter what checkmark you see, they’re all fake.
If you still want the checkmark, click the ‘Edit Profile’ option underneath your username on your Mastodon account.
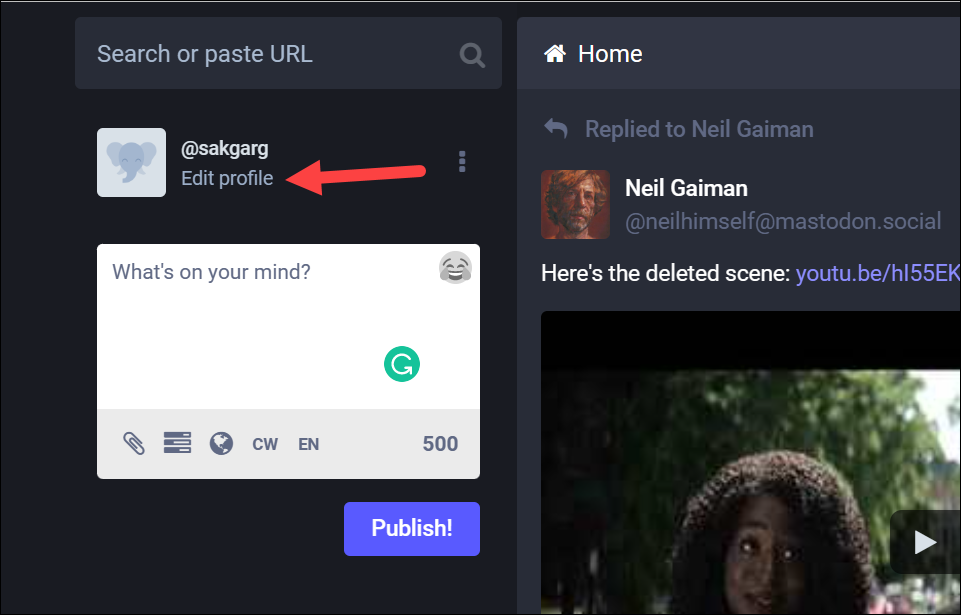
Then, add a checkmark to your ‘Display Name’ and click ‘Save changes’.

But seriously, the only form of verification Mastodon offers is in the metadata section of a user’s profile where you can have verified links with a green checkmark. There are some ways to use this section to verify your Mastodon profile, some of which include using your Twitter account. Let’s take a look at these.
Use Twittodon to Verify the Connection Between your Twitter and Mastodon account
If your main motive is to let your Twitter followers find your account on Mastodon, or let your Mastodon followers know you’re the same person from Twitter, you can use Twittodon to link your accounts and verify that connection.
Twittodon is a free tool whose main motive is to create a database of Twittrer-Mastodon verified accounts.
It’s easy to use the tool and you don’t have to provide any login credentials; a privacy concern many users have when using a third-party tool. The site also lists the entire process in plain terms once you get started to make it easy for you to use it.
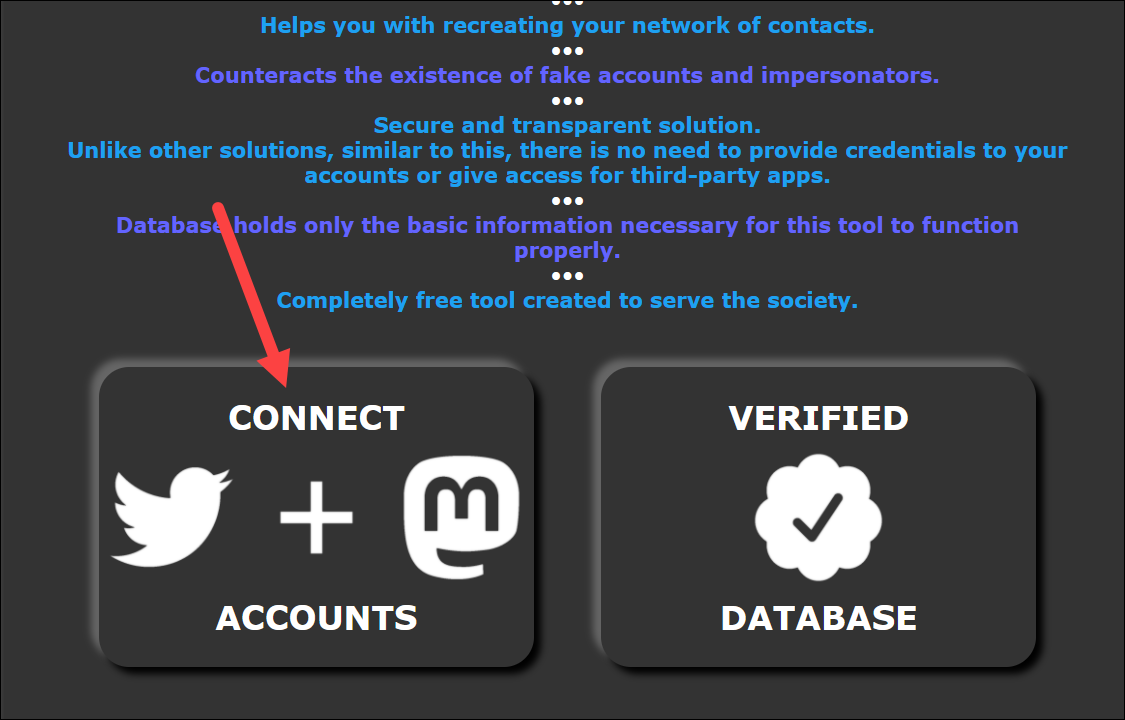
Go to twittodon.com and click the ‘Connect Accounts’ button.
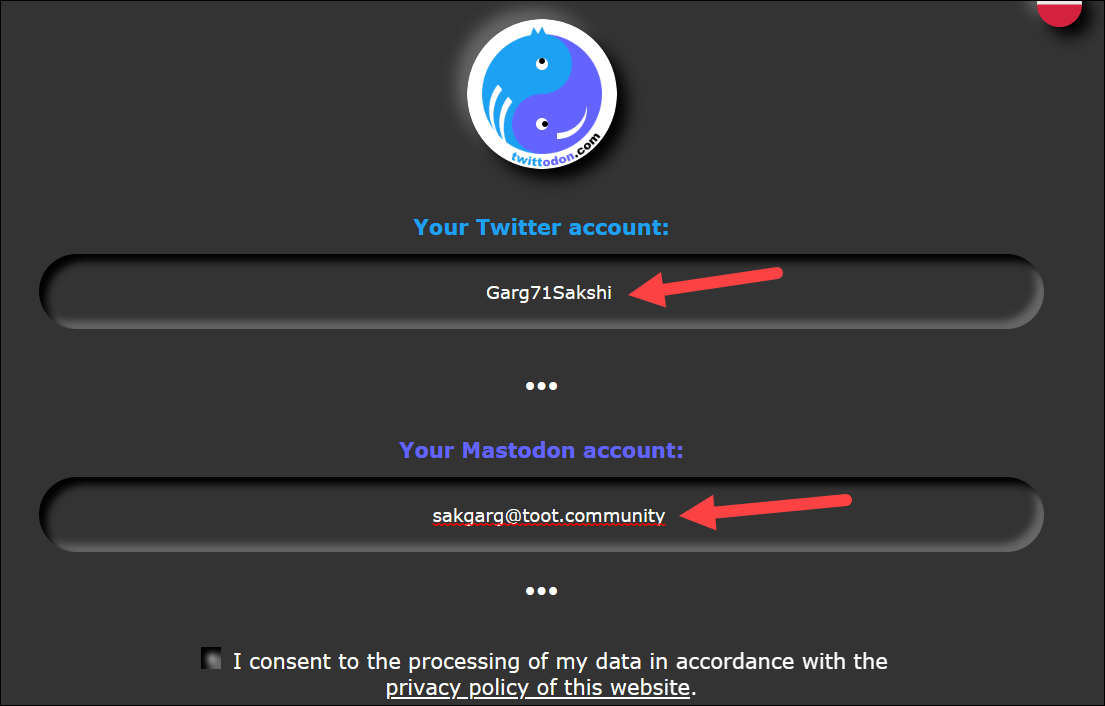
Then, enter your Twitter username without ‘@’ in the field under the ‘Your Twitter Account’ option. Next, enter your Mastodon username with the server domain in the format username@domain in the field under the ‘Your Mastodon account’ option. Don’t add ‘@’ before the username. For example, enter [email protected], not @[email protected].
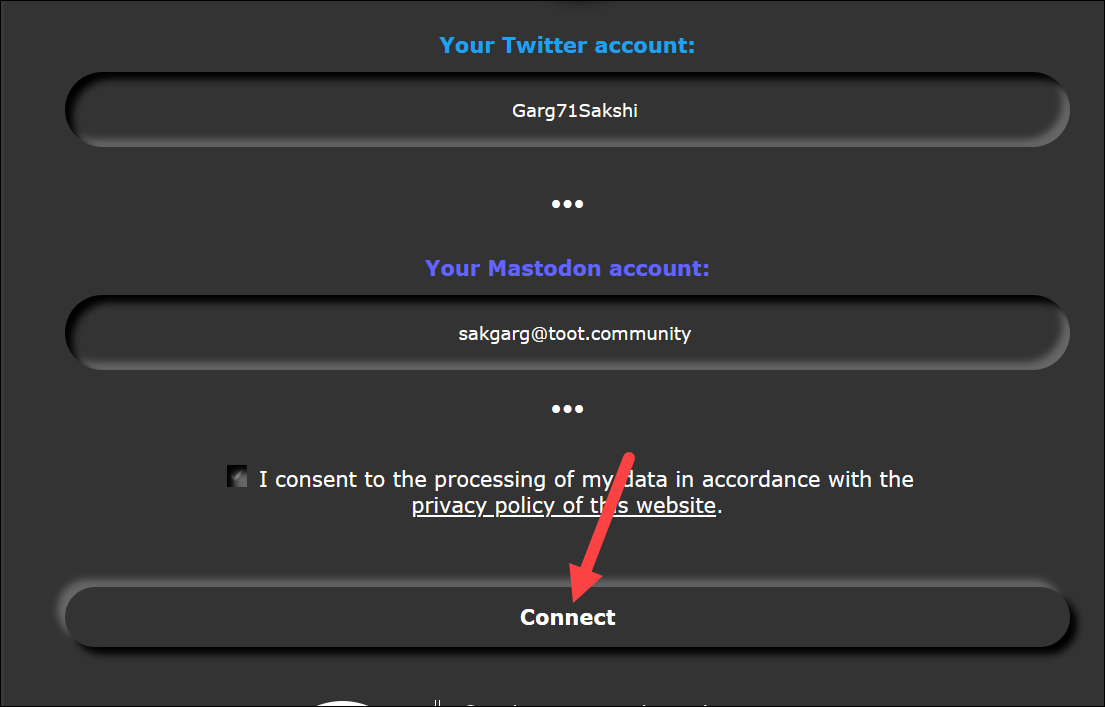
Then, check the privacy policy checkmark and click the ‘Connect’ button.
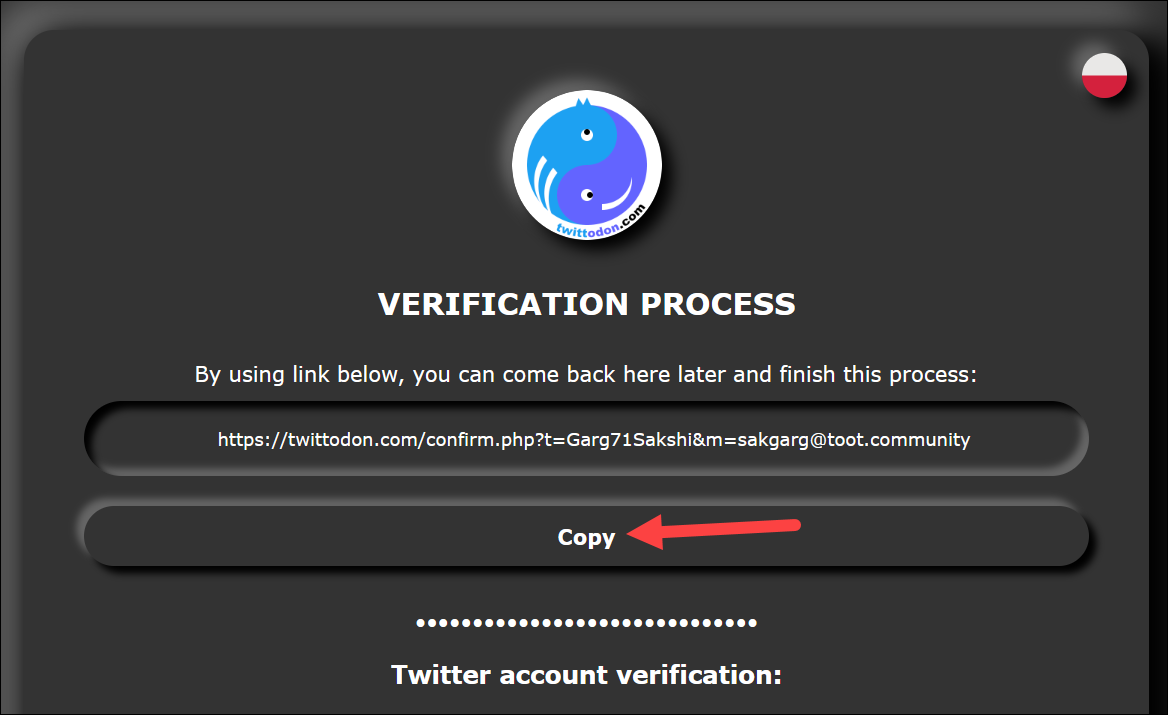
You’ll reach the Verification Process screen. If you don’t have the time to complete it right away, click the ‘Copy’ button to copy the link and save it somewhere. You can then use the link to re-visit the verification process.
Now, the verification process includes two steps:
First, you’ll need to tweet the specified content from your Twitter account and verify on Twittodon that you have completed the task; your account must be public.
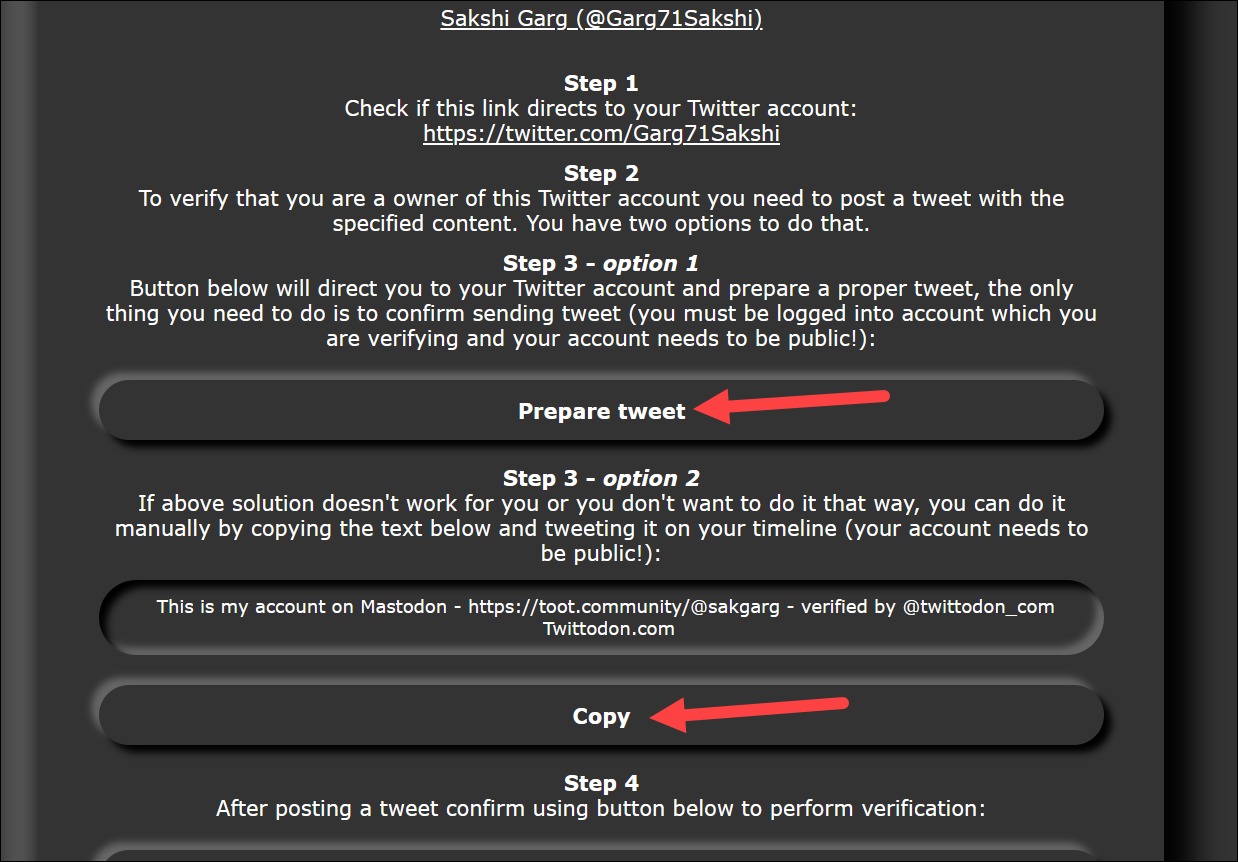
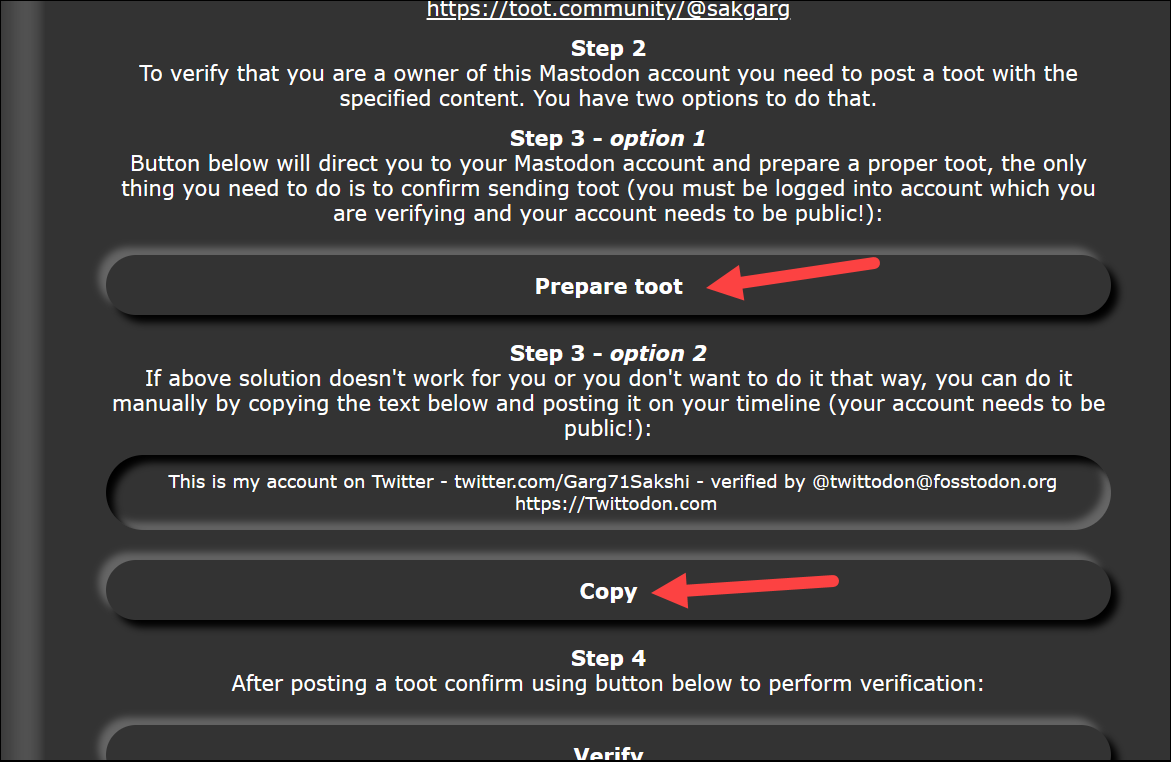
Before tweeting, make sure that the link to your Twitter account to verify it redirects to your account only. Then, either click the ‘Prepare Tweet’ option to let Twittodon open your Twitter account and prepare the tweet itself; the only thing you’ll need to do is send the tweet. Or, copy the contents in ‘Step 3 option 2’ and manually copy-paste the tweet on your Twitter account and send it.
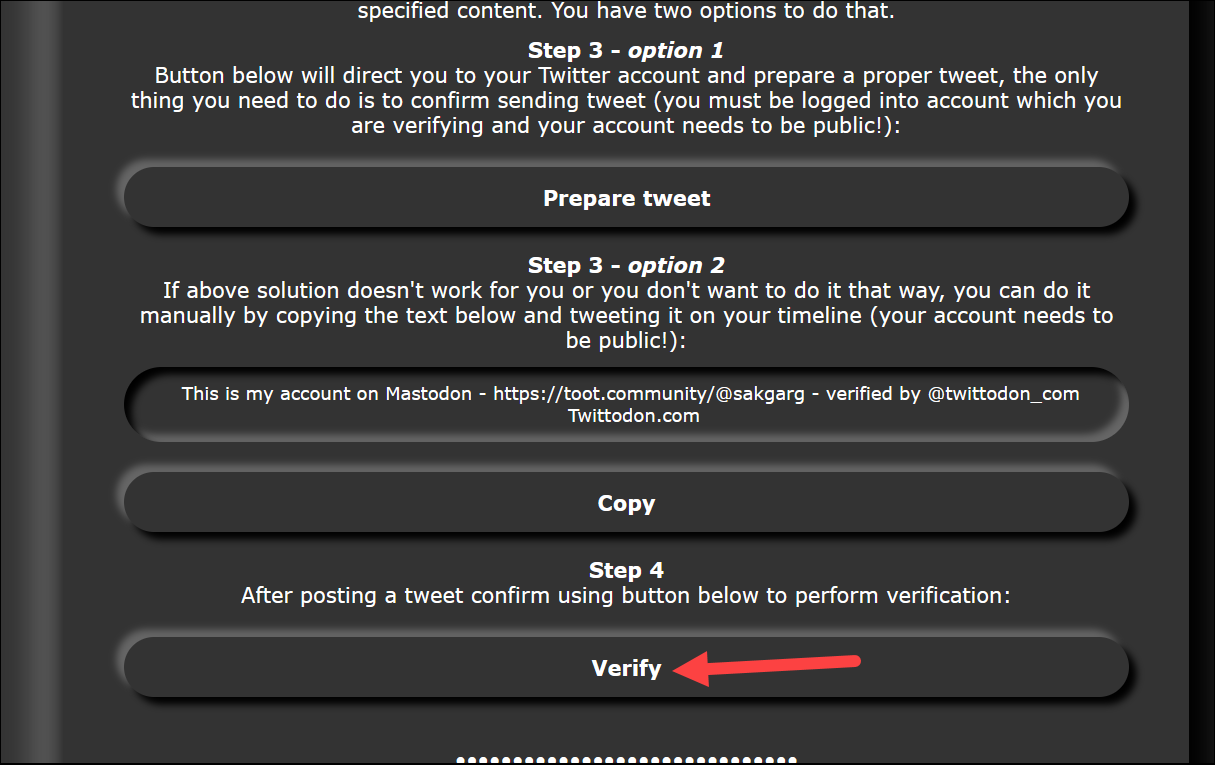
Finally, click the ‘Verify’ button on Twittodon under the Twitter account verification section.
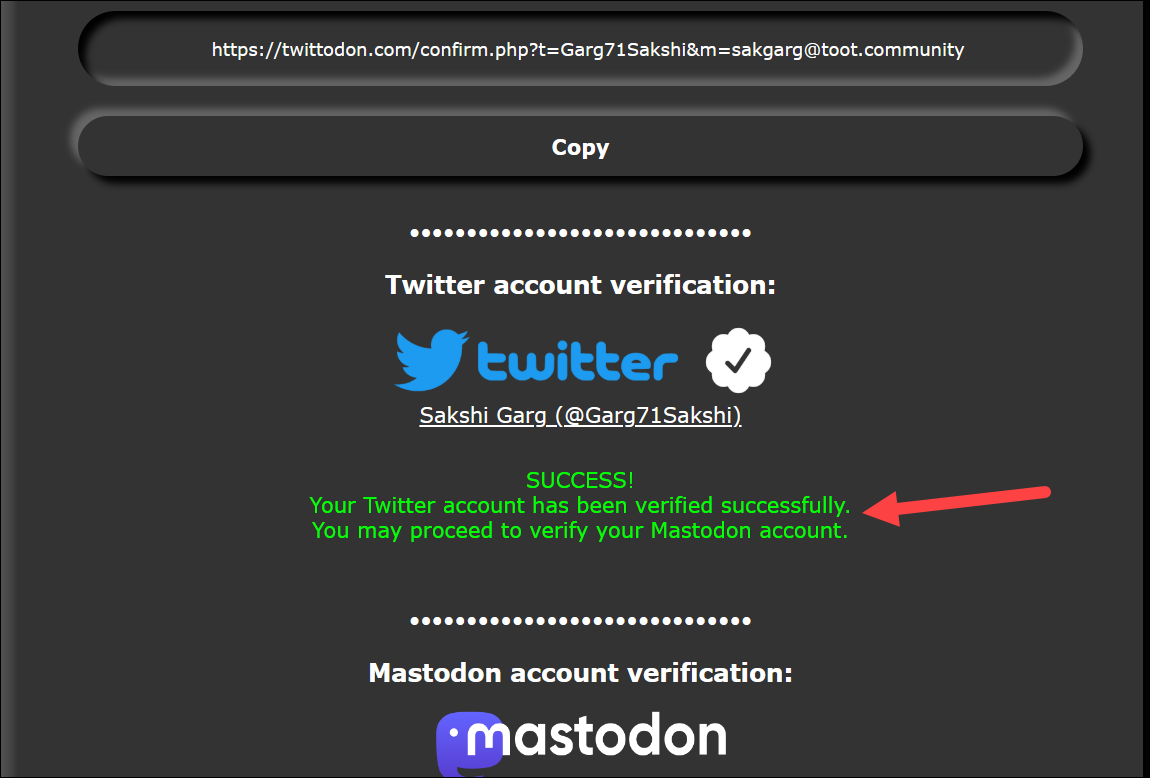
You will get a Twitter verification successful message. You can now move on to Mastodon verification.
Second, you’ll need to repeat the same steps for Mastodon, i.e., post a toot from your Mastodon account with the specified content and verify the step on Twittodon.
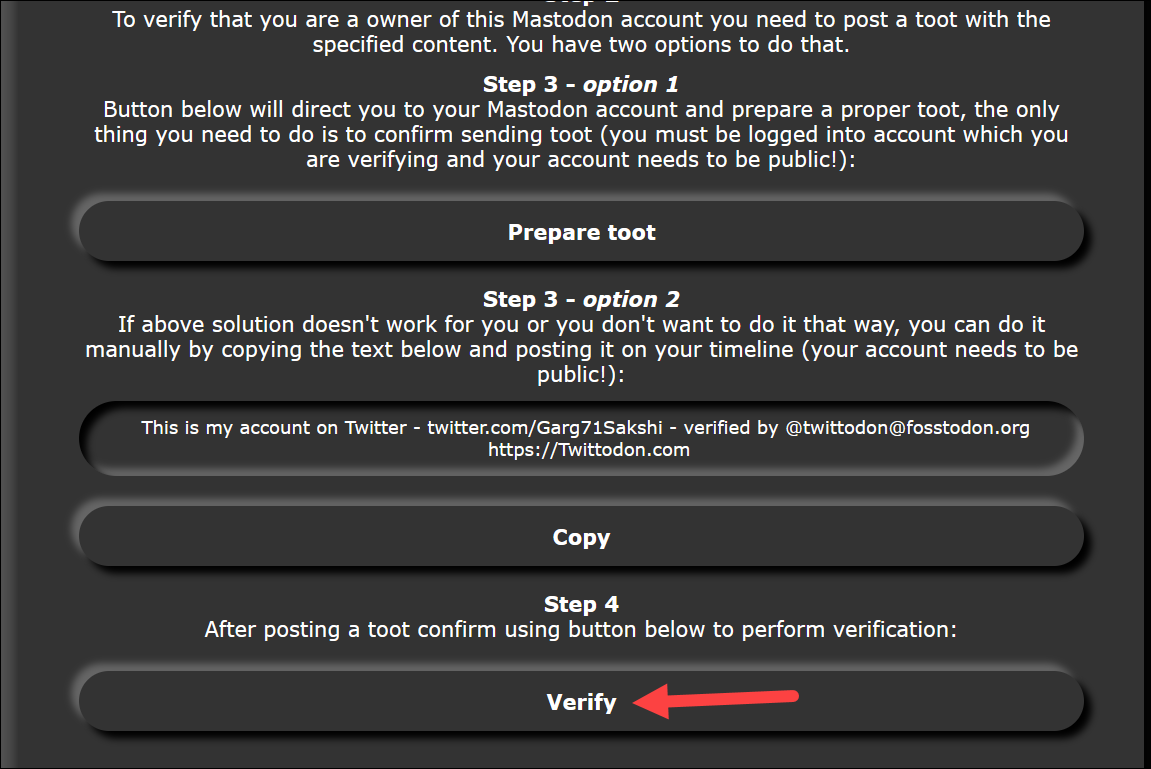
The steps are largely the same. Either click the ‘Prepare Toot’ button to let Twittodon prepare the toot on your Mastodon account. Or, copy the contents in ‘Step 3 option 2’ and paste the toot manually. Then, post it.
After that, come back to Twittodon and click the ‘Verify’ button in the Mastodon account verification section.
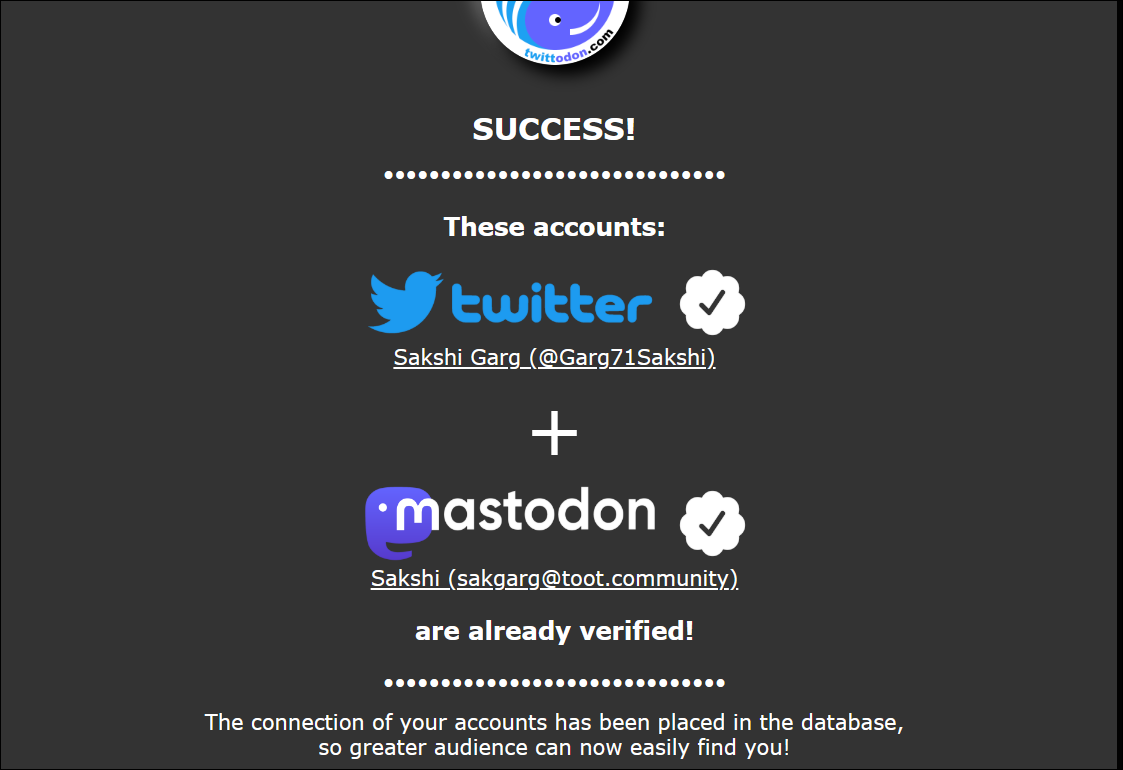
Your accounts will be added to the Twittodon database and you can even share the confirmation page.
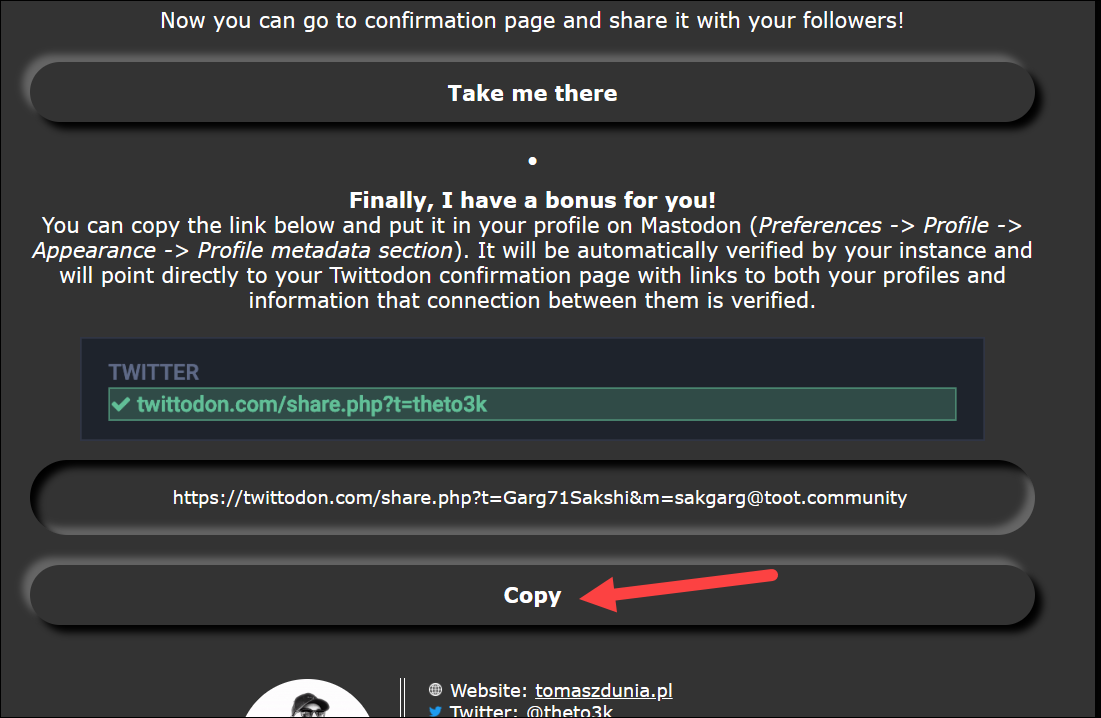
Additionally, once you perform both these steps, Twittodon will generate a link that you can add to your profile metadata that will be verified with the green checkmark.
To add the link to your profile metadata, follow these steps. First, scroll down on the Twittodon confirmation page and copy the link provided.
Then, go to your Mastodon account and click the ‘Edit Profile’ button under your username on the left corner of the screen. You can also navigate to Preferences > Profile.

Scroll down to the ‘Profile Metadata’ section. Then, add ‘Twitter Verification’ or ‘Twittodon’ (or anything else you want) in the ‘Label’ field and paste the link you copied earlier in the ‘Content’ field. Finally, click ‘Save changes’.
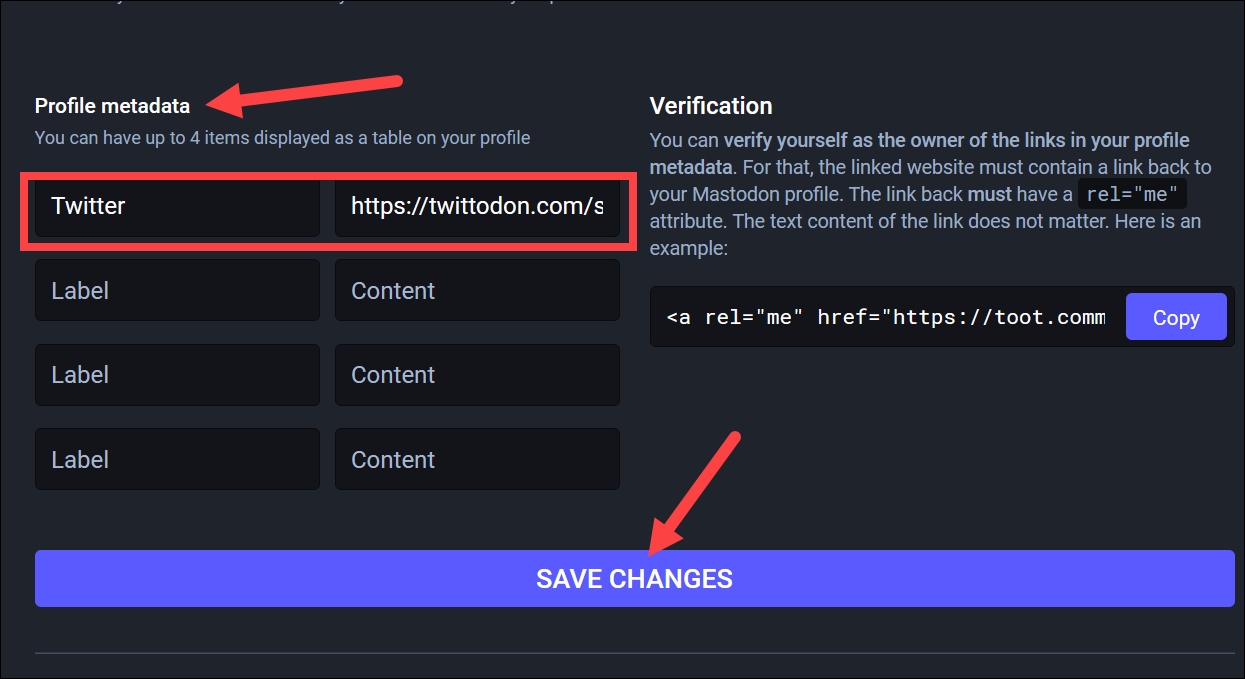
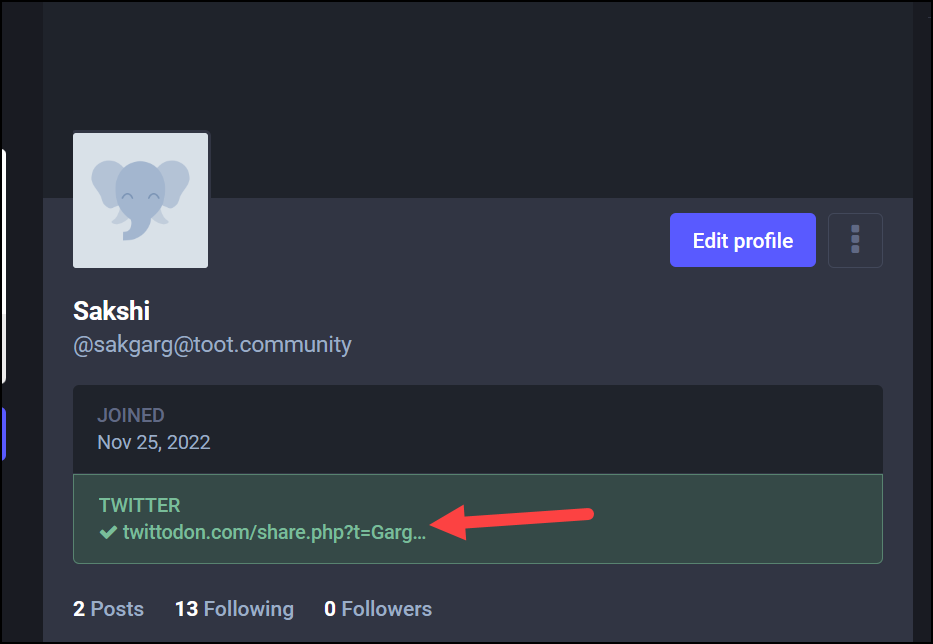
Now, if you open your profile, you’ll find the verified link with the green checkmark there.
Use Fedified for Legacy Verified Twitter Accounts
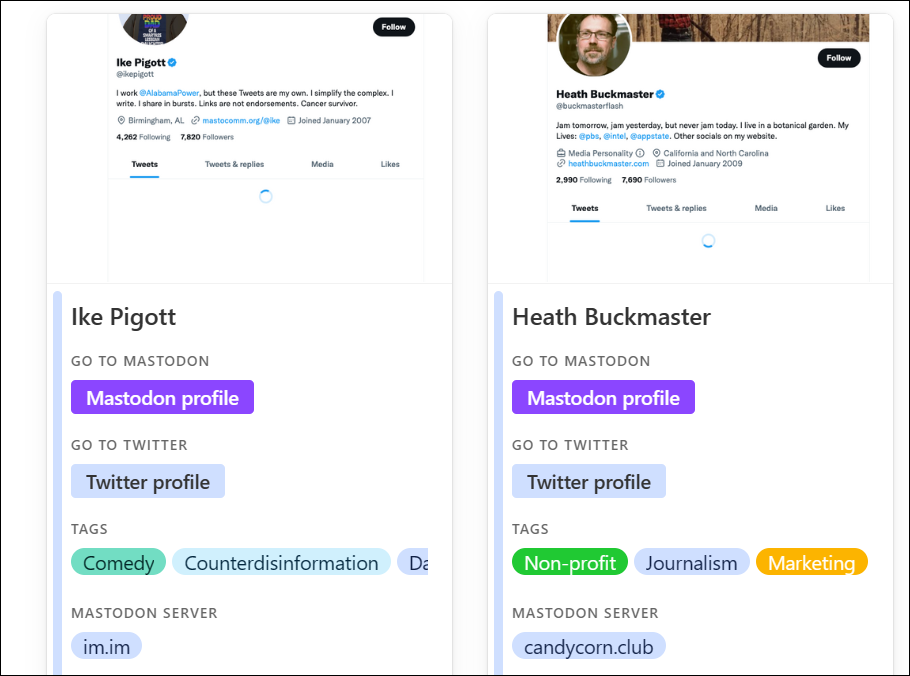
For accounts that are legacy verified on Twitter, i.e., which were verified before 5th November 2022 when blue ticks were not paid and were still considered legit, Fedified is a service that you can use. It is a centralized directory of legacy verified accounts on Twitter that are also on Mastodon.
If there is evidence that your verified Twitter account links to a Mastodon account, i.e., you’ve either tweeted the link to your Mastodon account or added it to your Twitter bio, Fediverse independently confirms and verifies that and adds your accounts to their directory. You can then share their directory entry about your account with your followers. Or, people can visit Fediverse, find your account in the directory, and hence, find you on Mastodon.
But there are a few caveats. Fedified is only available in the U.S., Canada, Mexico, and Puerto Rico. Other than that, there are also controversies around the tool as there are people who feel that a centralized directory like this defeats the purpose of a decentralized Fediverse. But whether or not you want to use the tool is up to you.
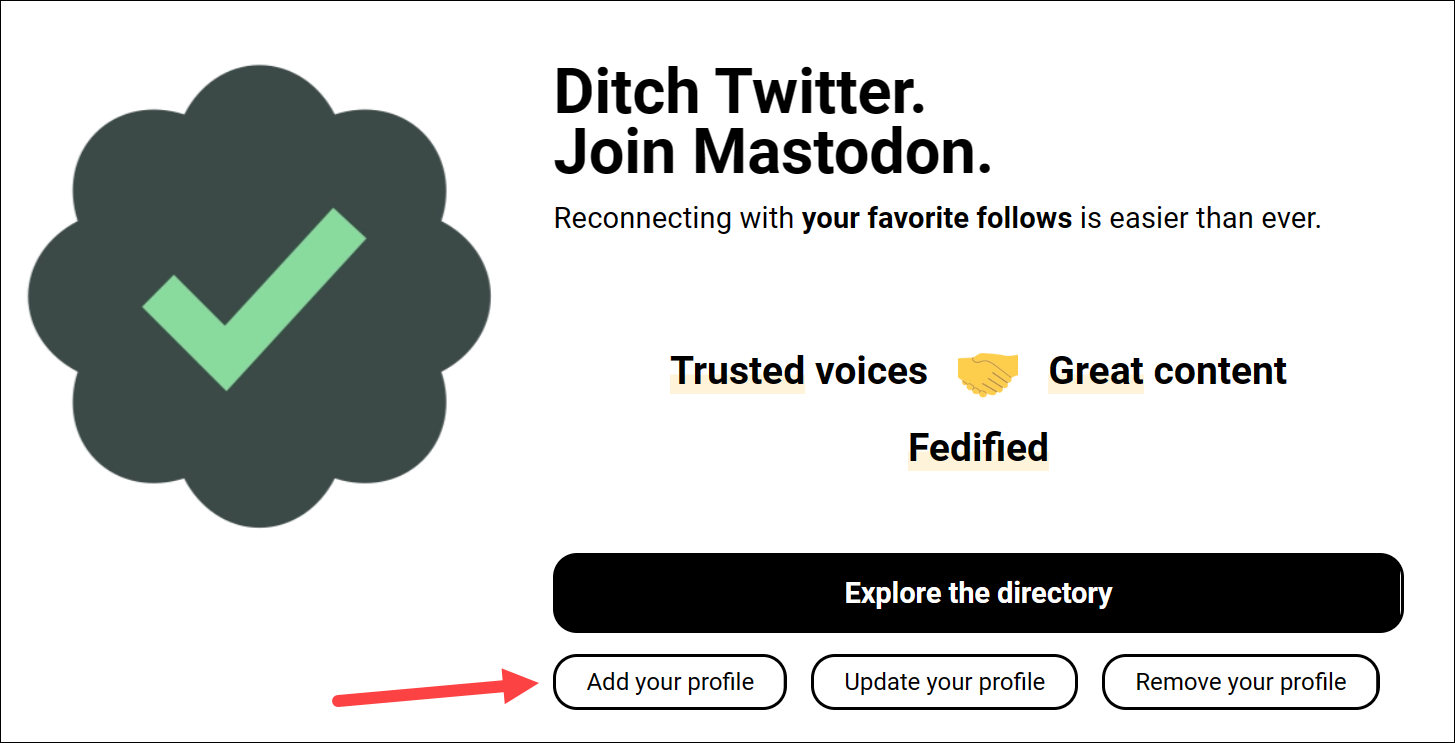
To add your profile to the directory, click the ‘Add your profile’ option on Fedified.com and follow any steps on the screen.
Use your Website to Verify your Identity on Mastodon
This is the non-Twitter option and how Mastodon really intended people to use the profile metadata option to verify their identity. Anyone who owns a website can use this option to verify their identity to their followers. So, if you’re a business owner or own a blog and would like your followers to know you are who you say you are, a verified link on your profile confirms to that you are the owner of the website you’ve linked.
You don’t need any third-party tool either to use this option. All you need to do is add a link to the website you’re adding to your profile that links back to your Mastodon profile. The link should also contain a “rel=me” attribute. You can find an example of the link to add next to the profile metadata section that’ll look something like this.
<a rel="me" href="https://toot.community/@sakgarg">Mastodon</a>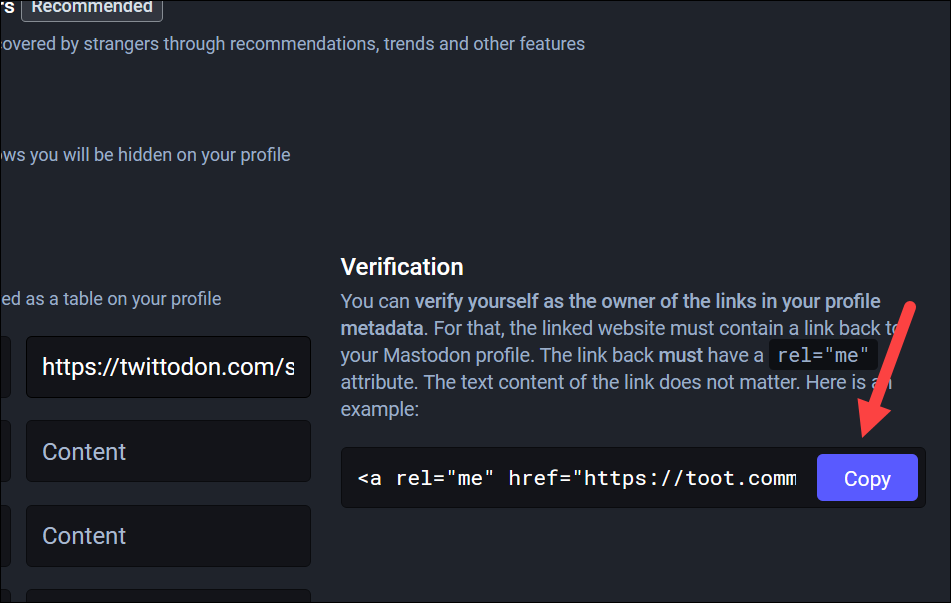
Simply add your website information in the metadata section on Mastodon. Then, add the above link to your website, whether using a plugin if you’re a WordPress user or yourself.
Now, the link on your profile will appear verified.
There you have it. Although traditional verification is not a thing on Mastodon, verification in the form where you can let your followers know that you are who you say you are does exist. You can either have verified links to your Twitter account or your website to confirm your identity to your followers.