Windows 11 runs numerous background processes to maintain system functionality. While most of these processes are essential, you might want to hide certain non-critical ones for better system management or privacy reasons. This guide will walk you through using the Windows Registry Editor to hide specific background processes in Windows 11.
Method 1: Hide Individual Processes
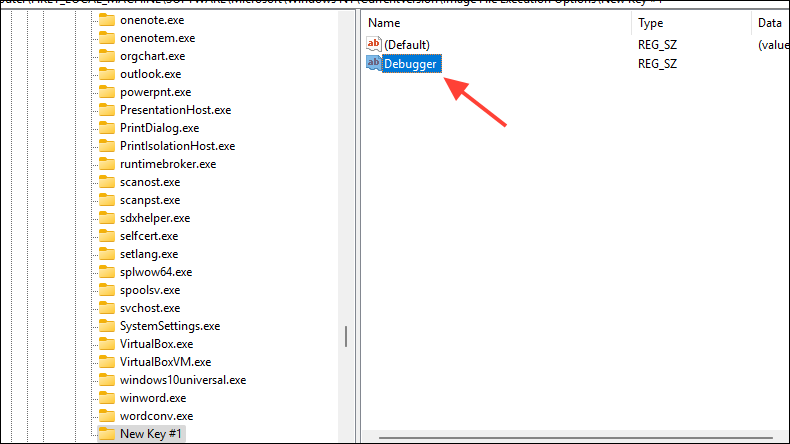
Windows key + R, typing “regedit”, and pressing Enter. If prompted by User Account Control, click “Yes” to allow the app to make changes.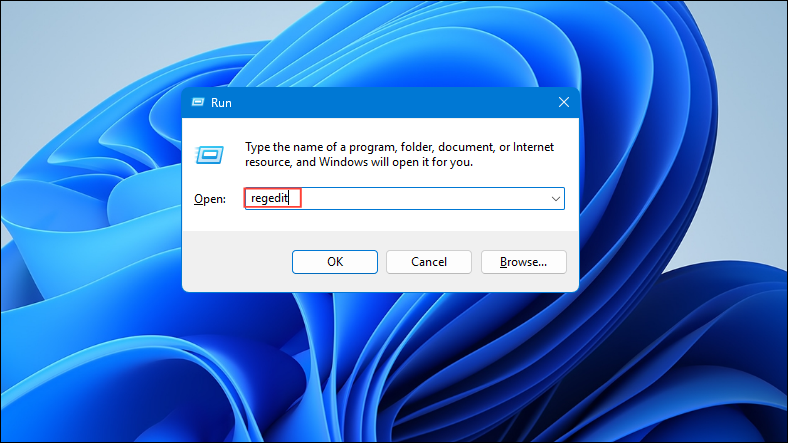
HKEY_LOCAL_MACHINE\SOFTWARE\Microsoft\Windows NT\CurrentVersion\Image File Execution Options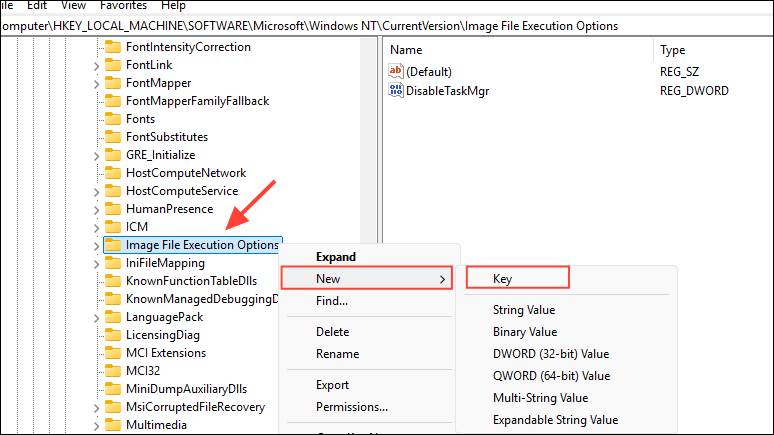
C:\Windows\System32\systray.exe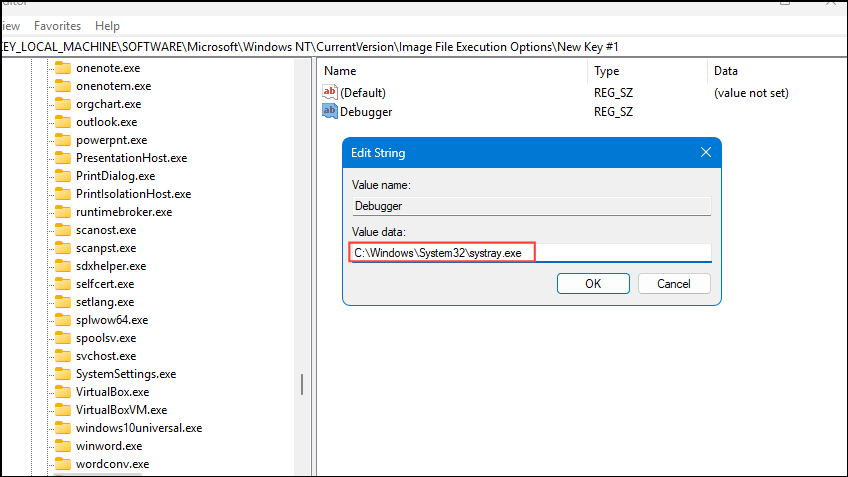
This method effectively hides the specified process by redirecting it to systray.exe, which does nothing. The process will still run but won’t be visible in Task Manager.
Method 2: Hide Multiple Processes Using a Single Key
HKEY_LOCAL_MACHINE\SOFTWARE\Microsoft\Windows NT\CurrentVersion\Image File Execution Options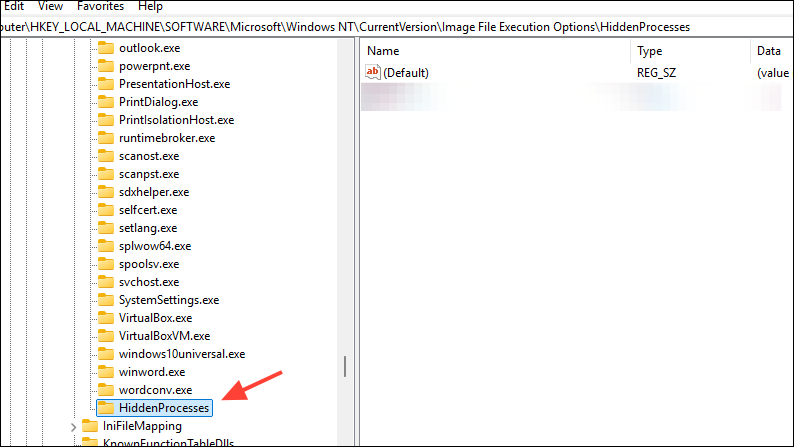
C:\Windows\System32\systray.exe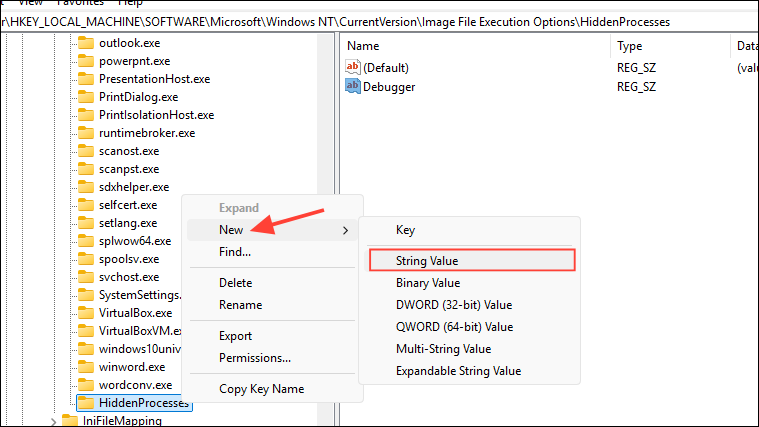
This method allows you to hide multiple processes using a single registry key, making it easier to manage and revert changes if needed.
Reverting Changes
To unhide processes, simply delete the corresponding keys or values you created in the Registry Editor. After deletion, restart your computer for the changes to take effect.
Important: Be cautious when hiding system processes, as this may lead to unexpected behavior or system instability. It’s recommended to only hide non-essential processes that you’re familiar with.
By following these steps, you can effectively hide specific background processes in Windows 11 using the Registry Editor. This can be useful for managing system resources or maintaining privacy, but always exercise caution when modifying system settings.