
Windows 11 brings new features and improvements for gaming, but it can also be a resource-intensive operating system. To get the best gaming performance on Windows 11, you’ll want to optimize various settings and components. This guide covers several effective methods to boost gaming performance on Windows 11.
Keep Windows 11 updated
One of the simplest ways to optimize gaming performance is to ensure Windows 11 is fully up-to-date. Microsoft regularly releases performance improvements, bug fixes, and security patches that can enhance system stability and gaming performance.
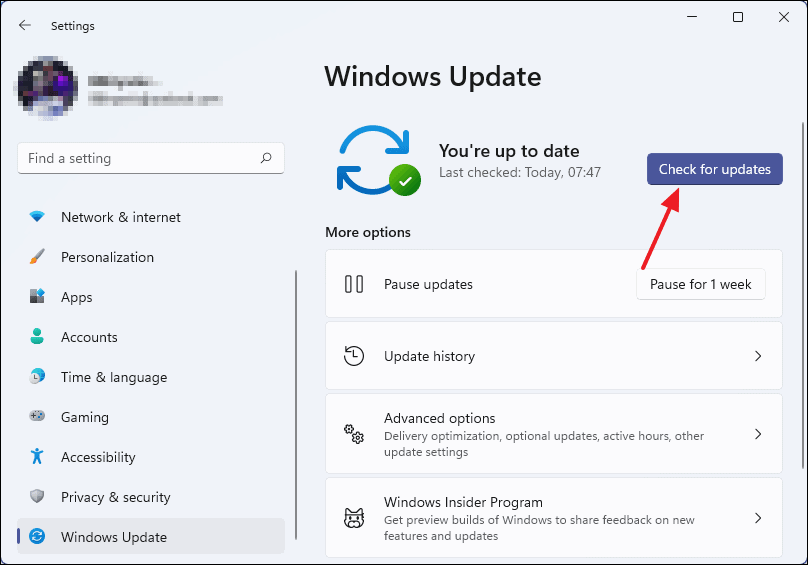
To check for Windows updates:
- Open the Start menu and go to Settings
- Click on Windows Update in the left sidebar
- Click “Check for updates”
- If updates are available, install them and restart your PC when prompted
Update graphics drivers
Keeping your graphics drivers updated is crucial for optimal gaming performance. For dedicated GPUs from NVIDIA or AMD, use their official software to get the latest drivers.
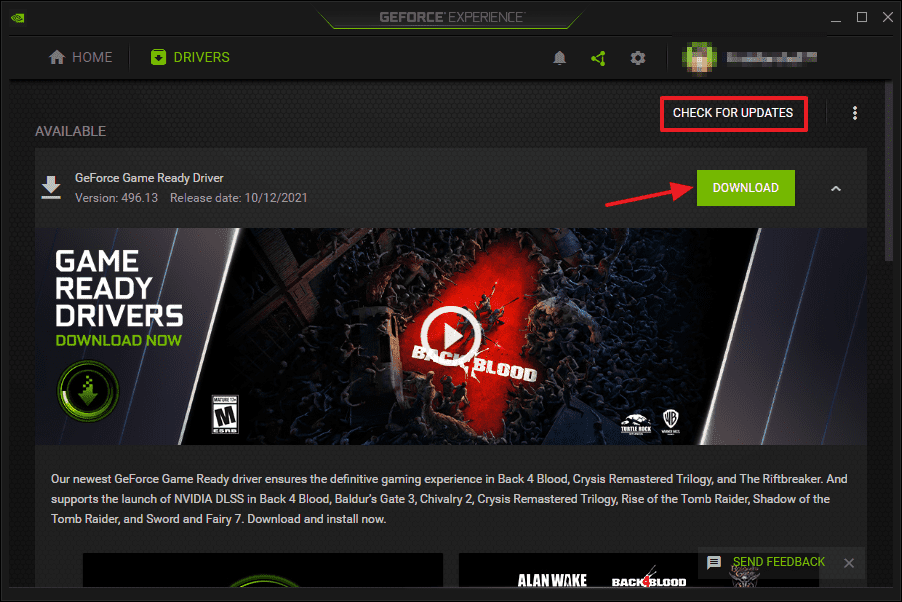
For NVIDIA GPUs:
- Download and install GeForce Experience from NVIDIA’s website
- Open GeForce Experience and go to the Drivers tab
- Click “Check for updates”
- If an update is available, click “Download” then “Express Installation”
Enable Game Mode
Windows 11’s Game Mode can help boost performance by optimizing system resources for gaming.
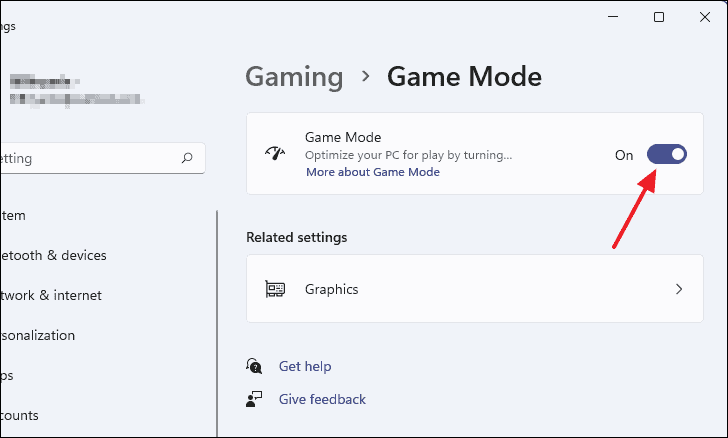
To enable Game Mode:
- Open Settings and go to Gaming
- Click on Game Mode
- Toggle the switch to turn on Game Mode
Optimize power settings
Using the High Performance power plan can improve gaming performance by ensuring your CPU runs at full speed.
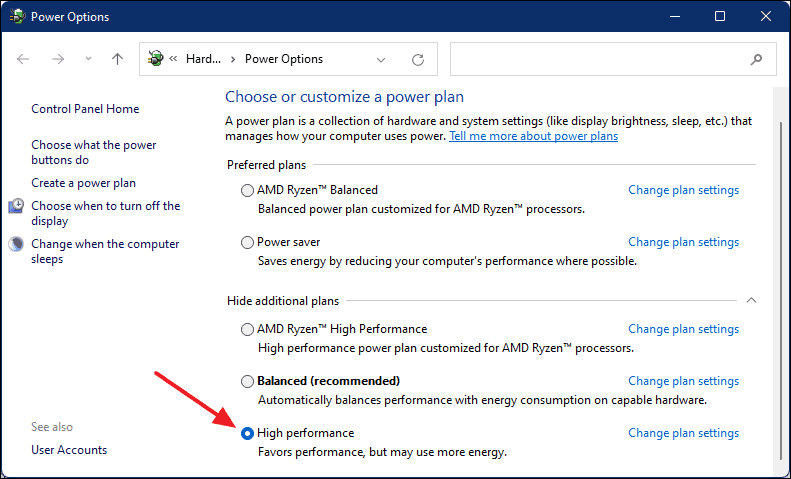
To change power settings:
- Search for “Choose a power plan” in the Start menu
- Click “Show additional plans”
- Select “High performance”
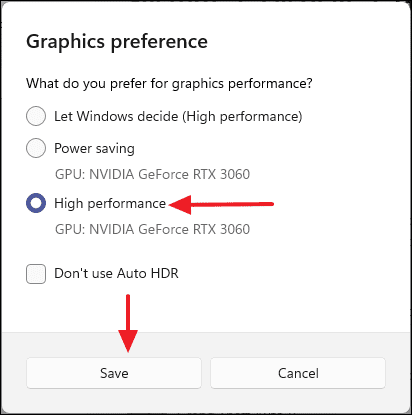
Set per-app graphics performance
Windows 11 allows you to set graphics performance preferences for individual games.
To optimize graphics settings per game:
- Go to Settings > System > Display
- Scroll down and click on Graphics
- Select a game from the list and click Options
- Choose “High performance” and click Save
Disable unnecessary background processes
Closing unnecessary apps and processes can free up system resources for gaming.
Some steps to reduce background processes:
- Uninstall unused applications
- Disable startup programs through Task Manager
- Close resource-intensive background apps before gaming
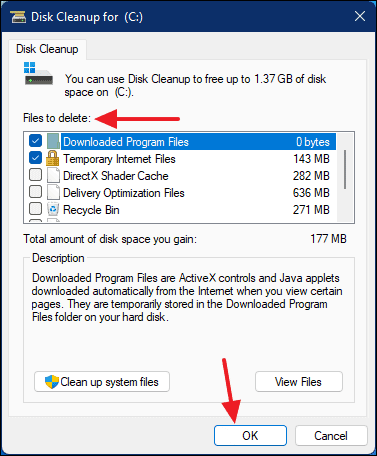
Perform disk cleanup and defragmentation
Regular disk maintenance can improve overall system performance:
- Search for “Disk Cleanup” in the Start menu and run it
- Search for “Defragment and Optimize Drives” and run it on your game installation drive
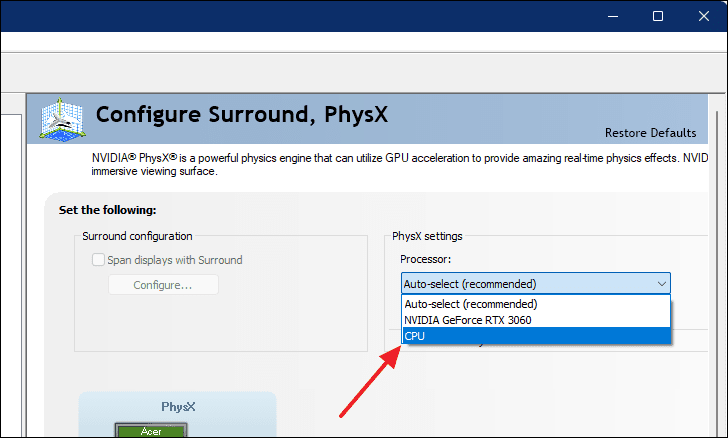
Disable hardware acceleration
In some cases, disabling hardware acceleration can improve gaming performance:
- Open NVIDIA Control Panel
- Go to “Configure Surround, PhysX”
- Set the processor to “CPU” under PhysX settings
- Click Apply
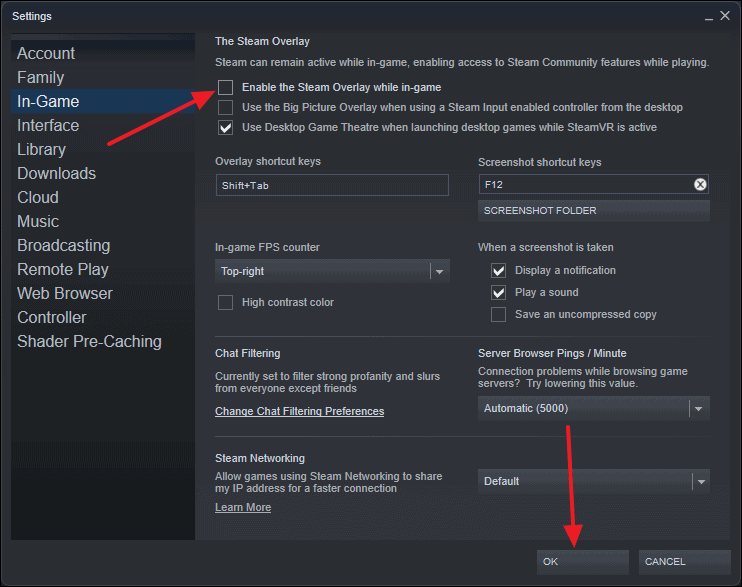
Disable game overlays
Game overlays from apps like Steam or Discord can impact performance. Consider disabling them:
For Steam:
- Open Steam and go to Settings
- Click on “In-Game” in the left sidebar
- Uncheck “Enable the Steam Overlay while in-game”
- Click OK
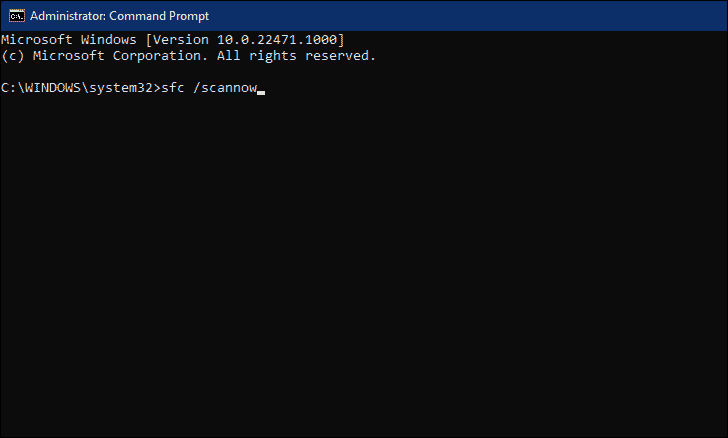
Verify system files
Corrupted system files can cause performance issues. Run the System File Checker to find and fix problems:
- Open Command Prompt as administrator
- Type
sfc /scannowand press Enter - Wait for the scan to complete and restart if prompted
By implementing these optimizations, you can potentially improve gaming performance on your Windows 11 system. Remember that results may vary depending on your specific hardware configuration and the games you play.


