For many people, the word Zoom has to be one of their most-uttered words of this year. Whether it’s an office meeting, online class, a chill-out session with the homies, or a full-blown virtual party (because that’s a thing this year), Zoom’s been the place to go to.
Zoom makes it really easy to have virtual meetings too. But when you try to add some Quarantunes to the mix, things can get a bit tricky. Whether you’re someone who’s just trying to play some songs or you’re a professional who needs to play an instrument, knowing how to do it right can save you from a world of pain.
Sharing Music in a Zoom Meeting
We’ve all been there. Whether you’re trying to set up a good atmosphere to vibe to, or you’re having a party, a dance lesson, or maybe a workout session on Zoom, trying to play music on Zoom in the background can give many people a headache.
That’s because you’re trying to play music on Zoom the wrong way. If you’re putting on music in the background and letting your microphone capture it manually for the meeting, it’s bound to create problems.
Trying to find the right balance so the attendees can hear you as well as the music clearly itself is going to drive you insane. And add to the mix the dilemma of what to do when you need to go on mute to let someone else speak.
But all that is nothing when compared to the problems Zoom’s audio enhancement features will create for you. Zoom would detect the music playing in the background as noise and attempt to suppress it to the best of its abilities. So the music other attendees will hear would be choppy.
There are just too many variables with just playing the music in the background. That’s why you need to do it the right way!
Everyone knows that you can share your screen in Zoom; it’s old news. Most of you also know that you can also share your computer audio with the screen; this is what lets you watch movies and videos together. But there’s another aspect of screen sharing not everyone’s aware of – you can also share only the computer sound without sharing your screen.
That’s right, folks! Zoom has a built-in feature to share music so you can jam without any headaches. But so many people are unaware of it because it falls under the screen sharing domain; when, in reality, you’re not going to be sharing your screen at all. So it’s not really your fault for being negligent of its existence.
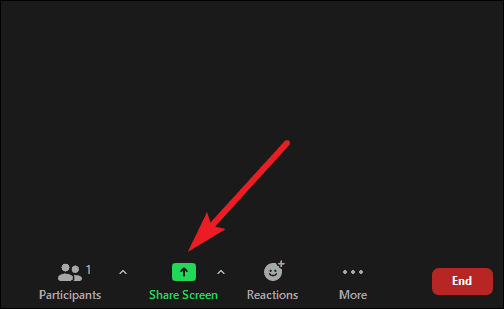
Go to the meeting toolbar in the meeting, and click the ‘Share Screen’ button.
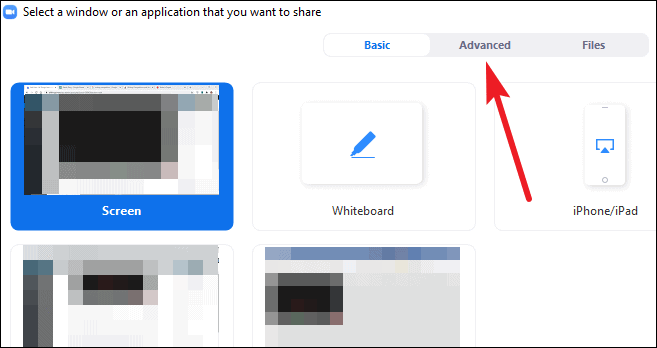
Screen sharing window will open. Navigate to the ‘Advanced’ tab.
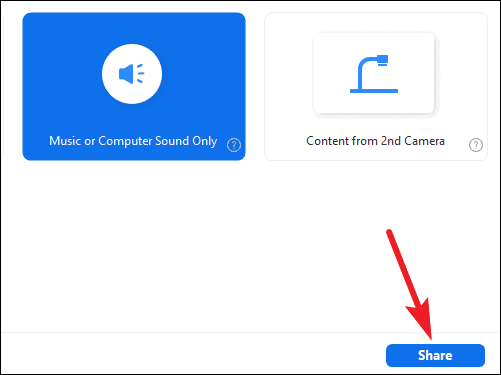
There, you’ll find the option for ‘Music or Computer Sound only’. Click it to select it.
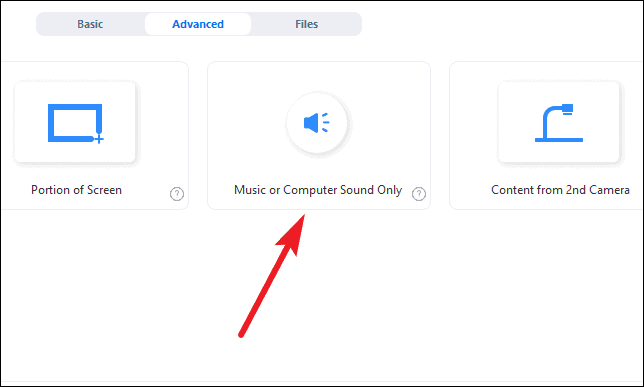
Then, click the ‘Share’ button at the bottom-right corner of the window.
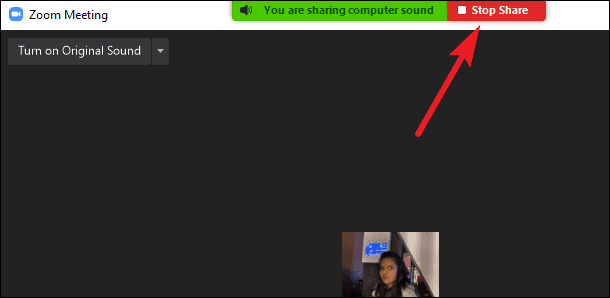
You’ll see a “You are sharing computer sound” message at the top of your meeting window, just like when you’re sharing your screen. Click the ‘Stop Share’ button at any time to stop sharing the music.
Now, you can play music from your computer any way you like – from a streaming service, downloads, even a CD, if that’s still a thing? The participants will be able to hear all sound from your computer, including the music. And the whole experience will be way better and smoother than you doing it manually.
This way, even if you mute your microphone in the meeting, it won’t impact the background music at all.
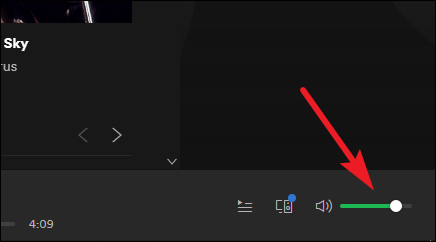
You can even easily control the volume of the music from the music player. Go to the volume option in the music player and adjust the volume from there. If you change the volume for your system or speakers, it would only change the volume for you and not the entire meeting.
You can make the experience even better by using headphones. It’ll ensure that there is no echo or feedback in the meeting created by your microphone picking up the music and playing it back when you’re not on mute. Although Zoom does the job of not producing any echo when you’re sharing computer sound using this method very nicely, you can never be too safe.
Note: You can only share computer sound while using the desktop client. The option to Share sound is also not available when multiple users are sharing screens.
Performing Live Music Show on Zoom
Now, people who want to play music in the background for parties, dance classes, or workout sessions have got it easy with Zoom’s in-house feature. But for musicians who want to practice while social distancing, host concerts, or conduct music classes via Zoom, things are definitely a lot trickier, especially when it involves an instrument.
That’s because Zoom’s audio settings are by default configured for speech. That makes the default audio quality not at all suitable for playing music. But you can change these settings to make sure that playing an instrument over Zoom is less headache-inducing and a more pleasant ordeal.
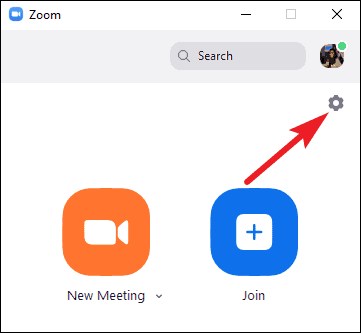
Open the settings for Zoom from the desktop client.
From the navigation menu on the left, go to ‘Audio’.

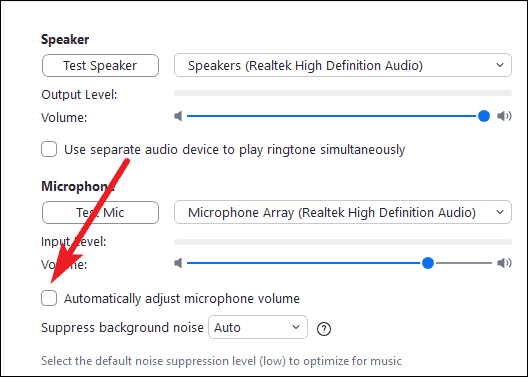
Audio settings will open. First, disable the option for ‘Automatically adjust microphone volume’. Automatic adjustment of your microphone volume is fine for talking; it’s preferable even. But for music, it’d just make it flat. And nobody wants that! You want to hear all the dynamic variation – the highs and the lows.
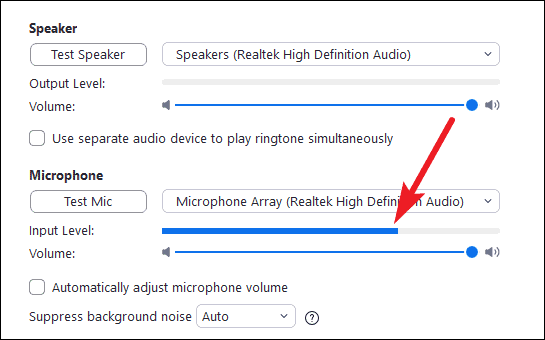
But after you disable the option, it’s important to make sure that the volume isn’t too high either to be damaging for other meeting participants. Try your instrument with the settings still open. You’ll see a blue bar on the right of the ‘Input Level’ option that varies according to sound. Make sure it doesn’t rise too high. If it does, adjust the volume slider for the microphone beneath the input level. The ideal setting for the volume is when the bar only reaches somewhere between the middle and the end, and not all the way.
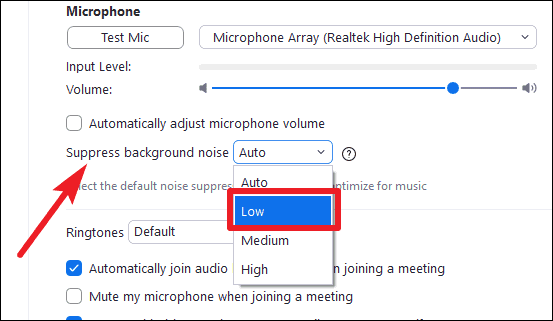
Now, go to the ‘Suppress background noise’ option and click on the drop-down menu next to it. Previously, you could disable it entirely. But now, there is no such option, and it can confuse many users. Select the option ‘Low’ to optimize your audio for music instead.
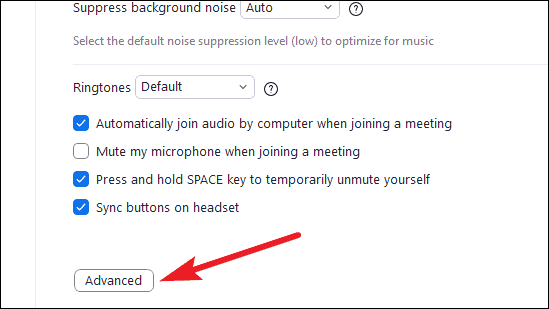
Finally, on to the last setting you need to configure. Click the ‘Advanced’ button at the bottom of the screen.
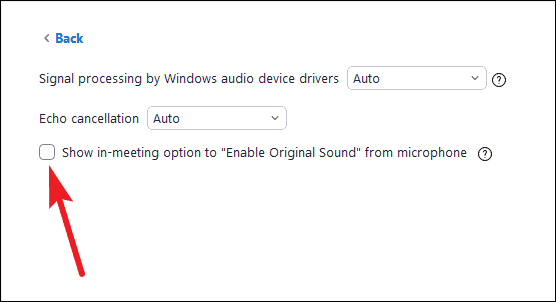
Advanced audio settings will open. Check the option for ‘Show in-meeting option to “Enable original sound” from microphone’.
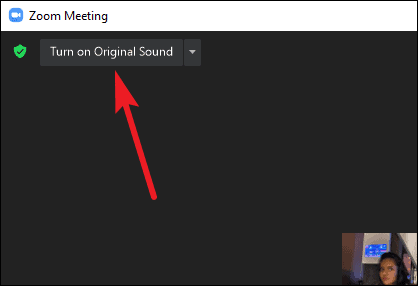
Enabling this option will add an ‘Enable Original Sound’ to your meeting. Click the button in the meeting whenever you want to play music.
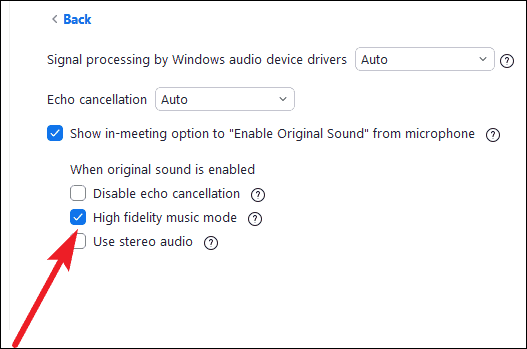
Additionally, as soon as you check the option to show the button to enable the original sound, a few more options will appear. If you have some professional-grade equipment, these options will help you step up your audio game even further. But if you don’t, no worries. The changes in previous settings will make your experience infinitely better.
For those who do have a professional audio interface, microphone, and headphones, enable the option for ‘High fidelity music mode’. It will optimize your Zoom audio for the highest music quality. But remember that enabling this setting can increase CPU utilization and bandwidth consumption. Zoom advises you to use this setting on an ethernet connection instead of Wi-Fi if you can.
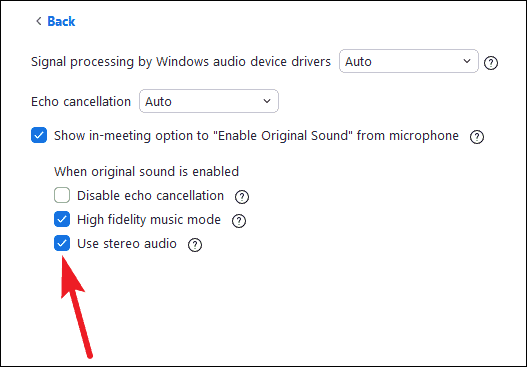
The next option you want to enable is ‘Use stereo audio’. But to use this option, you need to have a microphone or audio interface that can process audio in stereo mode. Using stereo mode for music instead of the mono channel Zoom normally uses for speech will make a huge difference for your music session. But remember that using stereo mode will affect the CPU usage for everyone in the meeting, and not just you.
These settings are part of the “Original Sound” setting and not standalone settings, i.e., they will only come in effect when you enable original sound in the meeting.
Playing music virtually can be a challenge, but Zoom has various settings to help you. Considering that Zoom only used to be a product used by businesses till last year, it’s adapted and risen to the occasion rather dramatically, accommodating various settings to help everyone.


