
Selecting the appropriate layout in Windows 11 File Explorer can enhance your ability to navigate and locate files efficiently. Different file types may benefit from different views—for instance, images are easier to browse in thumbnail view, while documents might be more manageable in list view. This guide will show you how to quickly switch between thumbnail and list views, explore all available layout options, and organize your files using grouping and sorting features.
Switching between thumbnail and list layouts quickly
There are times when you may need to switch your folder view swiftly to better accommodate the files you’re working with. For example, viewing images in thumbnail view allows you to preview the content without opening each file individually.
To switch to thumbnail view:
- Open File Explorer and navigate to the folder containing your files.
- Click on the ‘Thumbnail view’ icon located at the bottom-right corner of the File Explorer window.
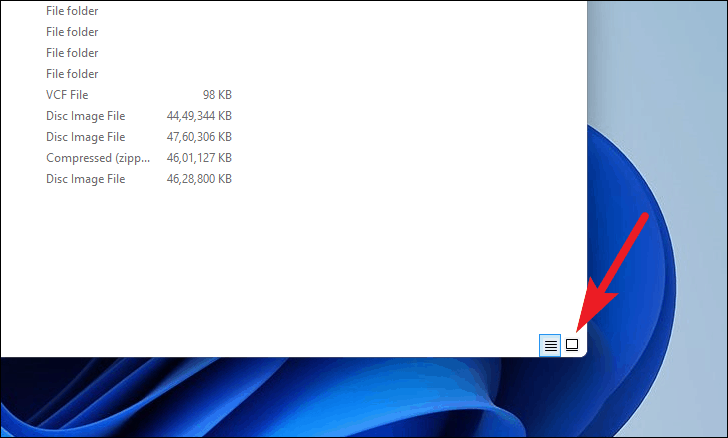
Alternatively, you can press Ctrl + Shift + 2 on your keyboard to switch to thumbnail view.
To switch to list view:
- Click on the ‘List view’ icon next to the ‘Thumbnail view’ icon at the bottom-right corner.
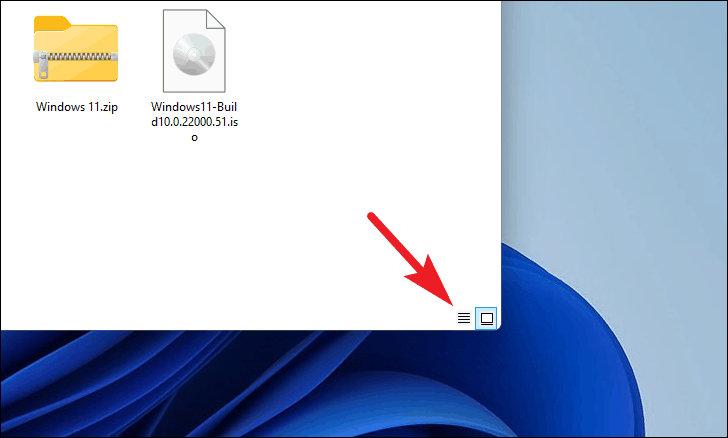
You can also use the keyboard shortcut Ctrl + Shift + 6 to switch to list view.
All layout options available in Windows 11
Windows 11 offers a variety of layout options in File Explorer to accommodate different preferences and improve file management.
To access all layout options:
- Open File Explorer and navigate to your desired folder.
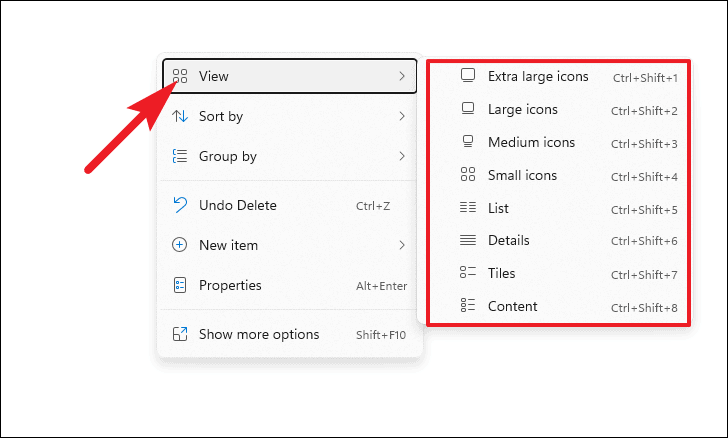
- Right-click on an empty space within the folder.
- Hover over the ‘View’ option to see a list of available layouts.
Note: You can use the keyboard shortcuts displayed next to each layout option in the context menu to switch layouts quickly.
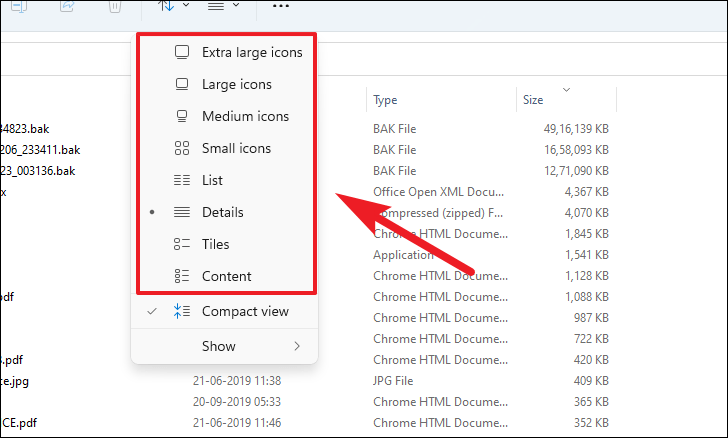
Alternatively, you can change the layout from the Ribbon menu:
- Click on the ‘Layout’ icon in the Ribbon menu at the top of the File Explorer window.
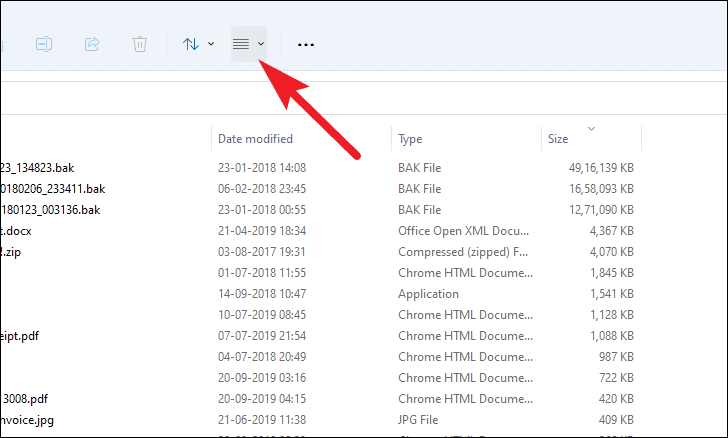
- From the dropdown menu, select your preferred layout option. Your current layout is indicated by a black dot next to the option.
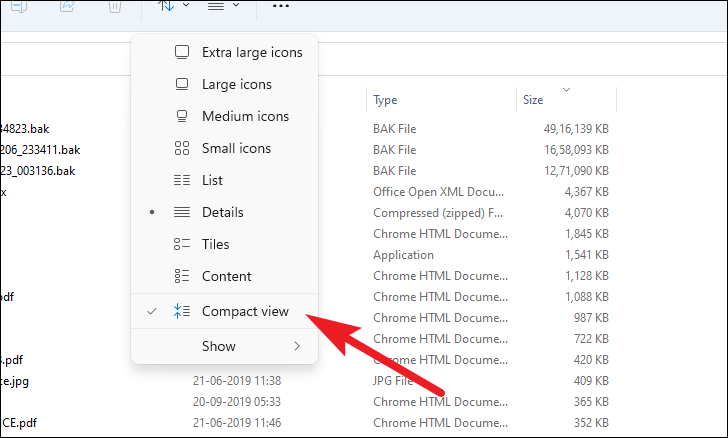
- If you prefer a more condensed view, you can enable the ‘Compact view’ option from the layout menu. This reduces the spacing between items in File Explorer, allowing more files to be displayed on the screen.
Grouping and sorting files and folders in File Explorer
In addition to layout options, Windows 11 allows you to group and sort files and folders in File Explorer. This helps organize your files more effectively and makes it easier to find specific items.
To group files:
- Navigate to the folder containing your files.
- Right-click on an empty space within the folder.
- Hover over the ‘Group by’ option and select an attribute to group the files by, such as ‘Type’.
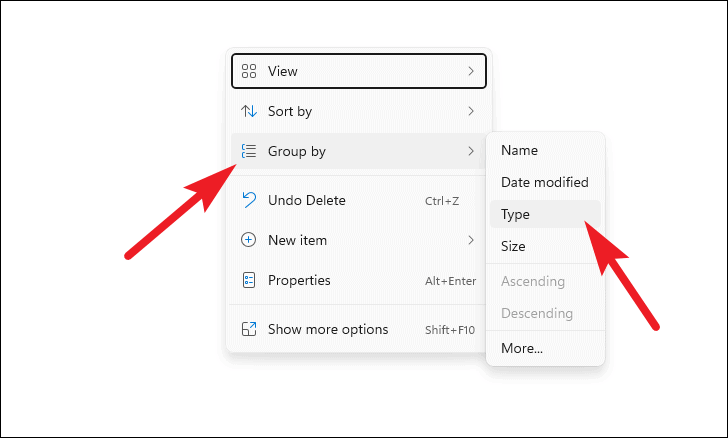
- Your files will now be grouped according to the selected attribute.

To sort files:
- Right-click on an empty space within the folder.
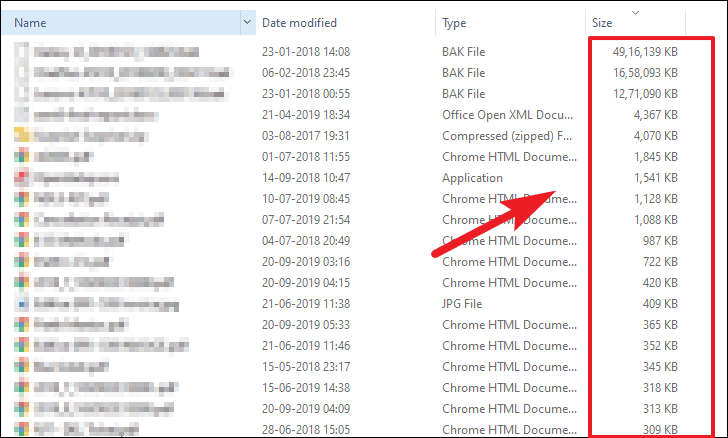
- Hover over the ‘Sort by’ option and choose an attribute to sort the files by, such as ‘Size’.
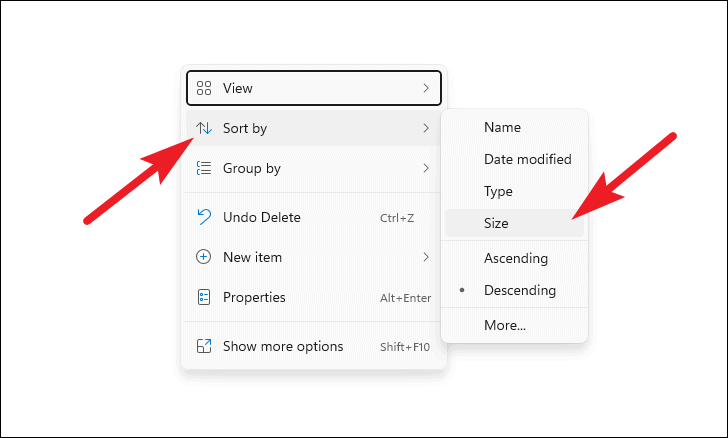
The files will be sorted based on the selected attribute, making it easier to identify files according to your preference.
Customizing the layout, grouping, and sorting options in Windows 11 File Explorer can greatly enhance your file management experience, making it easier to navigate and find your files efficiently.


