Explore the benefits and features of 7-Zip, a free, open-source file compression tool for Windows 11. Learn how to install, set up, compress, extract, and encrypt your files with this comprehensive guide.
Explore the benefits and features of 7-Zip, a free, open-source file compression tool for Windows 11. Learn how to install, set up, compress, extract, and encrypt your files with this comprehensive guide.
by Raj Kumar
Do you feel overwhelmed by the sheer number of files on your computer, making it difficult to find what you need or manage your storage efficiently? Compressing and organizing your files can alleviate this issue, freeing up space and simplifying your file management. While there are paid options like WinZip and WinRAR, not everyone wants to spend money on a file compression tool. Fortunately, 7-Zip is a free and powerful alternative that offers high compression ratios without compromising on features. In this guide, we’ll show you how to use 7-Zip on Windows 11 to compress, extract, and encrypt your files effectively.
Why You Should Use 7-Zip
7-Zip is completely free for both personal and commercial use.
The software supports localization in 87 different languages.
It offers a high compression ratio for formats like 7z, ZIP, and GZIP, outperforming many competitors.
Provides strong AES 256-bit encryption for 7z and ZIP formats.
Can handle files up to 16 exbibytes in size, which is 264 bytes.
Available in lightweight command line versions as well.
Integrates seamlessly with Windows Shell for easy access.
Supports packing and unpacking of various formats: 7z, XZ, BZIP2, GZIP, TAR, ZIP, and WIM.
Can unpack a wide range of formats: AR, ARJ, CAB, CHM, CPIO, CramFS, DMG, EXT, FAT, GPT, HFS, IHEX, ISO, LZH, LZMA, MBR, MSI, NSIS, NTFS, QCOW2, RAR, RPM, SquashFS, UDF, UEFI, VDI, VHD, VMDK, XAR, and Z.
How to Install 7-Zip on Windows 11
If you haven’t installed 7-Zip on your Windows 11 system yet, follow these steps to download and install it.
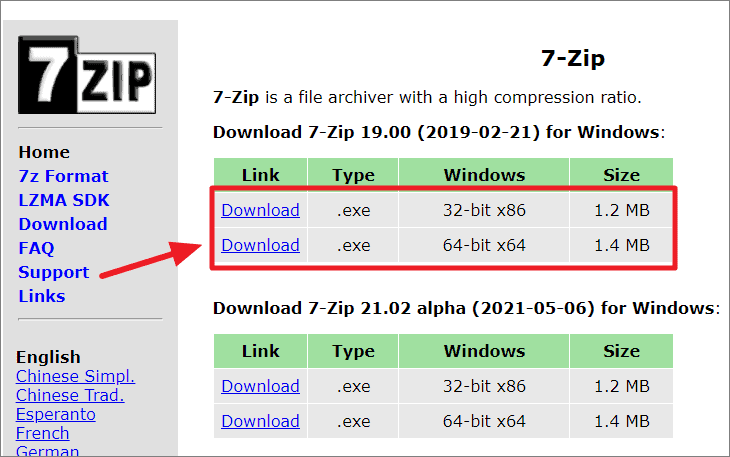
On the homepage, you’ll see different versions of 7-Zip available for download. Choose the version that matches your system architecture. For most modern systems, this will be the ’64-bit x64′ version. If you’re using a 32-bit system, select the ’32-bit x86′ version.
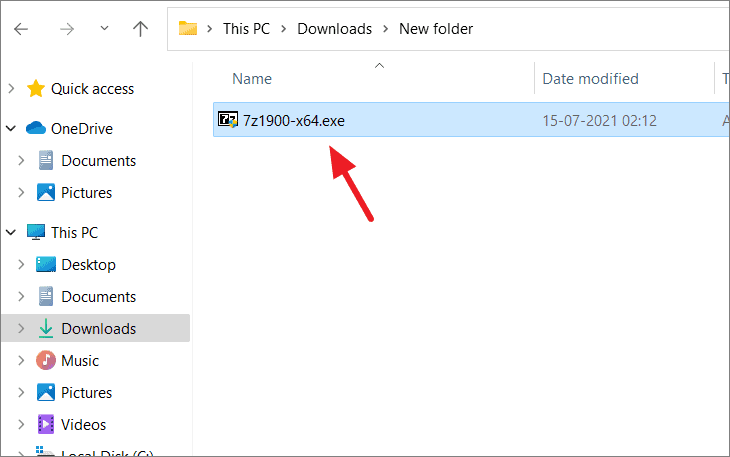
Once the download is complete, open File Explorer and navigate to the folder where the installer was saved. Double-click on the setup file to begin the installation process.
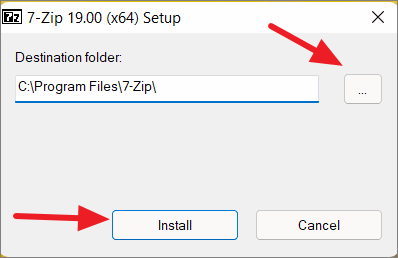
In the 7-Zip Setup window, you’ll be asked to choose the installation destination. You can click the ‘…’ button to select a different folder, or proceed with the default location. Click ‘Install’ to continue.
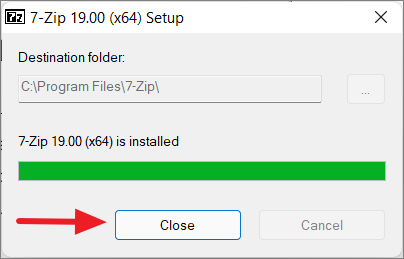
The installation process is quick since 7-Zip is a lightweight application. Once it’s finished, click ‘Close’ to exit the setup window.
Setting Up 7-Zip in Windows 11
After installing 7-Zip, it’s a good idea to set it as the default program for opening archive files and creating compressed archives. This will make it easier to work with compressed files directly from File Explorer. Here’s how to do it:
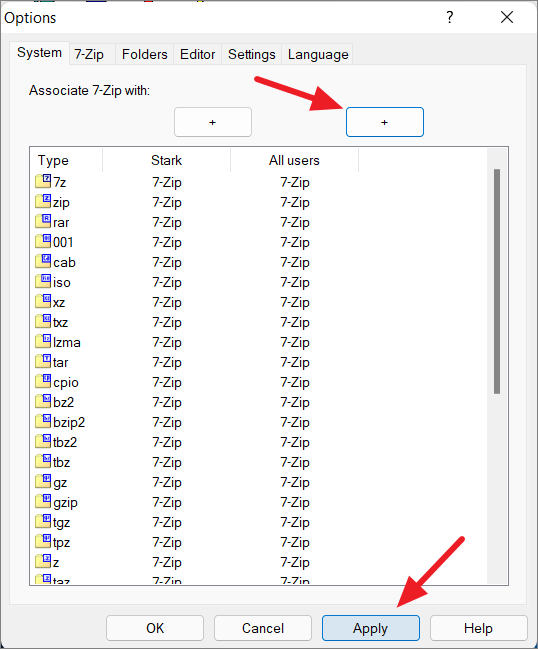
Under the ‘System’ tab, you’ll see a list of file types associated with 7-Zip. Click the first ‘+’ button to associate 7-Zip with all supported archive formats for the current user. This means 7-Zip will open these file types by default.
If you want to set 7-Zip as the default for all users on the system, click the second ‘+’ button. After making your selections, click ‘Apply’ to save the changes, then click ‘OK’ to close the dialog.
You can also associate or disassociate specific file types individually by checking or unchecking them in the list.
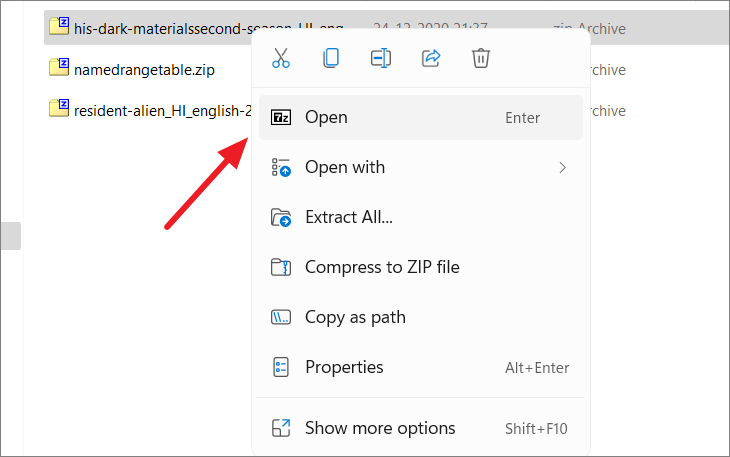
Now, when you right-click on compressed files in File Explorer, you’ll see options to open them with 7-Zip or to compress files using 7-Zip directly from the context menu.
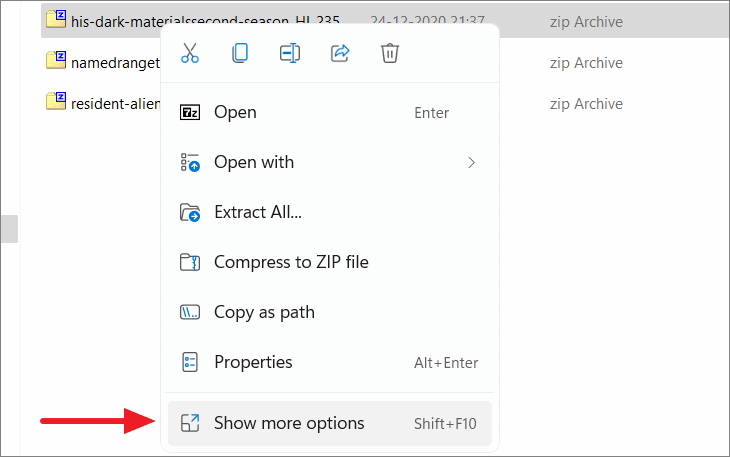
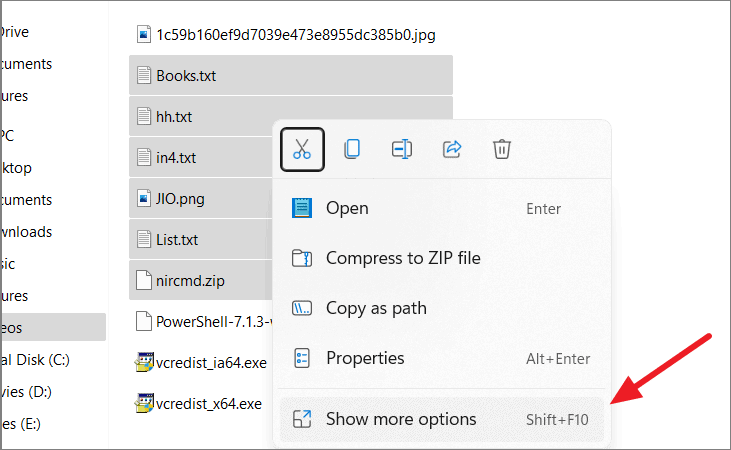
In Windows 11, the right-click context menu has a simplified look. To access the full set of 7-Zip options, right-click on a file and select ‘Show more options’ at the bottom of the context menu.
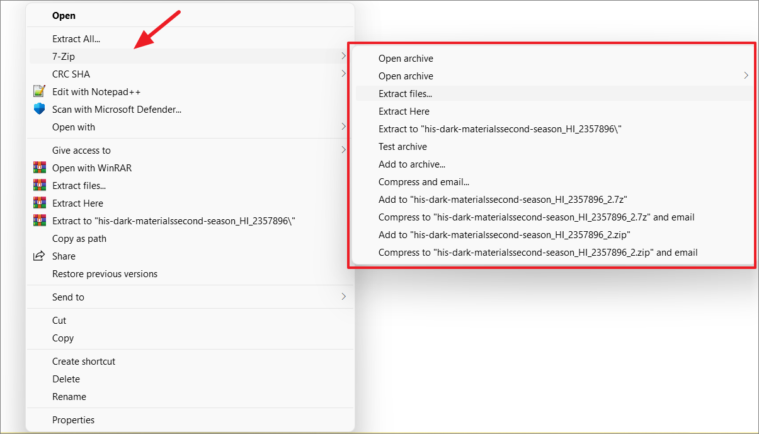
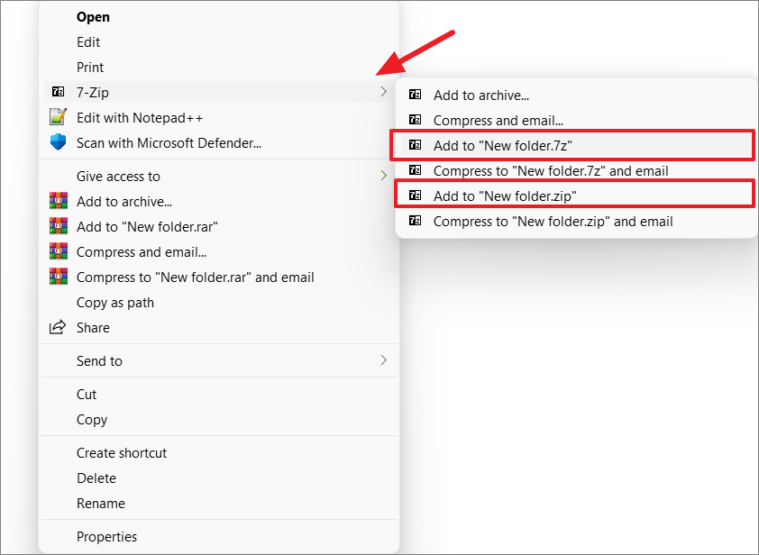
This will bring up the classic context menu where you can hover over ‘7-Zip’ to see all the available options.
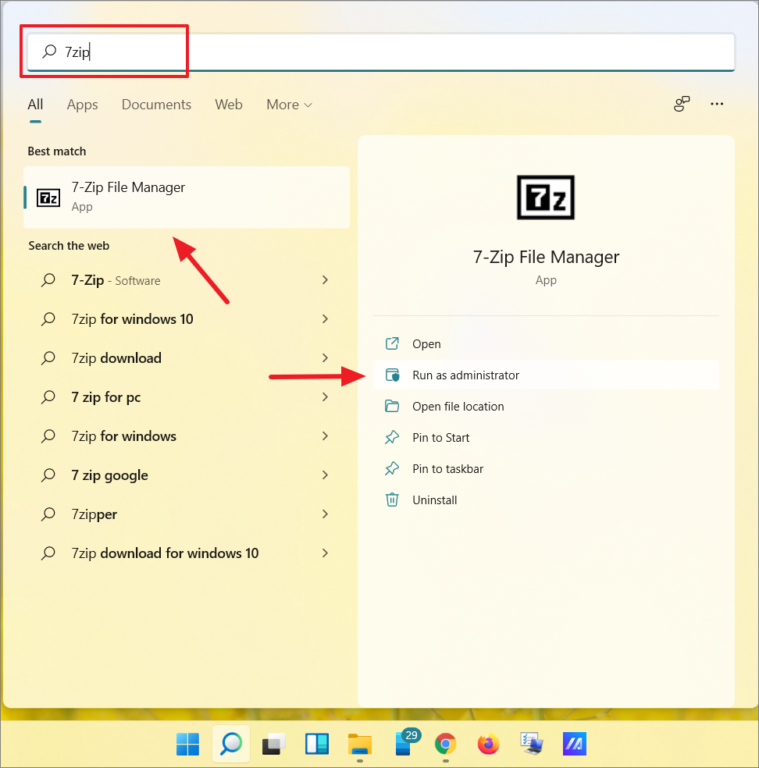
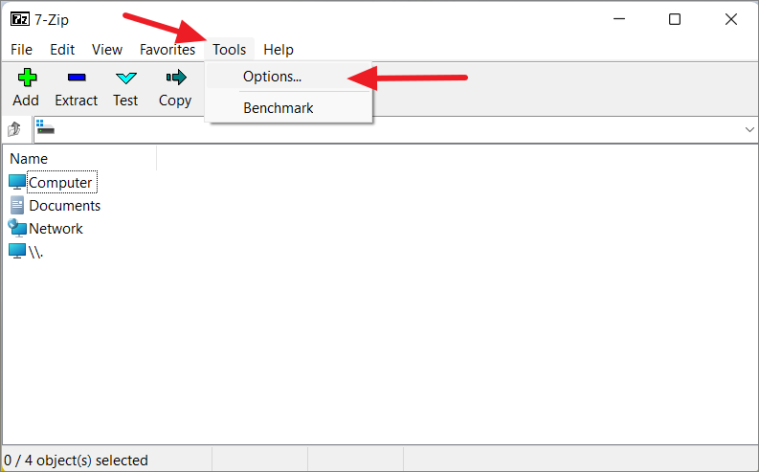
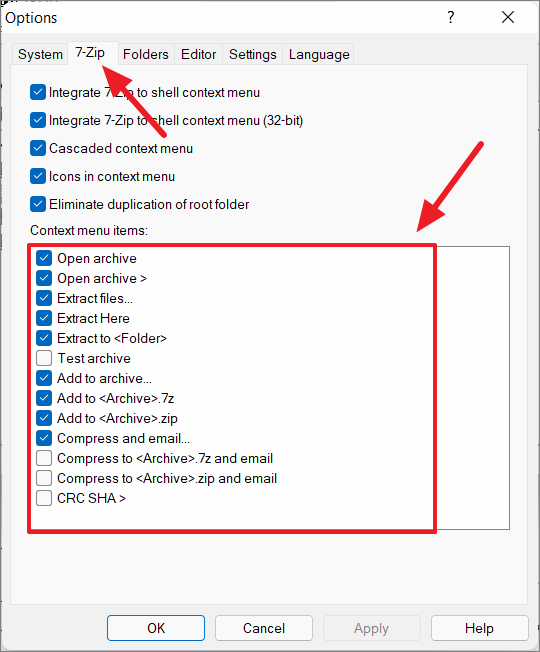
To customize the context menu items, open the 7-Zip File Manager again, go to Tools → Options, and switch to the ‘7-Zip’ tab. Here, you can select which items you want to appear in the context menu.
How to Compress Files Using 7-Zip
With 7-Zip installed and set up, you can start compressing files to save space or organize your data. Here’s how to compress files using 7-Zip:
Open File Explorer and navigate to the file(s) or folder(s) you want to compress. Select the items by clicking on them. You can select multiple files by holding down the Ctrl key while clicking.
Hover over the ‘7-Zip’ option in the context menu. You’ll see several actions. For quick compression, you can select ‘Add to [filename].zip’ or ‘Add to [filename].7z’ to compress the files using the ZIP or 7z formats respectively.
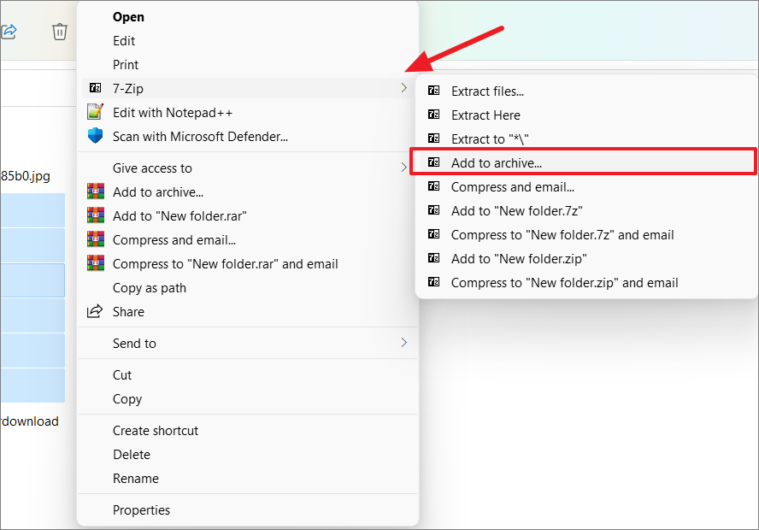
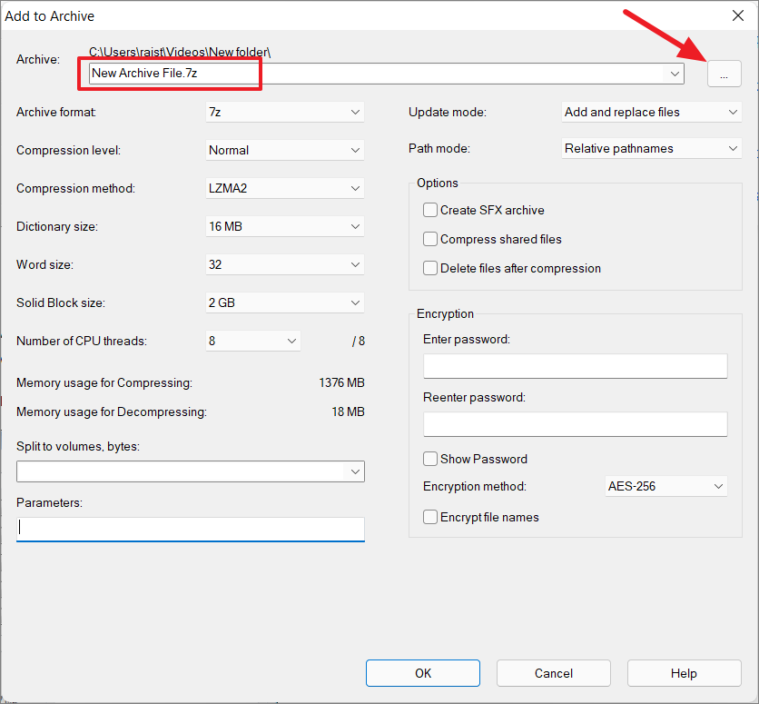
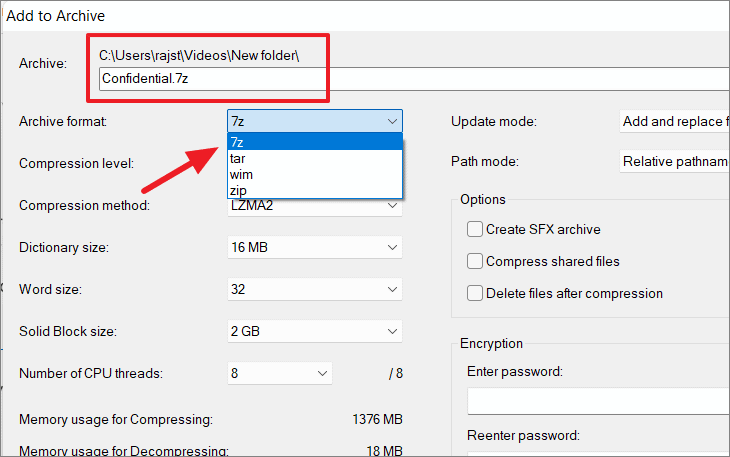
In the ‘Add to Archive’ window, you can configure various settings. Enter a name for the archive in the ‘Archive’ field. To change the save location, click the ‘…’ button and select a different folder.
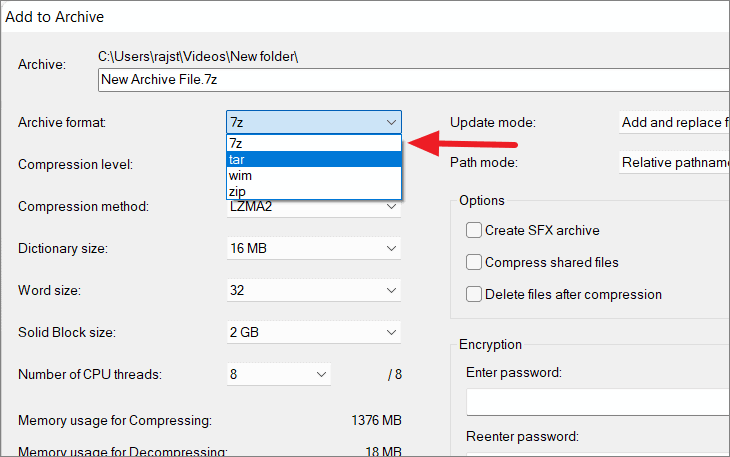
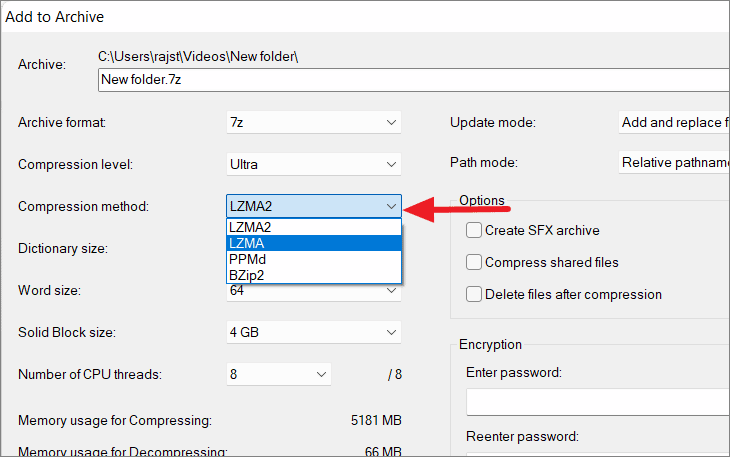
Choose the archive format from the ‘Archive format’ dropdown menu. 7-Zip supports formats like 7z, zip, tar, and wim. Select the one that suits your needs.
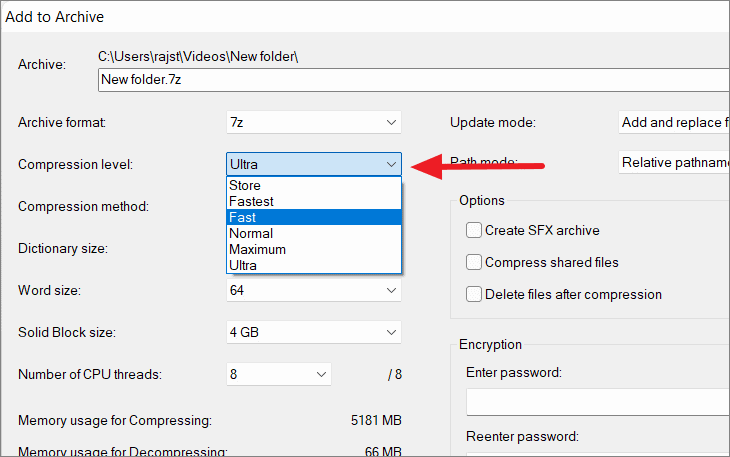
Adjust the ‘Compression level’ to control how much the files are compressed. Options range from ‘Store’ (no compression) to ‘Ultra’ (maximum compression). Higher compression levels save more space but take longer to process.
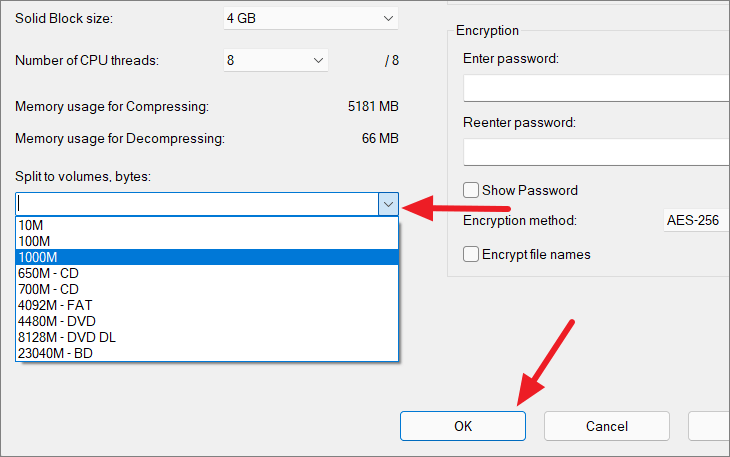
If you want to split the archive into multiple parts, you can specify the size of each part in the ‘Split to volumes, bytes’ field. This is useful for sharing large files over email or other services with size limits.
Once you’ve configured all settings, click ‘OK’ to start the compression process. The time it takes will depend on the size of the files and the compression options you’ve chosen.
The compressed archive will be created in the location you specified, and you can now share or store it as needed.
Encrypt a File with Password Protection Using 7-Zip
7-Zip not only compresses files but also allows you to encrypt them with strong AES-256 encryption. This ensures that only people with the correct password can access the contents of the archive. Here’s how to encrypt your files using 7-Zip:
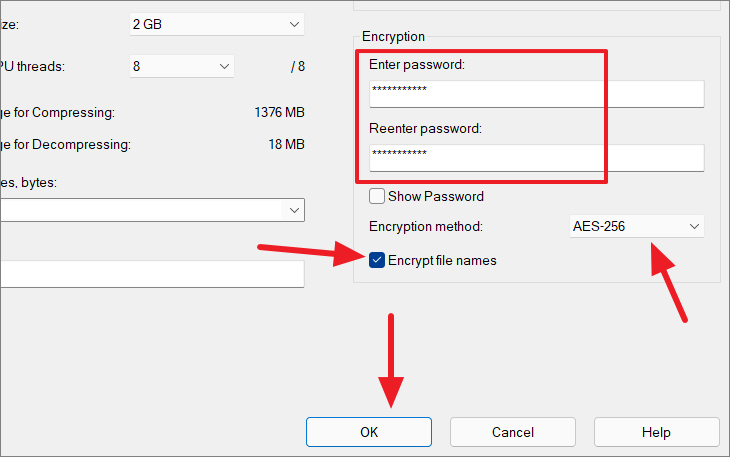
In the ‘Add to Archive’ window, enter a name for your archive and choose the ‘Archive format’ as ‘7z’ or ‘zip’. The ‘7z’ format offers better compression and encryption options.
In the ‘Encryption’ section, enter a strong password in both the ‘Enter password’ and ‘Reenter password’ fields. Ensure that ‘Encryption method’ is set to ‘AES-256’. If you’re using the ‘7z’ format, you can also check the ‘Encrypt file names’ option for additional security, which hides the names of files inside the archive until the correct password is entered.
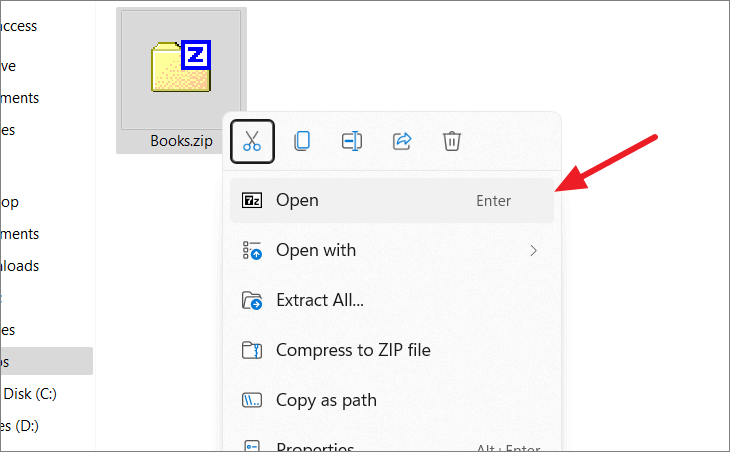
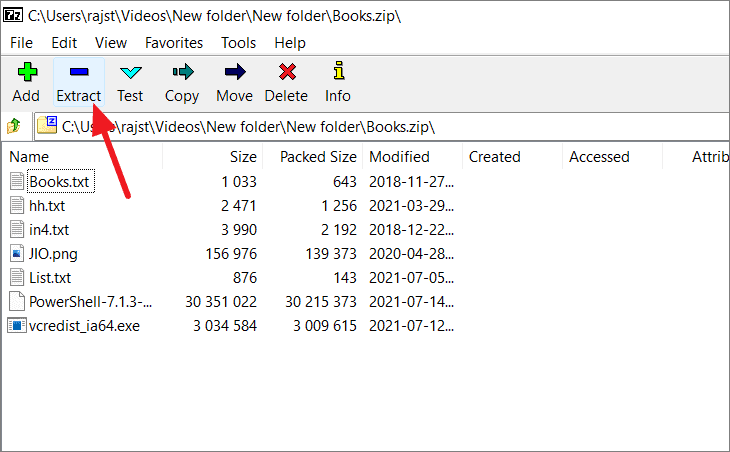
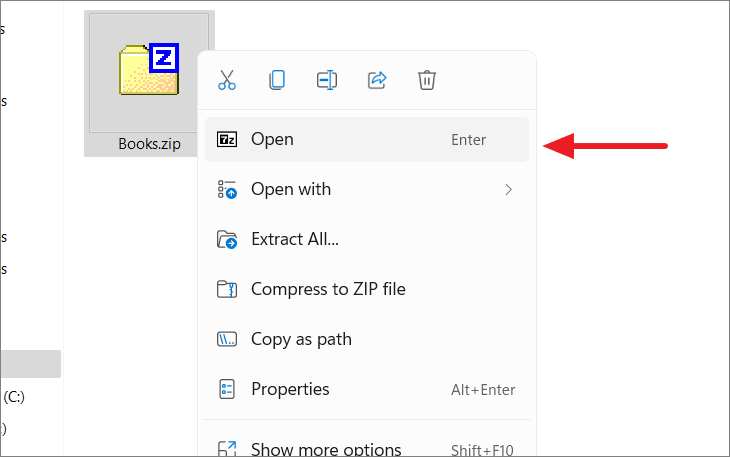
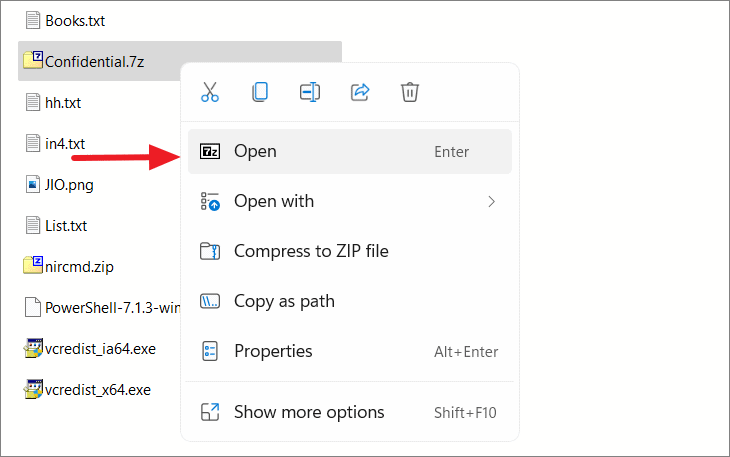
Right-click on the archive file. If it’s a split archive, make sure to select the first part (usually ending with ‘.001’). Choose ‘Open’ from the context menu to view the contents in 7-Zip.
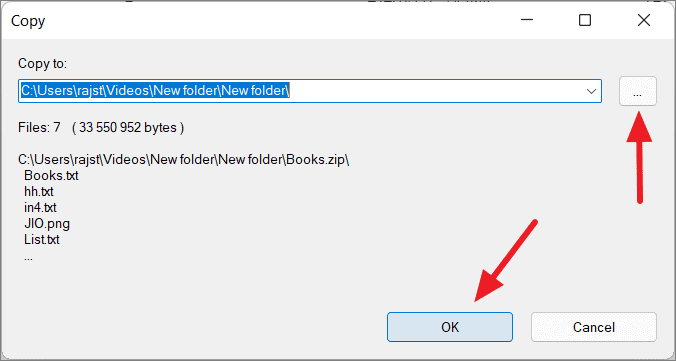
In the ‘Extract’ dialog, you can choose the destination folder where you want the files to be extracted. By default, it will extract to the same folder as the archive. Click on the ‘…’ button to select a different location if desired.
Click ‘OK’ to start the extraction process. The files will be extracted to the chosen location.
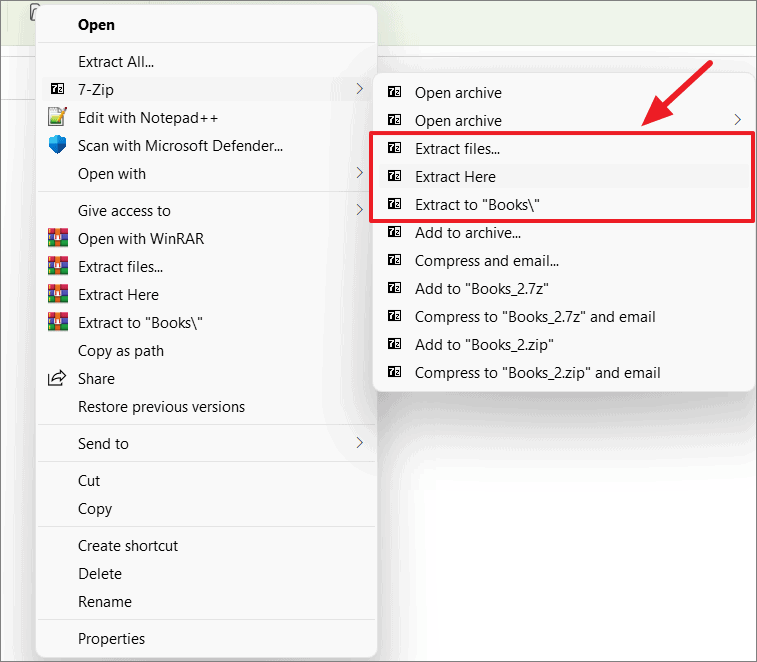
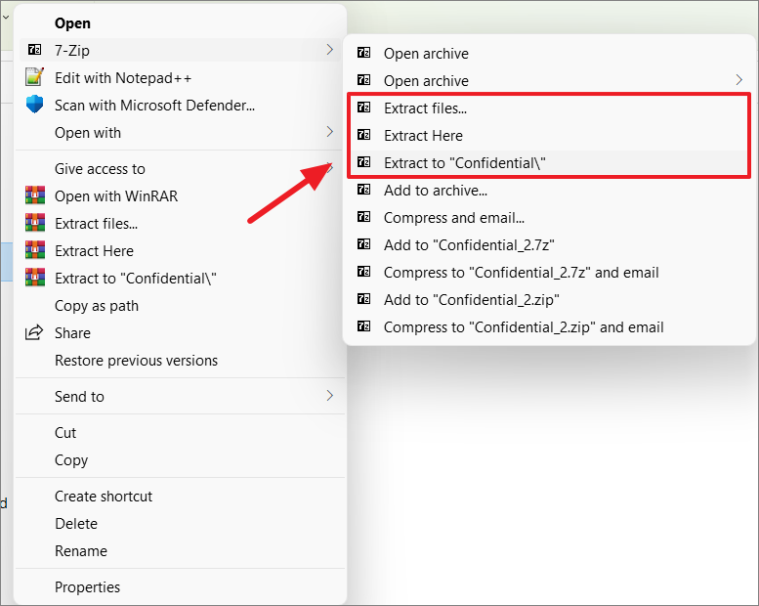
You can also extract files directly from the context menu. Right-click on the archive file, select ‘Show more options’, hover over ‘7-Zip’, and choose one of the extraction options:
– ‘Extract files…’: Allows you to specify the destination folder before extracting.
– ‘Extract Here’: Extracts the files into the current folder.
– ‘Extract to “[FolderName]\”‘: Creates a new folder named after the archive and extracts the files into it.
Extract a Single File from an Archive Using 7-Zip
If you only need to extract a specific file from an archive, you can do so without extracting the entire contents:
To extract the files, right-click on the encrypted archive, select ‘Show more options’, hover over ‘7-Zip’, and choose your preferred extraction option.
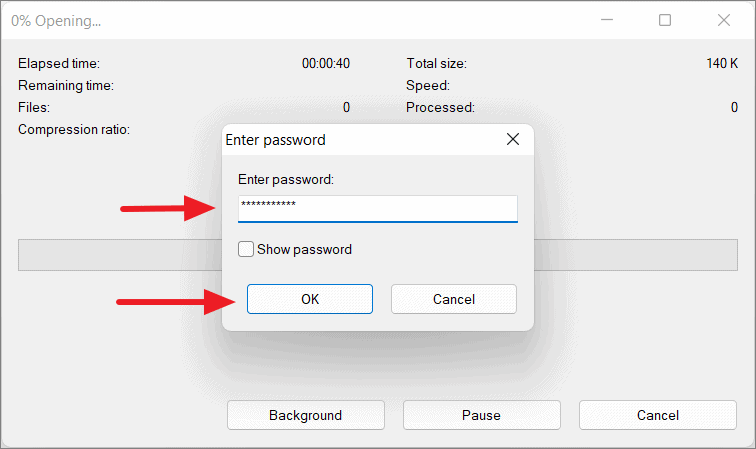
You will be prompted to enter the password again. After entering it, click ‘OK’ to start the extraction.
That’s it! You now have a comprehensive understanding of how to use 7-Zip on Windows 11 to compress, encrypt, and extract files. Whether you’re managing large amounts of data or simply looking to save space, 7-Zip is a versatile tool that can make your file management more efficient.