Zoom is a popular choice among educational institutions like schools and colleges to conduct classes online, especially during this COVID-19 Pandemic.
If you are hosting a Zoom Meeting, then you can record the meeting and save the video recordings locally on your computer. However, if you are a participant, you cannot use Zoom’s built-in recording option without getting permission from the meeting host. In such scenarios, the only available option is to use a reliable third-party screen recorder software to record the meeting.
Record a Zoom Meeting using ApowerREC Desktop Software
ApowerREC is a screen recorder software that allows you to record any kind of activity on your computer screen (in our case, a Zoom Meeting) and save that in a desired video file format like MP4, AVI, MOV and so on.
Download and Install ApowerREC
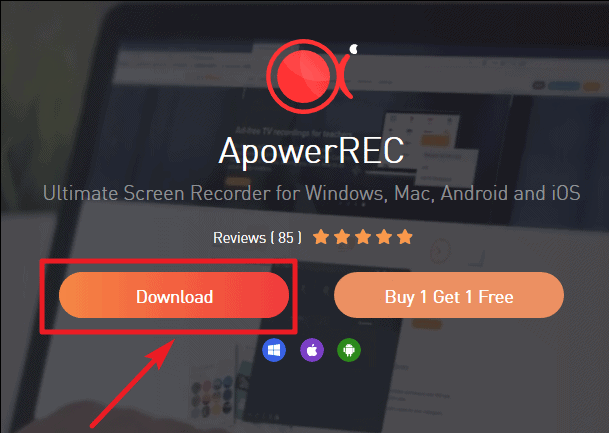
In order to record a Zoom Meeting, first, you need to install ApowerREC software on your computer. Go to apowersoft.com/record-all-screen and click the ‘Download’ button on the page.
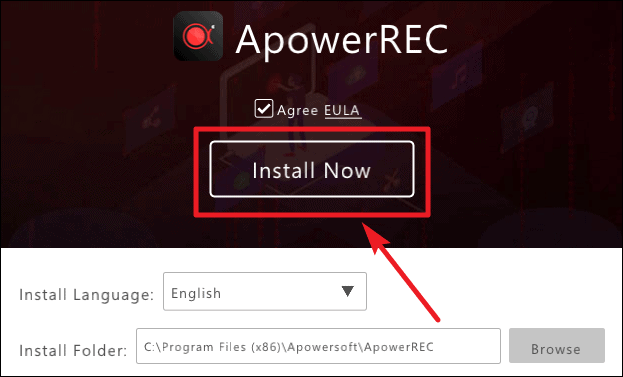
After the file gets downloaded, go to the folder where you had saved the file and double-click on the .exe installer file. Then, click the ‘Install Now’ button on the ApowerREC window to start the installation process.
Once the installation gets completed (it might take 30-40 seconds), click the ‘X’ button on the ApowerREC window to exit the installer.

Configure ApowerREC to Record a Zoom Meeting Window
By default, ApowerREC is set to record the full screen of your computer. But it can be configured to record a particular window too, which in our case, would be the Zoom Meeting window. If you go full screen in your Zoom Meeting, the software would follow the Zoom Meeting window size and record full screen for you. No issues.
So, let’s start with joining a Zoom Meeting first. Open the Zoom app on your computer and set up a new meeting or join one. Since you’re just learning to record a Zoom meeting using third-party tools, we’d suggest you create a dummy meeting for yourself to test the software.
Once you’ve created and joined a Zoom meeting, bring the meeting window in focus and then launch the ApowerREC software.
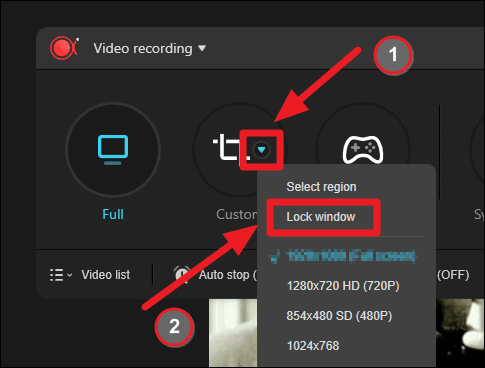
In ApowerREC configuration options, click on the the ‘Dropdown’ button under the ‘Custom’ circle and select ‘Lock window’ option.
You’ll see a dialogue box explaining how the ‘Lock window’ feature works. Click on the ‘Select window’ button to proceed.
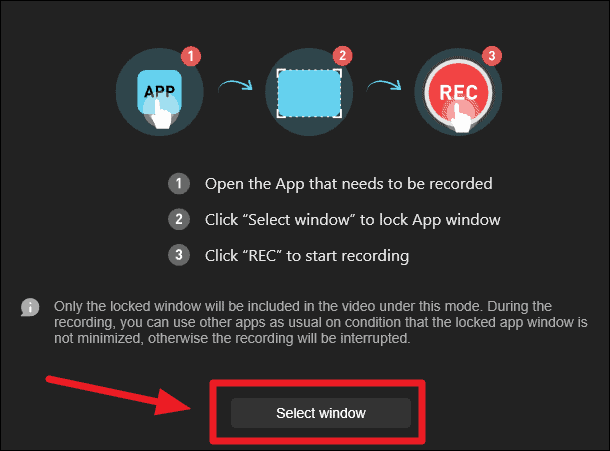
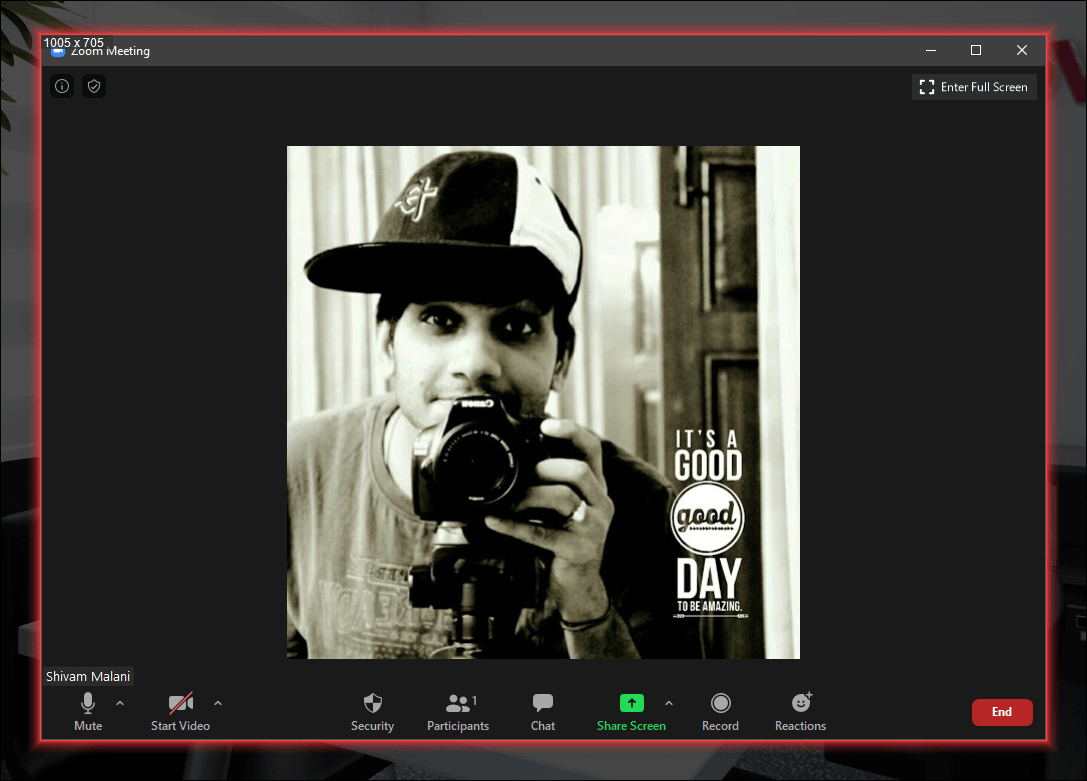
Then, hover your cursor over the Zoom Meeting window and left-click on it to select the window. The window frame will be highlighted with a red glow while you’re selecting.
ApowerREC screen recorder will record only the sound generated from your computer speaker. If you wish to record your voice as well, then click the drop-down arrow of the ‘Speaker’ icon on the screen recorder window and select ‘System sound and microphone’.

Note: If you’re just attending a lecture or class, and don’t want to record sound from your mic, then leave the audio setting to the default ‘System sound’ setting.
Start Recording a Zoom Meeting
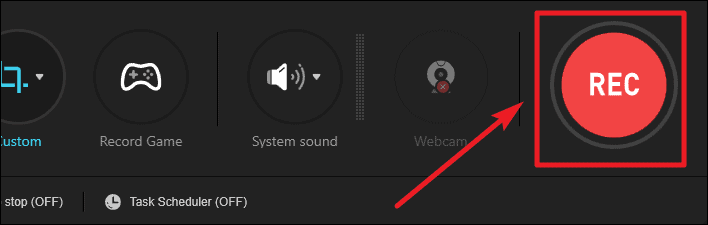
After configuring the recorder, click on the ‘REC’ button on the ApowerREC window to start recording your Zoom meeting.
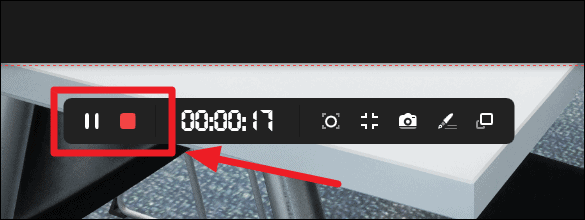
Once the recording begins, you will see a small recorder toolbar instead of the main ApowerREC window on the screen. When you want to pause or stop the recording, use the ‘pause’ and ‘stop’ button on the recorder toolbar.
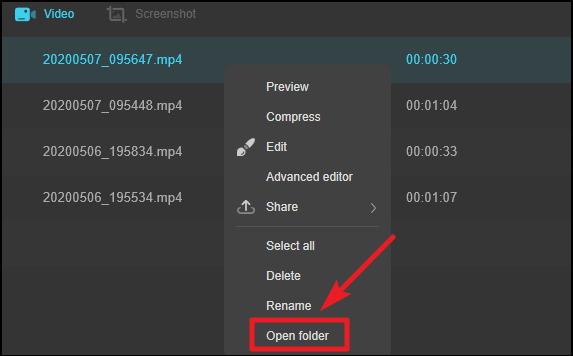
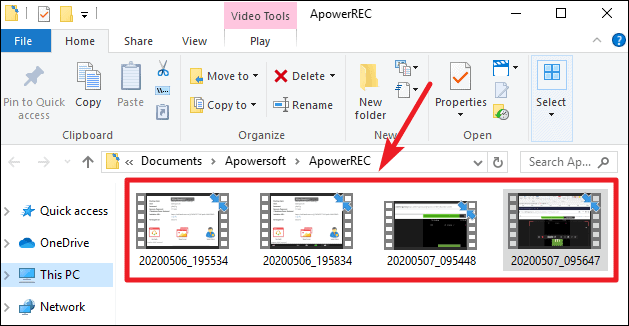
After you stop the recording, the recorder toolbar will disappear and you will be redirected to the main ApowerREC window. To view your video recordings, right-click on the video file, and click ‘Open folder’ from the list of options. You can also edit, share, or compress the video file by selecting the relevant option from the list.
By default, all the video recordings are stored in the following path on your computer. \users\...\Documents\Apowersoft\ApowerREC.
Note: The free trial version of the ApowerREC screen recorder has some restrictions. Like, it allows you to record for a maximum duration of 3 minutes per video. To get access to full features, you need to purchase ApowerREC screen recorder software.
Record a Zoom Meeting using Loom Chrome Extension
Don’t wish to install any software for recording your computer screen? Then, you can simply use the Loom Chrome Extension to record a Zoom Meeting. With Loom, you can record any activity on your screen, even if it happens outside of Chrome. Loom basic plan comes at free of cost whereas you need to make payment for Business and Enterprise plans.
Install ‘Loom for Chrome’ Extension
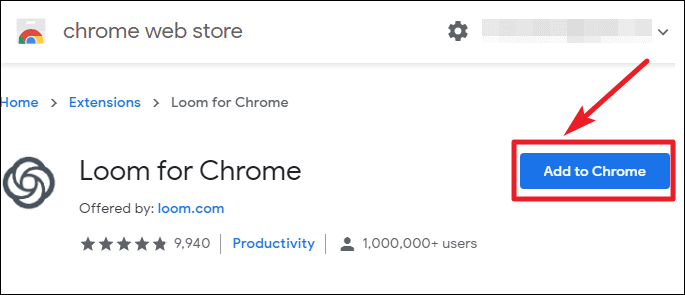
Go to the Chrome Web Store, and search for ‘Loom for Chrome’. Or you can simply click here instead to visit the Chrome extension page directly.
After opening the extension page, click on the ‘Add to Chrome’ button next to it to install the extension.
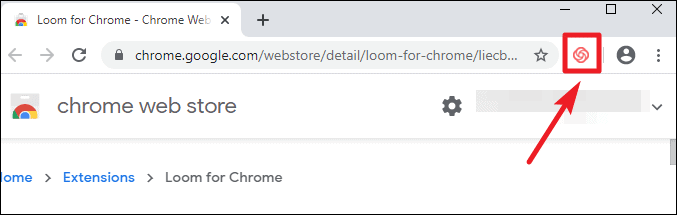
Click ‘Add extension’ on the new dialog box to confirm the installation.

Once installed, the icon for the extension will appear on the right side of the address bar of your Chrome browser.
Loom for Chrome icon
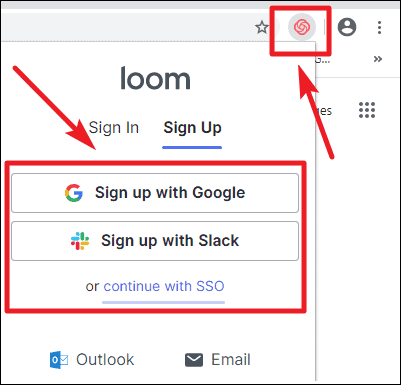
In order to use the Loom screen recorder, you need to create an account. Click the Loom extension icon from your browser and sign up for an account using any of the options like Google, Slack, and so on.
Record a Zoom Meeting using Loom
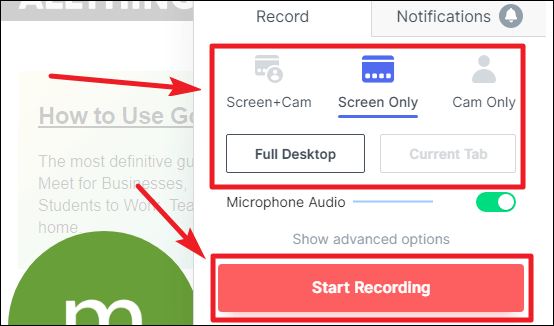
Open the Zoom Desktop app on your computer and join Zoom Meeting. Then, click the Loom icon from your browser to launch the extension. On the Record tab, you will see three options. Since our aim is to record only the Zoom meeting screen, we will be using the option ‘Screen only’ in this example. Then, click the ‘Start Recording’ button on the Loom window.
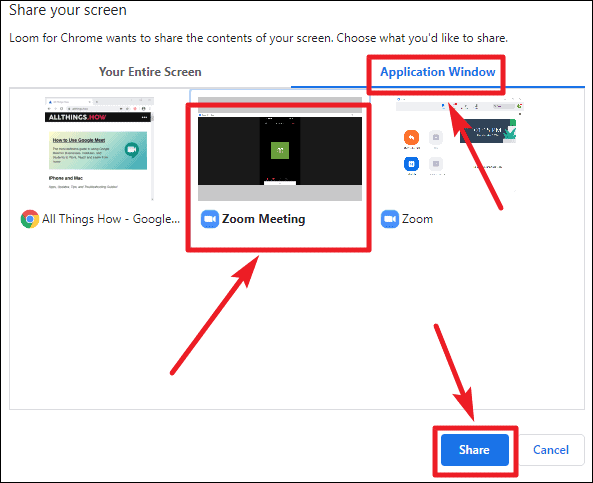
After you clicked the recording button, a small dialog titled ‘Share your screen’ will appear. Since we need to record the Zoom meeting, click the tab titled ‘Application window’, select the Zoom meeting screen and then click the ‘Share’ button located on the bottom.
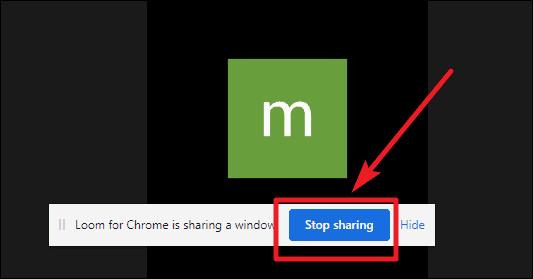
After the recording has started, you will see a small control toolbar near the bottom of your screen. When the meeting has finished and you want to stop recording, click the ‘Stop sharing’ button on the toolbar. If you need to pause the recording, you can click the ‘Pause’ button at the start of the toolbar.
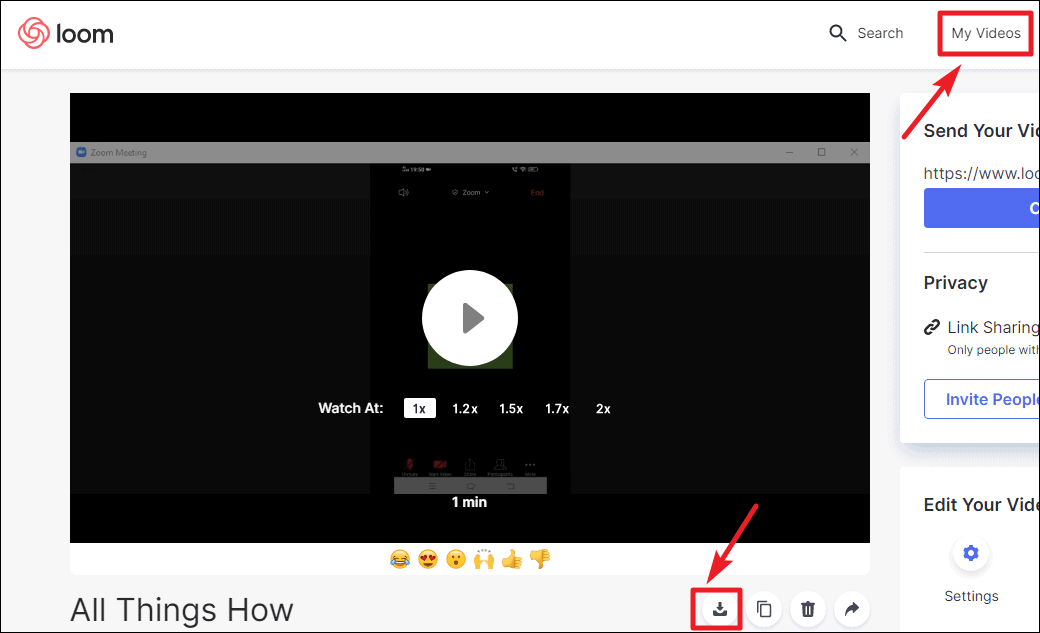
As soon as you stop the recording, you will be automatically redirected to your Loom account to view your videos. By default, the last recorded video will be displayed. To view all your videos, click ‘My videos’ on your Loom screen. To save the video file on your computer, click ‘Download’ icon below the video.
The next you want to record a Zoom meeting for your personal use but can’t ask the host for permission, you can use the tools we shared above to record the meeting.
Remember, since you’re recording without consent. Know that it might be a punishable act in your country. You must NOT share the recording with any other person or publicly upload it on the internet. Use the recording for your personal use only and delete it when you don’t need it anymore.


